
Wendy’s Frosty has been a favorite treat for many years. People line up for that thick, chocolatey cup because nothing else feels quite like it.
Now you can skip the drive and make that same treat right at home with a handy tool called the Iceman Slush Ease. This machine turns simple ingredients into a smooth, thick slush in just minutes, and it takes the guesswork out of frozen treats.
In this Iceman Slush Ease Wendy’s Frosty Recipe, you will learn how to copy that famous thick texture and rich chocolate flavor using basic pantry items.
The steps are easy to follow, the cost stays low, and you can change the flavor any way you like. Grab your machine, gather a few items from your kitchen, and get ready to make a treat that tastes just like the one from the drive-through window.
This recipe works well for warm days, quick snacks, or a sweet treat after dinner. Let’s get started.
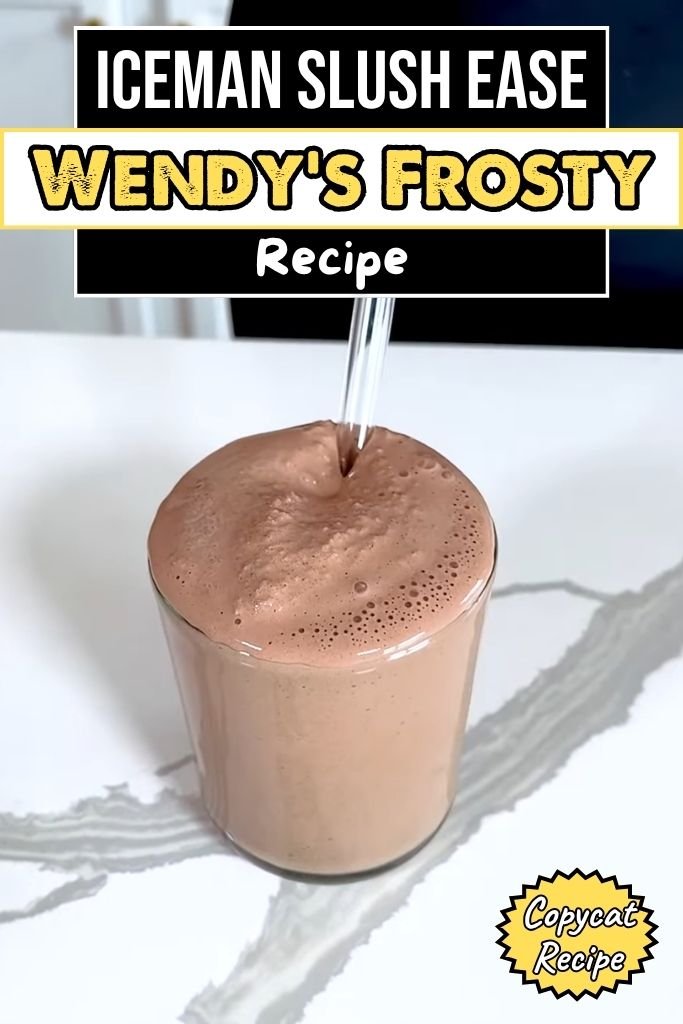
Why You’ll Love This Wendy’s Frosty Copycat Recipe
This copycat treat turns out thick, creamy, and full of chocolate flavor, much like the cup from the drive-through window. It uses simple items most people already keep in their pantry, so there’s no need for a special grocery trip or a long list of odd items.
Making this at home also costs much less than buying a cup every time a craving hits, since one batch of milk, cream, and cocoa powder stretches over several servings.
Another great part is how easy it is to switch up the flavor, add mix-ins, or adjust the sweetness to match personal taste. Some days it turns out extra rich, and other days a lighter version works better, and both come out great with small changes to the recipe.
Kids and adults both enjoy this cold treat, making it a great pick for any table or party tray, from weekday snacks to weekend get-togethers. Best of all, the Slush Ease machine gets the job done in minutes, so there’s barely any wait between mixing and serving.
This recipe brings that classic frozen chocolate cup into a simple, low-cost, homemade version that anyone can put together, no matter their cooking skill level. Once the basic steps become familiar, the whole process turns into something quick enough for a regular weekday treat rather than a special-occasion project.
Iceman Slush Ease Wendy’s Frosty Ingredients & Substitutions
- Whole milk – This forms the base of the drink and gives it a smooth, light body without turning the mixture too heavy. The fat content in whole milk also helps the drink chill into a creamy texture rather than an icy one. Two percent milk also works, though the final texture will be a touch thinner and less rich.
- Heavy cream – Cream adds richness and helps the mixture turn thick once it chills and churns in the machine. It also gives the drink that smooth, almost velvety feel on the tongue that sets a Frosty apart from a plain milkshake. Half-and-half also works for a lighter version, though the result will be slightly less rich and a bit softer once served.
- Unsweetened cocoa powder – Cocoa powder gives the deep, dark chocolate flavor that makes this drink so recognizable. It also adds a light brown-black color that matches the classic look of the original treat. Dutch-process cocoa also works and gives a smoother, slightly milder chocolate taste with less sharpness.
- Granulated sugar – Sugar sweetens the mixture and balances the bitter notes that come from the cocoa powder. It also helps the mixture reach a smoother texture once frozen, since sugar keeps ice crystals from forming too large. Brown sugar also works and adds a light caramel note to the finished drink.
- Vanilla extract – A small splash of vanilla rounds out the chocolate flavor and adds warmth to the overall taste without overpowering the cocoa. Vanilla bean paste also works and adds tiny flecks throughout the mixture for a more old-fashioned look.
- Salt – A pinch of salt sharpens the chocolate flavor and keeps the drink from tasting flat or one-note. It also helps balance out the sweetness from the sugar, so the final flavor tastes rounded rather than overly sugary.
- Chocolate syrup (optional) – A spoonful of chocolate syrup deepens the color and adds an extra layer of chocolate taste beyond what the cocoa powder alone provides. Melted chocolate chips also work when stirred into slightly warm milk before the mixture goes into the tank.
- Malted milk powder (optional) – This adds a light, toasty flavor close to the taste found in old-fashioned soda shop treats, giving the drink a slightly nutty background note. Plain milk powder also works when a milder flavor is wanted, or it can be left out entirely without changing the recipe much.
- Instant chocolate pudding mix (optional) – A small spoonful of this dry mix thickens the base slightly before it even goes into the machine, giving a small head start toward that dense Frosty texture. Instant vanilla pudding mix also works when a lighter chocolate flavor is the goal, since the cocoa powder still carries most of the taste.
- Cornstarch (optional) – A tiny amount whisked into the cold milk before mixing can add a bit more body to the finished drink, which helps thin batches turn out closer to the classic thick texture. Arrowroot powder also works in the same small amount, and it dissolves smoothly without leaving a chalky feel behind.
Kitchen Equipment You’ll Needed
- Iceman Slush Ease machine – chills and mixes the drink
- Large mixing bowl – blends the base first
- Whisk – breaks up cocoa powder lumps
- Measuring cups – for accurate liquid amounts
- Measuring spoons – for small ingredient amounts
- Rubber spatula – scrapes the bowl clean
- Small saucepan (optional) – warms milk for mixing
- Fine mesh strainer (optional) – removes any lumps
- Serving cups – ready for the finished treat
- Long spoon or straw – for stirring and serving
How To Make Iceman Slush Ease Wendy’s Frosty at Home
Step 1 | Set Up the Machine Before adding any mixture, check that the tank drip tray sits in place and is pushed all the way in. Install the auger and make sure the bottom end rests fully on the point of the cooling cylinder, since a loose auger can lead to uneven mixing later on.
Slide the tank over the auger and push it all the way in, then lock it firmly with the tank locking lever. This keeps every part steady once the machine begins running and prevents the tank from shifting during the chilling cycle.
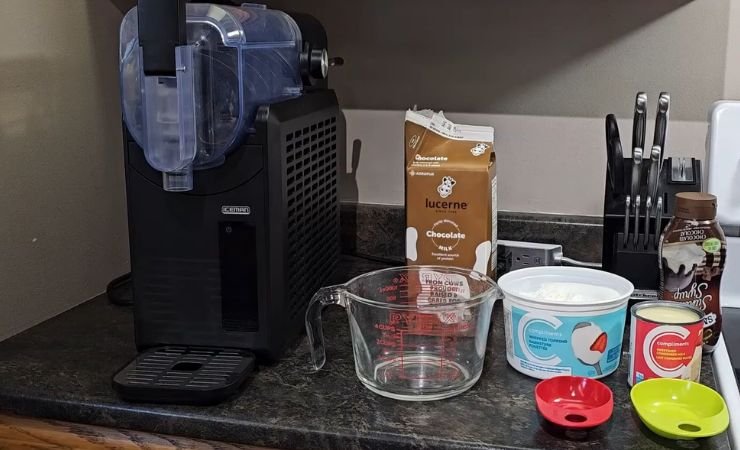
Step 2 | Mix the Frosty Base In a large mixing bowl, add the whole milk, heavy cream, cocoa powder, sugar, vanilla extract, and salt. Whisk everything together until the cocoa powder and sugar dissolve fully and no lumps remain, since leftover lumps can clog the dispenser nozzle later.
For extra chocolate flavor, stir in the chocolate syrup or malted milk powder at this point, tasting the mixture and adjusting sweetness as needed. Chilling the mixture in the refrigerator for about thirty minutes before the next step helps the machine work faster and reach the right thickness sooner.
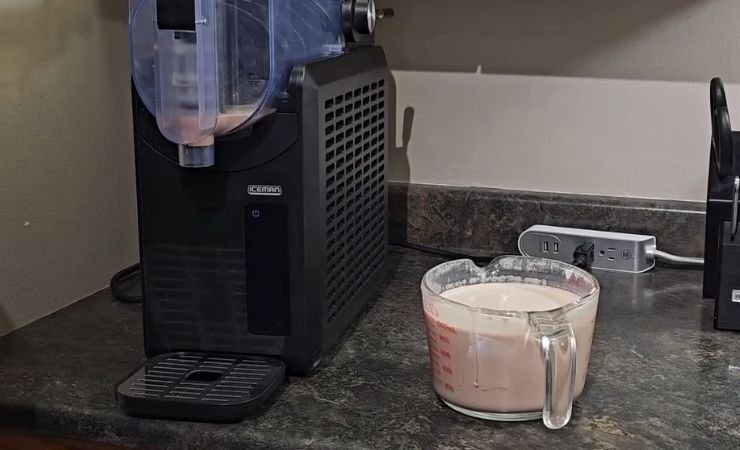
Step 3 | Pour the Mixture into the Tank Plug in the machine, then open the fill hatch door on top of the tank. Pour the chilled Frosty mixture into the tank through the hatch, keeping the liquid level between the MIN and MAX markings printed on the side of the tank. Do not pour in only water or leave the tank empty, since running the machine this way can damage the internal parts over time.
Step 4 | Choose the Settings Pick a preset button that matches a thick frozen drink, or select Custom to control the thickness by hand using the Thickness +/- buttons.
A lower number gives a thinner drink, while a higher number gives a thicker, spoonable texture closer to the real Frosty. Since Wendy’s Frosty is known for being extra thick, choose one of the higher thickness settings for the closest match to the original.
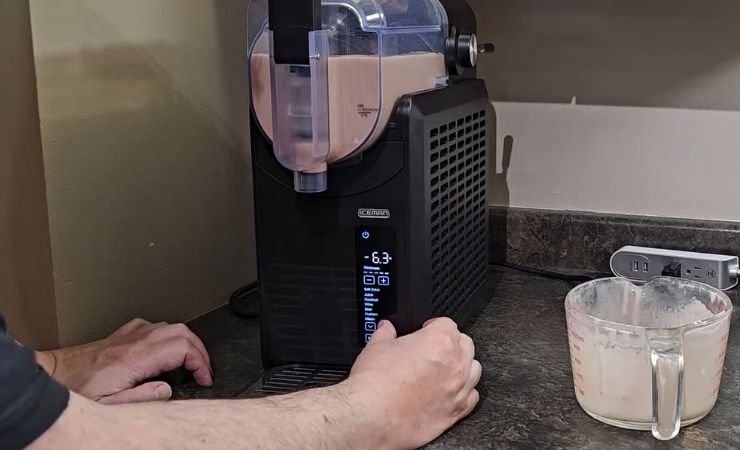
Step 5 | Start the Machine Press the START/STOP button to begin the chilling and mixing process. The machine will churn the mixture while lowering the temperature, and the whole process usually takes between nineteen and twenty-five minutes, depending on the chosen setting and the starting temperature of the mixture. A drop in temperature followed by a quick rise near the end of the cycle is normal and does not mean anything has gone wrong with the machine.
Step 6 | Check for Readiness Once the mixture reaches the right temperature and thickness, the machine will beep, and the Ready light will turn on to signal that the frozen chocolate drink is ready to be served. There is no need to open the tank or check the mixture by hand, since the display and lights show the exact status of the batch.
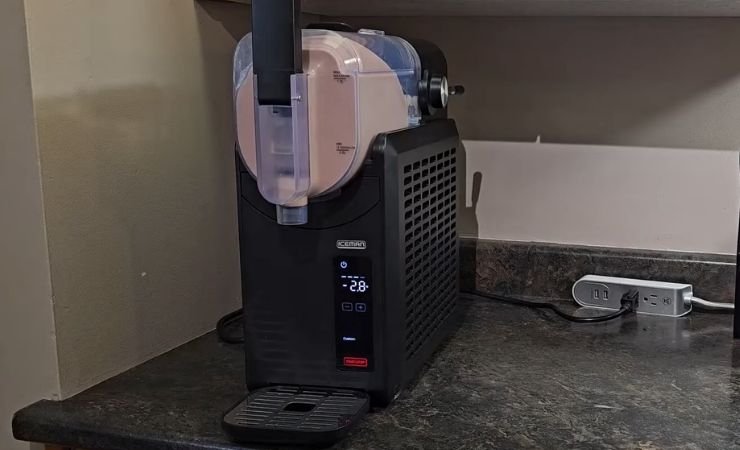
Step 7 | Serve the Frosty Place a cup under the dispenser nozzle and gently pull the dispenser handle down along its full length to release the drink. Pulling from just the tip of the handle can cause damage, especially with a very thick mixture, so always use the entire length of the lever. Serve right away for the best texture and flavor, since the drink is thickest immediately after the cycle finishes.
Expert Tips for the Best Frosty Texture
- Chill Every Ingredient First – Cold milk and cream lower the starting temperature of the mixture, which helps the machine reach the right thickness sooner and shortens the overall chilling time.
- Avoid Overfilling the Tank – Staying within the MIN and MAX lines allows the auger to mix everything evenly, which leads to a smoother finished drink with no icy patches near the bottom.
- Pick the Right Thickness Level – A higher thickness setting copies the dense, spoonable texture that Wendy’s Frosty is known for, so avoid lower settings unless a thinner, more drinkable version is wanted instead.
- Add Mix-Ins After Chilling – Small candy pieces, cookie bits, or chocolate chips taste best when stirred in right before serving, since blending them into the tank can clog the dispenser nozzle over time.
- Serve Within the Holding Window – The machine keeps the mixture at serving temperature for up to four hours after the cycle ends. Drinks served closer to that four-hour mark will be slightly thicker than those served right away.
- Run a Short Cleaning Cycle for Extra-Thick Batches – When a batch turns out too thick to flow from the nozzle, running the cleaning cycle for a short time raises the temperature just enough to let it pour smoothly again.
- Keep the Compressor Life in Mind – Since the manufacturer recommends against running the unit past the four-hour holding period, plan batch sizes around how many servings will realistically get poured within that window.
- Watch the Progress Lights During the Cycle – The control panel shows progress lights that fill in as the batch gets closer to done, giving a rough sense of remaining time without needing to guess or open the tank early.
What to Serve with a Homemade Frosty
A cold, thick chocolate drink pairs naturally with warm, salty, or crunchy foods placed right beside it on the table.
The contrast between something hot from the oven or fryer and something cold and creamy from the Slush Ease machine tends to please almost everyone at the table, young or old.
On busy weeknights, a cup of this treat next to a quick dinner turns an ordinary meal into something a little more special without adding extra work in the kitchen.
Salty snacks balance the sweetness of the chocolate, while baked sweets bring out even more of the rich cocoa flavor, and either direction works well depending on the mood of the day. Here are a few pairing ideas worth trying alongside a fresh batch:
- French fries
- Burgers
- Chicken nuggets
- Chocolate cookies
- Brownies
- Waffles
Storage and Make-Ahead Tips
Leftover Frosty that has already been dispensed can be covered and kept in the refrigerator for about a day, though the texture will turn softer and less thick over time as it sits.
Stirring a spoonful of leftover mixture before serving can help bring back some of the original creamy feel, though it will not fully match the texture straight from the machine.
The unmixed liquid base, meaning the milk, cream, and cocoa mixture before it goes into the machine, can be frozen in a sealed container for up to one month without losing much flavor.
Pouring the base into a labeled freezer-safe container makes it easy to grab a fresh batch on a busy afternoon without measuring everything out again.
Thaw this frozen base in the refrigerator overnight before pouring it into the tank the next day, and give it a quick whisk to smooth out anything that separated while frozen.
To bring back a thick, smooth texture after storage, run the mixture through the Slush Ease machine again using the same thickness settings used for the first batch.
For the best flavor and texture, plan to use refrigerated leftovers within twenty-four hours and frozen base mixture within one month of freezing, labeling the container with the date to keep track of freshness.
Frequently Asked Questions
1. Can this recipe be made without a slush machine?
A blender or ice cream maker can create a similar frozen texture, though the result will not be quite as thick or smooth as one made in the Iceman Slush Ease. A blender version usually needs extra time in the freezer between blending sessions to reach a similar thickness.
2. Why does the mixture stay thin instead of turning thick?
This usually happens when the starting mixture was not cold enough before pouring it into the tank, or when the thickness setting was too low for the chosen preset. Starting with fully chilled ingredients solves most thickness problems on the first try.
3. Can chocolate milk replace the plain milk and cocoa powder?
Yes, chocolate milk can replace part of the milk and cocoa powder, though the sweetness level should be checked and adjusted since chocolate milk is already sweetened on its own. Cutting back on the added sugar keeps the drink from tasting overly sweet.
4. Does this recipe work with dairy-free milk options?
Oat milk or coconut cream can replace the dairy items listed in the ingredient section, though the finished texture may turn out slightly different from the original dairy version. Coconut cream tends to give a thicker result than oat milk alone.
5. How many servings does one batch make?
A standard batch made with this recipe usually fills between four and six small cups, depending on the exact tank size of the machine used and how full the tank gets filled during Step 3.
6. Can the sweetness level be lowered for a lighter treat?
Cutting the sugar amount by a small portion still leaves a pleasant, balanced flavor, since the cocoa powder and vanilla carry much of the taste on their own. Testing a smaller batch first helps figure out the right sweetness level before making a full-size portion for a group.
7. Does the type of cocoa powder change the final color?
Natural cocoa powder gives a lighter reddish-brown shade, while Dutch-process cocoa gives a darker, almost black-brown color closer to what many people picture when thinking of a classic chocolate treat. Either type works well in this recipe, so the choice mostly comes down to personal preference rather than a strict rule.
Iceman Slush Ease Wendy's Frosty Recipe

Make this Iceman Slush Ease Wendy's Frosty at home in just 1 hour 5 minutes with simple ingredients for a thick, creamy chocolate frozen treat everyone loves.
Ingredients
- 2 cups whole milk
- 1 cup heavy cream
- ¼ cup unsweetened cocoa powder
- ½ cup granulated sugar
- 1 teaspoon vanilla extract
- ⅛ teaspoon salt
- 2 tablespoons chocolate syrup (optional)
- 2 tablespoons malted milk powder (optional)
- 1 tablespoon instant chocolate pudding mix (optional)
- 1 teaspoon cornstarch (optional)
Instructions
- Prepare the Machine: Install the drip tray, auger, and tank according to the manufacturer's instructions. Make sure everything is securely locked into place before use.
- Mix the Frosty Base: In a large mixing bowl, whisk together the whole milk, heavy cream, cocoa powder, granulated sugar, vanilla extract, and salt until completely smooth. Stir in the chocolate syrup, malted milk powder, instant pudding mix, and cornstarch if using.
- Chill the Mixture: Refrigerate the mixture for 30 minutes to help it freeze faster and produce a thicker, creamier texture.
- Fill the Machine: Pour the chilled mixture into the Iceman Slush Ease machine, keeping the liquid between the minimum and maximum fill lines.
- Select the Settings: Choose the frozen drink preset or use the custom thickness setting. Select a higher thickness level for a spoonable Frosty consistency.
- Start Churning: Press the start button and allow the machine to churn and freeze the mixture for 19–25 minutes, or until the ready indicator signals the batch is finished.
- Serve: Place a serving cup beneath the dispenser and slowly pull the handle down to dispense the Frosty. Serve immediately while thick, creamy, and perfectly chilled.
Nutrition Information:
Serving Size: 1Amount Per Serving: Calories: 330
A little planning ahead makes this recipe even smoother the second time around. Once the right thickness setting and ingredient ratio get figured out during the first batch, later batches come together with almost no guesswork. Keeping a small note of the exact settings used, along with any small changes made to the sugar or cocoa amount, turns this into a repeatable treat rather than a one-time experiment.
This Iceman Slush Ease Wendy’s Frosty Recipe brings that classic thick, chocolate treat to your table without any hassle. The steps stay simple, and the machine does most of the work for you. Try this recipe soon, then share your thoughts below. Rate the recipe and tell others how yours turned out!