
Nothing beats a bowl of cold, creamy ice cream made right in your own kitchen. Store-bought tubs are fine, but homemade batches taste richer because you control every single ingredient that goes into them.
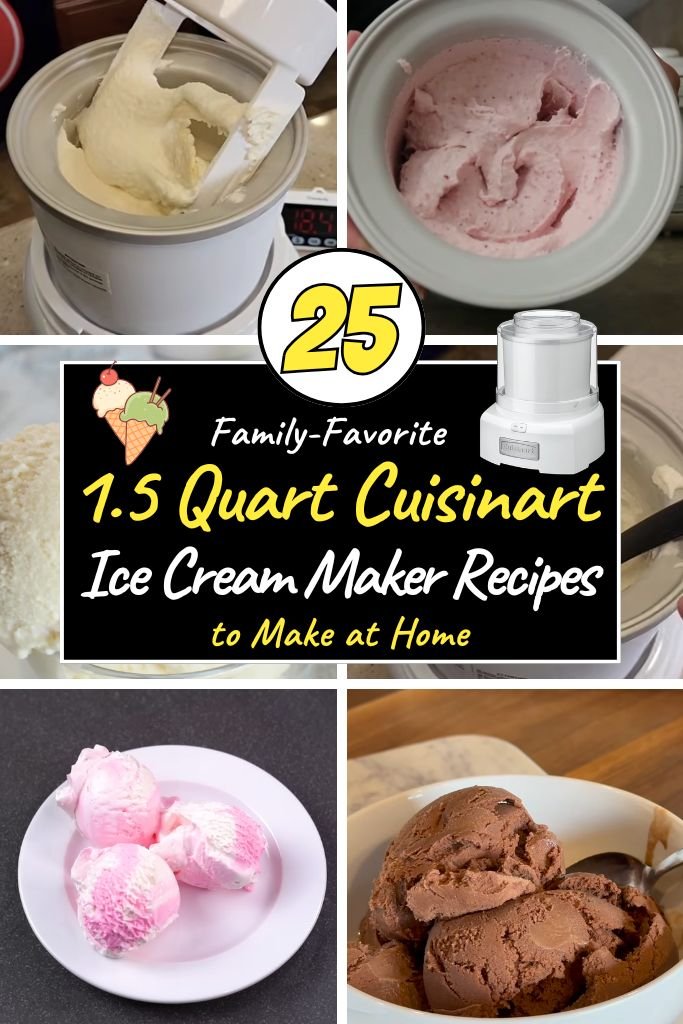
That fresh cream, real fruit, and pure vanilla give each scoop a flavor that packs a punch you just can’t buy in a store. These 1.5 Quart Cuisinart ice cream maker recipes are built for anyone who wants restaurant-quality dessert without leaving home.
A 1.5-quart machine is the perfect size for a small household, a couple, or a few close friends gathered on a warm evening. It churns quickly, cleans up easily, and turns basic pantry items into smooth, scoopable dessert in under an hour.
Below, you’ll find classic flavors like vanilla and chocolate, fruity options like mango and raspberry, and a few unexpected combos like honey lavender and matcha green tea. Grab your machine, pick a flavor, and get ready to make something truly special.
Why Choose a 1.5 Quart Cuisinart Ice Cream Maker?
A 1.5-quart Cuisinart ice cream maker earns its spot on the counter for good reason. Here’s what makes this small machine such a smart pick for home dessert making:
1. Perfect size for families – This compact freezer bowl makes just enough dessert for a small household or a cozy get-together, without leaving you stuck with more than you can eat.
2. Easy to operate – The controls are simple enough for a beginner, and most people figure out the whole process on their very first try.
3. Multiple frozen treats in one machine – Beyond basic ice cream, this maker handles frozen yogurt, sorbet, and gelato, so your dessert options never get boring.
4. Consistent results every time – The frozen bowl churns each batch evenly, giving you smooth, creamy texture instead of icy chunks or uneven freezing.
5. Compact storage – Its small footprint means it fits easily in a cabinet or on a shelf when it’s not in use.
6. Quick prep and cleanup – Most parts are simple to rinse, and the whole process from mixing to churning takes far less effort than older, hand-cranked machines.
1. Classic Vanilla Ice Cream
Prep Time: 15 minutes | Churn Time: 25 minutes | Serve: 6
Vanilla stays a favorite for a reason: it pairs with almost any topping and never goes out of style. This version leans on real vanilla bean paste for deep flavor and a soft speckled look throughout the finished batch. The custard base turns silky smooth once chilled, giving every spoonful a rich, buttery texture. Serve it plain, add warm fudge, or spoon it over a slice of pie.
Ingredients
- 2 cups heavy cream
- 1 cup whole milk
- 3/4 cup granulated sugar
- 1 tablespoon pure vanilla extract
- 1 teaspoon vanilla bean paste
- Pinch of salt
Instructions
Start by pouring the heavy cream and whole milk into a large mixing bowl. Add the granulated sugar and whisk everything together for about two minutes, until the sugar mostly dissolves into the liquid. The mixture will look slightly frothy at the top, which is normal and simply means the sugar is breaking down properly. Next, stir in the vanilla extract, vanilla bean paste, and a small pinch of salt. The salt might seem like an odd addition to a sweet dessert, but it actually sharpens the vanilla flavor and keeps the final product from tasting flat.
Cover the bowl with plastic wrap and place it in the refrigerator for at least two hours, though overnight chilling gives the best texture. A cold base churns faster and produces smaller ice crystals, which means a creamier finished product. Skipping this chilling step often leads to a softer, slushier batch that takes longer to firm up in the machine.
Once the mixture is thoroughly chilled, remove the freezer bowl from your 1.5 Quart Cuisinart ice cream maker, which should already be frozen solid for at least sixteen hours beforehand. Assemble the machine according to its instructions, then turn it on before pouring in the chilled base through the top opening. Let the paddle run continuously as the mixture thickens.
Churning usually takes between twenty and twenty-five minutes. Watch for the mixture to thicken to a soft-serve consistency, pulling away slightly from the sides of the bowl. The texture should resemble a thick milkshake rather than a liquid at this stage. Turn off the machine once it reaches that point, since over-churning can cause the mixture to separate or turn grainy.
Transfer the finished ice cream into a freezer-safe container using a rubber spatula, pressing it down gently to remove air pockets. Smooth the top layer, place a piece of parchment paper directly on the surface, then seal with a lid. Freeze for a minimum of four hours to let the batch firm up completely before scooping and serving to family or guests.
2. Chocolate Ice Cream
Prep Time: 15 minutes | Churn Time: 25 minutes | Serve: 6
Rich, dark, and deeply chocolatey, this recipe uses both cocoa powder and melted chocolate for a double layer of flavor. The combination creates a dense, fudge-like texture that satisfies any serious chocolate craving. It works well on its own, layered into a sundae, or paired with a scoop of vanilla for a two-flavor bowl. Chocolate lovers will want to keep this recipe on hand year-round.
Ingredients
- 1 3/4 cups heavy cream
- 1 cup whole milk
- 2/3 cup granulated sugar
- 1/2 cup unsweetened cocoa powder
- 4 ounces semisweet chocolate, melted and cooled
- 1 teaspoon vanilla extract
- Pinch of salt
Instructions
Begin by heating the milk gently in a small saucepan over medium-low heat, warming it until small bubbles appear around the edges but the liquid never fully boils. Remove the pan from the heat, then whisk in the cocoa powder a little at a time, breaking up any clumps until the mixture turns smooth and dark. Cocoa powder tends to resist liquid at first, so patient whisking makes a real difference in the final texture.
Add the granulated sugar to the warm cocoa mixture and stir until it dissolves completely, roughly two to three minutes of steady whisking. Pour in the heavy cream slowly, whisking constantly so the cold cream blends evenly into the warm chocolate base rather than seizing up. Melt the semisweet chocolate separately using a double boiler or short bursts in the microwave, stirring between each interval until smooth. Let the melted chocolate cool for a few minutes, then fold it into the cream mixture along with the vanilla extract and a pinch of salt.
Whisk the entire base thoroughly to make sure the melted chocolate distributes evenly throughout, without streaks or pockets of unmixed chocolate settling near the bottom. Cover the bowl and refrigerate for at least three hours, since chocolate bases benefit from extra chilling time compared to lighter flavors. The added density from the cocoa and melted chocolate means the mixture needs a longer rest to reach the proper temperature for churning.
Pour the fully chilled base into your prepped 1.5 Quart Cuisinart machine with the paddle already running. Chocolate mixtures tend to thicken a bit faster than plain vanilla, so check the consistency around the eighteen-minute mark and continue checking every few minutes after that. The finished texture should look glossy, thick, and hold soft peaks when lifted with a spoon.
Scoop the churned ice cream into a chilled container, pressing out air pockets as you go and smoothing the surface flat. Cover with parchment paper pressed directly onto the ice cream, then snap on a tight-fitting lid. Freeze for four to six hours for a scoopable, fudgy finished dessert.
3. Strawberry Ice Cream
Prep Time: 20 minutes | Churn Time: 25 minutes | Serve: 6
Fresh strawberries turn this recipe into a bright, fruity dessert with real pieces of fruit in every bite. Roasting the berries first concentrates their natural sweetness and deepens the pink color without needing extra food coloring. Summer fruit season makes this recipe especially good, though frozen strawberries work nearly as well during colder months. It’s a lighter option compared to heavier chocolate or caramel flavors.
Ingredients
- 2 cups fresh strawberries, hulled and chopped
- 3/4 cup granulated sugar, divided
- 1 tablespoon lemon juice
- 1 1/2 cups heavy cream
- 3/4 cup whole milk
- 1 teaspoon vanilla extract
Instructions
Preheat the oven to 400 degrees Fahrenheit. Spread the chopped strawberries onto a baking sheet lined with parchment paper, then sprinkle a quarter cup of the sugar and the lemon juice evenly over the top. Roast for twenty to twenty-five minutes, stirring the berries halfway through, until they turn soft and release their juices into a thick, syrupy pool. Roasting draws out moisture and concentrates the natural sugars, giving the finished ice cream a deeper strawberry flavor than raw fruit alone.
Remove the pan from the oven and let the roasted berries cool completely at room temperature, roughly thirty minutes. Once cool, transfer about two-thirds of the strawberries to a blender or food processor and puree until smooth. Leave the remaining third chopped into small chunks to add texture later in the process.
In a large bowl, whisk together the heavy cream, whole milk, and remaining half cup of sugar until the sugar dissolves fully, around two minutes of steady stirring. Add the strawberry puree and vanilla extract, mixing until the color turns an even, pale pink throughout the base. Taste the mixture and adjust sweetness slightly, keeping in mind that freezing dulls sweetness somewhat, so a base that tastes a touch sweeter than desired usually balances out once frozen.
Cover the bowl and chill in the refrigerator for at least two hours, allowing the fruit flavor to meld with the cream base. A longer rest of four hours or overnight produces even better flavor development.
Pour the chilled strawberry base into your 1.5 Quart Cuisinart machine and churn for eighteen to twenty-two minutes. During the final five minutes of churning, add the reserved chopped strawberry pieces through the top opening, letting the paddle fold them evenly throughout the batch. This timing keeps the fruit pieces from sinking to the bottom or freezing into hard, icy chunks.
Once the texture reaches a soft, creamy consistency with visible fruit throughout, transfer everything into a storage container. Press the surface smooth, cover with parchment, and freeze for four hours before serving in bowls or cones.
4. Cookies and Cream
Prep Time: 15 minutes | Churn Time: 25 minutes | Serve: 6
Crushed chocolate sandwich cookies fold into a creamy vanilla base for a treat that appeals to nearly everyone, kids and adults alike. Getting the cookie pieces the right size matters here, since chunks too small disappear into the base while pieces too large become hard to scoop. This recipe strikes that balance, resulting in even distribution and a satisfying crunch in every bite.
Ingredients
- 2 cups heavy cream
- 1 cup whole milk
- 3/4 cup granulated sugar
- 1 tablespoon vanilla extract
- Pinch of salt
- 15 chocolate sandwich cookies, roughly chopped
Instructions
Combine the heavy cream, whole milk, and granulated sugar in a large mixing bowl. Whisk the mixture steadily for two to three minutes, until the sugar granules fully dissolve and the liquid feels smooth rather than gritty when rubbed between two fingers. Add the vanilla extract and a small pinch of salt, stirring once more to distribute the flavors evenly through the base.
Cover the bowl tightly and refrigerate for a minimum of two hours, though longer chilling of four hours or overnight produces a smoother, creamier finished texture. While the base chills, prepare the cookies by placing them on a cutting board and chopping them into small, uneven chunks using a sharp knife. Avoid crushing them into fine crumbs, since larger pieces hold their texture better once frozen and give the finished dessert a more satisfying bite. Set the chopped cookies aside in a covered container so they stay fresh and don’t dry out before churning begins.
When the base has chilled thoroughly, pour it into the freezer bowl of your 1.5 Quart Cuisinart ice cream maker with the paddle already turning. Let the machine run for about fifteen minutes before checking the consistency, since adding cookies too early can cause them to break down into smaller crumbs than intended.
Once the base thickens to a soft-serve texture, around the fifteen to eighteen minute mark, add the chopped cookies gradually through the top opening. Pour them in slowly rather than all at once, giving the paddle time to fold each addition evenly throughout the mixture rather than clumping them together in one spot. Continue churning for another five to seven minutes, allowing the cookies to distribute fully while the base continues thickening.
Check the texture one final time, looking for an even mix of cookie pieces suspended throughout a thick, creamy base. Turn off the machine and use a rubber spatula to transfer the mixture into a freezer-safe container, scraping the sides of the bowl to capture every last cookie piece. Smooth the top, cover with parchment paper and a tight lid, then freeze for four to six hours before scooping and serving.
5. Mint Chocolate Chip
Prep Time: 15 minutes | Churn Time: 25 minutes | Serve: 6
Cool mint flavor paired with small chocolate chips makes a refreshing dessert that feels especially good on a hot afternoon. Natural mint extract gives a cleaner, less artificial flavor compared to some store-bought versions. A pale green tint from a small drop of food coloring gives the classic look, though it’s completely optional and can be left out for a more natural appearance.
Ingredients
- 2 cups heavy cream
- 1 cup whole milk
- 3/4 cup granulated sugar
- 1 teaspoon peppermint extract
- 1/2 teaspoon vanilla extract
- 3-4 drops green food coloring, optional
- 3/4 cup mini chocolate chips
Instructions
Pour the heavy cream and whole milk into a large mixing bowl, then add the granulated sugar. Whisk continuously for around three minutes, making sure the sugar dissolves completely into the liquid rather than settling at the bottom as grit. A properly dissolved base prevents a gritty texture later in the finished product, so this step deserves patience rather than rushing through it.
Add the peppermint extract carefully, starting with three-quarters of a teaspoon and tasting the mixture before adding more. Peppermint extract carries a strong, concentrated flavor, and too much can quickly turn the base bitter or overwhelming rather than refreshing. Stir in the vanilla extract next, which rounds out the sharper edges of the mint and adds a softer background note. For a traditional pale green color, mix in a few drops of food coloring at this stage, stirring until the shade looks even throughout the entire base.
Cover the mixing bowl and place it in the refrigerator for at least two hours. Mint bases actually benefit from a longer chill of three to four hours, since the extended time allows the peppermint flavor to mellow slightly and blend more smoothly with the cream. While the base chills, place the mini chocolate chips in the freezer for about thirty minutes, which keeps them from melting too quickly once added to the churning mixture.
Pour the chilled mint base into your prepped 1.5 Quart Cuisinart machine and start churning. Let the paddle run for about sixteen to eighteen minutes before adding the chilled chocolate chips gradually through the top opening. Adding the chips near the end of churning, during the final five minutes, keeps them from sinking to the bottom of the bowl and helps them stay evenly scattered.
Continue churning until the mixture reaches a thick, soft-serve consistency with chocolate chips visible throughout. Turn off the machine, then transfer the finished ice cream into a storage container using a spatula. Press the top smooth, cover with parchment paper, seal with a lid, and freeze for a minimum of four hours before serving in bowls or waffle cones.
6. Butter Pecan
Prep Time: 20 minutes | Churn Time: 25 minutes | Serve: 6
Toasted pecans coated in browned butter give this flavor a warm, nutty richness that pairs beautifully with a sweet caramel-like base. Browning the butter first adds a deep, almost toffee-like flavor that plain melted butter simply can’t match. Serve it on its own or alongside a slice of warm pie for a comforting dessert combination.
Ingredients
- 1 cup pecan halves, chopped
- 4 tablespoons unsalted butter
- 2 cups heavy cream
- 1 cup whole milk
- 3/4 cup brown sugar, packed
- 1 teaspoon vanilla extract
- Pinch of salt
Instructions
Melt the butter in a small saucepan over medium heat, swirling the pan occasionally as it cooks. After a few minutes, the butter will foam, then settle down and start turning golden brown with small brown flecks forming at the bottom of the pan. Watch closely during this stage, since browned butter can shift from perfectly toasted to burnt within a matter of seconds. Once the butter smells nutty and looks amber in color, remove the pan from the heat immediately.
Add the chopped pecans to the browned butter and stir to coat every piece evenly. Return the pan to low heat and toast the coated pecans for three to four minutes, stirring frequently to prevent scorching. The nuts should turn slightly darker and release a warm, toasted aroma. Spread the buttered pecans onto a plate lined with parchment paper and sprinkle a small pinch of salt over the top. Let them cool completely at room temperature, which usually takes about twenty minutes.
While the pecans cool, combine the heavy cream, whole milk, and brown sugar in a large mixing bowl. Brown sugar tends to clump more than white sugar, so whisk the mixture longer than usual, around four minutes, breaking up any small lumps until the base turns smooth and slightly caramel colored. Stir in the vanilla extract once the sugar fully dissolves.
Cover the bowl and refrigerate the base for at least two hours, or up to overnight for the best flavor and texture. Keep the cooled, toasted pecans in a separate sealed container at room temperature until churning time, since refrigerating them can soften their crunch.
Pour the chilled brown sugar base into your 1.5 Quart Cuisinart machine and churn for around eighteen minutes before checking consistency. Once the mixture thickens to a soft, creamy texture, add the toasted pecans through the top opening during the final four to five minutes of churning, letting the paddle distribute them evenly.
Transfer the finished ice cream to a freezer-safe container, pressing down gently to remove trapped air pockets and folding in any pecans left in the churning bowl. Cover with parchment paper and a tight lid, then freeze for four to six hours before scooping into bowls.
7. Salted Caramel
Prep Time: 25 minutes | Churn Time: 25 minutes | Serve: 6
Homemade caramel sauce swirled through a creamy vanilla base creates a rich, slightly salty dessert that balances sweetness with a savory edge. Making caramel from scratch takes a bit of attention, but the payoff is a deep, buttery flavor that store-bought sauces rarely match. Flaky sea salt sprinkled on top adds one final layer of contrast right before serving.
Ingredients
- 1 cup granulated sugar
- 6 tablespoons unsalted butter, cubed
- 1/2 cup heavy cream, room temperature
- 1 teaspoon sea salt, plus more for topping
- 1 3/4 cups heavy cream, cold
- 1 cup whole milk
- 1/4 cup granulated sugar
- 1 teaspoon vanilla extract
Instructions
Begin the caramel sauce by spreading the granulated sugar evenly over the bottom of a medium, heavy-bottomed saucepan. Place the pan over medium heat and let the sugar melt undisturbed for two to three minutes. Once the edges start turning amber, gently swirl the pan to encourage even melting, avoiding stirring with a spoon since that can cause the sugar to crystallize unevenly.
Continue cooking until the entire mixture turns a deep amber color, which typically takes another three to four minutes total. Watch closely during this stage, since sugar can burn quickly once it reaches this darker shade. Remove the pan from the heat and immediately add the cubed butter, whisking vigorously as it melts into the hot sugar. The mixture will bubble vigorously, so stand back slightly while whisking to avoid any splatter.
Slowly pour in the room temperature heavy cream while whisking constantly, continuing until the sauce turns smooth and glossy. Stir in the teaspoon of sea salt, then transfer the finished caramel to a heatproof bowl or jar to cool. Let it cool at room temperature for about twenty minutes, then refrigerate for at least one hour until thickened but still pourable.
While the caramel chills, prepare the ice cream base by whisking together the cold heavy cream, whole milk, and quarter cup of sugar in a large bowl until the sugar dissolves fully. Add the vanilla extract and stir once more. Cover and refrigerate the base for at least two hours alongside the caramel sauce.
Pour the chilled vanilla base into your 1.5 Quart Cuisinart machine and churn for twenty to twenty-five minutes, until it reaches a thick, soft-serve texture. Turn off the machine and layer the churned ice cream into a storage container in sections, drizzling a generous amount of the cooled caramel sauce between each layer using a spoon. Use a butter knife to gently swirl the layers together without fully blending them, keeping visible ribbons of caramel throughout.
Sprinkle a small amount of flaky sea salt over the top layer, then cover with parchment paper and a lid. Freeze for a minimum of four hours before serving, allowing the caramel ribbons to firm up alongside the base.
8. Coffee Ice Cream
Prep Time: 15 minutes | Churn Time: 25 minutes | Serve: 6
Bold coffee flavor makes this recipe a good pick for anyone who loves dessert with a bit of caffeine kick. Using freshly ground espresso beans and instant espresso powder together creates a layered coffee taste that’s much stronger than coffee-flavored syrup alone. Pair a scoop with a warm brownie for an easy, satisfying after-dinner treat.
Ingredients
- 2 cups heavy cream
- 1 cup whole milk
- 3/4 cup granulated sugar
- 3 tablespoons instant espresso powder
- 1 teaspoon vanilla extract
- Pinch of salt
Instructions
Warm the whole milk in a small saucepan over medium-low heat until steam rises from the surface, taking care not to let it reach a full boil. Remove the pan from the heat and whisk in the instant espresso powder, stirring until it dissolves completely into the warm milk without any gritty texture remaining. Espresso powder dissolves faster in warm liquid compared to cold, which is why heating the milk first makes such a noticeable difference in the finished texture.
Pour the espresso-infused milk into a large mixing bowl and add the granulated sugar, whisking until the sugar dissolves fully, around two to three minutes. Slowly pour in the heavy cream while whisking constantly, allowing the cold cream to blend evenly with the warm espresso mixture. Add the vanilla extract and a small pinch of salt, stirring one final time to combine everything into a smooth, tan-colored base.
Taste the mixture at this point and adjust the coffee strength to personal preference. Adding an extra half tablespoon of espresso powder creates a bolder, more intense flavor for serious coffee drinkers, while the original amount produces a milder, more balanced taste suitable for most palates.
Cover the bowl tightly with plastic wrap and refrigerate for at least three hours, since coffee bases tend to need slightly longer chilling time compared to plain vanilla or fruit-based mixtures. The extended chill allows the espresso flavor to mellow and fully integrate throughout the cream, preventing any bitter aftertaste in the finished dessert.
Once thoroughly chilled, pour the coffee base into your 1.5 Quart Cuisinart machine with the paddle running. Churn for twenty to twenty-five minutes, checking the texture periodically after the eighteen-minute mark. The finished mixture should look thick, glossy, and hold a soft peak when tested with the back of a spoon.
Transfer the churned ice cream into a freezer-safe container, smoothing the surface with a spatula and pressing out any trapped air pockets along the sides. Cover with a piece of parchment paper directly against the surface, then seal with a tight lid. Freeze for a minimum of four hours before scooping into bowls or layering into an affogato-style dessert with a shot of hot espresso poured over the top.
9. Chocolate Peanut Butter
Prep Time: 20 minutes | Churn Time: 25 minutes | Serve: 6
Rich chocolate ice cream gets swirled with creamy peanut butter for a combination that feels indulgent without much extra effort. The two flavors complement each other naturally, with the saltiness of the peanut butter cutting through the sweetness of the chocolate base. Chopped peanuts on top add one more layer of texture for anyone who enjoys extra crunch.
Ingredients
- 1 3/4 cups heavy cream
- 1 cup whole milk
- 2/3 cup granulated sugar
- 1/3 cup unsweetened cocoa powder
- 1/2 cup creamy peanut butter
- 1 teaspoon vanilla extract
- Pinch of salt
- 1/4 cup chopped roasted peanuts, optional
Instructions
Heat the whole milk gently in a small saucepan over medium-low heat until warm but not boiling. Remove from the heat and whisk in the cocoa powder gradually, breaking apart any clumps until the mixture turns smooth and deeply colored. Add the granulated sugar and continue whisking for another two minutes, until fully dissolved into the warm cocoa mixture.
Pour the warm chocolate base into a large mixing bowl and slowly add the heavy cream, whisking constantly to combine the two temperatures smoothly. Stir in the vanilla extract and a pinch of salt. Set the chocolate base aside to cool slightly at room temperature for about ten minutes before moving to the next step.
In a separate small microwave-safe bowl, warm the peanut butter for about twenty seconds, just enough to loosen it into a pourable consistency without fully melting it into liquid. Set the warmed peanut butter aside; it will be swirled in later rather than mixed directly into the chocolate base, keeping distinct ribbons throughout the finished dessert.
Cover the chocolate base and refrigerate for a minimum of three hours, allowing the cocoa flavor to deepen and the mixture to reach proper churning temperature. Keep the peanut butter at room temperature separately so it stays soft and easy to swirl later.
Pour the chilled chocolate base into your 1.5 Quart Cuisinart machine and churn for twenty to twenty-five minutes, checking consistency starting around the eighteen-minute mark. The mixture should thicken into a glossy, soft-serve texture that holds its shape when lifted with a spoon.
Layer the churned chocolate ice cream into a storage container in two or three sections, drizzling the softened peanut butter between each layer. Use a butter knife or skewer to swirl the peanut butter gently through the layers, creating visible ribbons rather than blending it in completely. Sprinkle the chopped roasted peanuts over the top layer.
Cover the container with parchment paper pressed against the surface, then seal with a lid. Freeze for a minimum of four hours before serving, giving the peanut butter swirls time to firm up alongside the chocolate base.
10. Rocky Road
Prep Time: 20 minutes | Churn Time: 25 minutes | Serve: 6
Marshmallows, almonds, and chunks of chocolate turn a basic chocolate base into a loaded, textured dessert. Rocky road works well for gatherings since it offers three different textures in a single scoop: creamy base, chewy marshmallow, and crunchy nuts. Mini marshmallows work better than large ones, since they distribute more evenly and stay softer once frozen.
Ingredients
- 1 3/4 cups heavy cream
- 1 cup whole milk
- 2/3 cup granulated sugar
- 1/2 cup unsweetened cocoa powder
- 1 teaspoon vanilla extract
- Pinch of salt
- 1 cup mini marshmallows
- 1/2 cup roasted almonds, roughly chopped
- 1/3 cup chopped dark chocolate
Instructions
Warm the whole milk in a small saucepan over medium-low heat until small bubbles form around the edges, then remove from the heat. Whisk in the cocoa powder gradually, working out any lumps until the mixture becomes smooth and rich in color. Add the granulated sugar next, whisking for two to three minutes until it dissolves completely into the warm cocoa base.
Pour the mixture into a large bowl and slowly whisk in the heavy cream, combining the warm cocoa base with the cold cream until the temperature evens out and the color turns a consistent medium brown. Add the vanilla extract and a pinch of salt, stirring once more to finish the base.
Cover the bowl and refrigerate for at least three hours, since the cocoa content benefits from a longer chill compared to lighter bases. While the mixture chills, prepare the mix-ins by placing the mini marshmallows in a bowl, chopping the roasted almonds into rough pieces, and chopping the dark chocolate into small chunks roughly the size of chocolate chips. Keep all three mix-ins together in a covered container at room temperature until churning time.
Once the chocolate base has chilled thoroughly, pour it into your 1.5 Quart Cuisinart machine and begin churning. Let the paddle run for about sixteen minutes before checking the thickness. The base should look glossy and start pulling away slightly from the sides of the bowl.
Add the marshmallows, chopped almonds, and chocolate chunks through the top opening during the final five to six minutes of churning, adding them gradually rather than dumping everything in at once. This gradual approach helps the paddle fold the mix-ins evenly throughout the batch instead of clumping them in one section.
Once everything is evenly distributed and the base reaches a thick, soft-serve texture, turn off the machine. Scoop the finished ice cream into a freezer-safe container, pressing gently to settle the mix-ins and remove air pockets. Cover with parchment paper and a tight lid, then freeze for a minimum of four hours before serving in bowls.
11. Birthday Cake Ice Cream
Prep Time: 15 minutes | Churn Time: 25 minutes | Serve: 6
Sprinkles and cake batter flavoring turn a simple vanilla base into a celebration-worthy dessert. It works well for actual birthday parties, though there’s no need to wait for a special occasion to enjoy it. The colorful sprinkles hold their shape nicely once frozen, adding little bursts of color and crunch throughout each scoop.
Ingredients
- 2 cups heavy cream
- 1 cup whole milk
- 3/4 cup granulated sugar
- 1 tablespoon vanilla extract
- 1/2 teaspoon almond extract
- Pinch of salt
- 1/2 cup rainbow sprinkles, plus more for topping
Instructions
Combine the heavy cream, whole milk, and granulated sugar in a large mixing bowl. Whisk the ingredients together for about three minutes, making sure the sugar dissolves fully into the liquid rather than settling at the bottom. A properly dissolved base avoids any gritty texture once the mixture freezes.
Add the vanilla extract along with the almond extract, which gives the base a subtle bakery-style flavor reminiscent of yellow cake batter. Almond extract is quite strong, so measure carefully and avoid adding more than called for, since too much can easily overpower the other flavors. Stir in a small pinch of salt to round out the sweetness, then whisk everything one final time to combine.
Cover the bowl tightly and refrigerate for a minimum of two hours, though longer chilling produces smoother results. While the base chills, keep the rainbow sprinkles in their original container at room temperature, away from any moisture that might cause the colors to bleed before churning.
Once the base has chilled thoroughly, pour it into your prepped 1.5 Quart Cuisinart machine with the paddle already running. Let the mixture churn for about sixteen to eighteen minutes before checking its thickness. The base should look pale and creamy, pulling away slightly from the edges of the freezer bowl.
Add the sprinkles gradually through the top opening during the final three to four minutes of churning. Adding them too early can cause the colors to bleed into the base, turning the whole mixture a muddy gray-purple shade instead of staying bright and colorful. Adding them near the very end keeps each sprinkle distinct and colorful throughout the finished batch.
Once the sprinkles are evenly distributed and the base reaches a thick, soft-serve consistency, turn off the machine. Transfer the ice cream into a freezer-safe container using a spatula, folding in a small handful of extra sprinkles on top for a decorative finish. Cover with parchment paper and a tight lid, then freeze for four to six hours before serving in bowls or cones for a celebration-ready treat.
12. Cinnamon Ice Cream
Prep Time: 15 minutes | Churn Time: 25 minutes | Serve: 6
Warm cinnamon spice gives this recipe a cozy flavor that pairs nicely with apple pie, warm cookies, or a plain bowl on its own. Using both ground cinnamon and a whole cinnamon stick during the infusion process creates a deeper, more rounded spice flavor than ground cinnamon alone can provide. It’s a good option for autumn gatherings or any time a warm, spiced dessert sounds appealing.
Ingredients
- 2 cups heavy cream
- 1 cup whole milk
- 3/4 cup granulated sugar
- 1 cinnamon stick
- 1 tablespoon ground cinnamon
- 1 teaspoon vanilla extract
- Pinch of salt
Instructions
Combine the whole milk and cinnamon stick in a small saucepan over medium-low heat. Warm the mixture gently for about five minutes, allowing steam to rise but never letting it reach a full boil. This slow warming process lets the cinnamon stick release its essential oils directly into the milk, building a deeper spice flavor than ground cinnamon could achieve on its own.
Remove the pan from the heat and let the cinnamon stick continue steeping in the warm milk for another ten minutes. Afterward, remove and discard the cinnamon stick, then whisk the ground cinnamon into the infused milk, stirring until no dry clumps remain visible.
Pour the spiced milk into a large mixing bowl and add the granulated sugar, whisking for two to three minutes until it dissolves completely. Slowly add the heavy cream while whisking constantly, blending the cold cream evenly into the warm spiced base. Stir in the vanilla extract and a pinch of salt to finish building the flavor.
Cover the bowl and refrigerate for at least three hours, allowing the cinnamon flavor to mellow and fully distribute through the cream. Skipping this rest period often leaves pockets of stronger cinnamon flavor scattered unevenly through the base rather than a smooth, consistent taste.
Once fully chilled, pour the cinnamon base into your 1.5 Quart Cuisinart machine and churn for twenty to twenty-five minutes. Check the texture starting around the eighteen-minute mark, looking for a thick, glossy consistency that holds its shape when scooped with a spoon.
Transfer the finished ice cream into a freezer-safe container, smoothing the top layer with a spatula and pressing out any trapped air along the sides. Cover with parchment paper pressed directly onto the surface, then seal with a tight lid. Freeze for a minimum of four hours before serving, ideally alongside a warm baked dessert for a comforting flavor pairing.
13. Maple Walnut
Prep Time: 20 minutes | Churn Time: 25 minutes | Serve: 6
Real maple syrup gives this recipe a warm, earthy sweetness that white sugar simply cannot replicate on its own. Toasted walnuts add crunch and a slightly bitter contrast that balances the deep sweetness of the maple base. This flavor works especially well during cooler months, though it makes a satisfying dessert any time of year.
Ingredients
- 2 cups heavy cream
- 1 cup whole milk
- 3/4 cup pure maple syrup
- 1/4 cup brown sugar
- 1 teaspoon vanilla extract
- Pinch of salt
- 3/4 cup walnuts, chopped and toasted
Instructions
Begin by toasting the chopped walnuts in a dry skillet over medium heat, stirring frequently for about five minutes, until they turn slightly darker and release a warm, nutty aroma. Watch them closely near the end, since nuts can shift from perfectly toasted to burnt within a short span of time. Once toasted, spread the walnuts onto a plate to cool completely at room temperature.
While the walnuts cool, combine the heavy cream, whole milk, maple syrup, and brown sugar in a large mixing bowl. Whisk the mixture thoroughly for about four minutes, making sure the brown sugar breaks apart completely and blends smoothly with the maple syrup rather than clumping at the bottom of the bowl. The base should turn a light amber color once fully combined.
Add the vanilla extract and a pinch of salt, stirring once more to round out the flavor. Taste the mixture at this stage, keeping in mind that different brands of maple syrup vary in sweetness and intensity, so a small adjustment of an extra tablespoon of syrup can help fine-tune the flavor to personal preference.
Cover the bowl and refrigerate for a minimum of three hours. Maple syrup adds extra liquid sugar to the base, which means a slightly longer chilling time helps the mixture reach the ideal churning temperature. Keep the toasted walnuts in a separate covered container at room temperature until churning begins.
Pour the chilled maple base into your 1.5 Quart Cuisinart machine and churn for twenty to twenty-five minutes, checking the consistency starting around the eighteen-minute mark. The mixture should thicken into a smooth, amber-colored, soft-serve texture.
Add the toasted walnuts through the top opening during the final four to five minutes of churning, letting the paddle fold them evenly throughout the base. Once fully mixed, transfer the finished ice cream into a freezer-safe container, pressing down gently to settle the walnuts and remove trapped air. Cover with parchment paper and a lid, then freeze for four to six hours before serving.
14. Lemon Ice Cream
Prep Time: 20 minutes | Churn Time: 25 minutes | Serve: 6
Bright, tangy lemon flavor makes this recipe a refreshing choice for warm weather, offering a lighter alternative to heavier chocolate or caramel flavors. Fresh lemon zest and juice work together here, with the zest providing aromatic oils and the juice adding sharp acidity. Together they create a balanced, citrus-forward dessert that never tastes overly sweet.
Ingredients
- 2 cups heavy cream
- 1 cup whole milk
- 3/4 cup granulated sugar
- Zest of 2 lemons
- 1/2 cup fresh lemon juice
- Pinch of salt
Instructions
Combine the granulated sugar and lemon zest in a small bowl, rubbing the zest into the sugar with your fingertips for about a minute. This step releases the fragrant oils trapped in the zest directly into the sugar, building a stronger citrus flavor throughout the finished base compared to simply tossing zest in with the liquid ingredients later.
In a large mixing bowl, combine the heavy cream and whole milk, then add the lemon-scented sugar. Whisk continuously for about three minutes, until the sugar dissolves completely and the citrus aroma becomes noticeable throughout the mixture. Add a small pinch of salt to balance the tartness.
Slowly pour in the fresh lemon juice while whisking constantly. Adding the juice gradually rather than all at once helps prevent the acidity from curdling the cream too quickly. The mixture may look slightly thicker once the juice is fully incorporated, which is completely normal for citrus-based bases due to the natural reaction between acid and dairy.
Cover the bowl and refrigerate for a minimum of two hours. Lemon bases benefit from a shorter chill compared to heavier flavors, since the acidity already helps thicken the mixture somewhat before it even reaches the machine. Longer chilling beyond four hours is fine too, though not strictly necessary for good results.
Pour the chilled lemon base into your 1.5 Quart Cuisinart machine and churn for eighteen to twenty-two minutes, checking the texture starting around the sixteen-minute mark. The finished mixture should look pale yellow and hold a soft, creamy texture when lifted with a spoon.
Transfer the churned ice cream into a freezer-safe container, smoothing the top with a spatula and pressing out any trapped air pockets. Cover with parchment paper directly against the surface, then seal with a tight lid. Freeze for a minimum of four hours before serving, ideally with a few extra curls of lemon zest scattered over the top for a decorative touch.
15. Coconut Ice Cream
Prep Time: 15 minutes | Churn Time: 25 minutes | Serve: 6
Full-fat coconut milk combined with shredded coconut produces a dairy-forward dessert with rich tropical flavor throughout. Toasting a portion of the shredded coconut beforehand adds a warm, nutty note that pairs nicely with the creamy base. This recipe works well on its own or as a base for tropical fruit toppings like pineapple or mango.
Ingredients
- 1 can (13.5 oz) full-fat coconut milk
- 1 1/2 cups heavy cream
- 1/2 cup whole milk
- 2/3 cup granulated sugar
- 1 teaspoon vanilla extract
- Pinch of salt
- 3/4 cup shredded coconut, half toasted
Instructions
Begin by toasting half of the shredded coconut in a dry skillet over medium-low heat, stirring frequently for three to four minutes, until it turns golden brown and smells fragrant. Watch closely, since shredded coconut can burn quickly once it starts browning. Transfer the toasted coconut to a plate and let it cool completely while keeping the remaining untoasted coconut set aside separately.
In a large mixing bowl, whisk together the coconut milk, heavy cream, and whole milk until the mixture looks smooth and uniform. Coconut milk sometimes separates in the can, so give it a good stir before measuring to make sure the thicker cream and thinner liquid combine properly before adding it to the other ingredients.
Add the granulated sugar and whisk for about three minutes, until it dissolves completely into the coconut and dairy mixture. Stir in the vanilla extract and a pinch of salt, mixing once more to finish the base.
Cover the bowl and refrigerate for a minimum of three hours. The combination of coconut milk and heavy cream creates a denser base than plain dairy alone, so the extra chilling time helps it reach the right temperature for smooth, even churning.
Pour the chilled coconut base into your 1.5 Quart Cuisinart machine and churn for twenty to twenty-five minutes, checking the consistency starting around the eighteen-minute mark. The mixture should thicken into a rich, pale, soft-serve texture.
Add the untoasted shredded coconut through the top opening during the final four minutes of churning, letting the paddle fold it evenly throughout the base. Once fully mixed, transfer the ice cream into a freezer-safe container, sprinkling the toasted coconut over the top layer for both flavor and visual appeal. Cover with parchment paper and a lid, then freeze for four to six hours before serving.
16. Mango Sorbet
Prep Time: 15 minutes | Churn Time: 20 minutes | Serve: 4
Ripe mango puree turns into a bright, dairy-free dessert with a smooth, refreshing texture. Choosing very ripe mangoes matters here, since underripe fruit lacks the natural sweetness needed to balance the sorbet without adding too much extra sugar. A splash of lime juice sharpens the tropical flavor and keeps the sweetness from feeling flat.
Ingredients
- 3 cups ripe mango, peeled and chopped
- 1/2 cup granulated sugar
- 1/2 cup water
- 2 tablespoons lime juice
- Pinch of salt
Instructions
Start by making a simple syrup, combining the granulated sugar and water in a small saucepan over medium heat. Stir occasionally until the sugar fully dissolves into the water, which usually takes about three minutes. Once dissolved, remove the pan from the heat and let the syrup cool to room temperature, roughly fifteen minutes, before moving forward with the recipe.
While the syrup cools, place the chopped mango into a blender or food processor. Puree the fruit until completely smooth, scraping down the sides of the container partway through to catch any larger chunks that escape the blades initially. The puree should look silky and pourable, without any stringy fibers remaining visible.
Once the simple syrup has cooled, pour it into the blender with the mango puree. Add the lime juice and a small pinch of salt, then blend everything together for another thirty seconds to fully combine. Taste the mixture at this stage, adjusting sweetness slightly with an extra tablespoon of sugar syrup for less ripe fruit, or holding back for mangoes that were already very sweet on their own.
Pour the finished mixture through a fine mesh strainer set over a bowl, pressing gently with a spatula to remove any remaining fibrous bits while letting the smooth puree pass through. Straining creates a noticeably silkier texture in the finished sorbet compared to skipping this step.
Cover the strained mixture and refrigerate for a minimum of two hours, allowing it to chill completely before churning. Cold mixtures churn faster and produce a smoother texture with smaller ice crystals throughout.
Pour the chilled mango mixture into your 1.5 Quart Cuisinart machine and churn for fifteen to twenty minutes. Sorbet typically churns a bit faster than dairy-based ice cream due to its lighter consistency, so check the texture starting around the twelve-minute mark. The finished sorbet should look thick and hold its shape softly when scooped with a spoon.
Transfer the churned sorbet into a freezer-safe container, smoothing the surface flat with a spatula. Cover with parchment paper pressed directly against the top, then seal with a tight lid. Freeze for a minimum of three hours before serving in small bowls, ideally garnished with a few fresh mango slices.
17. Raspberry Sorbet
Prep Time: 15 minutes | Churn Time: 20 minutes | Serve: 4
Tart raspberries create a vibrant pink sorbet with a bold, tangy flavor that balances nicely against the sweetness from added sugar. Straining out the seeds gives this recipe a smooth, elegant texture rather than the gritty feel raw raspberry puree can sometimes have. Serve it between courses as a palate cleanser or on its own after a heavy meal.
Ingredients
- 4 cups fresh or frozen raspberries
- 3/4 cup granulated sugar
- 1/2 cup water
- 1 tablespoon lemon juice
- Pinch of salt
Instructions
Combine the sugar and water in a small saucepan over medium heat, stirring occasionally until the sugar dissolves completely, which takes roughly three minutes. Remove the pan from the heat and set the simple syrup aside to cool for about fifteen minutes at room temperature.
While the syrup cools, place the raspberries into a blender or food processor, working in small batches for a container on the smaller side. Blend until completely smooth, which usually takes about a minute of steady blending. Frozen raspberries tend to blend a bit slower than fresh ones, so allow a minute or two of thawing time beforehand for easier processing.
Once the syrup has cooled, add it to the raspberry puree along with the lemon juice and a small pinch of salt. Blend everything together for another thirty seconds to combine fully. Pour the mixture through a fine mesh strainer set over a large bowl, using a spatula to press the puree through while leaving the seeds behind in the strainer. This step takes a few minutes of steady pressing, since raspberry seeds are numerous and the puree is fairly thick, but the smoother final texture makes the effort worthwhile.
Discard the seeds left in the strainer, then taste the smooth raspberry mixture and adjust sweetness as needed with a touch more sugar syrup, keeping in mind that the tartness mellows somewhat once frozen.
Cover the strained mixture and refrigerate for a minimum of two hours, allowing it to chill fully before churning begins. A properly cold mixture churns more evenly and produces a smoother, less icy finished product.
Pour the chilled raspberry mixture into your 1.5 Quart Cuisinart machine and churn for fifteen to twenty minutes, checking texture starting around the twelve-minute mark. The sorbet should thicken into a vibrant pink, soft, scoopable consistency.
Transfer the finished sorbet into a freezer-safe container, smoothing the top with a spatula. Cover with parchment paper directly against the surface, then seal with a tight lid. Freeze for a minimum of three hours before serving in small bowls or glasses.
18. Peach Frozen Yogurt
Prep Time: 15 minutes | Churn Time: 20 minutes | Serve: 5
Fresh peaches blended with plain Greek yogurt create a tangy, lighter dessert compared to traditional cream-based ice cream. The natural tang from the yogurt pairs especially well with ripe, sweet peaches during summer months. This recipe offers a good option for anyone looking for a slightly lighter treat without giving up creamy texture entirely.
Ingredients
- 3 cups ripe peaches, peeled and chopped
- 2 cups plain Greek yogurt
- 1/2 cup honey
- 1 tablespoon lemon juice
- 1/2 teaspoon vanilla extract
Instructions
Place the chopped peaches into a blender or food processor and puree until mostly smooth, leaving just a few small chunks for texture. Ripe, in-season peaches work best here, since their natural sweetness reduces the amount of added honey needed later in the recipe.
Add the plain Greek yogurt to the blender along with the honey, lemon juice, and vanilla extract. Blend everything together for about one minute, until the mixture turns smooth and pale orange in color. Scrape down the sides of the blender partway through to make sure all the ingredients combine evenly, without pockets of unmixed yogurt sticking to the container walls.
Taste the mixture at this stage, keeping in mind that frozen desserts generally taste less sweet once fully churned and frozen compared to their unfrozen state. Adjust the honey by an extra tablespoon for less ripe peaches, or reduce it slightly for very sweet, ripe fruit.
Pour the finished mixture into a large bowl, cover tightly, and refrigerate for a minimum of two hours. Yogurt-based bases benefit from thorough chilling, since the tangy yogurt combined with fruit needs time to fully meld into a cohesive flavor rather than tasting like separate components.
Once chilled, pour the peach yogurt mixture into your 1.5 Quart Cuisinart machine and churn for eighteen to twenty minutes. Frozen yogurt often takes slightly longer to thicken compared to sorbet due to the higher protein content from the yogurt, so check the texture starting around the fifteen-minute mark. The mixture should thicken into a smooth, soft-serve consistency that holds its shape when lifted with a spoon.
Transfer the churned frozen yogurt into a freezer-safe container, smoothing the top with a spatula and pressing out any trapped air pockets. Cover with parchment paper pressed directly against the surface, then seal with a tight lid. Freeze for a minimum of three hours before serving, allowing the texture to firm up slightly for easier scooping.
19. Blueberry Frozen Yogurt
Prep Time: 15 minutes | Churn Time: 20 minutes | Serve: 5
Cooked blueberries release their juices into a rich purple swirl throughout this tangy, fruity frozen yogurt. Cooking the berries first, rather than using them raw, deepens their flavor and softens their skins for a smoother finished texture. Plain yogurt keeps the tartness balanced against the natural sweetness of the fruit.
Ingredients
- 3 cups fresh or frozen blueberries
- 1/3 cup granulated sugar
- 1 tablespoon lemon juice
- 2 cups plain Greek yogurt
- 1/4 cup honey
Instructions
Combine the blueberries, granulated sugar, and lemon juice in a medium saucepan over medium heat. Cook the mixture for about eight to ten minutes, stirring occasionally, until the berries burst open and release their juices, forming a thick, jammy consistency. Use the back of a spoon to gently mash some of the berries against the side of the pan partway through cooking, which helps release even more juice and speeds up the thickening process.
Remove the pan from the heat once the mixture looks glossy and coats the back of a spoon. Let the cooked blueberries cool at room temperature for about twenty minutes, then transfer to the refrigerator for another thirty minutes to cool further before combining with the yogurt.
Once cooled, place the blueberry mixture into a blender along with the plain Greek yogurt and honey. Blend for about one minute, until the mixture turns a smooth, even purple color throughout. For a version with visible fruit texture rather than a completely smooth blend, reserve a quarter cup of the cooked blueberries and stir them in by hand after blending the rest.
Pour the finished mixture into a large bowl, cover, and refrigerate for a minimum of two hours to allow full chilling. The cooked fruit needs time to cool completely alongside the yogurt base for the best churning results.
Pour the chilled blueberry yogurt mixture into your 1.5 Quart Cuisinart machine and churn for eighteen to twenty minutes, checking the texture starting around the fifteen-minute mark. The mixture should thicken into a rich purple, creamy, soft-serve consistency.
Transfer the churned frozen yogurt into a freezer-safe container, smoothing the surface with a spatula. Cover with parchment paper pressed directly against the top, then seal with a tight lid. Freeze for a minimum of three hours before serving in bowls, ideally topped with a few fresh blueberries.
20. Honey Lavender Ice Cream
Prep Time: 20 minutes | Churn Time: 25 minutes | Serve: 6
Floral lavender combined with natural honey creates a sophisticated, fragrant dessert unlike the more common flavors on this list. Using culinary-grade dried lavender matters here, since decorative lavender sold for crafts may contain substances not meant for eating. A light hand with the lavender keeps the flavor pleasant rather than overwhelming or soapy tasting.
Ingredients
- 2 cups heavy cream
- 1 cup whole milk
- 2 tablespoons dried culinary lavender
- 1/2 cup honey
- 1/4 cup granulated sugar
- Pinch of salt
Instructions
Combine the whole milk and dried culinary lavender in a small saucepan over medium-low heat. Warm the mixture gently for about five minutes, until steam rises from the surface but the liquid never reaches a full boil. Remove the pan from the heat and let the lavender steep in the warm milk for fifteen minutes, allowing the floral oils to infuse fully into the liquid.
After steeping, pour the infused milk through a fine mesh strainer into a large mixing bowl, pressing gently on the lavender buds to extract any remaining liquid before discarding the spent flowers. Straining removes the small, slightly crunchy buds that would otherwise create an unpleasant texture in the finished ice cream.
Add the honey, granulated sugar, and a pinch of salt to the strained lavender milk, whisking for about three minutes until everything dissolves completely into a smooth, pale liquid. Slowly whisk in the heavy cream, blending it evenly with the infused milk mixture.
Taste the base carefully at this stage. Lavender flavor can turn from pleasantly floral to soapy tasting rather quickly with too much steeping or too many buds, so a mild, balanced flavor at this point usually translates well once frozen.
Cover the bowl and refrigerate for a minimum of three hours, allowing the flavors to fully settle and the mixture to reach proper churning temperature. The floral notes tend to mellow slightly and balance better after a longer chill of four hours or more.
Pour the chilled lavender base into your 1.5 Quart Cuisinart machine and churn for twenty to twenty-five minutes, checking the texture starting around the eighteen-minute mark. The mixture should thicken into a smooth, pale, soft-serve consistency with a light floral aroma.
Transfer the finished ice cream into a freezer-safe container, smoothing the top with a spatula and pressing out any trapped air pockets. Cover with parchment paper pressed directly against the surface, then seal with a tight lid. Freeze for a minimum of four hours before serving, ideally drizzled with a small extra amount of honey right before eating.
21. Banana Ice Cream
Prep Time: 15 minutes | Churn Time: 25 minutes | Serve: 6
Overripe bananas turn into a naturally sweet, creamy base with barely any added sugar needed. Mashing the bananas well and mixing them into a rich cream base gives this dessert a texture close to a classic banana pudding. It’s a good pick for using up spotted bananas sitting on the counter that seem past their best for eating plain.
Ingredients
- 4 very ripe bananas, mashed
- 2 tablespoons lemon juice
- 1 1/2 cups heavy cream
- 3/4 cup whole milk
- 1/2 cup brown sugar, packed
- 1 teaspoon vanilla extract
- Pinch of salt
Instructions
Peel the ripe bananas and place them in a large bowl. Mash them thoroughly using a fork or potato masher until mostly smooth, with just a few small lumps remaining for texture. Stir in the lemon juice right away, which helps prevent the mashed bananas from browning while the rest of the ingredients come together.
In a separate large mixing bowl, combine the heavy cream, whole milk, and brown sugar. Whisk the mixture for about three to four minutes, breaking apart any clumps of brown sugar until the base turns smooth and light caramel colored. Add the vanilla extract and a pinch of salt, stirring once more to combine.
Add the mashed banana mixture to the cream base and whisk everything together thoroughly, making sure the banana distributes evenly throughout the liquid rather than settling into a separate layer at the bottom of the bowl. The finished base should look pale yellow with small flecks of banana visible throughout.
For an extra smooth texture, transfer the entire mixture to a blender and pulse a few times until completely uniform, though this step is optional for anyone who prefers a bit of natural banana texture in the finished dessert. Pour the mixture back into the bowl.
Cover the bowl and refrigerate for a minimum of three hours. Banana-based mixtures benefit from a longer chill compared to plain dairy bases, since the fruit adds extra moisture that needs time to properly cool alongside the cream.
Pour the chilled banana base into your 1.5 Quart Cuisinart machine and churn for twenty to twenty-five minutes, checking texture starting around the eighteen-minute mark. The mixture should thicken into a rich, pale yellow, soft-serve consistency.
Transfer the finished ice cream into a freezer-safe container, smoothing the top with a spatula and pressing out trapped air pockets along the edges. Cover with parchment paper pressed directly against the surface, then seal with a tight lid. Freeze for a minimum of four hours before serving, ideally topped with a few slices of fresh banana.
22. Pumpkin Spice Ice Cream
Prep Time: 15 minutes | Churn Time: 25 minutes | Serve: 6
Real pumpkin puree combined with warm baking spices creates a cozy, autumn-inspired dessert perfect for cooler weather. Using canned pumpkin puree rather than pumpkin pie filling keeps the flavor balanced, since pie filling already contains added sugar and spices that can throw off the recipe’s proportions. A blend of cinnamon, nutmeg, and clove rounds out the classic pumpkin spice flavor people expect.
Ingredients
- 1 cup canned pumpkin puree
- 2 cups heavy cream
- 1 cup whole milk
- 3/4 cup brown sugar, packed
- 1 1/2 teaspoons ground cinnamon
- 1/2 teaspoon ground nutmeg
- 1/4 teaspoon ground clove
- 1 teaspoon vanilla extract
- Pinch of salt
Instructions
In a large mixing bowl, combine the pumpkin puree and brown sugar, stirring together with a spatula until the sugar mostly dissolves into the puree, forming a thick, smooth paste. Add the ground cinnamon, nutmeg, and clove, mixing thoroughly until the spices distribute evenly throughout the pumpkin mixture without any dry pockets remaining.
Slowly whisk in the whole milk, adding it gradually to loosen the thick pumpkin paste into a smoother, more pourable consistency. Once the milk fully incorporates, whisk in the heavy cream, blending everything together until the base turns a consistent light orange color throughout.
Add the vanilla extract and a pinch of salt, stirring once more to finish building the flavor. Taste the mixture carefully at this stage, since spice blends vary in strength depending on freshness, and adjusting the cinnamon by an extra quarter teaspoon can help balance a milder spice mix.
Cover the bowl tightly and refrigerate for a minimum of three hours. Pumpkin puree adds thickness and moisture to the base, so a longer chilling period helps the mixture firm up properly before it reaches the churning machine. Overnight chilling produces the best texture for this particular recipe.
Pour the chilled pumpkin base into your 1.5 Quart Cuisinart machine and churn for twenty to twenty-five minutes. Pumpkin-based mixtures tend to thicken a bit faster than plain dairy due to the natural fiber content, so start checking the texture around the sixteen-minute mark. The mixture should look thick, glossy, and hold a soft peak when tested with a spoon.
Transfer the finished ice cream into a freezer-safe container, smoothing the top with a spatula and pressing out any trapped air pockets. Cover with parchment paper pressed directly onto the surface, then seal with a tight lid. Freeze for a minimum of four hours before serving, ideally alongside a slice of spice cake or warm gingerbread.
23. Matcha Green Tea Ice Cream
Prep Time: 15 minutes | Churn Time: 25 minutes | Serve: 6
Earthy matcha powder gives this recipe a distinct green color and a slightly bitter, grassy flavor that balances nicely against sweet cream. Choosing a good-quality culinary matcha matters here, since lower grades can taste overly bitter or chalky once frozen. This dessert offers a nice change of pace from the sweeter, more traditional flavors on this list.
Ingredients
- 2 tablespoons culinary-grade matcha powder
- 1/4 cup hot water
- 2 cups heavy cream
- 1 cup whole milk
- 3/4 cup granulated sugar
- 1 teaspoon vanilla extract
- Pinch of salt
Instructions
Place the matcha powder in a small bowl and pour the hot water over it slowly, whisking continuously with a small whisk or bamboo whisk until the powder fully dissolves and forms a smooth, bright green paste without any dry clumps remaining. Matcha powder tends to clump easily, so whisking briskly at this stage makes a noticeable difference in the final smoothness of the base.
In a large mixing bowl, combine the heavy cream, whole milk, and granulated sugar. Whisk for about three minutes, until the sugar fully dissolves into the liquid. Add the matcha paste to the cream mixture, whisking thoroughly until the color turns an even, vibrant green throughout, with no streaks of unmixed matcha visible.
Stir in the vanilla extract and a pinch of salt, mixing once more to round out the flavor. Taste the base at this point, keeping in mind that matcha’s natural bitterness mellows somewhat once combined with the sweetness of the sugar and cream, so a base that tastes slightly bitter on its own usually balances out nicely once frozen.
Cover the bowl and refrigerate for a minimum of two hours, though a longer chill of three to four hours helps the matcha flavor fully settle into the cream base. Skipping the chill period often results in a weaker, less developed tea flavor throughout the finished dessert.
Pour the chilled matcha base into your 1.5 Quart Cuisinart machine and churn for twenty to twenty-five minutes, checking the texture starting around the eighteen-minute mark. The mixture should thicken into a smooth, vivid green, soft-serve consistency.
Transfer the finished ice cream into a freezer-safe container, smoothing the top with a spatula and pressing out any trapped air pockets along the sides. Cover with parchment paper pressed directly against the surface, then seal with a tight lid. Freeze for a minimum of four hours before serving, ideally with a light dusting of extra matcha powder over the top.
24. Chocolate Brownie Ice Cream
Prep Time: 25 minutes | Churn Time: 25 minutes | Serve: 6
Chunks of fudgy homemade brownie folded through a chocolate base create a dense, decadent dessert loaded with texture. Baking a small batch of brownies specifically for this recipe gives better results than using store-bought ones, since homemade brownies can be cut and slightly underbaked for a fudgier bite once frozen. This flavor works well for serious chocolate lovers looking for something extra indulgent.
Ingredients
- 1/2 cup all-purpose flour
- 1/3 cup unsweetened cocoa powder
- 1/2 cup granulated sugar
- 1/4 cup vegetable oil
- 1 large egg
- 1/2 teaspoon vanilla extract
- 1 3/4 cups heavy cream
- 1 cup whole milk
- 2/3 cup granulated sugar
- 1/3 cup unsweetened cocoa powder
- Pinch of salt
Instructions
Preheat the oven to 350 degrees Fahrenheit and line a small 8-by-8 inch baking pan with parchment paper. In a medium bowl, whisk together the flour, cocoa powder, and sugar for the brownies. Add the vegetable oil, egg, and vanilla extract, stirring until a thick, glossy batter forms. Spread the batter evenly into the prepared pan.
Bake the brownies for eighteen to twenty minutes, slightly less than a typical batch, since a softer, fudgier texture works better once frozen into small chunks. A toothpick inserted in the center should come out with a few moist crumbs attached rather than completely clean. Let the brownies cool completely in the pan, about forty-five minutes, before cutting into small, bite-sized cubes. Place the cubed brownies in the freezer for at least thirty minutes to firm up before adding them to the ice cream later.
While the brownies bake and cool, prepare the chocolate ice cream base. Warm the whole milk gently in a small saucepan until steam rises, then remove from the heat and whisk in the cocoa powder until smooth. Add the granulated sugar and whisk for another two minutes until fully dissolved. Pour the warm cocoa mixture into a large bowl and slowly whisk in the heavy cream along with a pinch of salt.
Cover the chocolate base and refrigerate for a minimum of three hours, allowing it to chill thoroughly before churning begins. Keep the frozen brownie cubes stored in the freezer separately until ready to use.
Pour the chilled chocolate base into your 1.5 Quart Cuisinart machine and churn for eighteen to twenty minutes before checking consistency. Once the mixture thickens into a glossy, soft-serve texture, add the frozen brownie cubes through the top opening during the final four to five minutes of churning, letting the paddle fold them evenly throughout without breaking them apart too much.
Transfer the finished ice cream into a freezer-safe container, folding in any remaining brownie pieces left in the churning bowl. Cover with parchment paper and a tight lid, then freeze for a minimum of four hours before serving in generous scoops.
25. No-Sugar Vanilla Ice Cream
Prep Time: 15 minutes | Churn Time: 25 minutes | Serve: 6
A sugar-free take on the classic vanilla flavor, this recipe relies on a granulated sugar substitute to build sweetness without the usual added sugar. It’s a helpful option for anyone watching their sugar intake but still wanting a proper, creamy dessert. The texture stays smooth and scoopable, close to a traditional vanilla base, when the correct type of substitute gets used.
Ingredients
- 2 cups heavy cream
- 1 cup whole milk
- 3/4 cup granulated erythritol or another cup-for-cup sugar substitute
- 1 tablespoon pure vanilla extract
- 1/4 teaspoon xanthan gum
- Pinch of salt
Instructions
In a large mixing bowl, combine the heavy cream and whole milk. Add the granulated sugar substitute gradually, whisking continuously as it goes in. Sugar substitutes sometimes dissolve differently than regular sugar, so whisk for a full four minutes, longer than a standard base, checking for any remaining granules by rubbing a small amount of the mixture between two fingers.
Add the xanthan gum very slowly, sprinkling just a small pinch at a time while whisking briskly and constantly. Xanthan gum clumps almost instantly on contact with liquid when added too quickly, so this gradual approach matters for a smooth final texture. The gum helps replace some of the body that sugar normally provides in a traditional base, keeping the finished ice cream from turning too icy or hard once frozen.
Stir in the vanilla extract and a small pinch of salt, whisking one final time to combine everything into a smooth, pale liquid. Taste the base and adjust sweetness with an extra tablespoon of the sugar substitute for a sweeter finished product, keeping in mind that some substitutes carry a slightly different sweetness profile compared to regular sugar.
Cover the bowl tightly and refrigerate for a minimum of three hours. Sugar-free bases often benefit from a longer chilling period compared to traditional recipes, since the lack of sugar means the mixture needs a bit more time to reach an ideal churning temperature and texture.
Pour the chilled base into your 1.5 Quart Cuisinart machine and churn for twenty to twenty-five minutes, checking consistency starting around the eighteen-minute mark. Sugar-free mixtures can sometimes take a touch longer to thicken fully, so patience during this stage helps achieve the best possible texture.
Once the mixture reaches a thick, creamy, soft-serve consistency, transfer it into a freezer-safe container using a spatula. Smooth the top and press out any trapped air pockets along the sides. Cover with parchment paper pressed directly onto the surface, then seal with a tight lid. Freeze for a minimum of four hours before serving, keeping in mind that sugar-free ice cream can freeze slightly harder than traditional versions, so a few minutes of rest at room temperature before scooping helps considerably.
How to Store Homemade Ice Cream
Getting the storage part right keeps your homemade batches tasting fresh and smooth for much longer. A few simple habits make a real difference between a creamy scoop weeks later and a hard, icy block.
1. Choose the right container – Shallow, wide containers with tight-fitting lids work better than tall, narrow ones, since ice cream freezes more evenly in a shallow layer. Freezer-safe plastic or metal containers hold up better over time than glass, which can crack under repeated temperature changes.
2. Press parchment paper directly on top – Placing a piece of parchment paper right against the surface before sealing the lid blocks air from reaching the ice cream, which is the main cause of freezer burn and icy crystals forming on top.
3. Store toward the back of the freezer – The back of the freezer stays at a steadier, colder temperature compared to the door, where temperature swings happen every time it opens. A steady temperature keeps the texture smoother for a longer stretch.
4. Eat within two to three weeks – Homemade ice cream lacks the stabilizers found in store-bought versions, so it tends to develop ice crystals faster. Two to three weeks marks the sweet spot for the best flavor and texture.
5. Soften before scooping – Homemade batches often freeze harder than store-bought tubs. Setting the container on the counter for five to ten minutes before serving softens it just enough for easy scooping without turning it soupy.
Conclusion
Making ice cream at home turns a simple treat into something worth looking forward to. A 1.5 Quart Cuisinart ice cream maker keeps the process quick and manageable, good for a classic vanilla base or something more adventurous like honey lavender or matcha green tea. Each recipe in this collection offers its own personality, from fruity sorbets to rich, loaded flavors packed with mix-ins.
Once the basic method feels familiar, experimenting becomes the best part. Try swapping in a favorite candy bar, folding in a new fruit combination, or adjusting the sweetness to personal taste. Small changes like these turn a single base recipe into dozens of new possibilities over time.
Keep this collection bookmarked for the next warm afternoon, holiday gathering, or random Tuesday that calls for something cold and homemade. With twenty-five recipes covering nearly every craving, there’s always a new flavor worth trying with the 1.5 Quart Cuisinart ice cream maker.