
Halloween season brings out a special kind of excitement in every household, and a big part of that excitement lives in the kitchen. Bright orange pumpkins, googly candy eyes, and spooky little ghosts made from simple pantry items turn an ordinary afternoon into a memory-making event.
Kids love Halloween snacks because they get to eat food that looks like a tiny costume party on a plate. A banana dressed up as a ghost or a hot dog wrapped like a mummy feels playful and silly, and that silliness is exactly what makes the holiday special for young eaters.
Making treats at home instead of buying packaged candy gives parents control over ingredients, portion sizes, and allergy concerns. Homemade snacks also become a shared activity, letting kids help stir, decorate, and assemble their own spooky creations.
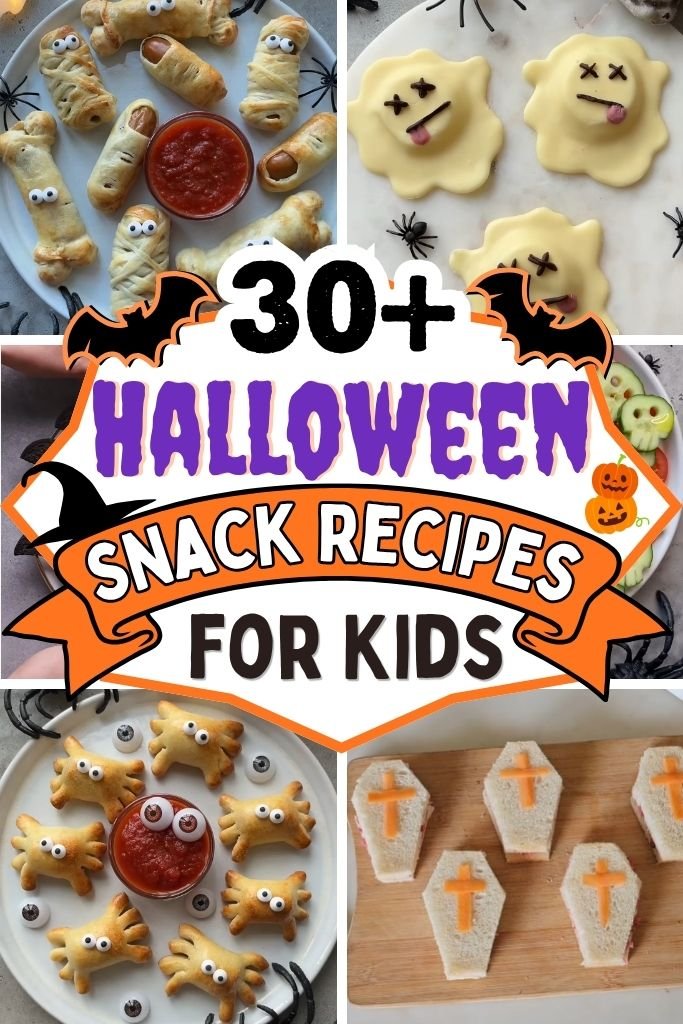
This collection brings together more than 30+ kid-friendly Halloween snack recipes, ranging from sweet treats to savory bites. Every recipe includes clear ingredients, step-by-step instructions, easy variations, and storage tips, so planning a full Halloween snack menu becomes simple from start to finish.
How to Plan the Perfect Halloween Snack Menu for Kids
Building a Halloween snack menu doesn’t need to be complicated. A little bit of planning goes a long way toward keeping kids happy and guests impressed. Here’s how to put together a menu that works for every occasion, from classroom parties to family movie nights.
1. Choose a mix of sweet and savory snacks. A menu built only on sugar can leave kids feeling wound up and cranky within an hour. Pairing cookies and candy-topped treats with cheese, crackers, and mini sandwiches keeps energy levels steadier and gives picky eaters more choices.
2. Include colorful Halloween-themed treats. Orange, black, purple, and green foods instantly signal “party time” to young guests. Using natural food coloring, fresh produce, and themed toppings brings visual excitement to the table without extra effort.
3. Offer allergy-friendly options. Many classrooms and playdates include kids with nut, dairy, or gluten sensitivities. Setting aside a few snacks made with allergy-friendly swaps means every child at the table gets to join the celebration.
4. Keep portions kid-sized and easy to grab. Small hands work best with small bites. Mini cups, bite-sized skewers, and single-serving portions cut down on mess and make cleanup far less stressful for parents and teachers alike.
Tips for Making Kid-Friendly Halloween Snacks
Cooking with a Halloween theme sounds like a big project, but it’s actually simple once broken down into a few easy habits. These tips make the process smoother for both the cook and the little helpers in the kitchen.
- Choose simple ingredients children already enjoy. Bananas, pretzels, cheese sticks, crackers, and marshmallows are familiar foods that most kids already love. Turning these everyday snacks into Halloween characters means there’s less resistance at snack time.
- Keep decorations cute instead of scary. Younger children often prefer friendly ghosts and smiling pumpkins over anything too spooky. Rounded shapes, soft colors, and simple faces make treats approachable rather than frightening.
- Use safe, age-appropriate kitchen tasks for little helpers. Spreading frosting, placing candy eyes, or stacking ingredients are tasks young kids can manage without needing sharp tools or the stove. Letting them participate builds excitement about eating what they helped create.
- Balance sweet treats with healthier snack options. Adding fruit, vegetables, and protein-based bites alongside candy-heavy recipes keeps the overall spread more balanced. This also gives parents peace of mind when packing lunch boxes or classroom treats.
Halloween Snack Decorating Ideas
Decorating is where the real Halloween magic happens. A plain snack becomes a pumpkin, a ghost, or a monster with just a few simple touches. These decorating ideas work well for beginners and experienced home cooks alike.
1. Easy candy eyes and edible decorations. Store-bought candy eyes are one of the fastest ways to give any snack instant personality. Mini chocolate chips, pretzel pieces, and colored sprinkles also work well as budget-friendly decorations.
2. Natural food coloring ideas. Beet juice creates soft pink and red shades, turmeric brings out warm yellow and orange tones, and spinach powder produces a gentle green. These natural options add color without artificial ingredients.
3. Simple frosting and icing techniques. A butter knife or the back of a spoon works fine for spreading frosting evenly. Piping bags made from a plastic sandwich bag with a snipped corner allow for neater lines on cookies and cupcakes.
4. Creative ways to shape pumpkins, ghosts, mummies, monsters, and bats. Orange fruits and cheese rounds become pumpkins with a small stem shape on top. White foods like marshmallows or peeled bananas turn into ghosts with two dots for eyes, while strips of dough or cheese wrapped around a hot dog create the look of a mummy.
30+ Halloween Snack Recipes for Kids
Now that the planning and decorating basics are covered, here are the recipes themselves. Each one includes clear measurements, detailed steps, easy variations, and storage advice, so every treat turns out right on the first try.
1. Ghost Banana Pops
⏱ Time
- Prep Time: 15 minutes
- Cook time: 0 minutes
- Total: 15 minutes (plus 1 hour freezing)
- Servings: 6
These little ghost pops turn a plain banana into one of the easiest and most popular Halloween snack recipes for kids. Bananas get sliced in half, dipped in melted white chocolate, and given a sweet, spooky face with mini chocolate chips. Kids enjoy holding the popsicle stick and biting into a cool, creamy treat that looks like a friendly ghost. The recipe requires no oven and comes together with items most kitchens already have on hand.
Ingredients
- 3 ripe but firm bananas
- 6 wooden popsicle sticks
- 2 cups white chocolate chips (or white candy melts)
- 1 tablespoon coconut oil
- 12 mini chocolate chips (for eyes)
Instructions
- Peel the bananas and slice each one in half crosswise, creating six shorter pieces. Insert a popsicle stick into the flat end of each banana half, pushing it about halfway through so it holds steady.
- Place the banana pops on a parchment-lined baking tray and set the tray in the freezer for about 20 minutes. Chilling the bananas first keeps them firm and makes the coating process much smoother.
- While the bananas chill, add the white chocolate chips and coconut oil to a microwave-safe bowl. Heat in 20-second bursts, stirring between each round, until the mixture turns smooth and fully melted.
- Remove the bananas from the freezer and dip each one into the melted white chocolate, turning it slowly to coat every side. Let the extra chocolate drip off for a few seconds before setting the pop back on the parchment paper.
- While the coating is still soft, press two mini chocolate chips onto the upper portion of each pop to form eyes. Work quickly, since the chocolate firms up fast once it touches the cold banana.
- Return the finished pops to the freezer for 30 to 40 minutes, or until the coating hardens completely. Serve cold, straight from the freezer or refrigerator.
Variations Swap the mini chocolate chips for candy eyes to save time, or drizzle a small amount of melted dark chocolate over the finished pops for a marbled ghost pattern. Frozen grapes can replace bananas for a smaller, bite-sized version.
Storage Tips Store finished pops in a single layer inside an airtight container, separated by parchment paper to prevent sticking. Keep frozen for up to one week, and allow a few minutes at room temperature before serving for the best texture.
2. Mini Pumpkin Cheese Balls
⏱ Time
- Prep Time: 20 minutes
- Cook time: 0 minutes
- Total: 20 minutes (plus 30 minutes chilling)
- Servings: 8
This savory snack balances out all the sweet treats on a Halloween table with a creamy, cheesy bite shaped like a tiny pumpkin. Cream cheese gets mixed with shredded cheddar and a few seasonings, then rolled into small orange-tinted balls and marked with a butter knife to look like pumpkin ridges. A pretzel stick pressed into the top completes the look. Kids enjoy spreading these on crackers, and parents appreciate that the recipe skips added sugar entirely.
Ingredients
- 8 ounces cream cheese, softened
- 1 cup shredded sharp cheddar cheese
- 1/4 teaspoon garlic powder
- 1/4 teaspoon smoked paprika
- 4 to 5 drops orange food coloring
- 16 small pretzel sticks
- 2 small sprigs fresh parsley or a green pepper strip, cut into small pieces
Instructions
- In a mixing bowl, combine the softened cream cheese, shredded cheddar, garlic powder, and smoked paprika. Stir with a spatula until the mixture becomes smooth and evenly blended.
- Add the orange food coloring one drop at a time, mixing thoroughly after each addition, until the cheese mixture reaches a warm pumpkin-orange shade. Cover the bowl and refrigerate for 15 minutes to firm up slightly.
- Scoop out portions of the chilled cheese mixture using a small cookie scoop or spoon, then roll each portion between your palms to form a smooth ball roughly the size of a golf ball.
- Using the dull edge of a butter knife, gently press vertical lines into each ball, spacing them evenly around the sides to mimic the ridges of a real pumpkin.
- Insert one pretzel stick into the top center of each ball to form the pumpkin stem, and tuck a small piece of parsley or green pepper beside the stem to look like a leaf.
- Arrange the finished pumpkin balls on a serving plate lined with crackers, and refrigerate for 15 to 20 minutes before serving so they hold their shape.
Variations Use pepper jack cheese instead of cheddar for a bit of heat, or roll the balls in finely crushed crackers for added texture on the outside. Dairy-sensitive families can substitute a plant-based cream cheese alternative.
Storage Tips Store the cheese balls in an airtight container in the refrigerator for up to three days. Add the pretzel stems right before serving, since they soften and lose their crunch when stored too long.
3. Mummy Hot Dogs
⏱ Time
- Prep Time: 15 minutes
- Cook time: 20 minutes
- Total: 35 minutes
- Servings: 8
Mummy hot dogs remain one of the most requested savory Halloween snack recipes for kids, mainly because they take a lunchbox favorite and turn it into something playful. Strips of crescent roll dough wrap around each hot dog, leaving a small gap near the top for two dots of mustard to form eyes. Once baked, the dough turns golden and slightly crisp, wrapping the hot dog like a tiny bandaged mummy.
Ingredients
- 8 beef or turkey hot dogs
- 2 cans refrigerated crescent roll dough (or crescent dough sheets)
- 1 egg, beaten (for egg wash)
- Yellow mustard, for the eyes
- Flour, for dusting the work surface
Instructions
- Preheat the oven to 375°F (190°C) and line a baking sheet with parchment paper. Pat the hot dogs dry with a paper towel to help the dough stick more evenly.
- Unroll the crescent dough onto a lightly floured surface and press the seams together to seal any perforations. Using a knife or pizza cutter, slice the dough into thin strips, about 1/4 inch wide.
- Wrap two or three strips of dough around each hot dog in a criss-cross pattern, leaving a small gap uncovered near one end for the mustard eyes later. Tuck the loose ends of the dough underneath to keep them from unraveling during baking.
- Place the wrapped hot dogs on the prepared baking sheet, spacing them about an inch apart. Brush the dough lightly with the beaten egg to help it turn a deep golden color while baking.
- Bake for 18 to 20 minutes, or until the dough turns golden brown and fully cooked through. Remove the tray from the oven and let the mummies cool for about 5 minutes.
- Once slightly cooled, dip a toothpick into the yellow mustard and dot two small eyes onto the exposed section of each hot dog to complete the mummy face.
Variations Use mini cocktail sausages instead of full-sized hot dogs for a bite-sized party version, or swap the mustard eyes for small dots of ketchup. Plant-based sausages work well for families avoiding meat.
Storage Tips Store leftover mummy hot dogs in an airtight container in the refrigerator for up to three days. Reheat in a 350°F oven for about 8 minutes to bring back the crisp texture of the dough.
4. Spider Peanut Butter Crackers
⏱ Time
- Prep Time: 15 minutes
- Cook time: 0 minutes
- Total: 15 minutes
- Servings: 10
These crunchy little crackers come together fast and require no cooking at all, making them a smart pick for last-minute Halloween party prep. Round crackers get spread with peanut butter, sandwiched together, and given pretzel stick legs so each one resembles a tiny spider. A dab of melted chocolate and two candy eyes finish the look.
Ingredients
- 20 round buttery crackers
- 1/2 cup creamy peanut butter
- 40 thin pretzel sticks
- 2 tablespoons mini chocolate chips or candy eyes
- 2 tablespoons melted chocolate, for attaching eyes
Instructions
- Lay half of the crackers flat on a clean work surface or tray. Spread about 1 teaspoon of peanut butter evenly over the top of each one, leaving a small border around the edge.
- Break each pretzel stick into two shorter pieces, so there are eight small legs available per spider. Press four pretzel pieces into the peanut butter on each cracker, angling them outward like spider legs.
- Top each prepared cracker with a second plain cracker, pressing down gently so the peanut butter holds the two crackers together while keeping the pretzel legs in place around the edges.
- Dip a toothpick into the melted chocolate and dot two small spots onto the top cracker near one edge. Press a mini chocolate chip or candy eye onto each dot while the chocolate remains sticky.
- Let the finished spiders sit for about 5 minutes so the chocolate eyes set in place before serving. Arrange them on a platter with legs facing outward for the best spider effect.
Variations Sunflower seed butter makes a good substitute for classrooms with nut allergies. Chocolate hazelnut spread also works well in place of peanut butter for a sweeter version.
Storage Tips Keep assembled spiders in an airtight container at room temperature for up to two days. Avoid refrigeration, since the crackers can turn soft and lose their crunch.
5. Witch Hat Cookies
⏱ Time
- Prep Time: 20 minutes
- Cook time: 0 minutes
- Total: 20 minutes
- Servings: 12
Witch hat cookies use just three ingredients and skip the oven completely, which makes them an easy project for young helpers. A chocolate cookie forms the wide brim of the hat, a chocolate kiss becomes the pointed top, and a small ring of orange frosting ties the two pieces together like a witch’s hat band.
Ingredients
- 24 small chocolate wafer cookies
- 24 chocolate kiss candies, unwrapped
- 1/4 cup orange frosting or icing (store-bought or homemade)
- Small piping bag or plastic sandwich bag
Instructions
- Lay the chocolate wafer cookies flat on a tray or clean countertop, spacing them slightly apart so there’s enough room to work around each one.
- Spoon the orange frosting into a piping bag or a plastic sandwich bag with a small corner snipped off. Pipe a small dot of frosting in the center of each cookie.
- Press the flat bottom of a chocolate kiss into the frosting dot on each cookie, holding it in place for a few seconds until it sticks firmly to the cookie base.
- Once all the kisses are attached, pipe a thin ring of orange frosting around the base of each chocolate kiss where it meets the cookie, creating the look of a hat band.
- Let the cookies sit at room temperature for 10 minutes so the frosting can firm up slightly before serving or packing them away for a party.
Variations Use purple or green frosting instead of orange for a different color scheme, or add a tiny candy buckle made from a small square of fondant on the hat band.
Storage Tips Store the finished cookies in a single layer in an airtight container at room temperature for up to five days. Avoid stacking them until the frosting has fully hardened.
6. Monster Rice Krispie Treats
⏱ Time
- Prep Time: 20 minutes
- Cook time: 10 minutes
- Total: 30 minutes (plus 30 minutes setting)
- Servings: 12
Classic rice krispie treats get a spooky makeover with green food coloring and a handful of candy features. The chewy marshmallow base stays exactly the same, but a few simple additions turn ordinary squares into a batch of grinning little monsters that kids can help decorate themselves.
Ingredients
- 6 cups crispy rice cereal
- 1 bag (10 ounces) mini marshmallows
- 3 tablespoons unsalted butter
- Green food coloring
- Candy eyes, various sizes
- Assorted small candies, for teeth and horns
Instructions
- Melt the butter in a large pot over low heat, then add the mini marshmallows and stir continuously until they melt into a smooth, sticky mixture. Add the green food coloring a few drops at a time, stirring until the color spreads evenly throughout.
- Remove the pot from the heat and add the crispy rice cereal all at once. Fold the cereal into the marshmallow mixture gently but thoroughly, coating every piece without crushing the cereal.
- Pour the mixture into a greased 9×13 inch baking dish. Use a piece of buttered parchment paper or a greased spatula to press the mixture down evenly, since wet hands can also work well here.
- Let the pan cool at room temperature for about 20 to 30 minutes, or until it firms up enough to hold its shape when cut. Cutting too early can cause the treats to fall apart.
- Once cooled, cut the mixture into square or rectangular pieces. Press candy eyes, small candy pieces for teeth, and pretzel pieces for horns onto the top of each square while the surface still holds a bit of stickiness.
- Arrange the finished monster treats on a serving tray, spacing them apart so the decorations stay intact and visible.
Variations Divide the marshmallow mixture into two bowls and color one purple for a mixed batch of monster colors. Mini candy-coated chocolates also work well as monster teeth for extra crunch.
Storage Tips Store in an airtight container at room temperature for up to four days. Keep the container away from direct sunlight, since heat can cause the treats to turn soft and lose their shape.
7. Candy Corn Fruit Cups
⏱ Time
- Prep Time: 15 minutes
- Cook time: 0 minutes
- Total: 15 minutes
- Servings: 6
These layered fruit cups mimic the classic look of candy corn using only fresh fruit, giving parents a naturally sweet option to balance out the richer treats on the snack table. Pineapple, mango or peaches, and grapes stack in clear cups to form the familiar yellow, orange, and white stripes.
Ingredients
- 1 cup fresh pineapple chunks
- 1 cup diced mango or canned peaches, drained
- 1 cup green grapes, halved
- 6 small clear plastic cups
- Fresh mint leaves, for garnish (optional)
Instructions
- Prepare all the fruit ahead of time by dicing the pineapple and mango into small, bite-sized pieces. Halve the grapes so they layer more evenly inside the cups.
- Begin layering each cup by adding a spoonful of diced pineapple to the bottom, pressing it down gently with the back of a spoon to create an even base layer.
- Add a layer of diced mango or peaches on top of the pineapple, filling each cup roughly halfway. This middle layer should sit level so the final layer looks neat once completed.
- Top each cup with the halved green grapes, filling the remaining space near the rim. The grapes represent the white tip of a candy corn piece, so keep this layer slightly smaller than the others.
- Garnish each cup with a small mint leaf tucked near the edge, then chill the cups in the refrigerator for at least 10 minutes before serving.
Variations Swap grapes for chopped green apple for a bit of crunch, or use canned mandarin oranges instead of mango when fresh fruit isn’t available.
Storage Tips Cover and refrigerate the fruit cups for up to two days. Add the mint garnish right before serving, since it wilts quickly once stored.
8. Pumpkin Patch Pudding Cups
⏱ Time
- Prep Time: 15 minutes
- Cook time: 0 minutes
- Total: 15 minutes (plus 15 minutes chilling)
- Servings: 6
Chocolate pudding forms the “dirt” base of these pudding cups, topped with crushed chocolate cookies and a few orange candies shaped like tiny pumpkins. The layered look makes this dessert feel far more special than the short prep time suggests.
Ingredients
- 2 cups prepared chocolate pudding
- 1 cup crushed chocolate sandwich cookies
- 12 orange candy pumpkins or candy corn pieces
- 6 small green fondant or icing leaves (optional)
- 6 clear cups or small mason jars
Instructions
- Spoon a layer of chocolate pudding into the bottom of each clear cup, filling about one-third of the way up. Smooth the top gently with the back of a spoon.
- Sprinkle a generous layer of crushed chocolate cookies over the pudding, covering the surface completely to resemble a patch of dark garden soil.
- Add another layer of chocolate pudding on top of the cookie crumbs, filling the cups to about three-quarters full. Smooth the surface again so the next layer sits evenly.
- Top each cup with a final sprinkle of crushed cookies, leaving a small clear space in the center for the pumpkin candies.
- Place two orange candy pumpkins or a small cluster of candy corn in the center of each cup to look like pumpkins growing in the patch. Add a tiny green candy leaf beside each one as an optional touch.
- Refrigerate the cups for at least 15 minutes before serving to let the layers set slightly.
Variations Use vanilla pudding tinted with a bit of green food coloring as a base layer for a grassy garden look, or swap chocolate cookies for graham cracker crumbs for a lighter flavor.
Storage Tips Cover and refrigerate for up to two days. Add the cookie crumb topping just before serving to keep it from turning soggy.
9. Ghost Pretzels
⏱ Time
- Prep Time: 15 minutes
- Cook time: 0 minutes
- Total: 15 minutes (plus 20 minutes setting)
- Servings: 10
Pretzel rods dipped in white chocolate and dotted with a simple face turn into a crunchy, sweet-and-salty snack shaped like little ghosts. This recipe works well as a quick project for kids since the steps are short and mostly involve dipping and decorating.
Ingredients
- 20 thick pretzel rods
- 2 cups white chocolate chips or candy melts
- 1 tablespoon vegetable shortening
- 40 mini chocolate chips or small candy eyes
Instructions
- Line a baking sheet with parchment paper and set it aside for later. Break each pretzel rod in half for a shorter ghost shape, or keep them whole for a taller look.
- Combine the white chocolate chips and shortening in a microwave-safe bowl. Heat in 20-second bursts, stirring after each round, until the mixture turns fully smooth and pourable.
- Dip each pretzel rod into the melted white chocolate, turning it slowly so the coating covers about three-quarters of the pretzel, leaving a bit of the bottom exposed to act as a handle.
- Gently tap off any extra chocolate, then lay the coated pretzel flat on the parchment-lined tray. Repeat with the remaining pretzels, working in small batches so the chocolate doesn’t harden too fast.
- While the coating is still wet, press two mini chocolate chips onto the upper portion of each pretzel to form eyes. Space them evenly for a friendly ghost expression.
- Let the pretzels sit at room temperature for about 20 minutes, or until the chocolate hardens completely, before moving or serving them.
Variations Drizzle a small amount of black candy melts over the finished pretzels for a striped ghost pattern, or use dark chocolate instead of white for a different flavor combination.
Storage Tips Store in an airtight container at room temperature, away from heat or sunlight, for up to one week. Layer with parchment paper to prevent the pretzels from sticking together.
10. Halloween Popcorn Mix
⏱ Time
- Prep Time: 10 minutes
- Cook time: 5 minutes
- Total: 15 minutes
- Servings: 10
This colorful popcorn mix combines popped corn with candy corn, pretzels, and chocolate candies for a sweet-and-salty snack that works well in large batches. It’s a practical choice for classroom parties, since it can be portioned into small bags for easy sharing.
Ingredients
- 10 cups popped popcorn
- 1 cup candy corn
- 1 cup mini pretzel twists
- 1 cup orange and brown candy-coated chocolates
- 1/2 cup white chocolate chips, melted
Instructions
- Pop the popcorn using an air popper or stovetop method, then spread it out on a large baking sheet lined with parchment paper. Remove any unpopped kernels before continuing.
- Add the candy corn, mini pretzel twists, and candy-coated chocolates to the tray with the popcorn. Toss everything together gently using two large spoons or clean hands.
- Melt the white chocolate chips in a microwave-safe bowl in 20-second bursts, stirring between each round, until smooth and fully melted.
- Drizzle the melted white chocolate over the popcorn mixture in a back-and-forth motion, covering the surface as evenly as possible without pouring it all in one spot.
- Let the mixture sit at room temperature for about 15 minutes, or until the chocolate drizzle hardens and the pieces no longer feel sticky to the touch.
- Break the mixture apart gently with your hands, then transfer it into bowls or small individual bags for serving.
Variations Swap orange and brown candies for seasonal mixed colors, or add pretzel sticks broken into smaller pieces for extra crunch throughout the mix.
Storage Tips Store in an airtight container or sealed bag at room temperature for up to five days. Keep away from humidity, since moisture can make the popcorn lose its crunch.
11. Apple Monster Mouths
⏱ Time
- Prep Time: 15 minutes
- Cook time: 0 minutes
- Total: 15 minutes
- Servings: 6
Apple slices spread with peanut butter and lined with mini marshmallow “teeth” turn into grinning monster mouths in just a few minutes. This snack pairs natural fruit with a bit of sweetness, giving parents a treat they feel good about serving.
Ingredients
- 3 red apples, cored
- 1/2 cup creamy peanut butter or sunflower seed butter
- 1 cup mini marshmallows
- Red food coloring (optional)
Instructions
- Slice each apple into wedges, cutting about 6 to 8 pieces per apple depending on size. Pat the cut edges dry with a paper towel to help the peanut butter stick more securely.
- Spread a generous layer of peanut butter onto the flat side of one apple wedge, covering most of the surface but leaving a small border near the edges.
- Press 4 to 6 mini marshmallows into the peanut butter along the edge of the wedge, spacing them evenly to resemble a row of teeth.
- Top the marshmallows with a second apple wedge, pressing down gently so the peanut butter holds both pieces together and the marshmallow teeth stay visible at the front.
- Repeat the process with the remaining apple wedges, arranging the finished mouths on a serving plate as they’re completed.
Variations Add a small drop of red food coloring to a bit of peanut butter and spread it along the inner edge of the apple for a more dramatic monster mouth look. Almond butter works well as another nut-based option.
Storage Tips These are best served fresh, since apples can brown after sitting too long. For prepping ahead, toss the apple wedges in a small amount of lemon juice and store separately from the peanut butter for up to four hours.
12. Cheese Stick Broomsticks
⏱ Time
- Prep Time: 10 minutes
- Cook time: 0 minutes
- Total: 10 minutes
- Servings: 8
Cheese sticks pull apart into thin strands to create the look of broom bristles, turning a simple snack into a playful little prop for a Halloween-themed lunch box. This one requires no cooking and comes together in minutes.
Ingredients
- 8 mozzarella cheese sticks
- 8 pretzel rods
- 8 small pieces of kitchen twine or thin strips of green onion (for tying)
Instructions
- Unwrap each cheese stick and, using clean hands, gently pull one end into several thin strands, about 1 to 2 inches long, leaving the rest of the stick intact.
- Insert a pretzel rod into the unshredded end of the cheese stick, pushing it in gently so it stays secure and resembles the handle of a broom.
- Tie a small piece of kitchen twine or a thin strip of green onion around the base of the shredded cheese strands, just above where the pretzel meets the cheese, to mimic the binding on a broom.
- Arrange the finished broomsticks on a serving tray, positioning them at slight angles so they look like a stack of little brooms.
Variations String cheese also works well in place of individual cheese sticks, and colored twine or thin licorice can replace the green onion for a more playful look.
Storage Tips Assemble these close to serving time for the best texture, since cheese can dry out at room temperature. Store unassembled cheese sticks and pretzels separately in the refrigerator and pantry until ready to use.
13. Spider Deviled Eggs
⏱ Time
- Prep Time: 20 minutes
- Cook time: 12 minutes
- Total: 32 minutes (plus cooling time)
- Servings: 12
Classic deviled eggs get a spooky spin with thin strips of black olive arranged as spider legs over the top. This savory snack adds protein to the table and gives kids a slightly different texture compared to the sweeter treats nearby.
Ingredients
- 6 large eggs
- 1/4 cup mayonnaise
- 1 teaspoon yellow mustard
- Salt and pepper, to taste
- 2 black olives, sliced into thin strips
- Paprika, for garnish
Instructions
- Place the eggs in a saucepan and cover with cold water by about an inch. Bring the water to a boil, then remove the pan from heat, cover it, and let the eggs sit for 12 minutes.
- Transfer the eggs to a bowl of ice water and let them cool for about 5 minutes. Peel the shells off carefully, then slice each egg in half lengthwise.
- Gently remove the yolks and place them in a small mixing bowl. Add the mayonnaise, mustard, salt, and pepper, then mash everything together with a fork until smooth and creamy.
- Spoon or pipe the yolk mixture back into the hollowed egg whites, filling each half generously and smoothing the top with the back of a spoon.
- Arrange 6 to 8 thin olive strips around each filled egg half, extending outward from the center like spider legs. Place a small piece of olive in the center as the spider’s body.
- Sprinkle a light dusting of paprika over the eggs for color, then refrigerate for at least 15 minutes before serving.
Variations Add a small dollop of relish to the yolk mixture for extra flavor, or use thin strips of black sesame-coated seaweed instead of olives for the spider legs.
Storage Tips Store in an airtight container in the refrigerator for up to two days. Keep the eggs covered tightly, since they can absorb odors from other foods nearby.
14. Jack-o’-Lantern Quesadillas
⏱ Time
- Prep Time: 15 minutes
- Cook time: 15 minutes
- Total: 30 minutes
- Servings: 6
Cheese quesadillas get a playful shape thanks to a small cookie cutter, turning a lunchtime favorite into a Halloween-ready snack. Melty cheese peeks through the cutout shapes, giving each quesadilla a warm, glowing pumpkin look.
Ingredients
- 6 large flour tortillas
- 2 cups shredded cheddar or Monterey Jack cheese
- 2 tablespoons butter, softened
- Small pumpkin-face cookie cutter or a sharp paring knife
Instructions
- Lay three tortillas flat on a clean surface and, using the cookie cutter or a paring knife, carefully cut out small triangle eyes and a jagged mouth shape from the center of each one to form a jack-o’-lantern face.
- Sprinkle a generous layer of shredded cheese over one whole tortilla (without cutouts), leaving a small border around the edge.
- Place one of the cut-out tortillas on top of the cheese, matching the edges evenly so the face shape sits centered once cooked.
- Heat a large skillet or griddle over medium heat and lightly butter one side of the assembled quesadilla. Place it butter-side down in the skillet and cook for 3 to 4 minutes, until the bottom turns golden.
- Butter the top tortilla, then carefully flip the quesadilla using a wide spatula. Cook for another 3 to 4 minutes, until the cheese melts fully and both sides turn golden brown.
- Remove from the skillet and let the quesadilla rest for 2 minutes before slicing into wedges. Repeat with the remaining tortillas and filling.
Variations Add finely diced bell peppers in orange and green for extra color inside the quesadilla, or swap cheddar for pepper jack for a bit of added flavor.
Storage Tips Store leftovers in the refrigerator for up to two days. Reheat in a skillet over low heat to keep the tortilla crisp instead of using a microwave, which can make it turn soft.
15. Bat Oreo Pops
⏱ Time
- Prep Time: 20 minutes
- Cook time: 0 minutes
- Total: 20 minutes (plus 20 minutes setting)
- Servings: 12
Chocolate sandwich cookies dipped in melted chocolate and shaped with a few added pieces turn into little bats on a stick. This no-bake project works well for kids who enjoy dipping and decorating more than following long cooking steps.
Ingredients
- 24 chocolate sandwich cookies
- 12 lollipop sticks
- 2 cups melted chocolate (dark or semi-sweet)
- 24 small triangle-cut chocolate wafer pieces (for wings)
- 24 candy eyes
Instructions
- Gently twist each cookie to separate the two halves without breaking them. Set aside the cream-filled half and keep the plain cookie halves nearby for the wings.
- Dip the end of a lollipop stick into the melted chocolate, then press it into the cream filling of one cookie half. Close the cookie back up gently so the stick stays secure in the center.
- Repeat with the remaining cookies and sticks, then place them in the refrigerator for about 10 minutes to let the chocolate around the stick firm up slightly.
- Once set, dip each cookie pop into the melted chocolate, turning it slowly to coat the entire surface evenly. Let any extra chocolate drip off before setting the pop on parchment paper.
- While the chocolate is still wet, press two small triangle-shaped cookie pieces into the sides of each pop to form bat wings, angling them slightly upward.
- Add two candy eyes near the top of each pop, then let the pops sit at room temperature for about 20 minutes, or until the chocolate coating hardens fully.
Variations Use white chocolate for a lighter-colored bat, or add small triangle pieces of black fondant for pointed bat ears near the top of the pop.
Storage Tips Store finished pops upright in a foam block or laid flat in a single layer inside an airtight container. Keep at room temperature for up to five days, away from direct heat.
16. Frankenstein Brownie Bites
⏱ Time
- Prep Time: 20 minutes
- Cook time: 25 minutes
- Total: 45 minutes (plus cooling time)
- Servings: 12
Baked brownie squares get topped with green frosting and a few simple candy pieces to look like tiny Frankenstein faces. The rich chocolate base pairs well with the sweet frosting, making this one of the more indulgent Halloween snack recipes for kids on this list.
Ingredients
- 1 box brownie mix (plus ingredients listed on the box, usually eggs, oil, and water)
- 1 cup green frosting or icing
- 24 mini candy eyes
- Black decorating gel
- Small square candies or chocolate chips, for hair and mouth details
Instructions
- Prepare the brownie batter according to the instructions on the box, then pour it into a greased 9×13 inch baking pan and spread it evenly with a spatula.
- Bake the brownies according to the package directions, usually around 25 minutes, or until a toothpick inserted in the center comes out with just a few moist crumbs attached.
- Let the brownies cool completely in the pan, then cut them into square pieces roughly 2 inches wide. Cooling fully before cutting helps keep the squares neat and even.
- Spread a layer of green frosting over the top of each brownie square, leaving the edges slightly bare so the dark chocolate peeks through like Frankenstein’s skin tone.
- Press two candy eyes onto the upper portion of each square, then use the black decorating gel to draw stitching lines, eyebrows, and a small mouth over the frosted surface.
- Add small square candy pieces or a row of chocolate chips along the top edge of the frosting to represent hair, then let the decorated squares sit for 5 minutes before serving.
Variations Add a thin line of black frosting along the sides of each square to mimic bolts on the neck, or use a boxed brownie mix with mint flavoring for a slightly different taste alongside the green color.
Storage Tips Store in an airtight container at room temperature for up to three days, or refrigerate for up to a week. Let refrigerated brownies sit out for a few minutes before serving for the best texture.
17. Monster Trail Mix
⏱ Time
- Prep Time: 10 minutes
- Cook time: 0 minutes
- Total: 10 minutes
- Servings: 10
This no-cook trail mix combines cereal, pretzels, and candy into a portable snack that works well for lunch boxes, car rides, and classroom parties. It comes together in one bowl and requires no baking or chilling time.
Ingredients
- 2 cups square rice or corn cereal
- 1 cup mini pretzel twists
- 1 cup candy corn
- 1 cup candy-coated chocolates
- 1/2 cup dried cranberries or raisins
Instructions
- Add the cereal, mini pretzel twists, candy corn, candy-coated chocolates, and dried cranberries to a large mixing bowl.
- Toss all the ingredients together gently using a large spoon or clean hands, making sure the mix spreads evenly without crushing the cereal pieces.
- Portion the trail mix into small resealable bags or paper cups for easy sharing, filling each portion with roughly 1/2 cup of the mixture.
- Seal the bags or cover the cups, then store them in a cool, dry spot until ready to serve or pack for school.
Variations Add a handful of pumpkin seeds for a bit of crunch and extra nutrition, or swap dried cranberries for dried apple pieces for a different flavor profile.
Storage Tips Store in a sealed container or resealable bags at room temperature for up to two weeks. Keep away from moisture to maintain the crunch of the cereal and pretzels.
18. Pumpkin-Shaped Mini Pizzas
⏱ Time
- Prep Time: 15 minutes
- Cook time: 10 minutes
- Total: 25 minutes
- Servings: 8
Mini pizzas made from English muffins or small tortillas turn into edible pumpkins with a bit of pepper and cheese decoration. This savory recipe gives kids a warm snack option that still fits the Halloween theme.
Ingredients
- 4 English muffins, split in half
- 1 cup pizza sauce
- 2 cups shredded mozzarella cheese
- 1 green bell pepper, sliced into small stem shapes
- Black olives, sliced thin (for faces)
Instructions
- Preheat the oven to 400°F (200°C) and line a baking sheet with parchment paper. Arrange the English muffin halves cut-side up on the tray.
- Spread a spoonful of pizza sauce over each muffin half, covering the surface evenly while leaving a small border around the edge.
- Sprinkle shredded mozzarella cheese generously over the sauce on each muffin half, making sure the cheese reaches the edges for even melting.
- Arrange thin olive slices on top of the cheese to form simple jack-o’-lantern faces, such as triangle eyes and a jagged mouth shape.
- Place a small piece of green bell pepper at the top edge of each muffin to represent the pumpkin stem, pressing it gently into the cheese so it stays in place.
- Bake for 8 to 10 minutes, or until the cheese melts fully and turns lightly golden at the edges. Let the mini pizzas cool for 3 minutes before serving.
Variations Use small flour tortillas instead of English muffins for a thinner, crisper base, or add mini pepperoni slices underneath the cheese for extra flavor.
Storage Tips Store leftovers in the refrigerator for up to two days. Reheat in the oven or toaster oven rather than the microwave to keep the base from turning soggy.
19. Ghost Marshmallow Pops
⏱ Time
- Prep Time: 15 minutes
- Cook time: 0 minutes
- Total: 15 minutes (plus 15 minutes setting)
- Servings: 12
Large marshmallows dipped in white chocolate and given a simple candy face turn into quick, no-bake ghost pops. This recipe works especially well for younger kids since the steps are short, simple, and require no sharp tools.
Ingredients
- 12 large marshmallows
- 12 lollipop sticks
- 2 cups white chocolate chips or candy melts
- 24 mini chocolate chips (for eyes)
Instructions
- Insert a lollipop stick into the center of each marshmallow, pushing it about halfway through so it stays secure while dipping.
- Melt the white chocolate chips in a microwave-safe bowl in 20-second bursts, stirring between each round, until fully smooth and pourable.
- Dip each marshmallow into the melted chocolate, turning it slowly to coat the entire surface. Let any extra chocolate drip back into the bowl before lifting the pop out.
- Stand the coated marshmallow pops upright in a foam block or lay them flat on parchment paper to set. Work in small batches so the chocolate doesn’t harden before decorating.
- While the coating is still soft, press two mini chocolate chips onto the upper portion of each pop to form eyes, spacing them evenly for a friendly expression.
- Let the pops sit at room temperature for about 15 minutes, or until the chocolate coating fully hardens, before serving or packing them for a party.
Variations Drizzle a small amount of melted black candy melts over the finished pops for extra detail, or use square marshmallows for a slightly different ghost shape.
Storage Tips Store in an airtight container at room temperature for up to five days. Keep away from direct sunlight or heat, since the chocolate coating can soften quickly.
20. Spiderweb Cupcakes
⏱ Time
- Prep Time: 20 minutes
- Cook time: 18 minutes
- Total: 38 minutes (plus cooling time)
- Servings: 12
A simple swirl technique turns plain frosted cupcakes into detailed spiderwebs. This recipe uses a boxed cake mix to keep prep time short, letting most of the focus go toward decorating and shaping the web design on top.
Ingredients
- 1 box chocolate or vanilla cake mix (plus ingredients listed on the box)
- 2 cups white frosting
- 1/4 cup black or dark chocolate frosting
- 12 plastic spider rings or candy spiders
Instructions
- Prepare the cupcake batter according to the package directions, then divide it evenly among 12 lined cupcake tins, filling each about two-thirds full.
- Bake according to the package instructions, usually around 16 to 18 minutes, or until a toothpick inserted in the center comes out clean. Let the cupcakes cool completely before decorating.
- Spread a smooth, even layer of white frosting over the top of each cooled cupcake using an offset spatula or the back of a spoon.
- Spoon the black frosting into a piping bag with a small round tip, or use a plastic sandwich bag with a tiny corner snipped off. Pipe three or four thin circles, starting from the center of the cupcake and working outward.
- Take a toothpick and drag it from the center circle straight out to the edge of the cupcake, repeating this motion at even intervals around the circle to create the classic spiderweb pattern.
- Place a plastic spider ring or candy spider on top of each finished cupcake, pressing it gently into the frosting so it stays in place.
Variations Use orange frosting as the base color instead of white for a different look, or add edible glitter for a bit of sparkle around the web design.
Storage Tips Store in an airtight container at room temperature for up to three days, or refrigerate for up to five days when using a cream-based frosting.
21. Candy Corn Parfaits
⏱ Time
- Prep Time: 15 minutes
- Cook time: 0 minutes
- Total: 15 minutes
- Servings: 6
Layered yogurt parfaits mimic the classic candy corn color pattern using yogurt, mango, and whipped topping. This snack works well as a lighter option on a table full of sugary treats, giving parents a bit of added protein and calcium.
Ingredients
- 2 cups vanilla yogurt
- 1 cup diced mango or peaches
- 1 cup whipped topping
- Yellow and orange food coloring
- 6 small clear cups
Instructions
- Divide the vanilla yogurt into two bowls. Add yellow food coloring to one bowl and orange food coloring to the other, stirring each until the color spreads evenly.
- Spoon a layer of orange yogurt into the bottom of each clear cup, filling about one-third of the way up and smoothing the top with the back of a spoon.
- Add a layer of diced mango or peaches on top of the orange yogurt, filling the cups to about two-thirds full.
- Spoon a layer of yellow yogurt on top of the fruit, smoothing it into an even layer that leaves a small gap near the rim of the cup.
- Finish each parfait with a dollop of whipped topping on top, shaping it into a small peak to resemble the white tip of a candy corn piece.
- Chill the parfaits in the refrigerator for at least 10 minutes before serving to let the layers settle.
Variations Use canned pineapple in place of mango for a tangier flavor, or swap whipped topping for a small scoop of vanilla ice cream for a colder treat.
Storage Tips Cover and refrigerate for up to two days. Add the whipped topping layer close to serving time, since it can lose its shape after sitting too long.
22. Chocolate Spider Donuts
⏱ Time
- Prep Time: 15 minutes
- Cook time: 0 minutes
- Total: 15 minutes (plus 10 minutes setting)
- Servings: 6
Mini donuts get a chocolate glaze and a set of licorice legs to turn into a batch of sweet little spiders. This recipe uses store-bought mini donuts as a shortcut, keeping the process short while still delivering a fully decorated treat.
Ingredients
- 6 mini chocolate donuts
- 1 cup chocolate glaze or melted chocolate chips
- 12 thin black licorice strings
- 12 candy eyes
Instructions
- Place the mini donuts on a wire rack set over a baking sheet to catch any drips during the glazing step.
- Warm the chocolate glaze or melted chocolate chips gently, then spoon it over each donut, letting the excess drip down through the rack below.
- While the glaze is still wet, cut the licorice strings into shorter pieces, about 2 inches long, creating eight legs per donut.
- Press four licorice pieces into the glaze on each side of the donut hole, angling them outward and slightly bending each one to resemble bent spider legs.
- Add two candy eyes near the top edge of each donut, pressing them gently into the glaze so they hold in place.
- Let the finished spider donuts sit for about 10 minutes, or until the glaze firms up, before arranging them on a serving tray.
Variations Use pretzel sticks instead of licorice for crunchier legs, or drizzle a small amount of white chocolate over the finished donuts for added detail.
Storage Tips Store in an airtight container at room temperature for up to two days. Keep the licorice legs away from moisture, since they can turn sticky when exposed to humidity.
23. Jack-o’-Lantern Stuffed Peppers
⏱ Time
- Prep Time: 20 minutes
- Cook time: 20 minutes
- Total: 40 minutes
- Servings: 6
Mini orange bell peppers get carved with a simple jack-o’-lantern face, then filled with a cheesy filling and baked until soft. This savory option gives kids a vegetable-based snack that still fits right into the Halloween spread.
Ingredients
- 6 small orange bell peppers
- 1 cup cooked rice
- 1 cup shredded cheddar cheese
- 1/2 cup black beans, drained and rinsed
- 1/4 teaspoon cumin
- Salt, to taste
Instructions
- Preheat the oven to 375°F (190°C). Slice the top off each pepper and set the tops aside, then carefully remove the seeds and membranes from inside each pepper.
- Using a small paring knife, carve simple triangle eyes and a jagged mouth shape into the front of each pepper to create a jack-o’-lantern face.
- In a mixing bowl, combine the cooked rice, half of the shredded cheese, black beans, cumin, and a pinch of salt. Stir until the filling ingredients are evenly distributed.
- Spoon the filling into each carved pepper, packing it down gently and filling each one about three-quarters full.
- Top each stuffed pepper with the remaining shredded cheese, then place the pepper tops back on loosely or set them aside on the baking tray.
- Arrange the peppers upright in a baking dish and bake for 18 to 20 minutes, or until the peppers turn tender and the cheese melts fully on top.
Variations Add cooked ground turkey or shredded chicken to the filling for extra protein, or swap black beans for corn kernels for a milder flavor.
Storage Tips Store leftovers in an airtight container in the refrigerator for up to three days. Reheat in the oven at 350°F for about 10 minutes to keep the peppers from turning watery.
24. Halloween Yogurt Bark
⏱ Time
- Prep Time: 15 minutes
- Cook time: 0 minutes
- Total: 15 minutes (plus 3 hours freezing)
- Servings: 10
Frozen yogurt bark spreads thin on a tray and gets topped with colorful candy pieces before freezing into a crisp, snappable treat. This make-ahead snack works well for parties since it can be prepared days in advance and broken apart right before serving.
Ingredients
- 3 cups vanilla or strawberry yogurt
- 1/4 cup candy corn
- 1/4 cup mini candy-coated chocolates
- 2 tablespoons mini chocolate chips
- 1 tablespoon orange and purple sprinkles
Instructions
- Line a baking sheet with parchment paper, making sure the paper lies flat and covers the entire surface for even spreading.
- Pour the yogurt onto the center of the tray, then use an offset spatula to spread it into an even layer, roughly 1/4 inch thick, over the parchment paper.
- Scatter the candy corn, mini candy-coated chocolates, mini chocolate chips, and sprinkles evenly over the surface of the yogurt, pressing them down gently so they stick.
- Carefully transfer the tray to the freezer, keeping it as level as possible to avoid the yogurt shifting or pooling to one side.
- Freeze for at least 3 hours, or until the yogurt turns fully solid and firm to the touch.
- Remove the tray from the freezer and break the bark into irregular pieces using your hands or the back of a large spoon. Serve immediately or store right away.
Variations Swap the toppings for seasonal sprinkles in different colors, or use Greek yogurt for a slightly tangier flavor with added protein.
Storage Tips Store the broken bark pieces in a freezer-safe container with parchment paper between layers. Keep frozen for up to two weeks, and serve directly from the freezer since the bark softens fast at room temperature.
25. Monster Cookie Sandwiches
⏱ Time
- Prep Time: 20 minutes
- Cook time: 0 minutes
- Total: 20 minutes
- Servings: 10
Two soft cookies sandwich a layer of colorful frosting and candy eyes, creating a playful monster face that kids can help build themselves. This recipe closes out the list with a treat that combines a familiar cookie base with a quick, hands-on decorating step.
Ingredients
- 20 soft chocolate chip or sugar cookies
- 1 cup frosting (green, purple, or blue)
- 20 candy eyes of various sizes
- Small candy pieces, for teeth and horns
Instructions
- Lay half of the cookies flat side up on a clean work surface, spacing them apart so there’s room to add frosting and decorations without crowding.
- Spread a generous layer of frosting over the flat side of each cookie, leaving a small border around the edge so the frosting doesn’t spill out once sandwiched.
- Press one or two candy eyes into the frosting near the top of each cookie, followed by a few small candy pieces arranged in a row to look like teeth.
- Add a small candy piece or a broken pretzel stick near the top edge of the frosting to form a horn, pressing it in gently so it stays upright.
- Top each decorated cookie with a second cookie, flat side down, pressing down lightly so the frosting spreads to the edges without overflowing.
- Arrange the finished cookie sandwiches on a serving tray and let them sit for a few minutes so the frosting settles before serving.
Variations Use different frosting colors for a mixed batch of monster faces, or swap the base cookie for a gluten-free version to accommodate more dietary needs.
Storage Tips Store in an airtight container at room temperature for up to three days, or refrigerate for up to a week when using a cream-based frosting. Let refrigerated cookies sit out for a few minutes before serving.
Halloween Snack Serving Ideas
Once the recipes are made, the next step is figuring out where and how to serve them. Here are a few settings where these treats work especially well.
- Halloween Party Snack Table A full snack table looks best with a mix of heights and colors. Use small risers or upside-down bowls under platters to create levels, then group sweet and savory items separately so guests can build their own plates with ease.
- School Classroom Treats Individually wrapped or portioned snacks work best for classrooms, since teachers often need to hand out treats quickly. Items like trail mix bags, popcorn cups, and cookie sandwiches travel well and require no utensils.
- Family Movie Night Snacks For a cozy night at home, bowls of popcorn mix, monster rice krispie treats, or cheese balls with crackers pair nicely with a spooky movie on the screen. These snacks hold up well sitting out for a couple of hours.
- Trick-or-Treat Party Buffet Before heading out for the evening, a light buffet of savory bites like mummy hot dogs, spider deviled eggs, and mini pizzas gives kids something filling before they load up on candy later in the night.
- Lunch Box Halloween Surprises Smaller items such as ghost pretzels, apple monster mouths, or a bag of monster trail mix fit neatly into a lunch box, giving kids a small Halloween surprise during a regular school day.
Make-Ahead and Storage Tips
Planning ahead makes party day far less stressful, and many of these recipes hold up well when prepped early. Here’s how to plan storage and timing around each type of snack.
1. Which snacks can be prepared a day ahead Recipes like mini pumpkin cheese balls, candy corn fruit cups, and monster trail mix all hold up well when made the day before. Their ingredients stay fresh in the refrigerator or at room temperature without losing texture.
2. Best containers for freshness Airtight containers work best for baked goods like cookies and brownies, keeping moisture out and preventing the treats from drying out. Clear cups with lids work well for layered snacks like parfaits and pudding cups, since they’re easy to stack and carry.
3. Freezer-friendly Halloween treats Yogurt bark, ghost banana pops, and monster rice krispie treats all freeze well, making them smart choices for anyone who wants to prepare snacks weeks in advance. Wrap items individually or separate layers with parchment paper before freezing.
4. Tips for bringing snacks to school or parties Pack items in sturdy containers with secure lids to avoid spills during the ride over. Keep cold items like deviled eggs and cheese balls in an insulated bag with an ice pack, and add any final decorations, like frosting details or candy eyes, once you arrive at the destination.
Conclusion
This collection of Halloween snack recipes for kids covers everything from sweet treats to savory bites, giving families plenty of options for every type of gathering.
Mixing sweet and savory snacks throughout the party table keeps kids satisfied and balances out all the sugar that comes with the holiday.
Trying a handful of these recipes together builds a complete Halloween snack table without requiring an entire day in the kitchen.
Save the favorites from this list, since many of these treats turn into yearly traditions that kids look forward to remaking each Halloween season.