
Baking bread at home has never been this easy. The Neretva bread maker is one of the most loved kitchen tools for home bakers right now — and it’s easy to see why.
It does the hard work for you: mixing, kneading, rising, and baking all happen inside one machine. No mess, no guessing, no stress.
Homemade bread from a Neretva bread maker tastes so much better than anything from a store. The crust is fresh, the inside is soft, and you know exactly what went into it.
No preservatives, no mystery ingredients — just real food made in your own kitchen. Whether you’re new to baking or have been doing it for years, Neretva bread maker recipes are simple enough to follow every time. You’ll find yourself baking bread more often than you ever expected!
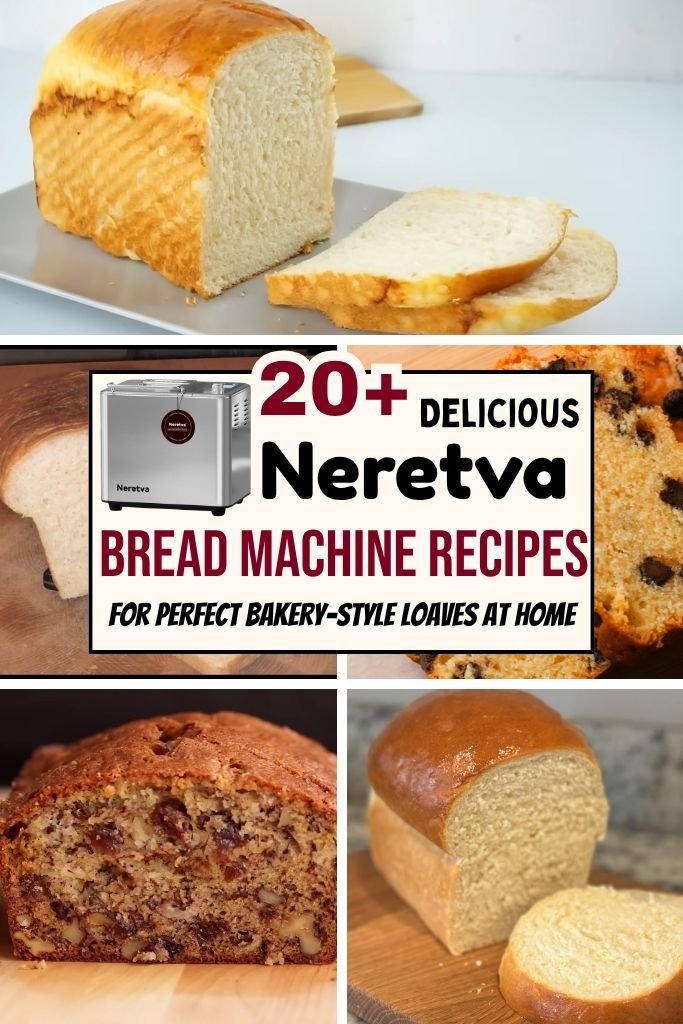
What Can You Make in a Neretva Bread Maker?
The Neretva bread maker is more flexible than most people think. Here’s a look at what you can bake or prepare with it:
1. Basic Breads — Classic white bread, sandwich bread, and milk bread are great starting points. These use simple pantry ingredients and come out soft and golden every time.
2. Whole Grain Breads — Whole wheat, multigrain, and oatmeal breads are easy to make with the right cycle. These are hearty, filling, and full of fiber.
3. Sweet Breads — Cinnamon raisin bread, banana bread, and chocolate chip sweet bread are perfect for breakfast or an afternoon snack.
4. Gluten-Free Breads — The gluten-free cycle makes it possible for people with dietary needs to enjoy fresh bread without worry.
5. Dough for Pizza, Rolls, and Pastries — Use the dough cycle to mix and rise dough, then shape it by hand and bake in your oven for extra control over the final product.
6. Specialty Recipes — Brioche, sourdough-style bread, garlic herb bread, and potato bread are all possible with Neretva bread maker recipes. These take a little more care but are totally worth it.
Understanding Neretva Bread Maker Settings
Before jumping into Neretva bread maker recipes, it helps to know what each setting does. Here’s a quick guide:
1. Basic Bread Cycle — This is the most-used setting. It works great for white bread, sandwich bread, and most standard loaves. The cycle includes mixing, kneading, rising, and baking.
2. French Bread Cycle — This cycle runs a longer bake time to produce a crispier crust. Great for French-style and Italian bread.
3. Whole Wheat Cycle — Whole wheat flour needs more time to rise properly. This cycle gives the dough extra rest before baking.
4. Sweet Bread Cycle — A lower baking temperature protects the sugars in sweet doughs from burning. Use this for brioche, banana bread, and cinnamon raisin bread.
5. Dough Cycle — This setting only mixes and rises the dough — it doesn’t bake. Perfect for making pizza dough, dinner rolls, or any recipe where you want to finish baking in the oven.
6. Gluten-Free Cycle — Gluten-free dough behaves differently, so this cycle skips the second rise and adjusts the knead time.
7. Delay Timer Function — Add ingredients at night, set the timer, and wake up to fresh bread in the morning. This is one of the most popular features of the Neretva bread maker.
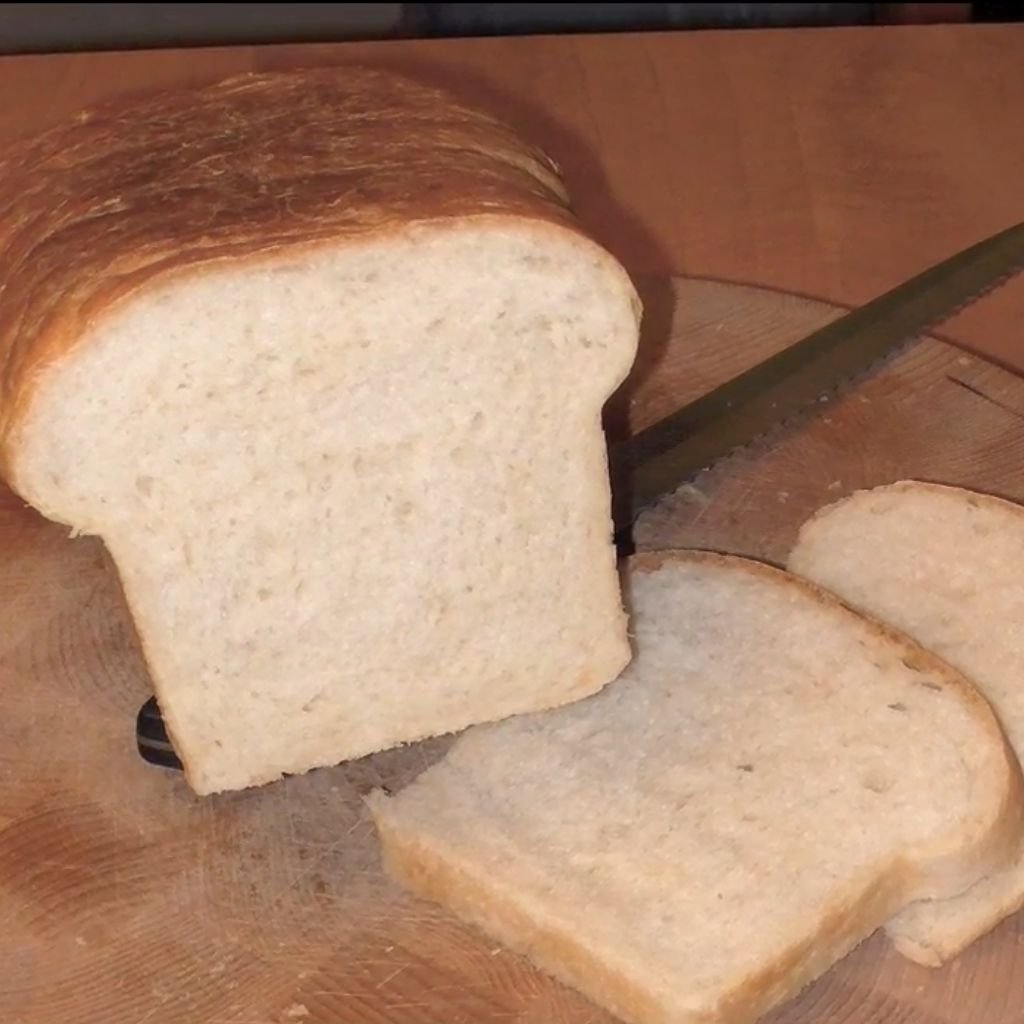
1. Classic White Bread
Prep Time: 10 minutes | Bake Time: 3 hours | Serves: 12 slices
A soft, golden loaf that works for everything — toast, sandwiches, or just eating warm with butter. Classic white bread is the best place to start with Neretva bread maker recipes, and it never disappoints.
Ingredients
- 1 cup warm water (110°F)
- 2 tablespoons unsalted butter, softened
- 1½ teaspoons salt
- 2 tablespoons sugar
- 3 cups bread flour
- 2¼ teaspoons active dry yeast
Instructions
Start by measuring the warm water carefully. The temperature matters here — too hot and it will kill the yeast, too cold and the yeast won’t activate properly. Aim for around 110°F, which feels warm on your wrist but not hot.
Pour the warm water into the bread pan first. Add the softened butter in small pieces so it distributes evenly. Sprinkle in the salt and sugar, keeping the salt away from the yeast at this stage.
Add the bread flour on top of the liquid ingredients. Use a spoon to gently level it off — don’t pack it down. Make a small well in the center of the flour and add the yeast into that well. The flour acts as a barrier between the yeast and the salt, which is important for a good rise.
Place the bread pan securely into the Neretva bread maker. Close the lid and select the Basic Bread cycle. Choose your preferred crust color — light, medium, or dark. If your machine has a 1.5 lb or 2 lb loaf setting, choose 1.5 lb for this recipe. Press start.
The machine will begin mixing the ingredients. During the first few minutes of kneading, open the lid briefly and check the dough. It should form a smooth, round ball that pulls away from the sides of the pan. If the dough looks too sticky and is clinging to the sides, add flour one tablespoon at a time. If it looks too dry and crumbly, add water one tablespoon at a time. Make these small adjustments within the first 10 minutes of the kneading cycle.
Once you’re satisfied with the dough’s consistency, close the lid and let the machine do its job. Do not open the lid during the rising and baking stages, as this lets out heat and can cause the bread to collapse in the middle.
When the cycle is complete, the machine will beep. Use oven mitts to remove the bread pan from the machine carefully — it will be very hot. Turn the pan upside down over a wire cooling rack and gently shake it to release the loaf. If the kneading paddle is stuck inside the bottom of the loaf, use a non-scratch tool to carefully remove it.
Let the bread cool on the rack for at least 20 to 30 minutes before slicing. Cutting into it too soon will make the inside gummy and compressed. Once cooled, slice with a serrated bread knife using a gentle sawing motion for clean, even cuts.
Baking Tips
- Always use bread flour instead of all-purpose flour for a better rise and texture.
- Measure flour by spooning it into the measuring cup and leveling off — never scoop directly from the bag.
- The butter can be replaced with vegetable oil if needed, but butter gives a richer flavor.
Storage Suggestions
Store at room temperature in a sealed bread bag or airtight container for up to 3 days. For longer storage, slice the bread and freeze in a zip-lock bag for up to 3 months. Toast slices directly from frozen — no need to thaw first.
2. Soft Sandwich Bread
Prep Time: 10 minutes | Bake Time: 3 hours | Serves: 12 slices
Softer and slightly richer than classic white bread, this loaf has a tender crumb and thin crust that makes it perfect for stacking. Great for school lunches, grilled cheese, and everyday sandwiches.
Ingredients
- ¾ cup warm milk (110°F)
- ¼ cup warm water (110°F)
- 2 tablespoons unsalted butter, softened
- 1 tablespoon sugar
- 1 teaspoon salt
- 3 cups bread flour
- 2¼ teaspoons active dry yeast
Instructions
Warm the milk and water together until they reach about 110°F. You can do this in a small saucepan over low heat or microwave them for 20 to 30 seconds. The milk adds fat and protein to the dough, which is what gives this bread its extra-soft texture compared to a water-only loaf.
Pour the warm milk and water mixture directly into the bread pan. Add the softened butter in small chunks. The butter doesn’t need to be fully melted — it will incorporate during the kneading process. Next, sprinkle in the sugar and salt, keeping them on opposite sides of the pan to avoid direct contact with each other.
Add the bread flour on top, covering the liquid completely. Create a small indent in the top of the flour and add the yeast there. This setup keeps the yeast away from the salt until the machine starts mixing.
Place the pan in the bread maker, lock it in, and select the Basic Bread cycle with a medium crust setting. This setting gives you a loaf that’s golden on the outside without being too thick or chewy on the crust — ideal for soft sandwich bread.
Press start and let the machine begin. During the first kneading phase, peek inside after about 5 minutes. The dough should be smooth and slightly tacky but not sticky. If it’s sticking to the walls of the pan, add a small amount of flour. If it feels too stiff and won’t pull together cleanly, add a teaspoon of water at a time until it smooths out.
Once the dough is looking good, leave it alone. The machine will take care of kneading, proofing, and baking. Avoid lifting the lid once the dough has started rising — any drop in temperature can affect how high the loaf rises.
When the baking cycle finishes, let the bread rest in the machine with the lid slightly open for about 5 minutes before removing the pan. This helps the crust set without getting soggy on the bottom. Then remove the pan, flip it over a cooling rack, and let the loaf drop out. Give it a full 30 minutes of cooling time before you cut into it so the interior can finish setting.
Baking Tips
- Replacing water entirely with milk makes the bread even softer, but the loaf may be slightly smaller.
- For a shinier crust, brush the top of the loaf with a little melted butter right after it comes out of the machine.
- This bread also works well with 1 tablespoon of honey instead of sugar for a subtle sweetness.
3. Honey Wheat Bread
Prep Time: 10 minutes | Bake Time: 3 hours 30 minutes | Serves: 12 slices
A light, slightly sweet loaf with just enough whole wheat to add flavor and fiber without making it dense. Honey gives it a natural sweetness that pairs beautifully with peanut butter or jam.
Ingredients
- 1 cup warm water (110°F)
- 2 tablespoons honey
- 1½ tablespoons unsalted butter, softened
- 1 teaspoon salt
- 1½ cups bread flour
- 1½ cups whole wheat flour
- 2¼ teaspoons active dry yeast
Instructions
Begin by combining the warm water and honey in a small bowl or directly in the bread pan. Stir briefly so the honey dissolves into the water. Honey not only adds flavor to this bread — it also feeds the yeast and helps the loaf rise and brown more evenly during baking.
Pour the honey-water mixture into the bread pan. Add the softened butter, then sprinkle in the salt. For this recipe, you’re working with two different types of flour — bread flour and whole wheat flour — and layering them properly makes a difference. Add the bread flour first, then spoon the whole wheat flour on top. This combination creates a loaf that has the rise and structure of white bread with the heartier flavor and nutrition of whole wheat.
Create a small well at the top of the flour and pour the yeast in there. Secure the pan in the bread maker and select the Whole Wheat cycle. This cycle gives the dough more time to rise, which is essential with whole wheat flour. Whole wheat contains bran that can inhibit gluten development, so the longer rise time allows the loaf to reach its full potential.
Once the machine starts kneading, check the dough after the first 8 to 10 minutes. Whole wheat dough tends to feel stickier than white bread dough, and that’s normal. Still, it should hold together as a rough ball. Add flour one tablespoon at a time if it looks too wet and is smearing along the sides of the pan.
Do not open the lid once the machine enters the first proofing stage. The warm, humid environment inside the machine during this phase is crucial for a proper rise. Let the full cycle run without interruption.
When the bread finishes, remove the pan with oven mitts and let the loaf rest on a cooling rack for at least 25 to 30 minutes before cutting. Whole wheat loaves can sometimes look done on the outside while the inside is still slightly underdone — letting it rest allows the residual heat to finish the job.
Baking Tips
- Use raw honey or wildflower honey for the best flavor. Avoid processed honey, which can affect yeast activity.
- For a lighter texture, you can use a 2:1 ratio of bread flour to whole wheat flour instead of equal parts.
- Adding 1 tablespoon of vital wheat gluten helps whole wheat bread rise higher and feel less dense.
4. Whole Wheat Bread
Prep Time: 10 minutes | Bake Time: 3 hours 30 minutes | Serves: 12 slices
A dense, nutty loaf made entirely with whole wheat flour. Full of fiber and nutrients, this bread is hearty enough to hold up to thick sandwich fillings and tastes great toasted with a little olive oil.
Ingredients
- 1⅛ cups warm water (110°F)
- 2 tablespoons olive oil
- 2 tablespoons honey or brown sugar
- 1½ teaspoons salt
- 3 cups whole wheat flour
- 1 tablespoon vital wheat gluten
- 2½ teaspoons active dry yeast
Instructions
Pour the warm water into the bread pan first. Add the olive oil — it helps keep the dense whole wheat crumb moist during and after baking. Add the honey or brown sugar next. Brown sugar gives the bread a slightly deeper flavor and helps with browning during the bake cycle.
Sprinkle the salt into the pan, keeping it away from where you plan to add the yeast. Then add all of the whole wheat flour in one layer over the liquid. Sprinkle the vital wheat gluten directly on top of the whole wheat flour and mix them lightly together on top before adding the yeast. Vital wheat gluten is the secret ingredient in a good 100% whole wheat loaf — it strengthens the gluten network and helps the bread rise higher than it would without it.
Make a small well in the flour-gluten mixture and add the yeast there. Lock the bread pan in the machine and select the Whole Wheat cycle. If your machine has a loaf size option, select 1.5 lb.
The kneading stage will be longer on this cycle. Whole wheat dough is naturally stiffer and less stretchy than white bread dough. During the first kneading, check the dough texture after about 8 minutes. It should feel firm but not crumbly. If it’s too dry and breaking apart, add warm water one tablespoon at a time. If it’s sticking to the pan walls, add one tablespoon of flour at a time.
The Whole Wheat cycle gives the dough a long first rise to help with gluten development. Don’t rush this. The extra rise time is what makes the difference between a flat, dense brick and a proper whole wheat loaf with some height and open crumb structure.
When the bake is done, remove the pan with mitts and allow the loaf to cool on a rack for a minimum of 30 minutes. Whole wheat bread continues cooking inside from residual heat after the machine shuts off — cutting it too soon results in a doughy, wet center.
Baking Tips
- Vital wheat gluten can be found at most grocery stores in the baking aisle or natural food section.
- If the loaf comes out flat or dense, check that your yeast is fresh. Old yeast is the most common reason whole wheat bread fails to rise.
- For extra texture, stir in 2 tablespoons of sunflower seeds or rolled oats after the first kneading cycle.
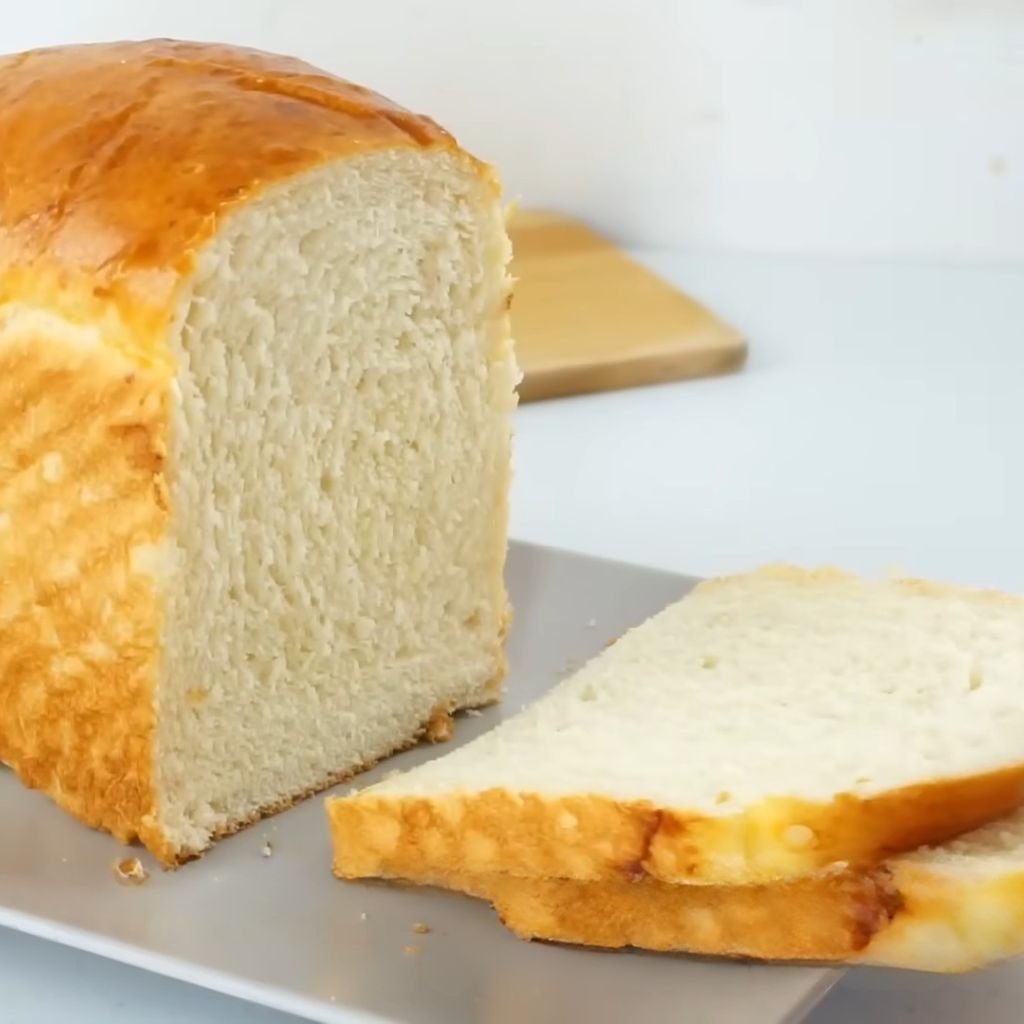
5. Milk Bread
Prep Time: 10 minutes | Bake Time: 3 hours | Serves: 12 slices
Light, fluffy, and just a touch sweet, milk bread has a soft, pillowy texture that’s completely different from regular white bread. Popular across Asia and loved worldwide for its cottony crumb and gentle flavor.
Ingredients
- ¾ cup whole milk, warmed to 110°F
- 1 large egg, room temperature
- 3 tablespoons unsalted butter, softened
- 3 tablespoons sugar
- 1 teaspoon salt
- 3 cups bread flour
- 2¼ teaspoons instant yeast
Instructions
Warm the milk to about 110°F and pour it into the bread pan. Crack the egg directly into the pan with the milk. The egg adds richness and helps the bread develop its signature golden color and soft texture. Make sure the egg is at room temperature — a cold egg can lower the temperature of the liquid and slow down yeast activity.
Add the softened butter in small pieces. For milk bread, butter plays a bigger role than in other loaves — it enriches the dough and gives the crumb that silky, tender quality. Sprinkle in the sugar and salt on opposite sides of the pan so they don’t interfere with each other before mixing begins.
Add the bread flour over the wet ingredients, spreading it evenly across the surface. Make a small well in the flour and pour the instant yeast in. Instant yeast works especially well in enriched doughs like milk bread because it activates quickly without pre-dissolving.
Insert the pan into the bread maker and select the Sweet Bread cycle or the Basic cycle depending on your machine. The Sweet Bread cycle uses a lower baking temperature, which is ideal here because the sugar in the dough can cause the crust to brown too quickly at higher temperatures.
Once kneading begins, watch the dough carefully. Enriched doughs like this one should feel smooth, soft, and a little stretchy — almost like a soft earlobe. If the dough is sticking to the sides and bottom of the pan after the first 5 minutes, add flour one tablespoon at a time until it forms a proper ball. If it looks dry or cracked, add milk or water by the teaspoon.
Let the full cycle run without opening the lid. Milk bread needs consistent warmth during the proofing stages to rise correctly. When the cycle ends, remove the loaf and cool it on a rack for 30 minutes. The texture will continue to set as it cools.
Baking Tips
- Whole milk produces the softest result. Lower-fat milks can be used but the texture won’t be as pillowy.
- For an even richer loaf, replace 2 tablespoons of milk with heavy cream.
- Brush the top of the loaf with melted butter right after baking for a glossy, soft crust.
6. French Bread
Prep Time: 10 minutes | Bake Time: 3 hours 50 minutes | Serves: 14 slices
Crispy on the outside, chewy and open on the inside. French bread made in the Neretva bread maker won’t have the long baguette shape, but the flavor and texture are spot on. Great for dipping in soup or serving alongside pasta.
Ingredients
- 1 cup warm water (110°F)
- 1½ teaspoons salt
- 1 teaspoon sugar
- 3 cups bread flour
- 2 teaspoons active dry yeast
Instructions
Pour the warm water into the bread pan. Add the salt and sugar. French bread is a lean dough — meaning it uses no fat (no butter, no oil, no milk). This simplicity is what gives it the chewy, slightly open crumb and the crisp crust that French bread is known for. Every ingredient plays a direct role, so measure carefully.
Add the bread flour over the liquid, making sure it fully covers the water. The flour will absorb the moisture during mixing — avoid stirring anything before placing the pan in the machine. Create a small well in the top of the flour and add the yeast there. The yeast should sit on dry flour, not in direct contact with the salt or water.
Place the pan securely in the Neretva bread maker and select the French Bread cycle. This is a longer cycle than Basic and usually runs around 3 hours and 45 minutes. The extended time allows the dough to develop more flavor, and the baking phase runs slightly longer to achieve that characteristic crispier crust.
During the kneading phase, the dough will look shaggy at first and then smooth out. French bread dough should be slightly stiffer than sandwich bread dough. After about 8 minutes of kneading, it should form a tight, smooth ball that stays in the center of the pan and doesn’t stick to the sides. If it’s still sticking, add flour by the tablespoon. If it looks too stiff or is tearing, add water by the teaspoon.
The French Bread cycle typically includes two separate rise periods, which allows the gluten to relax and develop. Do not interrupt either rise by opening the lid. The second rise in particular is important for the bread to have good oven spring during baking.
When the cycle ends, use oven mitts to remove the hot pan. Turn it upside down over a cooling rack and gently shake to release the loaf. The crust will be darker than a basic white bread loaf — that’s exactly what you want. Set the loaf on the rack and wait at least 20 to 25 minutes before cutting. The crust will soften slightly as it cools, but it should still have that satisfying crunch when you slice into it.
Baking Tips
- Don’t add oil or butter to this recipe — fat will soften the crust and change the texture.
- For a crispier crust, select the “dark crust” option on your machine.
- French bread is best eaten the same day. It starts to go stale faster than enriched breads because it has no fat to retain moisture.
7. Italian Bread
Prep Time: 10 minutes | Bake Time: 3 hours 40 minutes | Serves: 14 slices
Similar to French bread but slightly softer inside thanks to a small amount of olive oil. Italian bread has a golden, slightly chewy crust and an open crumb that soaks up olive oil and herbs beautifully.
Ingredients
- 1 cup warm water (110°F)
- 1 tablespoon olive oil
- 1½ teaspoons salt
- 1 teaspoon sugar
- 3 cups bread flour
- 2 teaspoons active dry yeast
Instructions
Add the warm water to the bread pan, followed by the olive oil. The olive oil in Italian bread is what separates it from French bread — just one tablespoon softens the interior crumb slightly and adds a subtle richness without making the bread heavy or overly enriched.
Sprinkle in the salt and sugar, keeping them on opposite sides of the pan. These ingredients both affect the bread differently — salt controls fermentation and adds flavor, while sugar helps the crust brown and feeds the yeast just slightly.
Spoon the bread flour over the liquid in an even layer. Then create a small well at the top of the flour and add the yeast there. This keeps the yeast from coming into direct contact with the salt before mixing begins.
Lock the pan into the bread maker and select the French Bread cycle, which gives Italian bread the right crust development. If your machine has a specific Italian bread setting, use that instead.
During the first kneading phase, watch the dough come together. It should form a smooth, firm ball within the first 8 to 10 minutes of kneading. Italian bread dough is slightly more pliable than French bread dough because of the olive oil. It should feel smooth and elastic, not sticky. If the ball is too wet and doesn’t hold its shape, add flour a tablespoon at a time. If it feels dry and crumbly, drizzle in a little water.
The rising phases in the French Bread cycle give the dough time to develop flavor and rise properly. Resist the temptation to open the lid during these phases. The humidity and warmth trapped inside the machine create the ideal environment for the dough to proof correctly.
Once the bread is done baking, remove the pan using oven mitts and flip it over a wire rack. Let the loaf rest for 20 to 25 minutes before slicing. The crust will be golden and slightly crispy, with a chewy interior that holds together well for slicing.
Baking Tips
- Extra virgin olive oil gives the bread a more pronounced flavor. Use a milder olive oil if you prefer a more neutral taste.
- For a more rustic finish, brush the top of the loaf with olive oil in the last 10 minutes of baking.
- Italian bread pairs perfectly with homemade pasta dishes and tomato-based soups.
8. Garlic Herb Bread
Prep Time: 10 minutes | Bake Time: 3 hours | Serves: 12 slices
Savory, aromatic, and deeply flavorful, this garlic herb bread fills the kitchen with an incredible smell while it bakes. Packed with garlic and dried herbs throughout every slice, it’s perfect alongside soups, grilled meats, or just eaten on its own.
Ingredients
- 1 cup warm water (110°F)
- 2 tablespoons olive oil
- 1½ teaspoons salt
- 1 teaspoon sugar
- 3 garlic cloves, finely minced (or 1 teaspoon garlic powder)
- 1 teaspoon dried rosemary
- 1 teaspoon dried Italian seasoning
- ½ teaspoon dried basil
- 3 cups bread flour
- 2¼ teaspoons active dry yeast
Instructions
Pour the warm water into the bread pan and add the olive oil. The olive oil serves two purposes here — it softens the crumb and also helps the herbs and garlic disperse evenly throughout the dough during kneading.
Add the salt and sugar. Then add the minced garlic directly into the pan. Fresh garlic gives this bread a much more vibrant flavor than garlic powder, but both work well. If using fresh garlic, mince it finely so it incorporates smoothly into the dough without leaving large chunks. Large pieces of raw garlic can sometimes create pockets that don’t bake evenly.
Sprinkle in all the dried herbs — rosemary, Italian seasoning, and basil. You can adjust the herb quantities based on your personal preference. More rosemary gives the bread a more savory, earthy edge. Adding ½ teaspoon of dried oregano or thyme is a nice addition as well.
Add the bread flour on top of the liquids and seasonings in one even layer. Create a small well in the top and pour in the yeast. Place the pan in the bread maker and select the Basic Bread cycle with a medium crust setting.
During the first kneading phase, the dough will take on the aroma of the garlic and herbs immediately. Watch it come together — it should form a smooth, herb-speckled ball within 8 to 10 minutes. Because of the olive oil and garlic moisture, this dough tends to be slightly softer than plain white bread dough. If it sticks to the sides of the pan after the first 10 minutes, add flour one tablespoon at a time until it clears the walls.
Let the machine complete the full cycle. The herbs will bake into the bread and develop a deeper, roasted flavor during the baking phase. The crust should come out golden and slightly firm.
Remove the pan with oven mitts once the cycle ends. Flip it out onto a cooling rack and allow the loaf to rest for 20 minutes before slicing. The garlic smell alone will be hard to resist, but waiting ensures a clean, fully set slice.
Baking Tips
- Roasting the garlic before adding it creates a sweeter, mellow garlic flavor instead of a sharp raw garlic bite.
- Add ¼ cup of shredded Parmesan cheese to the dough along with the herbs for an extra savory loaf.
- This bread makes outstanding croutons — cube leftover slices, toss with olive oil, and bake at 375°F for 12 to 15 minutes.
9. Cinnamon Raisin Bread
Prep Time: 10 minutes | Bake Time: 3 hours | Serves: 12 slices
Warm, sweet, and dotted with plump raisins, this bread smells like a bakery while it’s baking. Great for toasting in the morning and spreading with cream cheese or butter, or enjoying as a snack straight out of the bag.
Ingredients
- ¾ cup warm milk (110°F)
- ¼ cup warm water (110°F)
- 2 tablespoons butter, softened
- 1 egg, room temperature
- 3 tablespoons sugar
- 1 teaspoon salt
- 1 teaspoon cinnamon
- ¼ teaspoon nutmeg
- 3 cups bread flour
- 2¼ teaspoons active dry yeast
- ¾ cup raisins
Instructions
Pour the warm milk and water into the bread pan together. Add the softened butter in small pieces, followed by the egg. The milk and egg in this recipe make the dough rich and tender — exactly what you want in a sweet bread like this. Make sure both the milk and the egg are warm or at room temperature so they don’t slow down yeast activation.
Add the sugar, salt, cinnamon, and nutmeg. The cinnamon and nutmeg are what give this bread its signature warm, spiced aroma. Don’t skip the nutmeg — even just a pinch rounds out the cinnamon flavor beautifully.
Add the bread flour in an even layer over the wet ingredients. Create a small well at the top and add the yeast there. Set the bread pan in the machine and select the Sweet Bread cycle. This cycle bakes at a lower temperature than the Basic cycle, which prevents the sugar in the dough from burning or making the crust too dark.
Do not add the raisins at the beginning. Most Neretva bread maker models have a fruit and nut dispenser that automatically drops add-ins at the right time during the kneading cycle. If your model has this feature, add the raisins to the dispenser before starting the cycle.
If your model does not have a dispenser, wait for the bread maker to beep — it usually signals the right time to add extras during the second kneading phase. When you hear the beep, lift the lid and pour the raisins into the pan. Close the lid and let the machine continue. Adding raisins too early can cause them to get torn apart during kneading, turning the dough purple and losing the distinct pockets of raisin in each slice.
Once baking is complete, remove the pan carefully and flip the loaf onto a cooling rack. Wait a full 30 minutes before cutting. The cinnamon-sugar in the dough makes the inside retain heat longer than plain bread. Cutting too early compresses the warm interior. Once fully cooled, slice and enjoy — or freeze for later.
Baking Tips
- Soak the raisins in warm water for 10 minutes before adding them. This plumps them up so they stay moist and juicy inside the baked loaf.
- For extra cinnamon flavor, mix 1 tablespoon of cinnamon with 2 tablespoons of sugar and swirl it through the top of the dough just before the final bake.
- Golden raisins or a mix of golden and dark raisins work just as well in this recipe.
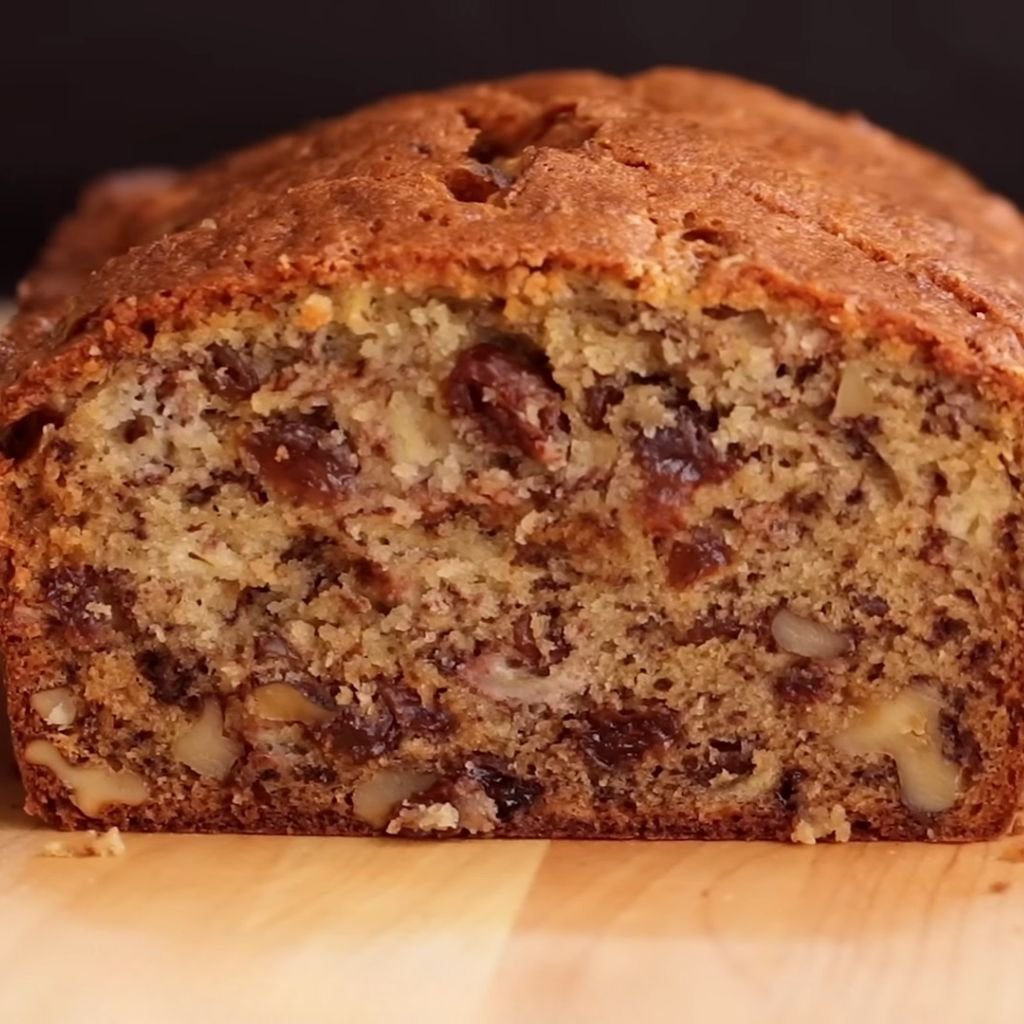
10. Banana Bread
Prep Time: 10 minutes | Bake Time: 3 hours | Serves: 12 slices
A moist, naturally sweet quick-bread-style loaf made with overripe bananas. No yeast needed — this recipe uses baking powder and soda as leaveners, making it one of the quickest and easiest Neretva bread maker recipes to pull together.
Ingredients
- 3 ripe bananas, mashed (about 1 cup)
- 2 eggs
- ⅓ cup melted butter
- ½ cup sugar
- ¼ cup whole milk
- 1½ cups all-purpose flour
- 1 teaspoon baking powder
- ½ teaspoon baking soda
- ½ teaspoon salt
- 1 teaspoon vanilla extract
- ½ teaspoon cinnamon (optional)
Instructions
Start by mashing the ripe bananas thoroughly. The more overripe the bananas are, the sweeter and more flavorful the bread will be. Bananas with brown or black spots on the skin are ideal — they’re soft, easy to mash, and have converted most of their starches into sugars. Mash them with a fork in a bowl until there are no large chunks left, just small lumps throughout.
Add the eggs to the mashed banana and beat them together well. Add the melted butter and stir to combine. The butter should be melted but not hot — let it cool for a minute or two after melting so it doesn’t scramble the eggs when mixed. Add the sugar, milk, and vanilla extract. Stir everything together until the mixture is smooth and uniform.
In a separate bowl, whisk together the all-purpose flour, baking powder, baking soda, salt, and cinnamon. Mixing the dry ingredients separately before combining ensures the leavening agents are evenly distributed. This is important for banana bread — uneven distribution can cause the bread to rise unevenly or have a sunken center.
Pour the wet banana mixture into the bread pan first, then add the dry flour mixture on top. Do not stir. Place the pan in the bread maker and select the Quick Bread or Cake cycle if your machine has one. These cycles are shorter and designed for batters rather than yeast doughs.
If your machine doesn’t have a Quick Bread cycle, you can bake banana bread by selecting a short mix-and-bake program. The machine will mix everything together during the initial knead and then move into the baking phase. Because there’s no yeast, there’s no rising phase — the bread bakes directly from the batter.
During the first few minutes of mixing, check that the batter is coming together evenly. It should look like a thick, lumpy cake batter — not a stiff dough. Once the machine finishes mixing and transitions to baking, leave it alone. Banana bread typically takes 60 to 90 minutes to bake depending on the setting and machine.
When the cycle is complete, insert a toothpick into the center of the loaf through the small vent hole in the lid or after removing the pan. If the toothpick comes out clean, the bread is done. If it still has wet batter on it, add more bake time using your machine’s Bake-only function in 10-minute increments.
Remove the pan and let the loaf cool for at least 20 minutes inside the pan before turning it out. Banana bread is fragile when hot and needs time to firm up.
Baking Tips
- Frozen and thawed bananas work excellently here — freezing breaks down the banana’s cell walls, making them extra soft and sweet.
- Add ½ cup of chopped walnuts or chocolate chips for extra texture and flavor.
- Store banana bread tightly wrapped at room temperature for 3 days, or refrigerate for up to a week.
11. Brioche Bread
Prep Time: 15 minutes | Bake Time: 3 hours | Serves: 12 slices
Rich, buttery, and golden, brioche is one of the most luxurious breads you can make in a bread machine. The high butter and egg content creates an incredibly tender crumb that melts in your mouth. Perfect for French toast or eating on its own.
Ingredients
- ¼ cup warm milk (110°F)
- 3 large eggs, room temperature
- 6 tablespoons unsalted butter, softened and cut into cubes
- 2 tablespoons sugar
- ¾ teaspoon salt
- 2¼ cups bread flour
- 2¼ teaspoons active dry yeast
Instructions
Pour the warm milk into the bread pan. Add the eggs one at a time. Because brioche dough contains a high ratio of eggs to flour, the eggs act as the primary liquid in this recipe along with the milk. Make sure the eggs are at room temperature — cold eggs can lower the dough temperature enough to slow fermentation significantly.
Add the sugar and salt on opposite sides of the pan. Then add the bread flour over everything in a flat, even layer. Create a small well in the flour and pour the yeast there.
Place the butter cubes to the side for now. Do not add them at the start. Brioche dough requires the gluten to develop first before the butter is added. Adding too much fat too early prevents gluten formation and results in a bread that won’t hold its structure or rise properly.
Insert the pan and select the Sweet Bread cycle. Once the machine starts kneading and the dough has come together into a rough, sticky ball — usually within the first 10 minutes — open the lid and begin adding the softened butter cubes, two or three at a time. Close the lid between additions and let the machine knead the butter fully into the dough before adding more. This process takes patience but is essential for proper brioche texture.
By the time all the butter has been incorporated, the dough should feel smooth, glossy, and very soft. It will be stickier than regular bread dough — that’s normal for brioche. Do not add more flour to compensate for the stickiness. The high fat content is what makes this bread unique.
Let the machine complete the full cycle including both rising phases and the bake. The baking temperature in the Sweet Bread cycle is gentle enough to bake the rich dough through without burning the exterior. Once the bread is done, remove it from the pan immediately and cool on a rack for 30 to 40 minutes before slicing.
Baking Tips
- The butter must be at room temperature and very soft for easy incorporation. Cold butter won’t knead in properly.
- Brioche dough can be made on the Dough cycle, shaped into rolls, and baked in the oven at 375°F for 18 to 22 minutes.
- Leftover brioche makes the best French toast — slice thickly and soak in an egg-cream mixture overnight.
12. Potato Bread
Prep Time: 15 minutes | Bake Time: 3 hours | Serves: 14 slices
Mashed potato adds moisture and softness to bread in a way that flour alone can’t replicate. Potato bread stays soft for days longer than regular white bread and has a slightly denser, chewier crumb that works great for both sandwiches and toast.
Ingredients
- ½ cup warm water (110°F)
- ½ cup warm milk (110°F)
- ½ cup mashed potatoes (unseasoned, room temperature)
- 2 tablespoons butter, softened
- 1 tablespoon sugar
- 1¼ teaspoons salt
- 3 cups bread flour
- 2¼ teaspoons active dry yeast
Instructions
The mashed potatoes need to be prepared in advance. Use plain mashed potatoes without salt, butter, or milk added — the recipe accounts for those separately and you want to control the quantities going into the dough. Leftover mashed potatoes from dinner work perfectly as long as they haven’t been heavily seasoned. Allow them to cool to room temperature before adding them to the bread pan.
Pour the warm water and warm milk into the bread pan. Add the cooled mashed potatoes and stir slightly to break them up in the liquid. Add the softened butter. The potato and butter together give this bread its noticeably soft, almost velvety crumb. Sprinkle in the sugar and salt.
Spoon the bread flour over the wet ingredients in an even layer. The starch in the potato will work alongside the bread flour to create a structure that retains more moisture than flour alone. Create a small well in the top of the flour and pour in the yeast.
Insert the pan into the Neretva bread maker and select the Basic Bread cycle with a medium crust. The potato in the dough will cause the bread to brown faster than a standard white loaf, so a medium crust setting prevents the exterior from getting too dark before the inside is fully cooked.
Once kneading begins, the dough will come together in a smooth, slightly sticky ball. The potato makes it naturally softer and slightly tacky. After 8 to 10 minutes of kneading, the dough should clear the sides of the pan but may still lightly touch the bottom — that’s fine. Don’t add more flour unless it’s actively sticking and not forming a cohesive ball.
Let the full cycle run. The potato also extends the shelf life of this bread naturally because it retains moisture inside the crumb. After baking, remove the loaf and cool on a rack for at least 30 minutes before slicing.
Baking Tips
- For extra flavor, add 1 tablespoon of dried chives or rosemary to the dough along with the other ingredients.
- Instant mashed potato flakes can be used instead of fresh — mix ¼ cup of flakes with enough warm water to make ½ cup of mashed potato consistency.
- This bread freezes very well. Slice before freezing so you can pull out individual slices as needed.
13. Oatmeal Bread
Prep Time: 10 minutes | Bake Time: 3 hours | Serves: 12 slices
Hearty, slightly chewy, and full of fiber, oatmeal bread is a satisfying everyday loaf. The rolled oats give it a gentle nuttiness and a tender texture that holds up well in sandwiches and tastes great toasted with a drizzle of honey.
Ingredients
- 1 cup warm water (110°F)
- 2 tablespoons butter, softened
- 2 tablespoons honey
- 1 teaspoon salt
- ¾ cup rolled oats (old-fashioned, not instant)
- 2¼ cups bread flour
- 2¼ teaspoons active dry yeast
Instructions
Pour the warm water into the bread pan. Add the softened butter and honey, stirring them slightly into the water. The honey in this recipe acts as both a sweetener and a yeast activator, helping the bread rise and brown evenly. It also pairs naturally with the mild, nutty oat flavor in the final loaf.
Add the salt, then pour in the rolled oats. The oats need time to absorb moisture before they’re fully incorporated into the dough, so adding them directly with the liquid gives them a head start. Old-fashioned rolled oats are best for this recipe because they maintain a bit of texture even after baking. Instant or quick oats break down too much and don’t add the same body to the crumb.
Add the bread flour over the oats in an even layer. Create a small well at the top of the flour and add the yeast into the well. Insert the pan into the bread maker and select the Basic Bread cycle with a medium crust setting.
During the kneading phase, the dough will be visibly different from plain white bread dough. The oats create a slightly lumpy, coarser texture in the dough. After about 10 minutes of kneading, it should form a cohesive, soft ball. If it’s too sticky, add flour one tablespoon at a time. If it looks dry and isn’t coming together, add water a teaspoon at a time.
As the oats soften fully during kneading and resting, the dough will become smoother and more uniform. Let the full cycle complete — two rises plus the bake — without opening the lid. The oatmeal bread should rise well because the bread flour gives it enough gluten structure to support the weight of the oats.
Once done, remove the loaf from the pan and cool on a rack. You can sprinkle a few extra rolled oats on top of the loaf before it goes into the final bake if you like a decorative finish — open the lid just before the bake cycle begins and press a small handful of oats gently onto the top of the risen dough.
Baking Tips
- Toast the oats in a dry pan over medium heat for 3 minutes before using them. Toasted oats add a deeper, nuttier flavor to the finished bread.
- Replace honey with maple syrup for a slightly different sweetness profile.
- This bread keeps well at room temperature for 3 to 4 days and is excellent for making avocado toast.
14. Multigrain Bread
Prep Time: 10 minutes | Bake Time: 3 hours 30 minutes | Serves: 14 slices
Packed with seeds, grains, and whole wheat flour, multigrain bread is nutritious, filling, and full of complex flavor. Every slice has a slightly different texture depending on which grains you include, making it one of the most interesting Neretva bread maker recipes to experiment with.
Ingredients
- 1 cup warm water (110°F)
- 2 tablespoons olive oil
- 2 tablespoons honey
- 1 teaspoon salt
- ½ cup multigrain cereal or 7-grain cereal (dry)
- 1½ cups whole wheat flour
- 1 cup bread flour
- 1 tablespoon vital wheat gluten
- 2½ teaspoons active dry yeast
Instructions
Pour the warm water into the bread pan. Add the olive oil and honey, mixing them slightly into the water with a spoon. These ingredients help keep the heavier grains from making the bread too dense and dry.
Add the salt, then pour in the dry multigrain cereal. You can use any store-bought 5-grain or 7-grain cereal blend. The grains typically include wheat, rye, oats, millet, and flax. Letting the grains sit in the water mixture for a few minutes before adding the flour helps them begin to soften, which improves the final texture of the crumb.
Add the whole wheat flour followed by the bread flour. Sprinkle the vital wheat gluten over the top of the flour and mix the two together lightly before adding the yeast. Vital wheat gluten is particularly important in multigrain bread because the weight of the grains and the lower gluten content of whole wheat flour can cause the loaf to come out flat without it.
Create a small well in the flour and pour the yeast in. Insert the pan and select the Whole Wheat cycle. This longer cycle gives the dense multigrain dough the time it needs to rise properly.
During kneading, the dough will look rough and grainy — that’s exactly right. It won’t be as smooth as white bread dough, but it should still form a cohesive ball. After the first 10 minutes of kneading, the grains will have absorbed more moisture and the dough will look a little smoother. If it’s too stiff and tearing, add warm water by the teaspoon. If it’s too sticky, add bread flour by the tablespoon.
Allow the full Whole Wheat cycle to run. This is a longer bake and requires patience. When the loaf comes out, it should have a dark, hearty crust with a dense but not gummy interior. Cool on a rack for 30 to 40 minutes before slicing.
Baking Tips
- Soak the multigrain cereal in the warm water for 10 minutes before adding any other ingredients. This pre-softens the grains significantly.
- Sunflower seeds, pumpkin seeds, or sesame seeds can be added to the fruit/nut dispenser or at the beep during kneading.
- This bread pairs wonderfully with aged cheddar and apple slices.
15. Buttermilk Bread
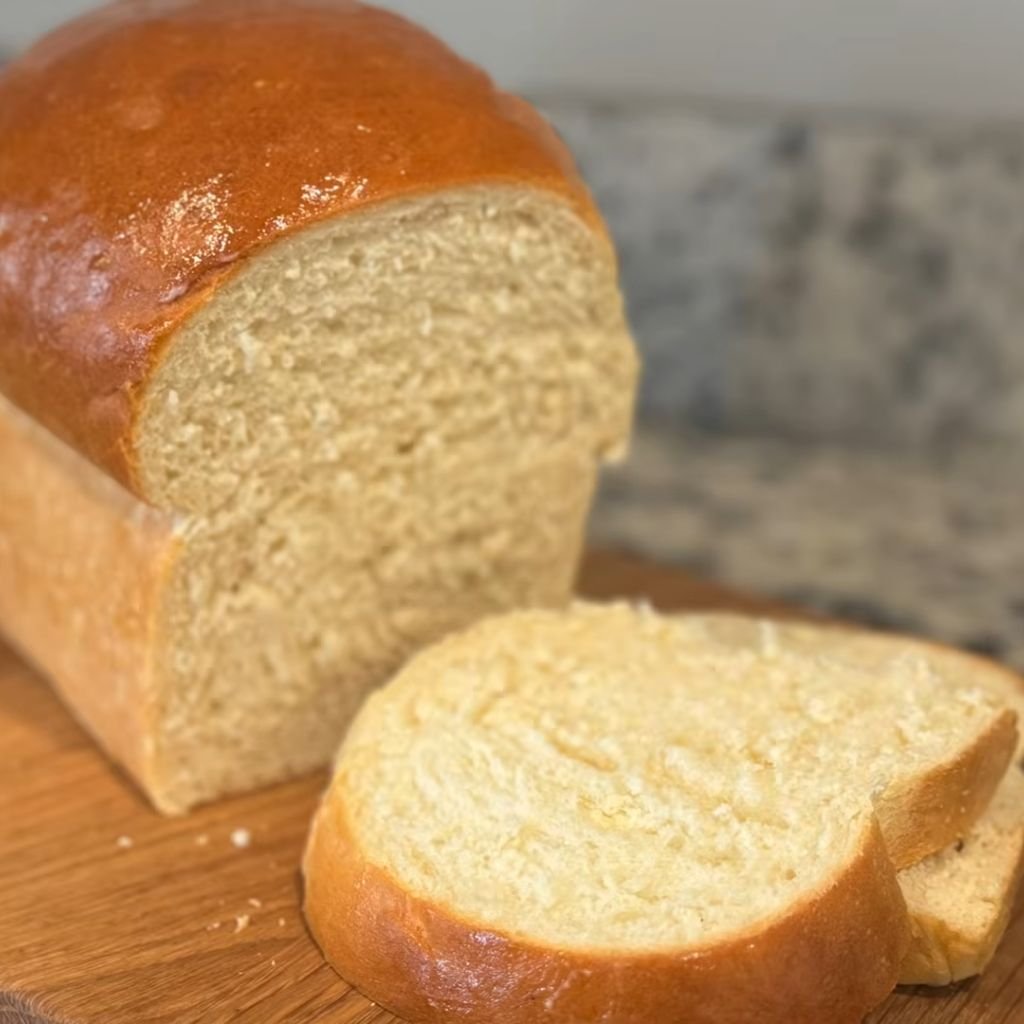
Prep Time: 10 minutes | Bake Time: 3 hours | Serves: 12 slices
Buttermilk gives this bread a subtle tang and an exceptionally soft, moist crumb. The acidity in the buttermilk reacts with the yeast to produce a consistent rise and a tender texture that stays fresh longer than plain water-based loaves.
Ingredients
- ¾ cup warm buttermilk (110°F)
- ¼ cup warm water (110°F)
- 2 tablespoons butter, softened
- 1 tablespoon sugar
- 1 teaspoon salt
- ½ teaspoon baking soda
- 3 cups bread flour
- 2¼ teaspoons active dry yeast
Instructions
Warm the buttermilk gently to about 110°F. Use a thermometer if possible — buttermilk can separate if heated too quickly or unevenly. Heat it slowly in a small saucepan over low heat, stirring gently until it reaches the right temperature. Do not boil it. Alternatively, microwave in 10-second bursts, stirring between each, until warm.
Pour the warm buttermilk and water into the bread pan. Add the softened butter in small chunks. The combination of buttermilk and butter is what gives this bread its uniquely soft, rich crumb without being overly sweet or heavy. Add the sugar and salt. Then add the baking soda. The baking soda is important in buttermilk bread — it neutralizes some of the acid in the buttermilk, which balances the flavor and ensures the yeast can work efficiently without being overpowered by the acidity.
Add the bread flour in an even layer over the liquid. Create a small indentation in the flour and pour the yeast in there. Insert the pan into the bread maker and select the Basic Bread cycle with a medium crust setting.
As the machine begins kneading, the dough should form a smooth, slightly tacky ball. Buttermilk dough is a little softer than regular milk bread dough because of the liquid-to-fat ratio. After 8 to 10 minutes of kneading, check that it’s cleared the sides of the pan. Add flour in small amounts if it’s sticking aggressively.
The bread will rise well and develop a mild, slightly tangy aroma as it bakes. The crust should come out golden and slightly glossy. Remove the loaf once the cycle is complete and cool it on a rack for 25 to 30 minutes before slicing.
Baking Tips
- Don’t have buttermilk on hand? Make a quick substitute by adding 1 tablespoon of white vinegar or lemon juice to ¾ cup of regular milk. Let it sit for 5 minutes before using.
- This bread has a slightly tangy flavor that pairs especially well with savory toppings like hummus, avocado, or sharp cheddar cheese.
- Buttermilk bread makes excellent dinner rolls when made on the Dough cycle and shaped by hand.
16. Cheese Bread
Prep Time: 10 minutes | Bake Time: 3 hours | Serves: 12 slices
Bold, savory, and full of melted cheese in every slice, this bread is a crowd-pleaser. The cheese melts into the crumb during baking, creating pockets of richness throughout. Great for snacking, sandwiches, and serving alongside chili or stew.
Ingredients
- 1 cup warm water (110°F)
- 1 tablespoon olive oil or butter
- 1½ teaspoons salt
- 1 teaspoon sugar
- 3 cups bread flour
- 2¼ teaspoons active dry yeast
- 1 cup shredded sharp cheddar cheese (or Gruyère, pepper jack, or a mix)
Instructions
Pour the warm water into the bread pan. Add the olive oil or butter, then sprinkle in the salt and sugar. The fat in this recipe helps create a soft crumb that holds the melted cheese well without becoming greasy or dense.
Add the bread flour over the liquid in an even layer. Create a small well in the flour and pour the yeast there. Do not add the cheese yet. Adding shredded cheese at the start of the cycle can interfere with yeast activity and make the dough difficult to knead properly, since the cheese creates a greasy, uneven texture in the dough before it has a chance to develop gluten structure.
Insert the pan into the bread maker and select the Basic Bread cycle. Once the machine starts kneading and the dough has formed a smooth ball — around 10 to 12 minutes into the first knead — use the bread machine’s fruit/nut dispenser if your model has one. Load the shredded cheese into the dispenser so it drops in automatically.
If your machine doesn’t have a dispenser, listen for the add-in beep during the second kneading phase. When you hear it, open the lid and pour the shredded cheese directly into the pan. Close the lid and let the machine continue. The cheese will be incorporated into the dough during the remaining kneading time.
After the cheese is added, the dough will look sticky and slightly greasy — that’s normal. The cheese releases fat as it warms up from the dough’s temperature, and that’s part of what creates the moist, cheesy interior. Resist the urge to add more flour.
As the bread bakes, the aroma will be absolutely incredible — warm, toasty cheese and fresh bread all at once. When the cycle finishes, remove the loaf and cool on a rack. The cheese creates beautiful golden pockets visible when you slice into the loaf. Wait at least 20 minutes before cutting so the interior can set.
Baking Tips
- Sharp cheddar gives the most pronounced cheese flavor. Gruyère creates a nuttier, more complex taste. Pepper jack adds heat.
- Cube the cheese instead of shredding it for more visible, melty pockets throughout the slices.
- This bread is excellent toasted — the outside gets crispy while the cheese inside warms up again beautifully.
17. Pumpkin Bread
Prep Time: 10 minutes | Bake Time: 3 hours | Serves: 12 slices
Warm spices, pumpkin puree, and a tender crumb make this one of the best fall-season Neretva bread maker recipes. Naturally moist from the pumpkin, this bread stays soft for days and smells amazing fresh out of the machine.
Ingredients
- ¾ cup canned pumpkin puree (not pumpkin pie filling)
- ¼ cup warm water (110°F)
- ¼ cup warm milk (110°F)
- 2 tablespoons butter, softened
- 2 tablespoons brown sugar
- 1 teaspoon salt
- 1 teaspoon cinnamon
- ½ teaspoon ground ginger
- ¼ teaspoon nutmeg
- ¼ teaspoon allspice
- 3 cups bread flour
- 2¼ teaspoons active dry yeast
Instructions
Measure out the canned pumpkin puree and set it aside. Make sure you’re using plain pumpkin puree and not pumpkin pie filling, which already contains sugar and spices. Using pumpkin pie filling will throw off the sugar balance in the recipe and can make the bread too sweet and dense.
Pour the warm water and warm milk into the bread pan. Add the pumpkin puree directly into the liquid and stir briefly to help it combine. The pumpkin adds natural moisture and starch to the dough, which helps create a soft, springy crumb. Add the softened butter in small cubes.
Sprinkle in the brown sugar, salt, cinnamon, ginger, nutmeg, and allspice. These spices together create the classic pumpkin bread flavor profile. Brown sugar is preferred over white sugar here because it complements the earthy sweetness of the pumpkin and the warmth of the spices more naturally.
Add the bread flour in an even layer over the wet ingredients. Create a small well at the top of the flour and pour the yeast in. Place the pan in the bread maker and select the Sweet Bread cycle. The lower baking temperature in this cycle prevents the brown sugar and pumpkin sugars from caramelizing too fast and creating a dark, overbaked crust.
During the first kneading phase, the dough will look orange and moist. It should come together into a smooth, soft ball within 10 minutes of kneading. Pumpkin dough tends to be softer than regular bread dough because of the added moisture in the puree. If the dough isn’t forming a ball after 10 minutes, add flour one tablespoon at a time. If it’s forming a ball but looks dry or cracked, add a tablespoon of warm water.
Let the full cycle run. When done, remove the loaf and let it cool on a rack for at least 30 minutes. The pumpkin-orange interior will be visible when you slice into it — slightly denser than white bread but incredibly moist and flavorful.
Baking Tips
- Adding ½ cup of toasted pepitas (pumpkin seeds) at the add-in beep gives this bread great texture contrast.
- Substitute the brown sugar with maple syrup for a more complex sweetness.
- This bread pairs beautifully with cream cheese or whipped honey butter.
18. Gluten-Free Bread
Prep Time: 10 minutes | Bake Time: 2 hours 30 minutes | Serves: 12 slices
A soft, sliceable gluten-free loaf made with a rice flour blend and xanthan gum for structure. Made specifically for those who avoid gluten, this bread works well for sandwiches and toast and won’t fall apart when sliced.
Ingredients
- 1¼ cups warm water (110°F)
- 2 tablespoons olive oil
- 2 eggs, room temperature
- 1 tablespoon apple cider vinegar
- 1 tablespoon honey
- 1½ teaspoons salt
- 2½ cups gluten-free all-purpose flour blend (with xanthan gum included)
- 1 teaspoon xanthan gum (if your flour blend doesn’t already contain it)
- 2¼ teaspoons active dry yeast
Instructions
Pour the warm water into the bread pan. Add the olive oil, eggs, apple cider vinegar, and honey. The apple cider vinegar is a key ingredient in gluten-free bread — it helps the bread rise by reacting with the xanthan gum and gives the crumb more structure and a mild tanginess that balances the neutral flavor of gluten-free flours.
Mix the wet ingredients briefly in the pan with a spatula before adding the dry ingredients. This is one area where gluten-free bread differs from regular bread: because there’s no gluten to develop, it’s actually fine to mix the wet and dry ingredients more aggressively than you would with a gluten-containing dough.
Add the salt and the gluten-free flour blend. Check whether your flour blend already contains xanthan gum — if it does, you don’t need to add more. If it doesn’t list xanthan gum in the ingredients, add 1 teaspoon on top of the flour. Xanthan gum is what replaces gluten in this recipe, providing the binding and structure that holds the bread together.
Create a small well in the flour and add the yeast. Place the pan in the bread maker and select the Gluten-Free cycle. This cycle is different from the Basic cycle in a few important ways: it typically has only one kneading phase, one shorter rise period, and a longer bake time. Because gluten-free dough behaves more like a thick batter than a traditional dough, it doesn’t need the extended kneading or double rise that wheat-based bread requires.
During the kneading phase, the gluten-free dough will look like a thick, smooth batter rather than a ball of dough. That’s completely normal. Don’t try to adjust it to look like regular bread dough. Once kneading finishes and the machine moves into the rise phase, the batter will puff up slightly but won’t double in size the way yeast bread does.
When the bake is complete, remove the pan and let the loaf cool completely inside the pan for 10 minutes before flipping it out. Gluten-free bread is more fragile than regular bread when hot. Cool on a rack for at least 45 minutes before slicing — cutting too early will cause the loaf to crumble.
Baking Tips
- Always use a flour blend specifically designed for bread, not one made for cakes or cookies.
- Gluten-free bread stales faster than wheat bread. Slice and freeze within 24 hours for best results.
- Toast gluten-free bread directly from frozen for the best texture.
19. Sourdough Bread Machine Bread
Prep Time: 10 minutes (plus sourdough starter) | Bake Time: 3 hours | Serves: 14 slices
A hybrid sourdough that uses a sourdough starter for flavor and commercial yeast for reliability. You get the tangy, complex taste of real sourdough without the unpredictability of wild fermentation alone. A great option for sourdough lovers using Neretva bread maker recipes.
Ingredients
- ¾ cup active sourdough starter (fed and bubbly)
- ½ cup warm water (110°F)
- 2 tablespoons olive oil
- 1 teaspoon salt
- 1 teaspoon sugar
- 3 cups bread flour
- 1¼ teaspoons active dry yeast
Instructions
Your sourdough starter must be active and bubbly before using it in this recipe. Feed your starter 6 to 12 hours before baking by mixing equal parts starter, flour, and water, then letting it sit at room temperature until it’s doubled in size and full of bubbles. An inactive or “sleepy” starter won’t contribute enough flavor and can cause the bread to rise inconsistently.
Pour the warm water into the bread pan, followed by the sourdough starter. The starter is thick and may take a moment to pour completely out of your measuring cup — scrape it all in. Add the olive oil, then sprinkle in the salt and sugar.
Add the bread flour in an even layer over everything. The commercial yeast — even though it’s just 1¼ teaspoons, less than a full packet — is added to give the bread a reliable, consistent rise alongside the wild yeast in the starter. Create a small well in the flour and pour the yeast there.
Insert the pan and select the Basic Bread cycle. The sourdough starter adds natural acids and flavor compounds to the bread that develop during the rise phases. The longer the dough rests, the more sour the flavor becomes. If your Basic cycle has a longer schedule option, use it for a more pronounced sourdough taste.
During the kneading phase, the dough may seem slightly stickier than plain bread dough because of the moisture in the sourdough starter. After 10 minutes of kneading, it should form a smooth, slightly tacky ball. If it’s sticking to the pan walls, add flour a tablespoon at a time. If it’s too stiff, add a teaspoon of water at a time.
Let the machine complete the full cycle. As it bakes, the sourdough aroma will fill the kitchen — tangy, yeasty, and warm all at once. Remove the loaf once done and cool on a rack for a minimum of 30 minutes before slicing. The crumb will be slightly more open and chewy than standard white bread, with a mildly tangy flavor throughout.
Baking Tips
- The more active your starter, the more sour flavor you’ll get. A starter that’s been refrigerated for weeks will produce much less flavor than a freshly fed one.
- Reduce the commercial yeast to ¾ teaspoon for a tangier, more traditional sourdough flavor — the loaf will rise slightly less but taste more authentic.
- This bread makes exceptional croutons and bread bowls for soup.
20. Chocolate Chip Sweet Bread
Prep Time: 10 minutes | Bake Time: 3 hours | Serves: 12 slices
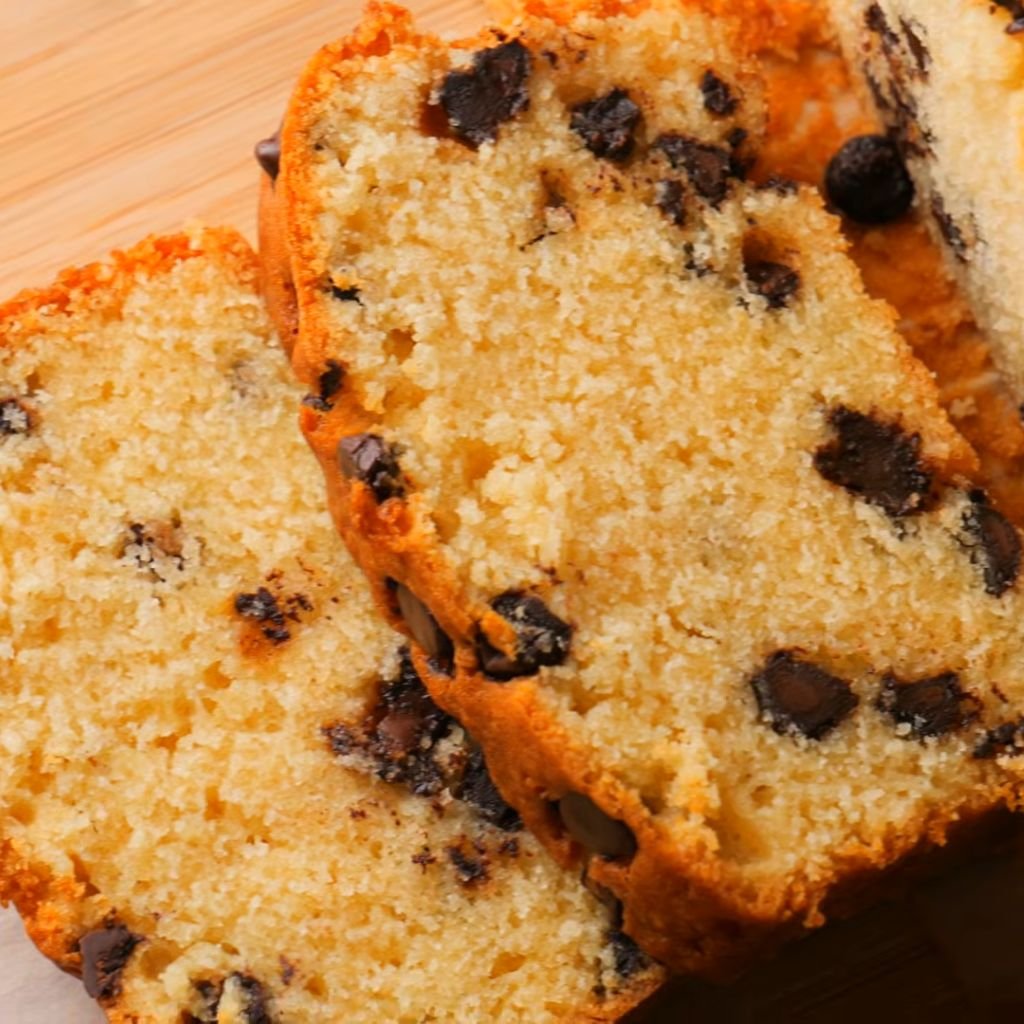
A soft, lightly sweet loaf packed with melty chocolate chips. Somewhere between a dessert and a breakfast bread, this sweet loaf is one of the most requested Neretva bread maker recipes for families with kids — and adults who love chocolate just as much.
Ingredients
- ¾ cup warm milk (110°F)
- ¼ cup warm water (110°F)
- 2 tablespoons butter, softened
- 1 egg, room temperature
- 3 tablespoons sugar
- 1 teaspoon vanilla extract
- ¾ teaspoon salt
- 3 cups bread flour
- 2¼ teaspoons active dry yeast
- ¾ cup semi-sweet chocolate chips
Instructions
Pour the warm milk and water into the bread pan together. The combination of milk and water in this recipe gives the bread a soft, slightly enriched crumb without making it overly dense like a full-milk loaf. Add the softened butter in small pieces. Crack the egg directly into the pan — room temperature eggs incorporate more easily into the dough and don’t lower the liquid temperature.
Add the sugar, vanilla extract, and salt. The vanilla adds a warm background note to the bread that pairs beautifully with the chocolate. Make sure the vanilla goes in with the liquid before the flour so it distributes evenly throughout the dough.
Add the bread flour over the liquid in a flat, even layer. Create a small well in the flour and pour the yeast there. Insert the pan into the Neretva bread maker and select the Sweet Bread cycle. The lower baking temperature of the Sweet Bread cycle is important here — chocolate chips can scorch or create hot spots if the bread bakes at too high a temperature.
Do not add the chocolate chips at the beginning. Like raisins and other add-ins, chocolate chips should go in during the second kneading phase or through the fruit/nut dispenser. If your machine has a dispenser, load the chocolate chips before starting the cycle. If not, wait for the beep during the second knead — this usually happens around 30 to 40 minutes into the cycle.
When you hear the beep, open the lid and pour the chocolate chips directly into the pan. Close the lid quickly to retain heat and let the machine work the chips into the dough. Some chips will break apart slightly during kneading — that’s fine and actually creates a beautiful chocolate swirl effect throughout the loaf.
As the bread bakes, the chocolate chips melt into the crumb, creating pockets of soft chocolate in every slice. The interior will look and smell like a warm chocolate cookie fresh from the oven. Remove the pan once the cycle ends and let the loaf rest on a cooling rack for 30 minutes. The chocolate chips need time to firm back up slightly after baking — cutting too early will create messy, sticky slices.
Baking Tips
- Use mini chocolate chips for more even distribution throughout the bread. Regular chips work too but tend to clump together more.
- Dark chocolate chips create a less sweet, more intense chocolate flavor. Milk chocolate chips make the bread sweeter and more dessert-like.
- Slice and store in an airtight container at room temperature for up to 3 days. This bread also freezes well and toasts beautifully from frozen.
How to Store Homemade Bread
Keeping your homemade bread fresh is just as important as baking it right. Here’s how to store bread properly:
1. Room Temperature Storage — Most homemade bread stays fresh at room temperature for 2 to 3 days. Keep it in a sealed bread bag, airtight container, or wrapped tightly in plastic wrap. Store it away from direct sunlight and heat. Avoid the refrigerator for short-term storage — refrigeration actually speeds up staling in most breads.
2. Refrigeration Tips — Only refrigerate bread that contains dairy-based ingredients like cream cheese or ricotta, or bread that you live in a very humid climate where mold grows quickly. If you do refrigerate, wrap the loaf tightly in plastic wrap first, then place it in a bag. Always bring refrigerated bread back to room temperature or toast it before eating.
3. Freezing Bread Successfully — Slicing the bread before freezing is the best approach. Place parchment paper between slices to prevent them from sticking together. Put the sliced loaf in a zip-lock freezer bag, press out as much air as possible, and freeze for up to 3 months. Label the bag with the bread type and date so you always know what’s inside.
4. Reheating Methods — For frozen slices, toast them directly in the toaster without thawing — they’ll come out crispy and fresh in about 2 to 3 minutes. To reheat a whole loaf or thicker slices, wrap in foil and warm in the oven at 300°F for 10 to 15 minutes. Avoid microwaving bread — it makes the crumb rubbery and the crust soft.
Conclusion
There’s something deeply satisfying about pulling a fresh loaf out of your Neretva bread maker and knowing that you made it from scratch. The 20 Neretva bread maker recipes covered in this guide give you everything from simple everyday white bread to buttery brioche, tangy sourdough, and chocolate chip sweet bread. Every single one is designed to be approachable and easy to follow, even if you’ve never baked bread before.
The best part of baking at home is that you can make each recipe your own. Once you’ve nailed the basics, try adding different herbs to the garlic bread, swapping honey for maple syrup in the oatmeal bread, or mixing in your favorite seeds to the multigrain loaf. Small changes create completely new results, and every bake teaches you something new about how bread works.
To get the most out of your Neretva bread maker, always measure your ingredients carefully, check your yeast before starting a batch, and use bread flour instead of all-purpose flour whenever a recipe calls for it. These small habits make a big difference in how your loaves turn out.
Ready to keep baking? Try the Honey Wheat Bread or the Buttermilk Bread next — both are simple, reliable, and absolutely delicious. From there, move on to the Brioche or Sourdough for a more rewarding challenge. No matter where you start, Neretva bread maker recipes make every baking session feel like a success.