
Eating well does not have to be boring or complicated. Healthy Mediterranean dinner recipes are a great way to enjoy meals that are full of color, flavor, and good nutrition — all at the same time.
The Mediterranean diet is one of the most studied and trusted eating patterns in the world. Doctors, nutritionists, and health experts keep recommending it because it is linked to a lower risk of heart disease, better weight control, and longer life.
These meals are built around fresh vegetables, lean proteins like fish and chicken, healthy fats from olive oil and nuts, and whole grains like quinoa and lentils.
Unlike heavy Western-style dinners, Mediterranean evening meals feel light but still keep you full. They use simple cooking methods like grilling, baking, and sautéing that keep nutrients in the food.
Adding healthy Mediterranean dinner recipes to your weekly routine is one of the easiest steps toward a healthier lifestyle.
What Is a Healthy Mediterranean Dinner?
Healthy Mediterranean dinner recipes follow a simple set of food rules that have been used for generations in countries like Greece, Italy, and Spain. Here is what makes these meals different from a typical dinner:
1. Fresh vegetables are the base. Most Mediterranean meals are packed with tomatoes, zucchini, spinach, eggplant, peppers, and leafy greens. Vegetables make up the largest portion of the plate.
2. Lean proteins replace heavy meats. Fish, seafood, chicken, and legumes like chickpeas and lentils are the main protein sources. Red meat is used only occasionally.
3. Healthy fats are used generously. Extra virgin olive oil is the primary cooking fat. Nuts, seeds, avocado, and olives also add good fats that support heart health.
4. Whole grains take the place of refined carbs. Brown rice, quinoa, farro, and whole wheat bread are common. These digest slowly and keep blood sugar stable.
5. Herbs and spices do the heavy lifting. Garlic, oregano, basil, cumin, parsley, and lemon are used to build flavor without relying on heavy sauces or salt.
6. Dairy is used in moderation. Feta cheese and plain Greek yogurt are staples, but they are used in small amounts to add flavor rather than bulk up calories.
7. Legumes appear often. Chickpeas, white beans, lentils, and cannellini beans are protein-rich, high in fiber, and very affordable.
8. Processed foods are largely absent. Mediterranean cooking relies on whole, real ingredients. There are no packaged seasonings or artificial shortcuts.
9. Portion sizes are sensible. Mediterranean meals are satisfying without being oversized. The goal is nourishment, not stuffing.
10. Meals are meant to be enjoyed slowly. The Mediterranean lifestyle values sitting down, eating mindfully, and savoring each bite — which supports better digestion and overall wellness.
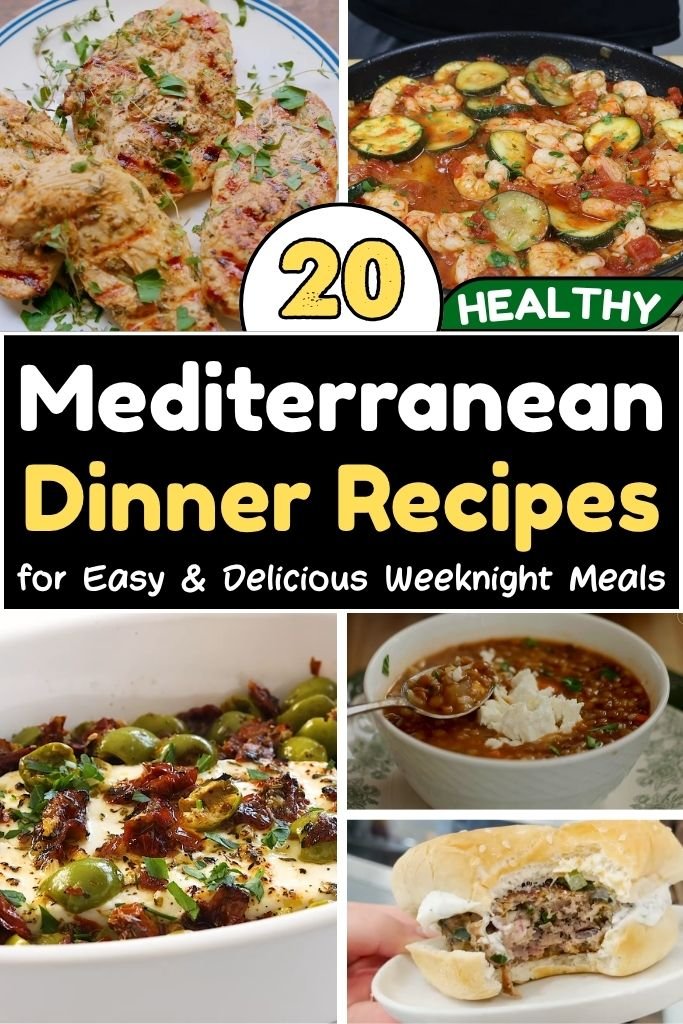
1. Mediterranean Grilled Lemon Herb Chicken
Prep Time: 15 min | Cook Time: 20 min | Serves: 4
A bright, zesty chicken dinner that brings bold lemon and herb flavors straight to the table. Marinated and grilled to golden perfection, each piece stays juicy on the inside with a lightly charred outside. Pairs beautifully with a simple salad or warm pita bread for a complete, satisfying meal.
Ingredients
- 4 boneless, skinless chicken breasts
- 3 tablespoons extra virgin olive oil
- Juice of 2 lemons
- Zest of 1 lemon
- 4 garlic cloves, minced
- 1 teaspoon dried oregano
- 1 teaspoon dried thyme
- ½ teaspoon smoked paprika
- ½ teaspoon ground cumin
- Salt and black pepper to taste
- Fresh parsley, chopped, for garnish
Instructions
Start by preparing the marinade. In a medium mixing bowl, combine the olive oil, fresh lemon juice, lemon zest, minced garlic, oregano, thyme, smoked paprika, and cumin. Stir everything together until it forms a well-blended mixture. Add a pinch of salt and a few cracks of black pepper, then taste and adjust the seasoning as needed.
Place the chicken breasts on a clean cutting board. Using a sharp knife, score the top of each breast with two or three shallow diagonal cuts. This helps the marinade soak deeper into the meat and speeds up the cooking process. Place the chicken into a large zip-lock bag or a shallow glass dish.
Pour the marinade over the chicken, making sure every piece is completely coated. Seal the bag or cover the dish with plastic wrap. Let the chicken marinate in the refrigerator for at least 30 minutes. For the best flavor, allow it to marinate for up to 4 hours. The longer it sits, the more the herbs and lemon infuse into the meat.
When ready to cook, remove the chicken from the refrigerator and let it sit at room temperature for 10 minutes. This ensures even cooking throughout. Preheat your outdoor grill or stovetop grill pan to medium-high heat. Lightly brush the grill grates with a little olive oil to prevent sticking.
Place the chicken on the hot grill. Do not move it right away — let it cook undisturbed for 5 to 6 minutes on the first side. You will see grill marks forming and the edges of the chicken turning white as it cooks through. Flip each piece carefully using tongs. Cook on the other side for another 5 to 6 minutes, or until the internal temperature of the thickest part reaches 165°F (74°C).
Once done, transfer the chicken to a clean plate and loosely cover it with aluminum foil. Let the chicken rest for 5 minutes before cutting into it. This step is important — resting the meat allows the juices to redistribute, keeping the chicken moist and tender rather than dry.
Slice the chicken or serve it whole. Scatter freshly chopped parsley over the top and add a few lemon wedges on the side for squeezing. Serve immediately.
Nutrition Highlights
- High in lean protein (approx. 35g per serving)
- Low in saturated fat
- Rich in vitamin C from fresh lemon
- Contains anti-inflammatory compounds from garlic and herbs
Serving Suggestions
Serve over a bed of arugula with cherry tomatoes, alongside warm pita bread, or with a side of Greek tzatziki and cucumber slices.
2. One-Pan Mediterranean Baked Salmon with Vegetables
Prep Time: 10 min | Cook Time: 25 min | Serves: 4
An easy sheet pan dinner that comes together with almost no cleanup. Salmon fillets are nestled among colorful vegetables, seasoned with lemon and Mediterranean spices, then baked until perfectly flaky. Each bite carries the rich, savory flavor of olive oil, garlic, and roasted produce.
Ingredients
- 4 salmon fillets (about 6 oz each)
- 1 zucchini, sliced into half-moons
- 1 cup cherry tomatoes
- 1 red bell pepper, chopped
- ½ red onion, sliced into thin wedges
- ½ cup Kalamata olives, pitted
- 3 tablespoons olive oil
- 3 garlic cloves, minced
- Juice of 1 lemon
- 1 teaspoon dried oregano
- 1 teaspoon dried basil
- Salt and black pepper to taste
- Fresh dill or parsley for garnish
Instructions
Preheat your oven to 400°F (200°C). Line a large baking sheet with parchment paper or lightly grease it with a thin coat of olive oil. Using parchment paper makes cleanup even easier and prevents the vegetables from sticking to the pan.
In a large bowl, combine the zucchini, cherry tomatoes, bell pepper, red onion, and olives. Drizzle 2 tablespoons of olive oil over the vegetables. Add the minced garlic, dried oregano, dried basil, half the lemon juice, a pinch of salt, and black pepper. Toss everything well until all the vegetables are evenly coated with the seasonings.
Spread the seasoned vegetables out in a single layer across the baking sheet. Make sure they are not piled on top of each other — a single layer allows the vegetables to roast properly rather than steam. Slide the pan into the oven and roast for 10 minutes.
While the vegetables are roasting, prepare the salmon. Pat each fillet dry with a paper towel. Moisture on the surface of the fish can prevent it from browning nicely. Drizzle the remaining tablespoon of olive oil over the fillets and squeeze the rest of the lemon juice on top. Season generously with salt and black pepper on both sides.
After the initial 10-minute roast, pull the baking sheet out of the oven. Move the vegetables around to create four open spaces. Nestle one salmon fillet into each space, skin-side down. Return the pan to the oven and bake for another 12 to 15 minutes, depending on the thickness of the fillets. The salmon is done when it flakes easily with a fork and the flesh has turned from translucent to opaque.
Remove the pan from the oven. Check that the vegetables are tender and slightly caramelized at the edges. If you prefer more color on the vegetables, switch the oven to broil for the last 2 minutes, watching carefully so nothing burns.
Let everything rest for a couple of minutes before serving. Garnish with fresh dill or chopped parsley. Serve directly from the baking sheet or transfer to individual plates.
Nutrition Highlights
- Excellent source of omega-3 fatty acids
- Rich in vitamins A, C, and K from roasted vegetables
- Contains lycopene from cherry tomatoes
- Supports cardiovascular and brain health
Serving Suggestions
Serve with a side of couscous or crusty whole-grain bread to soak up the flavorful pan juices.
3. Greek Chicken and Vegetable Sheet Pan Dinner
Prep Time: 15 min | Cook Time: 35 min | Serves: 4
Bold Greek flavors, one pan, and minimal effort — that is the beauty of this dinner. Chicken thighs roast alongside potatoes, olives, and artichoke hearts in a lemon-herb marinade. The result is a hearty, satisfying meal with a rich golden color and deep, herby aroma.
Ingredients
- 4 bone-in, skin-on chicken thighs
- 2 medium Yukon gold potatoes, cut into chunks
- 1 cup artichoke hearts (canned, drained)
- ½ cup Kalamata olives
- 1 cup cherry tomatoes
- 1 red onion, cut into wedges
- 4 tablespoons olive oil
- Juice of 1 lemon
- 4 garlic cloves, minced
- 1½ teaspoons dried oregano
- 1 teaspoon dried rosemary
- ½ teaspoon garlic powder
- Salt and pepper to taste
- Fresh lemon wedges and parsley to serve
Instructions
Heat your oven to 425°F (220°C). Line a large rimmed baking sheet with parchment paper or foil. A higher oven temperature is key for getting that golden-brown skin on the chicken while keeping the inside juicy.
In a small bowl, mix together 3 tablespoons of olive oil, lemon juice, minced garlic, oregano, rosemary, garlic powder, salt, and pepper. This is your Greek marinade. Whisk until everything is well combined.
Place the chicken thighs in a bowl or large dish. Pour half the marinade over them and rub it in thoroughly, getting under the skin as well. The skin protects the meat during roasting and crisps up beautifully when the chicken cooks. Let the chicken sit for at least 15 minutes while you prepare the vegetables.
In a separate large bowl, toss the potato chunks with the remaining marinade and 1 tablespoon of olive oil. Make sure the potatoes are well coated so they crisp up evenly. Spread the potatoes on the baking sheet first, as they take the longest to cook.
Place the baking sheet in the oven and roast the potatoes alone for 15 minutes. This head start ensures the potatoes will be fully cooked by the time the chicken is done.
Pull the pan out after 15 minutes. Scatter the cherry tomatoes, red onion wedges, artichoke hearts, and olives around the potatoes. Nestle the marinated chicken thighs on top of and between the vegetables, skin-side up.
Return the pan to the oven and roast for another 35 to 40 minutes, or until the chicken skin is deeply golden and the internal temperature has reached 165°F (74°C). During the last 5 minutes, you can switch to broil to get the skin extra crispy if needed.
Let the pan rest for 5 minutes after removing it from the oven. Scatter fresh parsley on top and add lemon wedges to the side.
Nutrition Highlights
- Bone-in chicken thighs provide iron and zinc
- Artichoke hearts are high in fiber and antioxidants
- Potatoes offer potassium and vitamin B6
- Olives contribute heart-healthy monounsaturated fats
Serving Suggestions
Serve straight from the pan with a simple cucumber and tomato salad and warm pita on the side.
4. Mediterranean Chickpea and Spinach Stew
Prep Time: 10 min | Cook Time: 25 min | Serves: 4
Hearty, warming, and completely plant-based, this stew is a go-to dinner for busy nights. Chickpeas and spinach simmer in a spiced tomato broth until everything is thick, rich, and deeply satisfying. Ready in under 40 minutes and even better the next day.
Ingredients
- 2 cans (15 oz each) chickpeas, drained and rinsed
- 4 cups fresh spinach
- 1 can (14 oz) diced tomatoes
- 1 medium onion, diced
- 4 garlic cloves, minced
- 3 tablespoons olive oil
- 1 teaspoon ground cumin
- 1 teaspoon smoked paprika
- ½ teaspoon ground coriander
- ½ teaspoon turmeric
- 1½ cups vegetable broth
- Salt and black pepper to taste
- Juice of half a lemon
- Fresh parsley for garnish
- Crusty bread or rice to serve
Instructions
Heat the olive oil in a large, deep skillet or Dutch oven over medium heat. Once the oil is warm and shimmering, add the diced onion. Stir the onion around the pan and cook for 6 to 7 minutes, or until it turns soft and translucent. The onion should start to look slightly golden around the edges — this is when its natural sweetness really develops.
Add the minced garlic to the pan. Stir immediately and cook for about 1 minute. Garlic burns quickly on high heat, so keep stirring and keep the heat at medium. You want the garlic to turn fragrant and slightly golden, not brown or bitter.
Next, add the cumin, smoked paprika, coriander, and turmeric. Stir the spices into the onion and garlic mixture. Let the spices toast in the oil for about 30 seconds. This step is important — toasting the spices in oil before adding liquids wakes up their flavor and gives the stew a deeper, more complex taste.
Pour in the diced tomatoes, including all the liquid from the can. Stir well to combine. Let the tomatoes cook down for 3 to 4 minutes, stirring occasionally. The mixture will thicken slightly as the tomato liquid reduces.
Add the drained chickpeas and pour in the vegetable broth. Stir everything together and bring the stew to a gentle boil. Once it reaches a boil, reduce the heat to low and let it simmer for 12 to 15 minutes. During this time, the chickpeas will absorb some of the spiced broth and the flavors will all meld together beautifully.
Add the fresh spinach in handfuls, stirring between each addition. The spinach will wilt down quickly — within 1 to 2 minutes it will be fully incorporated into the stew. Season with salt and black pepper, then squeeze in the lemon juice and stir once more.
Taste the stew and adjust seasoning as needed. Ladle into bowls and top with fresh parsley. Serve with crusty bread for dipping or over a bowl of steamed rice.
Nutrition Highlights
- Chickpeas provide 15g of plant-based protein per serving
- Spinach is rich in iron, calcium, and vitamin K
- Turmeric contains curcumin, a powerful anti-inflammatory
- High in dietary fiber for gut health
Serving Suggestions
Serve with warm pita bread, a dollop of plain Greek yogurt, and a drizzle of extra olive oil on top.
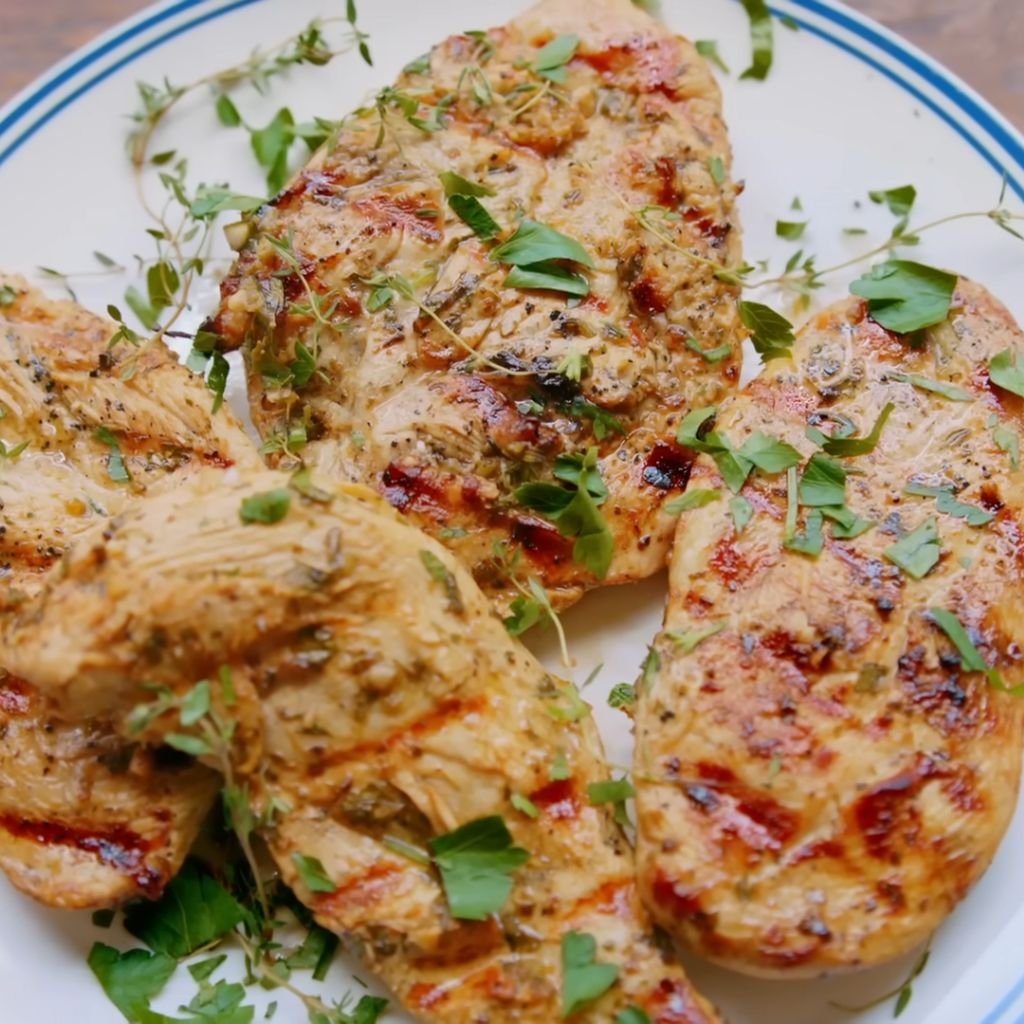
5. Garlic Shrimp with Zucchini and Tomatoes
Prep Time: 10 min | Cook Time: 15 min | Serves: 3–4
Quick, light, and packed with Mediterranean flavor, this shrimp skillet comes together in less than 25 minutes. Juicy shrimp cook alongside tender zucchini and blistered tomatoes in a garlicky olive oil sauce. A bright squeeze of lemon at the end ties everything together perfectly.
Ingredients
- 1 lb large shrimp, peeled and deveined
- 2 medium zucchini, sliced into half-moons
- 1 cup cherry tomatoes, halved
- 5 garlic cloves, thinly sliced
- 3 tablespoons olive oil
- ½ teaspoon red pepper flakes
- Juice of 1 lemon
- ½ teaspoon dried oregano
- Salt and black pepper to taste
- Fresh basil or parsley for garnish
Instructions
Pat the shrimp completely dry with paper towels before cooking. Dry shrimp sear better and get a nicer color in the pan. Season both sides lightly with salt, black pepper, and dried oregano. Set aside.
Heat a large skillet over medium-high heat. Add 2 tablespoons of olive oil. Once the oil is hot, add the zucchini slices in a single layer. Let them cook without stirring for 2 to 3 minutes so they can develop a light golden color on the bottom. Then flip them and cook for another 2 minutes. The goal is tender but not mushy zucchini. Transfer the zucchini to a plate and set it aside.
Reduce the heat slightly to medium. Add the remaining tablespoon of olive oil to the same pan. Add the sliced garlic and red pepper flakes. Stir continuously for about 30 seconds — the garlic should sizzle gently in the oil. Do not let it brown too deeply or the flavor will turn bitter.
Add the cherry tomatoes to the pan. Press them down lightly with the back of a spoon to encourage them to burst and release their juices. Cook for 2 to 3 minutes, stirring occasionally, until the tomatoes are soft and the juices have concentrated into a light sauce.
Add the seasoned shrimp in a single layer across the pan. Cook for 1 to 2 minutes per side. Shrimp cook very fast — they are done when they turn pink and curl into a C shape. Be careful not to overcook them, as they will become rubbery. Once all the shrimp are pink and cooked through, return the sautéed zucchini to the pan.
Squeeze the lemon juice over everything and toss the pan contents gently to combine all the flavors. Do a final taste test and adjust salt and pepper as needed.
Transfer to a serving dish or individual plates. Scatter fresh basil or parsley over the top. Serve immediately.
Nutrition Highlights
- Shrimp are high in protein and low in calories
- Zucchini provides vitamin C and potassium
- Garlic supports immune function and heart health
- Light in carbohydrates, suitable for low-carb eating plans
Serving Suggestions
Serve over whole-wheat pasta, cauliflower rice, or alongside warm crusty bread to soak up the garlic sauce.
6. Mediterranean Stuffed Bell Peppers
Prep Time: 20 min | Cook Time: 40 min | Serves: 4
Colorful bell peppers are filled with a savory mixture of ground turkey, rice, tomatoes, and Mediterranean herbs, then baked until tender. Each pepper is a complete, self-contained meal that looks impressive but takes very little effort to prepare.
Ingredients
- 4 large bell peppers (any color), tops cut off, seeds removed
- 1 lb ground turkey
- 1 cup cooked brown rice
- 1 can (14 oz) diced tomatoes, drained
- ½ cup crumbled feta cheese
- ½ cup Kalamata olives, chopped
- 1 small onion, finely diced
- 3 garlic cloves, minced
- 2 tablespoons olive oil
- 1 teaspoon dried oregano
- 1 teaspoon cumin
- Salt and pepper to taste
- Fresh parsley for garnish
Instructions
Preheat the oven to 375°F (190°C). Lightly oil a baking dish that is large enough to hold all four peppers upright without them toppling over. You can also trim a very thin slice off the bottom of each pepper to create a flat base for stability — just be careful not to cut through so the filling stays inside.
Bring a large pot of salted water to a boil. Add the whole, hollowed-out peppers and blanch them for 3 to 4 minutes. Blanching softens the peppers slightly and helps them cook evenly in the oven. Drain them and set aside upside-down on a paper towel to remove excess moisture.
In a large skillet, heat the olive oil over medium heat. Add the diced onion and cook for 5 minutes until soft. Add the garlic and stir for 1 minute until fragrant. Add the ground turkey to the pan, breaking it apart with a wooden spoon as it cooks. Cook for 7 to 8 minutes, stirring often, until the meat is fully browned with no pink remaining.
Drain any excess fat from the pan. Add the drained diced tomatoes, cooked brown rice, chopped olives, dried oregano, and cumin. Stir everything together over medium heat for 2 to 3 minutes. Taste and season with salt and black pepper. Remove the pan from heat and let the filling cool slightly before adding the feta. Fold in the crumbled feta gently.
Stand the blanched bell peppers upright in the prepared baking dish. Spoon the filling generously into each pepper, packing it down slightly so you can fit as much as possible. Mound a little extra filling on top of each one. Cover the baking dish tightly with aluminum foil.
Bake for 30 minutes covered. Then remove the foil and bake for an additional 10 minutes so the tops of the stuffed peppers get a slight golden color. The peppers should be fully tender when pierced with a fork.
Remove from the oven and let rest for 5 minutes. Garnish with fresh parsley before serving.
Nutrition Highlights
- Ground turkey is a lean source of protein with less fat than beef
- Brown rice adds fiber and complex carbohydrates
- Bell peppers are extremely high in vitamin C — one pepper covers over 100% of the daily requirement
- Feta adds calcium and satisfying savory flavor in a small amount
Serving Suggestions
Serve with a simple side salad of cucumber, tomato, and olive oil dressing, or alongside a cup of lentil soup.
7. Grilled Mediterranean Turkey Meatballs
Prep Time: 20 min | Cook Time: 20 min | Serves: 4
Tender, herb-packed turkey meatballs are grilled instead of fried, giving them a slightly smoky exterior with a juicy interior. These are seasoned with classic Mediterranean spices and pair perfectly with yogurt sauce, flatbread, or a fresh salad for a lighter take on a comfort food classic.
Ingredients
- 1 lb ground turkey
- ¼ cup breadcrumbs
- 1 egg
- 3 garlic cloves, minced
- ¼ cup fresh parsley, finely chopped
- 1 teaspoon dried oregano
- ½ teaspoon cumin
- ½ teaspoon ground coriander
- ¼ teaspoon cinnamon
- Zest of 1 lemon
- Salt and black pepper to taste
- Olive oil for brushing
- Greek yogurt and lemon wedges to serve
Instructions
In a large mixing bowl, combine the ground turkey, breadcrumbs, egg, minced garlic, parsley, oregano, cumin, coriander, cinnamon, and lemon zest. Season generously with salt and black pepper. Mix everything together using your hands or a fork until the ingredients are fully incorporated.
It is important not to over-mix the meat — working it too much makes the meatballs dense and tough. Mix just until you can no longer see separate ingredients.
Cover the bowl with plastic wrap and refrigerate for at least 20 minutes. Chilling the meat mixture firms it up, making it much easier to roll into smooth, even balls. It also helps the meatballs hold their shape on the grill without falling apart.
After chilling, remove the mixture from the refrigerator. Wet your hands slightly with cold water — this prevents the meat from sticking to your palms. Scoop about 2 tablespoons of the mixture and roll it between your palms into a smooth ball. Place each formed meatball on a plate. You should get approximately 16 to 18 meatballs total.
Preheat a grill or grill pan over medium heat. Brush the grill grates with olive oil to prevent sticking. Lightly brush the meatballs themselves with a thin coat of olive oil as well — this helps them develop a nice golden crust and keeps them moist during cooking.
Place the meatballs on the grill. Cook for 4 to 5 minutes per side, turning them carefully with tongs to get even browning on all sides. In total, the meatballs should take about 15 to 18 minutes to cook through. Cut one in half to check — the center should be no longer pink and the juices should run clear. The internal temperature should reach 165°F (74°C).
Remove the meatballs from the grill and let them rest for a few minutes before serving. Serve with plain Greek yogurt mixed with a squeeze of lemon as a dipping sauce, and plenty of warm flatbread.
Nutrition Highlights
- Turkey is a lean protein with less saturated fat than lamb or beef
- Cumin and coriander support digestion
- Cinnamon helps regulate blood sugar levels
- Lemon zest adds vitamin C without adding calories
Serving Suggestions
Serve in warm pita pockets with sliced tomato, cucumber, red onion, and a spoonful of tzatziki sauce.
8. Mediterranean Quinoa Bowl
Prep Time: 15 min | Cook Time: 20 min | Serves: 4
A nourishing bowl packed with protein-rich quinoa, roasted vegetables, tangy feta, and a bright lemon herb dressing. Easy to make ahead and perfect for meal prep, each bowl is a complete, balanced dinner in one container.
Ingredients
- 1½ cups dry quinoa
- 3 cups vegetable broth
- 1 cup cherry tomatoes, halved
- 1 cucumber, diced
- ½ cup Kalamata olives, halved
- ½ cup crumbled feta cheese
- ½ red onion, finely diced
- 1 can (15 oz) chickpeas, drained and rinsed
- 2 tablespoons olive oil
- 1 teaspoon cumin
- 1 teaspoon smoked paprika
Dressing:
- 3 tablespoons olive oil
- Juice of 1½ lemons
- 1 teaspoon dried oregano
- 1 garlic clove, grated
- Salt and pepper to taste
Instructions
Rinse the quinoa thoroughly under cold water in a fine mesh strainer for at least 60 seconds. Rinsing removes the natural bitter coating on quinoa called saponin. Skipping this step can result in a slightly soapy or bitter taste in the finished dish.
Transfer the rinsed quinoa to a medium saucepan. Add the vegetable broth and a small pinch of salt. Bring to a boil over high heat, then immediately reduce the heat to low. Cover the pot with a tight-fitting lid and let the quinoa cook for 15 minutes undisturbed. Do not lift the lid during cooking — the steam is what cooks the quinoa evenly.
After 15 minutes, turn off the heat but leave the lid on. Let the quinoa steam for an additional 5 minutes. Then remove the lid and fluff the quinoa with a fork. Spread it out onto a sheet pan or wide bowl to cool while you prepare the rest of the ingredients.
While the quinoa cooks, prepare the roasted chickpeas. Preheat the oven to 400°F (200°C). Pat the drained chickpeas dry with a paper towel — the drier they are, the crispier they will get in the oven. Toss them with the olive oil, cumin, and smoked paprika. Spread them in a single layer on a baking sheet. Roast for 20 to 25 minutes, shaking the pan halfway through, until they are golden and slightly crunchy.
While the chickpeas roast, make the dressing. In a small bowl or jar, whisk together the olive oil, lemon juice, oregano, grated garlic, salt, and pepper. Taste and adjust the acidity or seasoning to your preference.
Assemble the bowls. Divide the cooked quinoa evenly among four bowls. Top each bowl with cherry tomatoes, cucumber, red onion, olives, and roasted chickpeas. Spoon a generous amount of dressing over each bowl. Scatter crumbled feta on top.
Serve immediately or store the components separately in the refrigerator for up to 4 days for easy meal prep.
Nutrition Highlights
- Quinoa is a complete protein containing all 9 essential amino acids
- Chickpeas add additional plant protein and fiber
- Feta cheese provides calcium in a modest amount
- Lemon dressing is naturally low in calories
Serving Suggestions
Add a handful of fresh arugula or baby spinach to the base before adding the quinoa for extra greens.
9. Baked Cod with Olives and Cherry Tomatoes
Prep Time: 10 min | Cook Time: 20 min | Serves: 4
Mild, flaky cod gets a full flavor upgrade with a punchy olive and tomato sauce that bakes together in one dish. The briny olives balance the sweetness of the roasted tomatoes beautifully. Light, elegant, and genuinely easy to make.
Ingredients
- 4 cod fillets (about 6 oz each)
- 1 cup cherry tomatoes, halved
- ½ cup Kalamata olives, pitted
- ¼ cup capers, drained
- 4 garlic cloves, thinly sliced
- 3 tablespoons olive oil
- Juice of 1 lemon
- 1 teaspoon dried oregano
- ½ teaspoon red pepper flakes (optional)
- Salt and black pepper to taste
- Fresh basil or flat-leaf parsley for garnish
Instructions
Preheat the oven to 400°F (200°C). Choose a large baking dish that is wide enough to hold all four cod fillets in a single layer with a little space between them.
In a medium bowl, combine the cherry tomatoes, olives, capers, garlic slices, 2 tablespoons of olive oil, lemon juice, oregano, and red pepper flakes. Toss everything together and season lightly with salt and pepper. The olives and capers are already salty, so go easy on extra salt at this stage.
Pour the tomato and olive mixture into the baking dish and spread it out evenly. Place the baking dish in the preheated oven and roast the mixture for 10 minutes before adding the fish. This gives the tomatoes time to soften and begin releasing their juices, creating a natural sauce for the fish to bake in.
While the tomatoes are roasting, prepare the cod fillets. Pat them dry thoroughly with paper towels. Season both sides with a little salt, black pepper, and a small drizzle of the remaining tablespoon of olive oil.
After 10 minutes, remove the baking dish from the oven. Place the cod fillets on top of the tomato and olive mixture. Spoon a little of the pan sauce over each fillet. Return the dish to the oven and bake for another 12 to 15 minutes, depending on the thickness of the fish. Cod is done when the flesh is opaque all the way through and flakes easily with a fork. If the fillet is very thick, add 2 to 3 more minutes.
Remove the dish from the oven. Scatter fresh basil or parsley generously over the top. Serve directly from the baking dish for a rustic presentation.
Nutrition Highlights
- Cod is very low in fat and high in lean protein
- Olives and olive oil provide monounsaturated heart-healthy fats
- Capers are a good source of antioxidants
- Tomatoes are rich in lycopene, linked to cancer prevention
Serving Suggestions
Serve with roasted potatoes or a side of warm crusty bread to absorb the flavorful pan sauce.
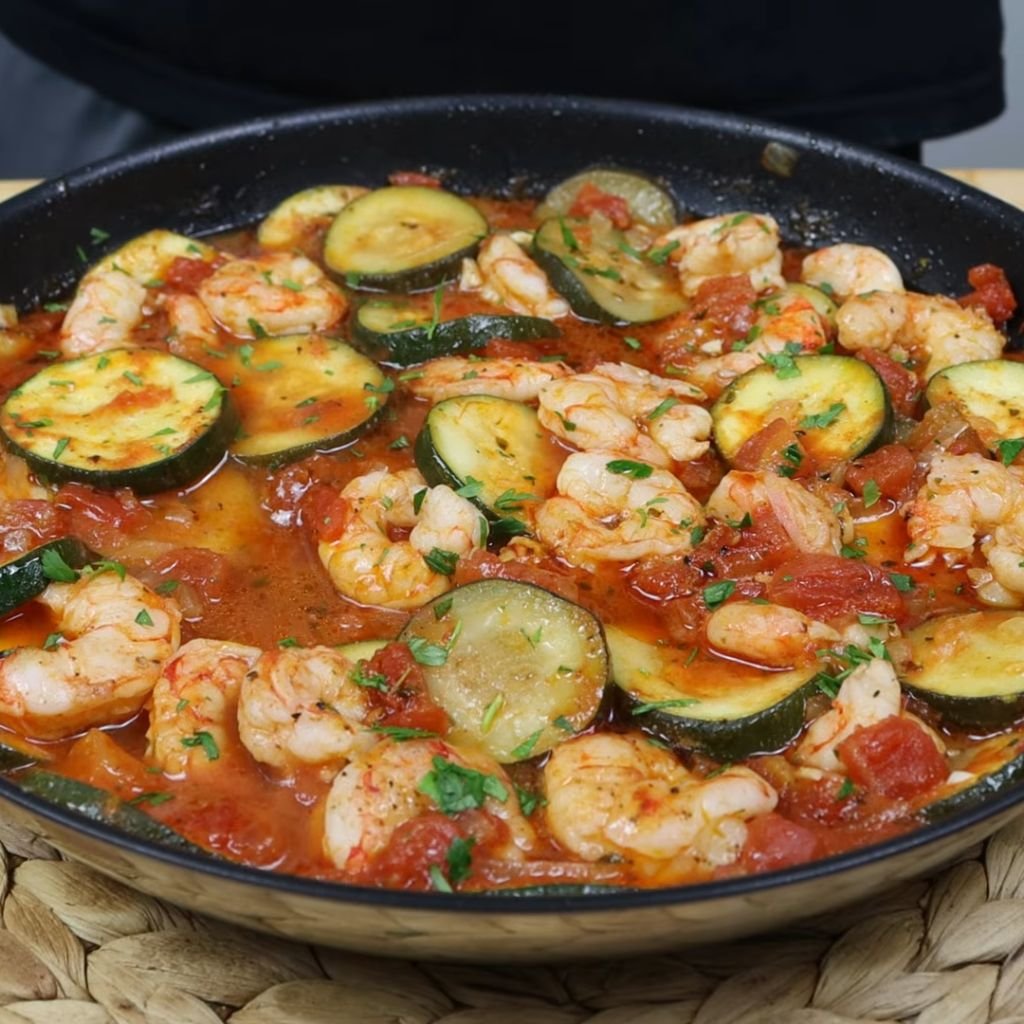
10. Greek Lentil Soup (Fakes)
Prep Time: 10 min | Cook Time: 45 min | Serves: 6
Fakes (pronounced FAH-kehs) is a classic Greek comfort dish that has warmed homes for generations. Brown lentils slow-cook with onion, tomato, and bay leaves until thick and deeply savory. A generous pour of olive oil and a splash of red wine vinegar at the end make this humble soup completely unforgettable.
Ingredients
- 2 cups brown or green lentils, rinsed
- 1 large onion, finely diced
- 4 garlic cloves, minced
- 1 can (14 oz) diced tomatoes
- 3 tablespoons olive oil (plus extra to serve)
- 2 bay leaves
- 1 teaspoon dried oregano
- ½ teaspoon ground cumin
- 6 cups water or vegetable broth
- 2 tablespoons red wine vinegar
- Salt and black pepper to taste
- Crusty bread and extra olive oil to serve
Instructions
Heat 2 tablespoons of olive oil in a large pot or Dutch oven over medium heat. Add the diced onion. Cook the onion slowly, stirring every couple of minutes, for about 8 to 10 minutes. Low, slow cooking turns the onion golden and sweet. This is the flavor base of the soup, so do not rush this step.
Add the minced garlic and stir for 1 minute until it becomes fragrant. Then add the cumin and oregano. Stir the spices into the oil and onion mixture for about 30 seconds to bloom their flavors.
Add the canned diced tomatoes along with their liquid. Stir well and cook for 3 to 4 minutes, letting the tomatoes reduce slightly. The mixture will look thick and fragrant at this point.
Pour in the rinsed lentils and add the water or vegetable broth. Drop in the bay leaves. Give everything a good stir and bring the pot to a strong boil over high heat.
Once boiling, reduce the heat to medium-low. Let the soup simmer, uncovered, for 35 to 40 minutes. Stir occasionally and check the lentils for tenderness after 30 minutes. The lentils should break down slightly and thicken the soup naturally — this is what gives Fakes its characteristic hearty, stew-like consistency.
Remove the bay leaves. Add the red wine vinegar and the remaining tablespoon of olive oil. Stir in the vinegar and taste. The tanginess of the vinegar is the classic finishing touch that lifts the whole soup. Add salt and black pepper to taste.
If the soup is thicker than you prefer, add a little extra water or broth and stir. If you want it thicker, let it simmer uncovered for a few more minutes.
Ladle into deep bowls. Add a drizzle of extra virgin olive oil over each serving and plenty of crusty bread on the side.
Nutrition Highlights
- Lentils are one of the richest plant-based sources of iron and protein
- High in soluble fiber, which supports cholesterol management
- Low in fat and very filling per calorie
- Red wine vinegar supports blood sugar balance after meals
Serving Suggestions
Serve with a side of olives, a chunk of feta cheese, and thick slices of crusty sourdough or whole-grain bread.
11. Mediterranean Chicken and Chickpea Skillet
Prep Time: 10 min | Cook Time: 30 min | Serves: 4
Seared chicken breasts and tender chickpeas come together in a fragrant tomato-herb sauce with a hint of warm spice. Everything cooks in a single skillet, making it a complete dinner with almost no cleanup. Bold flavor, simple ingredients, and ready in 40 minutes.
Ingredients
- 4 boneless, skinless chicken breasts
- 1 can (15 oz) chickpeas, drained and rinsed
- 1 can (14 oz) diced tomatoes
- 1 medium onion, diced
- 4 garlic cloves, minced
- 3 tablespoons olive oil
- 1 teaspoon smoked paprika
- 1 teaspoon cumin
- ½ teaspoon turmeric
- ½ teaspoon ground coriander
- Salt and black pepper to taste
- Fresh parsley and lemon wedges to serve
Instructions
Season the chicken breasts generously on both sides with salt, black pepper, and half of the smoked paprika. Press the seasoning gently into the meat to help it adhere. Allow the chicken to sit at room temperature for about 10 minutes before cooking.
Heat 2 tablespoons of olive oil in a large, wide skillet over medium-high heat. When the oil is shimmering, add the chicken breasts. Sear for 4 to 5 minutes on the first side without moving them — a golden crust forms only when the meat is in contact with the hot pan undisturbed. Flip and sear the other side for another 3 to 4 minutes. The chicken will not be fully cooked through at this stage. Transfer to a plate and set aside.
Reduce the heat to medium. Add the remaining tablespoon of olive oil. Add the onion and cook for 5 minutes, stirring regularly, until softened. Add the garlic and stir for 1 minute.
Stir in the remaining paprika, cumin, turmeric, and coriander. Let the spices cook in the oil for 30 seconds, stirring continuously, until you can smell them becoming aromatic.
Pour in the diced tomatoes with their juice. Stir well and let the sauce cook for 3 minutes to reduce slightly. Add the chickpeas and stir them into the sauce. Season the sauce with salt and pepper.
Return the seared chicken breasts to the skillet. Nestle them into the sauce, spooning some sauce over the top of each piece. Reduce the heat to low, cover the skillet with a lid, and let everything simmer together for 12 to 15 minutes, until the chicken is cooked all the way through and the internal temperature reaches 165°F (74°C).
Remove the lid for the last 3 minutes of cooking to allow the sauce to thicken.
Serve garnished with fresh parsley and lemon wedges for squeezing.
Nutrition Highlights
- One skillet provides lean protein, plant protein, and complex carbs
- Turmeric provides anti-inflammatory curcumin
- Tomatoes and chickpeas together create a nutrient-dense base
- Low in saturated fat and high in dietary fiber
Serving Suggestions
Serve with warm couscous, quinoa, or fluffy white rice to soak up the sauce.
12. Vegetarian Mediterranean Stuffed Eggplant
Prep Time: 20 min | Cook Time: 45 min | Serves: 4
Roasted eggplant halves are hollowed out and filled with a savory mixture of sautéed vegetables, herbs, and feta cheese. Every bite has smoky, creamy, and tangy notes all at once. An elegant, completely vegetarian dinner that does not feel like anything is missing.
Ingredients
- 2 large eggplants, halved lengthwise
- 1 cup cherry tomatoes, quartered
- ½ cup crumbled feta cheese
- ½ cup Kalamata olives, chopped
- 1 small zucchini, finely diced
- 1 small onion, diced
- 3 garlic cloves, minced
- 3 tablespoons olive oil
- 1 teaspoon dried oregano
- ½ teaspoon smoked paprika
- Salt and pepper to taste
- Fresh basil for garnish
Instructions
Preheat the oven to 400°F (200°C). Line a baking sheet with parchment paper.
Using a sharp knife, score the cut side of each eggplant half in a cross-hatch pattern, cutting about ½ inch deep without piercing through the skin. This scoring helps the eggplant cook through evenly and makes it easier to scoop out the flesh later.
Brush the cut sides generously with olive oil and season with salt and pepper. Place the eggplant halves cut-side down on the parchment-lined baking sheet. Roast for 25 to 30 minutes until the flesh is completely soft and the skin is slightly wrinkled. Pressing on the top of each half with a spatula — they should feel very soft and yielding.
Remove the eggplant from the oven and let cool for 10 minutes. Flip them cut-side up. Using a large spoon, carefully scoop out most of the soft flesh, leaving about a ½-inch border of flesh attached to the skin so the shells hold their shape. Coarsely chop the scooped-out flesh and set it aside.
While the eggplant roasts, prepare the filling. Heat 2 tablespoons of olive oil in a skillet over medium heat. Add the onion and cook for 5 minutes. Add the garlic and zucchini and cook for another 4 minutes, stirring often, until the zucchini is soft.
Add the chopped eggplant flesh, cherry tomatoes, olives, oregano, and smoked paprika. Stir everything together and cook for 5 minutes. The filling should be thick and fragrant. Season with salt and pepper, then remove from heat and let it cool for 2 minutes before stirring in half the feta.
Spoon the filling generously into each eggplant shell, mounding it slightly above the rim. Sprinkle the remaining feta over the top of each one.
Return the stuffed eggplants to the oven for 10 to 12 minutes until the feta starts to soften and the tops are golden.
Garnish with fresh basil and serve.
Nutrition Highlights
- Eggplant is rich in nasunin, a potent antioxidant found in the skin
- Feta provides calcium with a smaller saturated fat impact than harder cheeses
- Zucchini is low in calories and high in water content
- Olive oil supports healthy cholesterol levels
Serving Suggestions
Serve alongside a green salad and warm flatbread, or as a starter with lemon-dressed arugula.
13. Lemon Garlic Mediterranean Tilapia
Prep Time: 10 min | Cook Time: 15 min | Serves: 4
Tender tilapia fillets are pan-seared and finished with a vibrant lemon garlic sauce packed with herbs and olive oil. Light, fast, and full of Mediterranean sunshine. This recipe is perfect for weeknights when dinner needs to be on the table fast without skimping on flavor.
Ingredients
- 4 tilapia fillets
- 4 garlic cloves, minced
- Juice of 2 lemons
- Zest of 1 lemon
- 3 tablespoons olive oil
- 1 teaspoon dried oregano
- ½ teaspoon smoked paprika
- 2 tablespoons fresh parsley, chopped
- Salt and black pepper to taste
- Lemon slices to serve
Instructions
Remove the tilapia fillets from the refrigerator 10 minutes before cooking. Bringing the fish closer to room temperature ensures more even cooking. Pat each fillet very dry on both sides using paper towels. Moisture on the surface is the main reason fish sticks to the pan or steams instead of sears.
Season both sides of each fillet with salt, black pepper, oregano, and smoked paprika. Press the seasonings gently into the flesh.
Heat 2 tablespoons of olive oil in a large, non-stick skillet over medium-high heat. The pan needs to be properly hot before the fish goes in — you can test this by holding your hand 3 inches above the pan and feeling the heat radiating upward, or by flicking a tiny drop of water — it should sizzle and evaporate immediately.
Place the tilapia fillets in the hot pan. Do not crowd them. Cook for 3 to 4 minutes on the first side without moving. The fillet should release easily from the pan when it is ready to flip — if it sticks, it needs another minute. Flip carefully with a wide spatula and cook for another 2 to 3 minutes on the second side. Tilapia is done when the flesh is opaque and flakes easily. Transfer to a plate.
Turn the heat down to medium. Add the remaining tablespoon of olive oil to the same pan. Add the minced garlic and cook for about 45 seconds, stirring constantly. Once the garlic is fragrant and just turning golden, add the lemon juice and lemon zest. The sauce will sizzle and reduce slightly. Stir in the chopped parsley.
Pour the lemon garlic sauce directly over the tilapia fillets. Serve with extra lemon slices on the side.
Nutrition Highlights
- Tilapia is a lean, affordable white fish with about 23g of protein per fillet
- Very low in saturated fat
- Garlic and lemon together have immune-boosting and anti-inflammatory properties
- Under 300 calories per serving
Serving Suggestions
Serve over a bed of steamed brown rice, sautéed greens, or with roasted asparagus on the side.
14. Mediterranean White Bean and Kale Stew
Prep Time: 10 min | Cook Time: 30 min | Serves: 4–5
Creamy white beans, hearty kale, and a rosemary-scented tomato broth make this stew a cold-night essential. It is plant-based, filling, and requires only pantry staples. The flavor deepens as it sits, making leftovers even better the next day.
Ingredients
- 2 cans (15 oz each) cannellini beans, drained and rinsed
- 4 cups kale, roughly chopped, stems removed
- 1 can (14 oz) diced tomatoes
- 1 medium onion, diced
- 4 garlic cloves, minced
- 2 sprigs fresh rosemary (or 1 teaspoon dried)
- 3 tablespoons olive oil
- 2 cups vegetable broth
- ½ teaspoon red pepper flakes
- Salt and black pepper to taste
- Juice of half a lemon
- Parmesan or nutritional yeast to serve (optional)
Instructions
Heat the olive oil in a large, deep pot over medium heat. Add the diced onion and cook for 6 to 8 minutes, stirring occasionally, until it is soft and translucent with golden edges. Slow-cooked onion creates a sweet, mellow base that carries the rest of the flavors.
Add the garlic and red pepper flakes. Stir and cook for 1 minute. Add the rosemary sprigs — if using dried rosemary, add it at this stage too. The rosemary will infuse into the oil and become the defining aromatic note of this stew.
Pour in the diced tomatoes and their liquid. Stir to combine. Cook the tomato mixture for 4 to 5 minutes until it thickens slightly. As the tomatoes cook down, they become sweeter and more concentrated in flavor.
Add the cannellini beans and pour in the vegetable broth. Stir everything together. Bring the stew to a boil, then reduce the heat to a steady simmer. Cook for 15 minutes. During this time, smash about a quarter of the beans against the side of the pot using the back of a wooden spoon. This releases their starch and naturally thickens the broth, giving the stew a heartier texture without adding cream or flour.
Add the chopped kale to the pot in batches. Stir each batch in before adding the next. Kale is firmer than spinach and needs 5 to 7 minutes to fully wilt and become tender. Simmer the stew with the kale for 7 minutes.
Remove the rosemary sprigs. Add the lemon juice, stir, and taste. Adjust the seasoning with salt, pepper, and extra lemon as needed.
Ladle into bowls and finish with a drizzle of olive oil. Serve with grated Parmesan or nutritional yeast sprinkled on top, and a generous slice of crusty bread.
Nutrition Highlights
- White beans are packed with plant protein and fiber
- Kale is one of the most nutrient-dense vegetables, high in vitamins A, K, and C
- Rosemary contains rosmarinic acid, an antioxidant with anti-inflammatory properties
- Very low in fat, high in satiety
Serving Suggestions
Serve with toasted sourdough bread rubbed with a clove of raw garlic for classic Italian flair.
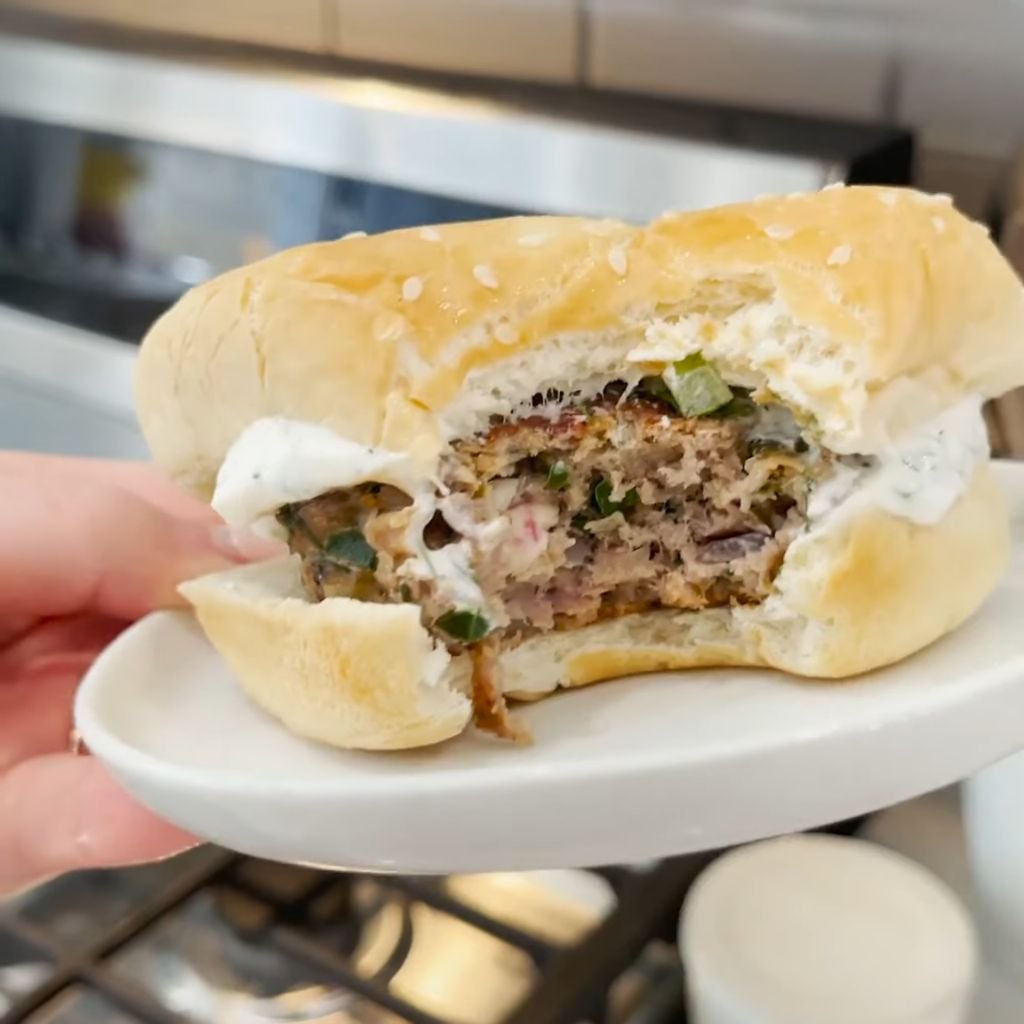
15. Greek Turkey Burgers with Tzatziki
Prep Time: 20 min | Cook Time: 15 min | Serves: 4
Ground turkey patties loaded with spinach, feta, and Greek herbs make these burgers juicy, flavorful, and far lighter than a typical beef burger. Topped with cool, creamy tzatziki and crisp vegetables, each bite delivers a complete Mediterranean experience.
Ingredients
For the burgers:
- 1 lb ground turkey
- ½ cup fresh spinach, finely chopped
- ¼ cup crumbled feta cheese
- 2 garlic cloves, minced
- 1 teaspoon dried oregano
- ½ teaspoon cumin
- Salt and black pepper to taste
- 1 tablespoon olive oil for cooking
For the tzatziki:
- 1 cup plain Greek yogurt
- ½ cucumber, grated and squeezed dry
- 2 garlic cloves, grated
- 1 tablespoon fresh dill (or ½ teaspoon dried)
- 1 tablespoon lemon juice
- Salt to taste
To serve:
- 4 whole wheat burger buns or pita pockets
- Sliced tomato, red onion, romaine lettuce
Instructions
Start by making the tzatziki since it benefits from resting in the refrigerator. Grate the cucumber using the large holes of a box grater. Place the grated cucumber in a clean kitchen towel or several layers of paper towels. Squeeze firmly and repeatedly to remove as much liquid as possible. Excess cucumber moisture will make the tzatziki watery and thin.
In a small bowl, combine the Greek yogurt, squeezed cucumber, grated garlic, dill, and lemon juice. Mix well and season with salt. Cover and refrigerate for at least 20 minutes. The longer it rests, the more the flavors meld together.
For the burger patties, combine the ground turkey, chopped spinach, feta, garlic, oregano, and cumin in a large bowl. Season with salt and pepper. Mix gently with your hands until just combined. Again, avoid overworking the meat to keep the burgers tender.
Divide the mixture into four equal portions. Shape each into a round patty about ¾ inch thick. Press a small indentation in the center of each patty with your thumb — this prevents the burgers from puffing up and doming during cooking, which helps them cook evenly and sit flat in the bun.
Heat the olive oil in a large skillet or grill pan over medium heat. Add the patties and cook for 5 to 6 minutes per side without pressing them down. Pressing squeezes out the juices and dries out the burger. The internal temperature should reach 165°F (74°C) when fully cooked.
Toast the burger buns or pita pockets lightly in a toaster or dry pan.
Assemble each burger: spread a generous layer of tzatziki on the bottom bun. Add a patty, then sliced tomato, red onion, and romaine lettuce. Add another dollop of tzatziki on top before closing. Serve immediately.
Nutrition Highlights
- Turkey patties provide 28g of protein per serving with less fat than beef
- Greek yogurt in the tzatziki adds probiotics and calcium
- Spinach inside the burger adds iron and folic acid
- Whole wheat bun increases fiber content
Serving Suggestions
Serve with a side of baked sweet potato fries or a Greek-style cucumber and olive salad.
16. Mediterranean Cauliflower Rice Bowl
Prep Time: 15 min | Cook Time: 20 min | Serves: 4
Cauliflower rice takes the place of regular rice in this low-carb Mediterranean bowl, making it lighter without losing any of the flavor. Topped with roasted vegetables, creamy hummus, and a sharp lemon dressing, it is satisfying, colorful, and completely plant-based.
Ingredients
- 1 large head of cauliflower, riced (or 4 cups store-bought cauliflower rice)
- 1 cup cherry tomatoes, halved
- 1 cucumber, diced
- ½ red onion, finely sliced
- ½ cup Kalamata olives
- ½ cup hummus
- ½ cup crumbled feta
- 2 tablespoons olive oil
- 1 teaspoon cumin
- Salt and pepper to taste
Lemon herb dressing:
- 3 tablespoons olive oil
- 2 tablespoons lemon juice
- 1 teaspoon dried oregano
- 1 garlic clove, minced
- Salt and pepper
Instructions
To make fresh cauliflower rice, cut the head of cauliflower into large florets. Working in batches, pulse the florets in a food processor for 10 to 15 seconds until they resemble grains of rice. Do not over-process or the cauliflower will become watery and mushy.
If using store-bought cauliflower rice, open the package and pat it dry with paper towels before cooking. Excess moisture is the main issue when cooking cauliflower rice — too much water turns it soggy instead of light and fluffy.
Heat 2 tablespoons of olive oil in a large skillet over medium-high heat. Add the cauliflower rice and spread it out in an even layer. Let it cook undisturbed for 3 to 4 minutes. You want some light golden color to develop on the bottom — this toasting step adds nuttiness to the cauliflower. Season with cumin, salt, and pepper.
Stir the cauliflower rice and cook for another 3 to 4 minutes, stirring occasionally, until tender but not soft. Remove from heat and set aside.
Prepare the lemon herb dressing by whisking all the dressing ingredients together in a small bowl until emulsified. Taste and adjust the lemon or salt as needed.
To assemble the bowls, divide the warm cauliflower rice among four bowls. Arrange the cherry tomatoes, cucumber, red onion, and olives over the cauliflower rice in individual sections. Spoon a generous portion of hummus to one side of each bowl. Scatter feta over the top of everything. Drizzle the lemon herb dressing liberally over each bowl just before serving.
Serve immediately while the cauliflower rice is still warm.
Nutrition Highlights
- Cauliflower rice is very low in carbohydrates compared to regular rice
- Hummus provides plant protein and tahini-derived calcium
- The combination of fiber, protein, and healthy fats in each bowl supports sustained energy
- One serving contains fewer than 400 calories
Serving Suggestions
Add a soft-boiled egg, grilled chicken, or falafel on top for extra protein.
17. Mediterranean Baked Chicken Thighs
Prep Time: 10 min | Cook Time: 40 min | Serves: 4
Bone-in chicken thighs are coated in a rich Mediterranean spice paste and baked until the skin is deeply caramelized and the meat is juicy enough to pull away from the bone with ease. Simple to prepare but generous in flavor, this is the kind of recipe that becomes a household staple quickly.
Ingredients
- 4 bone-in, skin-on chicken thighs
- 3 tablespoons olive oil
- 4 garlic cloves, minced
- Juice and zest of 1 lemon
- 1 teaspoon smoked paprika
- 1 teaspoon dried oregano
- ½ teaspoon cumin
- ½ teaspoon turmeric
- ½ teaspoon ground coriander
- Salt and black pepper to taste
- Fresh parsley and lemon wedges to serve
Instructions
Preheat the oven to 425°F (220°C). Line a baking sheet or oven-safe skillet with foil for easier cleanup, or use a bare cast iron pan for even crispier skin.
In a small bowl, combine the olive oil, minced garlic, lemon juice, lemon zest, smoked paprika, oregano, cumin, turmeric, and coriander. Stir until a thick, fragrant paste forms. Taste the paste and add salt and pepper generously — this is your entire seasoning for the chicken, so it needs to be well-seasoned.
Using clean hands, loosen the skin on each chicken thigh by gently separating it from the flesh with your fingers, being careful not to tear it. Spread about a third of the spice paste directly under the skin, pushing it as far as you can toward the center of the thigh. The spices under the skin season the meat directly and protect it from drying out.
Rub the remaining spice paste over the outside of the skin and underneath the thigh on the bone side. Make sure every surface is coated. Place the chicken thighs skin-side up on the prepared pan with a little space between each piece.
Slide the pan into the hot oven. Bake for 35 to 40 minutes. Do not open the oven during the first 25 minutes — the steady heat is what builds the golden, lacquered skin. After 35 minutes, check the skin color. It should be deep golden brown and slightly blistered in spots. The internal temperature should read 165°F (74°C) at the thickest part near the bone.
For extra-crispy skin, switch the oven to broil for the final 3 minutes. Watch carefully and do not walk away — broiling goes from golden to burnt very quickly.
Remove from the oven and let the chicken rest for 5 minutes before serving. Garnish with fresh parsley and serve with lemon wedges.
Nutrition Highlights
- Chicken thighs are richer in iron and zinc than chicken breast
- Skin-on cooking keeps the meat moist without added butter or cream
- Turmeric and cumin together provide significant anti-inflammatory benefits
- Bone-in cooking retains more nutrients in the meat
Serving Suggestions
Serve alongside roasted potatoes, steamed couscous, or a simple Greek salad.
18. Tuscan White Bean and Vegetable Skillet
Prep Time: 10 min | Cook Time: 25 min | Serves: 4
This hearty Tuscan-style skillet combines white beans, seasonal vegetables, and a fragrant garlic-tomato broth in one pan. Creamy beans and tender vegetables make each spoonful rich and warming. Completely vegetarian and ready in under 35 minutes.
Ingredients
- 2 cans (15 oz each) cannellini beans, drained and rinsed
- 1 medium zucchini, diced
- 1 red bell pepper, diced
- 2 cups baby spinach
- 1 can (14 oz) diced tomatoes
- 1 medium onion, diced
- 4 garlic cloves, minced
- 3 tablespoons olive oil
- ½ cup vegetable broth
- 1 teaspoon Italian seasoning
- ½ teaspoon red pepper flakes
- Salt and black pepper to taste
- Fresh basil and Parmesan to serve
Instructions
Heat the olive oil in a large skillet over medium heat. Add the onion and cook for 5 minutes until soft. Add the garlic and red pepper flakes and cook for 1 minute, stirring constantly.
Add the diced zucchini and bell pepper. Stir them into the onion and garlic mixture. Cook for 4 to 5 minutes, stirring occasionally, until the vegetables soften and start to gain a little color on their edges. The bell pepper will sweeten as it cooks, adding natural depth to the skillet.
Pour in the diced tomatoes with their liquid. Add the Italian seasoning and stir everything together. Allow the tomatoes to cook for 3 to 4 minutes, stirring occasionally, until they reduce slightly and the sauce thickens.
Add the cannellini beans and pour in the vegetable broth. Stir to combine everything. As before, use the back of a wooden spoon to mash about a quarter of the beans against the side of the skillet — this technique thickens the dish organically. Bring the mixture to a gentle simmer. Cook for 10 minutes, stirring occasionally, so the beans absorb the flavors of the sauce.
Add the baby spinach in two or three handfuls, stirring it in between additions. The spinach will wilt into the skillet within 2 minutes. Season generously with salt and black pepper. Taste the sauce and adjust seasoning as needed.
Remove the skillet from heat. Let it rest for 2 minutes. Serve topped with fresh basil leaves and grated Parmesan if desired.
Nutrition Highlights
- Cannellini beans are one of the highest-fiber legumes available
- Bell pepper is very high in vitamin C
- Spinach adds folate and iron to the dish
- A filling, high-fiber meal that supports gut health and sustained fullness
Serving Suggestions
Serve with thick slices of toasted sourdough rubbed with garlic, or alongside a bowl of simple tomato soup.
19. Mediterranean Tuna and Cannellini Bean Salad
Prep Time: 15 min | Cook Time: 0 min | Serves: 4
No cooking required for this one. Canned tuna and creamy white beans come together with crisp celery, red onion, olives, and a bright lemon dressing. Protein-packed, refreshing, and ready in under 15 minutes. A perfect no-heat dinner for warm evenings.
Ingredients
- 2 cans (5 oz each) tuna in olive oil, drained
- 1 can (15 oz) cannellini beans, drained and rinsed
- 3 stalks celery, thinly sliced
- ½ red onion, finely diced
- ½ cup Kalamata olives, halved
- 1 cup cherry tomatoes, halved
- 2 tablespoons capers, drained
- 3 tablespoons fresh flat-leaf parsley, chopped
Dressing:
- 4 tablespoons extra virgin olive oil
- Juice of 1½ lemons
- 1 teaspoon Dijon mustard
- 1 small garlic clove, grated
- Salt and black pepper to taste
Instructions
Start by preparing the dressing. In a small bowl or jar, whisk together the olive oil, fresh lemon juice, Dijon mustard, grated garlic, salt, and black pepper. The mustard acts as an emulsifier, keeping the dressing smooth and well-combined rather than separating into layers of oil and acid. Set aside.
Drain the canned tuna well. If the tuna is packed in larger chunks, break it apart gently with a fork into bite-sized flakes. You still want some texture — large, chunky pieces are more satisfying to eat than fine crumbles.
Drain and rinse the cannellini beans under cold running water. Rinsing removes excess sodium from the canning liquid. Shake them well in the colander to remove as much water as possible before adding them to the salad.
In a large mixing bowl, combine the tuna, cannellini beans, celery, red onion, olives, cherry tomatoes, and capers. Add the chopped parsley and toss everything gently to distribute the ingredients evenly throughout the bowl.
Pour the dressing over the salad. Toss gently once more until everything is lightly coated. Be careful not to mash the beans while mixing — you want them to stay whole for the best texture.
Taste the salad and adjust the seasoning with more salt, lemon juice, or black pepper as needed. Let the salad rest for 5 minutes before serving so the flavors can settle and develop.
Serve at room temperature or lightly chilled, with toasted bread on the side.
Nutrition Highlights
- Tuna is high in protein and omega-3 fatty acids
- Cannellini beans provide fiber and plant-based protein
- Capers are a rich source of antioxidants including quercetin
- The salad requires zero cooking and produces zero food waste
Serving Suggestions
Serve on top of a bed of arugula or in toasted whole wheat pita pockets as a hearty sandwich alternative.
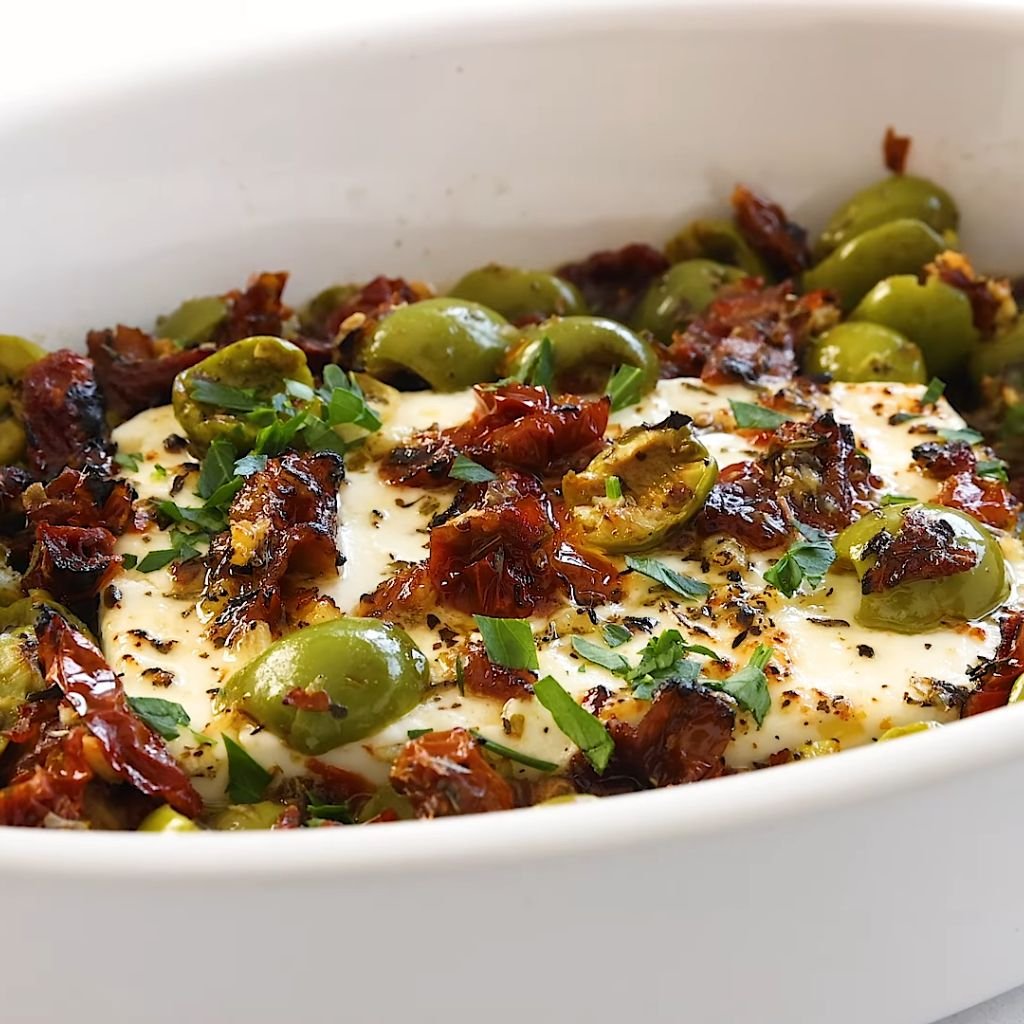
20. Greek-Inspired Vegetable and Feta Bake
Prep Time: 20 min | Cook Time: 40 min | Serves: 4–5
A celebration of simple, wholesome vegetables baked together with chunks of salty feta until golden and fragrant. Tomatoes, zucchini, bell peppers, and olives melt together in olive oil and Greek herbs, creating a dish that is equal parts stunning to look at and deeply satisfying to eat.
Ingredients
- 2 medium zucchini, sliced into rounds
- 2 bell peppers (one red, one yellow), cut into chunks
- 2 cups cherry tomatoes
- 1 large red onion, cut into wedges
- ½ cup Kalamata olives
- 200g (7 oz) feta cheese, cut into thick cubes
- 4 tablespoons olive oil
- 4 garlic cloves, thinly sliced
- 1½ teaspoons dried oregano
- ½ teaspoon dried thyme
- ½ teaspoon red pepper flakes
- Salt and black pepper to taste
- Fresh basil and a drizzle of olive oil to finish
Instructions
Preheat the oven to 400°F (200°C). Choose a large, deep baking dish — a 9×13 inch pan or a large ceramic roasting dish works well. The depth of the dish helps contain the juices that the vegetables will release as they roast.
Place all the vegetables — zucchini, bell peppers, cherry tomatoes, red onion wedges, and olives — into the baking dish. Add the sliced garlic. Drizzle 3 tablespoons of olive oil over everything. Sprinkle the oregano, thyme, and red pepper flakes on top. Season generously with salt and black pepper.
Using clean hands or two large spoons, toss everything together directly in the baking dish until the vegetables are evenly coated with the oil and seasonings. Spread them out in as even a layer as possible — overlapping is fine, but try to avoid too many large gaps or piles.
Cover the baking dish tightly with aluminum foil. Bake for 20 minutes covered. The steam trapped under the foil begins to soften the vegetables and draws out their natural juices, creating a fragrant broth at the bottom of the dish.
After 20 minutes, remove the foil. Tuck the cubes of feta cheese in between and on top of the vegetables. Drizzle the remaining tablespoon of olive oil over the feta specifically — this helps the feta soften and develop golden edges as it bakes.
Return the dish to the oven, uncovered, and bake for another 20 minutes. The vegetables will caramelize at the edges, the tomatoes will burst and release their sweet juices, and the feta will soften and turn golden on top.
Check the vegetables at the 35-minute mark. The peppers and zucchini should be completely tender and slightly charred at the tips. If you prefer more color, add 3 to 4 minutes under the broiler.
Remove from the oven and let the bake rest for 5 minutes. Scatter fresh basil leaves over the top and finish with a final drizzle of good quality extra virgin olive oil. Serve directly from the baking dish.
Nutrition Highlights
- Highly concentrated source of vitamins A and C from multiple vegetables
- Feta adds satisfying saltiness and calcium in moderate amounts
- Olive oil provides polyphenols, among the most studied antioxidants in nutrition science
- Naturally gluten-free, low in calories, and high in water-rich vegetables that support hydration
Serving Suggestions
Serve with warm flatbread or crusty sourdough for scooping up the pan juices, or alongside a bowl of herbed couscous.
Tips for Creating Balanced Mediterranean Meals
Building healthy Mediterranean dinner recipes into a weekly routine is easier than it sounds. These practical tips will help every meal feel complete and nourishing:
1. Build your plate around vegetables first. Fill at least half your plate with vegetables before adding protein or grains. This keeps the calorie count reasonable while maximizing nutrients and fiber.
2. Keep portions sensible. A serving of protein the size of your palm, a cup of cooked grains, and a large portion of vegetables is the right balance for most adults. Mediterranean eating is not about restriction — it is about proportion.
3. Choose baking, grilling, and sautéing over frying. These methods preserve the natural flavors of ingredients without adding unnecessary calories. A drizzle of olive oil in a hot pan is all you need to build excellent flavor.
4. Prepare components on Sunday for faster weeknight dinners. Cook a large batch of quinoa, lentils, or chickpeas. Roast a tray of mixed vegetables. Store them separately in the refrigerator for up to 5 days. On busy evenings, dinner comes together in 10 minutes.
5. Add more vegetables with easy swaps. Swap pasta for zucchini noodles, use cauliflower rice instead of white rice, add a handful of spinach to any sauce or stew, or toss extra cherry tomatoes onto any baking sheet. Small additions make a big nutritional difference over time.
6. Use herbs and citrus to add flavor without relying on salt. A squeeze of lemon or a handful of fresh herbs can do more for a dish than an extra pinch of salt. This keeps sodium levels in check while keeping meals vibrant.
7. Include a healthy fat in every meal. A drizzle of olive oil, a small handful of walnuts, a few olives, or a spoonful of hummus all count. Healthy fats help the body absorb fat-soluble vitamins from vegetables.
Conclusion
Healthy Mediterranean dinner recipes offer something that most diets cannot: meals that are genuinely good for your body and genuinely enjoyable to eat at the same time. From grilled lemon herb chicken to warm lentil soup and vibrant veggie bakes, the 20 recipes in this collection cover every season, every schedule, and every preference. These are not complicated or expensive meals. Most require fewer than 10 ingredients, a single pan, and under an hour from start to finish.
The Mediterranean diet is ranked as the top eating pattern year after year for good reason. It is built on whole, real foods that have nourished entire populations for centuries. Research consistently links it to lower rates of heart disease, improved brain function, better blood sugar management, and longer, healthier lives.
Adding even two or three of these dinners to your weekly meal plan is a meaningful step forward. You do not need to overhaul everything at once. Start with one recipe this week. Try a different one the week after. Over time, these colorful, herb-scented, olive-oil-drizzled meals become a natural part of how you eat — not a chore, but something to look forward to.
Good food and good health were never meant to be separate things. These healthy Mediterranean dinner recipes prove that the two go hand in hand every single night of the week.