
A single-serving ice cream maker changes how frozen desserts get made at home. The Dash My Mug Ice Cream Maker turns simple ingredients into creamy, ready-to-eat treats in under thirty minutes, no ice cream base needed overnight and no bulky machine taking up counter space. For anyone craving a small treat without commitment to a full batch, this compact appliance solves that problem instantly.
Dairy-free ice cream keeps gaining fans because more people choose plant-based living, deal with lactose intolerance, or simply enjoy the lighter texture that coconut, almond, and oat milk bring to frozen desserts. These alternatives create rich, smooth results without heavy cream, and flavor combinations feel nearly endless once dairy leaves the equation.
Making frozen desserts at home also brings real benefits. Control over sugar levels, ingredient quality, and portion size beats anything found in a grocery freezer aisle. Fresh ingredients mean better flavor, and homemade batches skip preservatives common in store-bought pints.
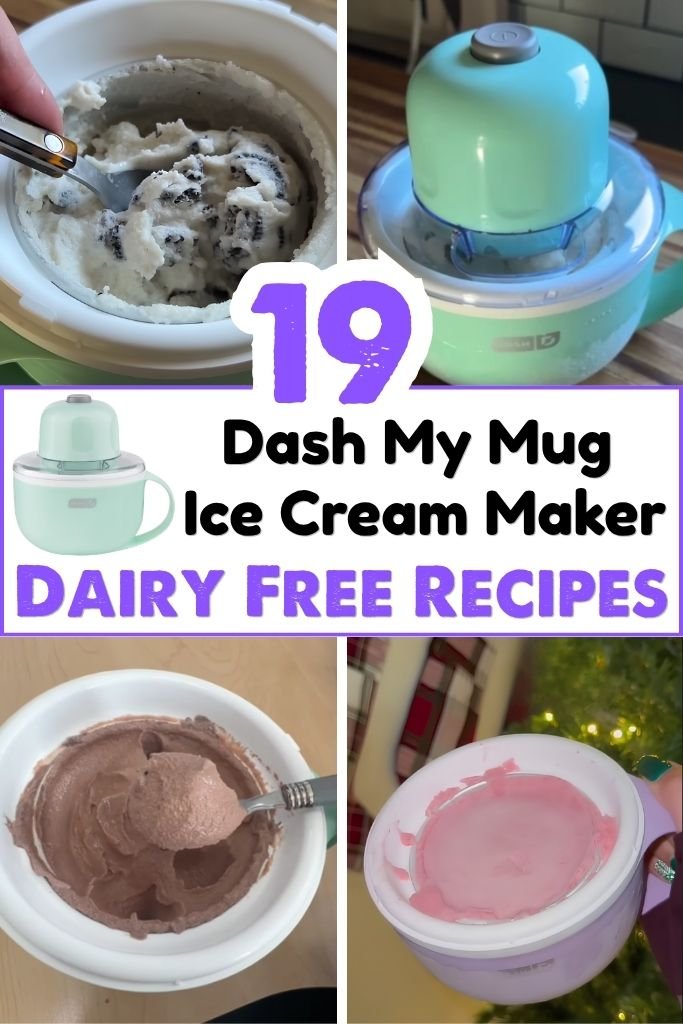
This collection of Dash My Mug ice cream maker dairy free recipes brings together nineteen flavors built for that little machine, each one simple enough for a weeknight craving.
Why You’ll Love Making Dairy-Free Ice Cream with the Dash My Mug
Making frozen treats at home might seem intimidating or difficult at first glance, but with this small machine, it’s actually quite the opposite!
1. Perfect single-serving portions – Each batch fills exactly one mug, so nothing sits in the freezer going to waste and portion control stays effortless.
2. Quick preparation – Mixing and churning happen together, meaning a fresh batch turns from ingredients into dessert in around twenty to thirty minutes.
3. Beginner-friendly – No prior experience with frozen desserts is required; the machine handles the churning work while the cook focuses on flavor choices.
4. Budget-friendly – Basic pantry staples like coconut milk, oat milk, and fruit replace expensive store-bought pints, saving money over repeated grocery runs.
5. Endless flavor combinations – Swapping plant-based milks, mix-ins, and toppings keeps every batch different, so boredom never becomes a problem.
1. Classic Vanilla Coconut Ice Cream
Prep Time: 10 minutes | Churn Time: 20-25 minutes | Serve: 1
A simple base built on full-fat coconut milk and real vanilla, this flavor works as a starting point for nearly every other recipe in this collection. Sweetened lightly with maple syrup, it delivers a smooth, rich texture that tastes close to traditional soft-serve, minus any dairy ingredients at all.
Ingredients
- ½ cup full-fat coconut milk
- 2 tablespoons maple syrup
- ½ teaspoon pure vanilla extract
- Pinch of sea salt
- ¼ teaspoon cornstarch (optional, for extra creaminess)
Instructions
Begin by pouring the coconut milk into a small mixing bowl, whisking it thoroughly to break down any separated fat that may have settled at the top of the can. A smooth, uniform liquid at this stage prevents lumps later in the churning process. Add the maple syrup next, stirring until it fully dissolves into the coconut milk without any streaks remaining visible.
Sprinkle in the pinch of sea salt, which balances the sweetness and brings out the vanilla flavor more clearly than sugar alone could manage. Pour in the vanilla extract and whisk again for about fifteen seconds, making sure every part of the mixture carries that fragrant, warm aroma evenly.
For those wanting an extra creamy result, dissolve the cornstarch in one teaspoon of water separately before whisking it into the base; this small step thickens the final texture slightly and helps prevent ice crystals from forming during freezing. Skip this addition for a lighter, more traditional coconut ice cream consistency.
Once the mixture reaches a smooth and even consistency, pour it directly into the Dash My Mug freezer bowl, which should already be pre-frozen according to the manufacturer’s instructions, typically for at least eight hours beforehand. Attach the mixing paddle and lock the lid securely into place before starting the churn cycle.
Let the machine run for twenty to twenty-five minutes, checking the texture around the eighteen-minute mark. The mixture should thicken noticeably and take on a soft-serve consistency, pulling away slightly from the sides of the bowl as it churns. Avoid opening the lid too early, since heat escaping can slow down the freezing process.
Once churning finishes, scoop the finished ice cream immediately for a soft-serve texture, or transfer it into a small airtight container and place it in the freezer for thirty to forty-five minutes for a firmer, scoopable consistency. Serve plain or topped with shredded coconut for extra texture.
Pro Tips
- Chill the coconut milk in the refrigerator overnight before mixing for a colder starting base, which shortens overall churn time noticeably.
- Use canned coconut milk rather than carton varieties, since canned versions carry higher fat content and produce creamier results.
Flavor Variations
- Stir in toasted coconut flakes during the last two minutes of churning for added crunch.
- Swap vanilla extract for almond extract to create a completely different flavor profile using the same base recipe.
2. Chocolate Almond Milk Ice Cream
Prep Time: 8 minutes | Churn Time: 20-25 minutes | Serve: 1
Rich cocoa powder meets creamy almond milk in this deep, chocolatey treat built for anyone craving dessert without dairy. Unsweetened almond milk keeps the calorie count reasonable while cocoa powder delivers bold flavor that rivals traditional chocolate ice cream, made possible entirely through the Dash My Mug’s compact churning system.
Ingredients
- ½ cup unsweetened almond milk (well shaken)
- 2 tablespoons unsweetened cocoa powder
- 2 tablespoons brown sugar
- ½ teaspoon vanilla extract
- 1 tablespoon almond butter
- Pinch of sea salt
Instructions
Start by warming the almond milk slightly, either on the stovetop over low heat or in short bursts in the microwave, just enough to make dissolving the cocoa powder easier. Avoid bringing it to a full simmer; lukewarm liquid works best for this step. Pour the warmed almond milk into a mixing bowl and sift the cocoa powder over the top to prevent clumping.
Whisk the cocoa powder into the almond milk vigorously, working out any small lumps until the mixture turns a smooth, deep brown color with no dry powder remaining visible on the surface. Add the brown sugar next, continuing to whisk until it dissolves completely, which usually takes around one minute of steady stirring.
Spoon in the almond butter, choosing a natural, unsweetened variety for the best flavor balance. Whisk thoroughly until the almond butter blends seamlessly into the chocolate mixture, adding a subtle nutty richness and a slightly thicker body to the final base. Stir in the vanilla extract and sea salt, mixing one final time to combine everything evenly.
Allow the mixture to cool to room temperature before pouring it into the pre-frozen Dash My Mug bowl; adding a warm mixture directly to the frozen bowl can shorten the bowl’s effectiveness and slow the churning process considerably. Once cooled, pour the chocolate base into the freezer bowl, attach the paddle, and secure the lid.
Run the churn cycle for twenty to twenty-five minutes. Around the fifteen-minute point, the mixture should start thickening and darkening slightly in color as air incorporates into the base. Continue churning until the texture resembles thick pudding that holds its shape when lifted with a spoon.
Once finished, serve the ice cream right away for a soft, fudgy texture, or freeze it in a covered container for thirty minutes for a firmer scoop. The almond butter helps keep the texture from turning rock-hard even after extended freezer time, making leftovers easy to enjoy later.
Pro Tips
- Use dark cocoa powder for a more intense, bittersweet chocolate flavor instead of standard unsweetened varieties.
- Add a few dairy-free chocolate chips during the last three minutes of churning for extra texture and bursts of melted chocolate throughout.
3. Strawberry Coconut Ice Cream
Prep Time: 10 minutes | Churn Time: 20-25 minutes | Serve: 1
Fresh strawberries blended into a coconut milk base create a naturally pink, fruity dessert bursting with real berry flavor. No artificial coloring or flavoring is needed here, since ripe strawberries alone provide enough sweetness and color to make this recipe both simple and satisfying from the very first spoonful.
Ingredients
- ½ cup fresh strawberries, hulled and chopped
- ⅓ cup full-fat coconut milk
- 1 tablespoon honey or maple syrup
- ½ teaspoon lemon juice
- Pinch of sea salt
Instructions
Wash the strawberries thoroughly under cold water, then remove the green tops and slice each berry into smaller pieces to make blending easier. Place the chopped strawberries into a blender or food processor along with the lemon juice, which helps brighten the fruit’s natural flavor and prevents the mixture from tasting flat once frozen.
Blend the strawberries and lemon juice on high speed until completely smooth, scraping down the sides of the blender halfway through to catch any larger pieces that escape the blades. The goal is a silky, seed-free puree, though a few small seeds remaining are perfectly fine and add a bit of natural texture.
Pour the coconut milk into the blender with the strawberry puree, along with the honey or maple syrup and the pinch of sea salt. Blend again for another twenty to thirty seconds until the entire mixture turns a uniform, pale pink color with no streaks of white coconut milk remaining visible anywhere in the base.
Taste the mixture at this stage and adjust sweetness if needed, keeping in mind that freezing slightly mutes sweetness, so the base should taste a touch sweeter than desired for the final result. Pour the finished mixture into the pre-frozen Dash My Mug bowl, attach the paddle, and lock the lid firmly into place before beginning the churn cycle.
Churn the mixture for twenty to twenty-five minutes, watching closely after the fifteen-minute mark since fruit-based bases sometimes thicken faster than plain vanilla or chocolate versions due to natural fruit sugars. The finished texture should look thick, glossy, and pale pink, holding soft peaks similar to whipped cream once fully churned.
Serve immediately for a soft-serve consistency bursting with fresh berry flavor, or transfer to a small container and freeze for thirty to forty-five minutes for a firmer scoop. Fresh strawberry slices on top make a simple, colorful garnish that matches the flavor inside perfectly.
Pro Tips
- Use very ripe, in-season strawberries for the best natural sweetness and deepest pink color throughout the finished dessert.
- Freeze the strawberries for fifteen minutes before blending to help the base chill faster and reduce overall churn time slightly.
4. Mango Coconut Sorbet
Prep Time: 10 minutes | Churn Time: 20-25 minutes | Serve: 1
Sweet, tropical mango blends with coconut milk to create a bright, refreshing sorbet-style treat perfect for warm afternoons. Naturally sweet ripe mango means less added sugar is needed, and the tropical pairing with coconut brings a vacation-like flavor combination without any dairy ingredients involved at all.
Ingredients
- ¾ cup ripe mango, peeled and cubed
- ¼ cup coconut milk
- 1 tablespoon lime juice
- 1 tablespoon agave syrup
- Pinch of sea salt
Instructions
Peel a ripe mango carefully, cutting away the skin with a sharp knife before slicing the flesh away from the large flat pit in the center. Cube the mango flesh into small chunks, discarding any fibrous or overly firm sections that would resist blending smoothly later in the process.
Place the mango chunks into a blender along with the lime juice, which cuts through the fruit’s natural sweetness and adds a slight tang that keeps the finished sorbet from tasting overly sugary. Blend on high speed until the mango turns into a completely smooth puree, pausing to scrape down the sides as needed to catch any larger pieces.
Add the coconut milk and agave syrup to the blender, along with the pinch of sea salt. Blend again until the entire mixture becomes uniform in color and texture, with no separation visible between the mango puree and the coconut milk base. The finished mixture should look like a pale orange, silky liquid.
Taste the base and adjust sweetness with additional agave if the mango was not fully ripe, keeping in mind that under-ripe mango tends to taste more tart once frozen. Pour the finished mixture into the pre-frozen Dash My Mug bowl, attach the paddle securely, and close the lid before starting the churn cycle.
Churn for twenty to twenty-five minutes, checking around the fifteen-minute mark since fruit purees with higher water content sometimes take a bit longer to firm up compared to dairy-free bases built on nut milks alone. The finished sorbet should look thick and hold its shape softly when a spoon is dragged through the surface.
Serve immediately for the brightest, freshest flavor and a soft, slushy texture, or transfer to a container and freeze for twenty to thirty minutes for a firmer, more traditional sorbet consistency. This flavor works especially well on hot days when a lighter, fruitier dessert feels more appealing than a rich, creamy one.
Pro Tips
- Choose mangoes that give slightly under gentle pressure, since fully ripe fruit produces the smoothest puree and best natural sweetness.
- Add a few fresh mint leaves to the blender for a subtle herbal note that pairs nicely with tropical mango flavor.
5. Peanut Butter Banana Ice Cream
Prep Time: 8 minutes | Churn Time: 20-25 minutes | Serve: 1
Ripe banana and creamy peanut butter combine into a naturally sweet, protein-packed treat that tastes indulgent without needing much added sugar at all. The banana’s natural creaminess pairs beautifully with peanut butter’s richness, creating a dessert that feels closer to a milkshake than a typical frozen treat.
Ingredients
- 1 medium ripe banana, sliced and frozen
- ¼ cup unsweetened almond milk
- 2 tablespoons natural peanut butter
- 1 teaspoon maple syrup
- Pinch of cinnamon
Instructions
Begin the night before by peeling a ripe banana, slicing it into small rounds, and placing the pieces into a freezer bag or container overnight. Frozen banana slices form the backbone of this recipe’s creamy texture, so skipping this step will result in a thinner, less satisfying final product once churned.
The following day, place the frozen banana slices into a blender along with the almond milk. Blend on low speed initially, increasing gradually as the banana breaks down, since frozen fruit can sometimes strain a blender motor if pushed too hard right from the start. Pause occasionally to scrape down the sides.
Once the banana reaches a smooth, thick consistency similar to soft-serve, add the peanut butter directly into the blender. Choose a natural variety without added sugar or hydrogenated oils for the cleanest flavor and smoothest texture. Blend again until the peanut butter fully incorporates, leaving no streaks or clumps visible anywhere in the mixture.
Add the maple syrup and cinnamon, blending one final time to combine everything into a uniform, pale tan mixture. Taste at this stage, since ripe bananas vary in natural sweetness, and adjust the maple syrup slightly if a sweeter result feels necessary before moving forward with the churning process.
Pour the finished mixture into the pre-frozen Dash My Mug bowl. Because the base already starts partially frozen from the banana, this recipe often churns slightly faster than others in the collection. Attach the paddle, secure the lid, and run the churn cycle for eighteen to twenty-two minutes, checking texture a few minutes early.
The mixture should thicken into a rich, creamy consistency resembling traditional peanut butter ice cream, holding soft peaks when tested with a spoon. Serve right away for the creamiest texture, or freeze for fifteen to twenty minutes for a slightly firmer scoop, since the banana base tends to stay soft even after chilling further.
Pro Tips
- Freeze overripe, spotted bananas for the sweetest natural flavor, since spots indicate higher natural sugar content within the fruit.
- Drizzle extra peanut butter over the top before serving and swirl gently with a spoon for a marbled visual effect.
6. Blueberry Oat Milk Ice Cream
Prep Time: 10 minutes | Churn Time: 20-25 minutes | Serve: 1
Blueberries bring deep purple color and antioxidant-rich flavor to this creamy oat milk based treat, offering a slightly different texture than coconut milk versions thanks to oat milk’s naturally thinner, smoother consistency. This combination results in a lighter dessert with a fresh, berry-forward flavor throughout.
Ingredients
- ½ cup fresh or frozen blueberries
- ⅓ cup oat milk
- 1 tablespoon maple syrup
- ½ teaspoon lemon zest
- Pinch of sea salt
Instructions
Rinse fresh blueberries under cold water if using them, or measure out frozen blueberries directly if that option is more convenient. Place the blueberries into a small saucepan over medium-low heat along with one tablespoon of water, cooking gently for about five minutes until the berries soften and begin releasing their natural juices into the pan.
Mash the softened blueberries lightly with a fork or the back of a spoon while they continue cooking, breaking down the skins so the mixture turns into a chunky, deep purple compote. Remove the pan from heat once the mixture thickens slightly and let it cool for about ten minutes before moving to the next step.
Pour the oat milk into a blender along with the cooled blueberry compote, maple syrup, lemon zest, and sea salt. Blend on high speed until the mixture becomes completely smooth and uniform in color, with no chunks of blueberry skin remaining visible throughout the base. This step usually takes around thirty seconds of steady blending.
Taste the mixture and adjust sweetness if needed, since blueberries vary in natural sugar content depending on ripeness and season. The lemon zest should provide a subtle brightness without overpowering the berry flavor; add a touch more if the mixture tastes flat rather than fresh.
Pour the finished base into the pre-frozen Dash My Mug bowl, attach the paddle, and secure the lid tightly before beginning the churn cycle. Oat milk tends to churn slightly differently than coconut milk due to its thinner consistency, so expect a slightly softer final texture compared to coconut-based recipes in this collection.
Churn for twenty to twenty-five minutes, checking around the eighteen-minute mark for thickness. The finished ice cream should hold a soft, scoopable texture with visible flecks of purple blueberry throughout. Serve immediately for the best texture, or freeze for thirty minutes in a covered container for a firmer result that holds its shape longer.
Pro Tips
- Reserve a small spoonful of blueberry compote before blending and swirl it through the finished ice cream for a marbled, bakery-style look.
- Use frozen blueberries straight from the freezer bag for a slightly thicker compote without needing extra cooking time.
7. Cookies & Cream Dairy-Free Ice Cream
Prep Time: 10 minutes | Churn Time: 20-25 minutes | Serve: 1
Crushed dairy-free sandwich cookies fold into a smooth vanilla coconut base, creating a familiar, nostalgic flavor built entirely without dairy ingredients. The contrast between the creamy base and crunchy cookie pieces makes this one of the more textured options within the entire recipe collection.
Ingredients
- ½ cup full-fat coconut milk
- 2 tablespoons maple syrup
- ½ teaspoon vanilla extract
- 3 dairy-free chocolate sandwich cookies, crushed
- Pinch of sea salt
Instructions
Start by placing the chocolate sandwich cookies into a small resealable bag, sealing it most of the way, and crushing them gently with a rolling pin or the bottom of a heavy glass. Aim for a mix of larger crumbs and smaller pieces rather than a fine powder, since varied texture makes the finished dessert more interesting to eat.
In a separate mixing bowl, whisk together the coconut milk, maple syrup, vanilla extract, and sea salt until the mixture turns smooth and fully combined, with no streaks of separated coconut fat remaining visible on the surface. This base should taste like a slightly sweet, mild vanilla mixture before any cookies get added.
Set aside about one tablespoon of the crushed cookies for topping later, then pour the pre-frozen Dash My Mug bowl setup, transferring the vanilla base into it. Attach the paddle and secure the lid, then begin the churn cycle, allowing the machine to run for about fifteen minutes before adding any cookie pieces.
After fifteen minutes, carefully lift the lid and sprinkle the remaining crushed cookies into the partially churned base, working quickly to minimize heat escaping from the bowl. Close the lid again immediately and continue churning for another five to ten minutes, allowing the paddle to fold the cookie pieces throughout the mixture evenly.
Check the texture around the twenty-minute total mark; the base should look thick and creamy with visible dark cookie flecks distributed throughout, resembling classic cookies and cream texture found in traditional dairy versions. Continue churning briefly if the mixture still looks too soft or liquid in consistency.
Once finished, scoop the ice cream into a serving bowl immediately for the best texture and cookie crunch, topping with the reserved crushed cookies for extra visual appeal and added crunch. This flavor tends to soften faster than others once served, so eating within a few minutes of churning gives the best overall experience.
Pro Tips
- Add cookie pieces later in the churn cycle rather than at the start, since early addition can cause pieces to turn soggy before serving.
- Choose cookies with a firm, crisp texture rather than soft varieties, since firmer cookies hold their crunch better once mixed into the cold base.
8. Mint Chocolate Chip Ice Cream
Prep Time: 10 minutes | Churn Time: 20-25 minutes | Serve: 1
Fresh mint extract brings a cool, herbal flavor to a coconut milk base, while dairy-free chocolate chips add rich bursts of flavor throughout. The natural pale green color comes from a small amount of spinach or matcha rather than artificial dye, keeping the recipe simple and free of unnecessary additives.
Ingredients
- ½ cup full-fat coconut milk
- 2 tablespoons maple syrup
- ½ teaspoon peppermint extract
- 2 tablespoons dairy-free mini chocolate chips
- Small pinch of matcha powder (optional, for color)
Instructions
Whisk the coconut milk in a mixing bowl until smooth, breaking apart any solid chunks of coconut fat that may have separated inside the can. A uniform, liquid consistency at this stage makes the rest of the recipe come together far more evenly than starting with a lumpy base would allow.
Add the maple syrup to the coconut milk, whisking until fully dissolved. Stir in the peppermint extract slowly, tasting as it goes, since peppermint extract carries a strong flavor that can quickly become overwhelming if added too generously. Half a teaspoon usually provides a balanced, refreshing mint flavor without tasting like toothpaste.
For a naturally tinted green color, whisk in a very small pinch of matcha powder, adding it gradually and checking the color after each addition. This step is entirely optional and only affects appearance rather than flavor, so those preferring a plain, uncolored base can skip it without changing the final taste.
Pour the mint base into the pre-frozen Dash My Mug bowl, attach the paddle, and secure the lid before starting the churn cycle. Allow the machine to run for about fifteen minutes before checking on progress, since chocolate chips added too early can sink to the bottom rather than distributing evenly.
At the fifteen-minute mark, lift the lid carefully and sprinkle in the dairy-free mini chocolate chips, working quickly to avoid losing too much cold air from inside the bowl. Secure the lid again and continue churning for another five to eight minutes, allowing the paddle to fold the chips throughout the thickening base.
Check the texture once total churn time reaches twenty to twenty-five minutes. The mixture should look thick, pale green, and evenly speckled with small chocolate chip pieces throughout. Serve immediately for the coolest, freshest mint flavor, or freeze briefly in a covered container for a firmer, more traditional scoopable texture.
Pro Tips
- Use mini chocolate chips rather than standard-sized ones, since smaller pieces distribute more evenly throughout the finished base without sinking as quickly.
- Chop fresh mint leaves finely and steep them in warmed coconut milk beforehand for a more natural, less intense mint flavor than extract alone provides.
9. Salted Caramel Cashew Ice Cream
Prep Time: 10 minutes | Churn Time: 20-25 minutes | Serve: 1
Homemade date caramel blends into a creamy cashew milk base, creating a rich, slightly salty dessert that tastes indulgent despite containing no refined sugar or dairy ingredients. Toasted cashew pieces add crunch, making this one of the more textured, satisfying flavors within the entire collection.
Ingredients
- ½ cup unsweetened cashew milk
- 3 pitted dates, softened in warm water
- ½ teaspoon vanilla extract
- ¼ teaspoon flaky sea salt
- 2 tablespoons chopped toasted cashews
Instructions
Begin by soaking the pitted dates in warm water for about ten minutes, softening them enough to blend smoothly without leaving tough, chewy pieces throughout the finished base. Drain the dates once softened, discarding the soaking water, and place them into a blender ready for the next step.
Pour the cashew milk into the blender along with the softened dates, blending on high speed until the dates break down completely into a smooth, caramel-colored puree with no visible chunks remaining. This process usually takes about one full minute of continuous blending, depending on blender strength.
Add the vanilla extract and flaky sea salt to the blender, pulsing a few more times to combine everything evenly. Taste the mixture at this stage, since date sweetness varies depending on freshness and variety; add an extra date if a sweeter, more pronounced caramel flavor feels necessary before moving forward.
While the base chills briefly, toast the chopped cashews in a dry skillet over medium heat for two to three minutes, stirring frequently to prevent burning. Toasting brings out a deeper, nuttier flavor than raw cashews alone provide, adding another layer of complexity to the finished dessert once mixed in.
Pour the caramel cashew base into the pre-frozen Dash My Mug bowl, attach the paddle, and secure the lid before starting the churn cycle. Allow the machine to run for about fifteen minutes before adding the toasted cashew pieces, giving the base time to thicken before introducing any solid mix-ins.
At the fifteen-minute mark, sprinkle the toasted cashews into the partially churned base, closing the lid quickly afterward to preserve cold air inside the bowl. Continue churning for another five to ten minutes until the mixture reaches a thick, glossy, caramel-colored consistency studded with cashew pieces throughout.
Serve immediately with an extra pinch of flaky sea salt on top for visual appeal and a final burst of salty contrast against the sweet caramel base. This flavor also freezes well for later enjoyment, holding its texture nicely even after sitting in the freezer for a short period.
Pro Tips
- Use Medjool dates rather than smaller varieties, since their higher moisture content blends into a smoother, more caramel-like consistency.
- Toast cashews just before churning begins, since freshly toasted nuts provide the strongest flavor and best crunch once folded into the base.
10. Matcha Green Tea Ice Cream
Prep Time: 8 minutes | Churn Time: 20-25 minutes | Serve: 1
Earthy matcha powder combines with coconut milk to create a pale green, slightly bitter-sweet dessert popular among tea lovers seeking something different from typical fruit or chocolate flavors. The natural antioxidants in matcha add a subtle nutritional benefit alongside its distinctive, unmistakable flavor.
Ingredients
- ½ cup full-fat coconut milk
- 1 teaspoon culinary-grade matcha powder
- 2 tablespoons maple syrup
- ½ teaspoon vanilla extract
- Pinch of sea salt
Instructions
Sift the matcha powder through a fine mesh strainer directly into a small mixing bowl, breaking up any clumps that commonly form inside matcha packaging over time. Sifting prevents small green lumps from remaining in the finished base, which can otherwise create a slightly gritty, uneven texture once frozen.
Add two tablespoons of warm, not boiling, water to the sifted matcha powder, whisking briskly in a zigzag motion until the powder dissolves into a smooth, bright green paste with a light foam forming on top. This traditional whisking method helps matcha dissolve more evenly than simply stirring it into cold liquid directly.
Pour the coconut milk into the matcha paste gradually, whisking continuously to prevent clumping as the two liquids combine. Add the maple syrup, vanilla extract, and sea salt, whisking one final time until the entire mixture turns a uniform, pale jade green color with a smooth, silky consistency throughout.
Taste the base at this stage, since matcha quality varies significantly between brands, with some producing a stronger, more bitter flavor than others. Add a touch more maple syrup if the bitterness feels too pronounced, keeping in mind that freezing tends to mellow flavors slightly compared to the liquid base.
Pour the finished matcha mixture into the pre-frozen Dash My Mug bowl, attach the paddle, and secure the lid tightly before beginning the churn cycle. Run the machine for twenty to twenty-five minutes, checking texture around the eighteen-minute mark for thickness and color consistency throughout the mixture.
The finished ice cream should look thick, smooth, and evenly colored a soft jade green, holding its shape when tested with the back of a spoon. Serve immediately for the freshest tea flavor, or freeze in a covered container for thirty minutes for a firmer, more traditional scoop.
Pro Tips
- Choose culinary-grade matcha rather than ceremonial-grade for this recipe, since culinary matcha holds up better when mixed with sweeteners and other ingredients.
- Store unused matcha powder in an airtight container away from light and heat to preserve its color and flavor for future batches.
11. Raspberry Lemon Sorbet
Prep Time: 10 minutes | Churn Time: 20-25 minutes | Serve: 1
Tart raspberries and bright lemon juice combine into a naturally dairy-free sorbet bursting with sharp, refreshing flavor. Unlike the creamier recipes throughout this collection, this one skips coconut or nut milk entirely, relying instead on fruit and a touch of sweetener for its entire structure and texture.
Ingredients
- ¾ cup fresh or frozen raspberries
- 2 tablespoons fresh lemon juice
- 2 tablespoons agave syrup
- 2 tablespoons water
- Pinch of sea salt
Instructions
Place the raspberries into a blender along with the water, blending on high speed until the berries break down into a smooth, deep red puree. Raspberries contain small seeds that will not fully disappear during blending, so expect a slightly textured result rather than a completely smooth, seedless liquid.
For those preferring a seedless sorbet, pour the blended raspberry mixture through a fine mesh strainer set over a bowl, pressing the puree through with the back of a spoon to separate the seeds from the liquid. Discard the leftover seeds once most of the liquid has passed through the strainer.
Return the strained raspberry puree to the blender, adding the lemon juice, agave syrup, and sea salt. Blend again briefly to combine everything into a smooth, tart, and slightly sweet base. Taste the mixture at this point, adjusting sweetness with additional agave if the raspberries were particularly tart or underripe.
Pour the finished raspberry lemon base into the pre-frozen Dash My Mug bowl, attach the paddle, and secure the lid firmly before starting the churn cycle. Because this base contains no fat from coconut or nut milk, it may churn slightly faster than creamier recipes, so check progress a few minutes early.
Churn for eighteen to twenty-two minutes, watching closely after the fifteen-minute mark for the mixture to thicken into a soft, icy consistency typical of traditional sorbet. The finished texture should hold together when scooped but still feel light and slushy compared to the creamier, coconut-based recipes in this collection.
Serve the sorbet immediately for the brightest, most refreshing flavor, since fruit-based sorbets without fat tend to freeze harder and faster than creamier bases once left in the freezer for extended periods. A few fresh raspberries on top make a simple, colorful garnish that complements the tart flavor inside.
Pro Tips
- Use frozen raspberries straight from the bag for a slightly thicker starting puree that requires less churn time overall.
- Balance extra-tart batches with a touch more agave rather than water, since water can dilute flavor without improving sweetness.
12. Pineapple Coconut Ice Cream
Prep Time: 10 minutes | Churn Time: 20-25 minutes | Serve: 1
Sweet pineapple and rich coconut milk pair together into a tropical, sunny flavor reminiscent of a classic piña colada, minus any alcohol or dairy involved. Fresh pineapple brings natural acidity that balances coconut’s richness, resulting in a well-rounded dessert that feels light despite its creamy texture.
Ingredients
- ½ cup fresh pineapple chunks
- ⅓ cup full-fat coconut milk
- 1 tablespoon maple syrup
- ½ teaspoon lime juice
- Pinch of sea salt
Instructions
Cut fresh pineapple into small chunks, removing the tough core and outer skin completely before measuring out the amount needed for this recipe. Fresh pineapple provides brighter, more natural flavor than canned varieties, though canned pineapple in juice, well drained, works as a reasonable substitute when fresh fruit is not available.
Place the pineapple chunks into a blender along with the lime juice, blending on high speed until the fruit breaks down into a smooth, slightly fibrous puree. Pineapple contains natural fibers that may not fully disappear during blending, so expect a small amount of texture remaining within the finished puree.
Add the coconut milk, maple syrup, and sea salt to the blender, blending again until the entire mixture becomes uniform in color and consistency, turning a pale golden yellow throughout. Taste the base at this stage, adjusting sweetness slightly if the pineapple used was less ripe or particularly tart.
Pour the finished pineapple coconut mixture into the pre-frozen Dash My Mug bowl, attach the paddle securely, and close the lid before beginning the churn cycle. The natural fiber content in pineapple can occasionally cause slightly uneven churning, so check on the mixture a bit earlier than usual, around the fifteen-minute mark.
Continue churning until the total time reaches twenty to twenty-five minutes, watching for the mixture to thicken into a soft, creamy consistency with small flecks of pineapple fiber visible throughout. The finished texture should hold its shape softly when tested with a spoon, similar to traditional soft-serve.
Serve immediately for the brightest tropical flavor and softest texture, or transfer to a covered container and freeze for thirty minutes for a firmer, more scoopable result. A small wedge of fresh pineapple or a sprinkle of toasted coconut flakes makes an easy, fitting garnish for this flavor.
Pro Tips
- Choose a fully ripe pineapple with a slightly sweet aroma near the base for the best natural flavor and reduced need for added sweetener.
- Toast shredded coconut in a dry skillet for two minutes before topping the finished dessert for extra flavor and crunch contrast.
13. Mocha Coffee Ice Cream
Prep Time: 10 minutes | Churn Time: 20-25 minutes | Serve: 1
Bold brewed coffee meets rich cocoa in this energizing dessert built for anyone who enjoys the combination of coffee and chocolate together. Coconut milk provides the creamy base, while strong coffee ensures the flavor stays noticeable even after freezing, rather than becoming muted or weak.
Ingredients
- ½ cup full-fat coconut milk
- 2 tablespoons strongly brewed coffee, cooled
- 1 tablespoon unsweetened cocoa powder
- 2 tablespoons maple syrup
- Pinch of sea salt
Instructions
Brew a small batch of strong coffee using a ratio slightly higher in coffee grounds than usual, since a more concentrated brew ensures the coffee flavor remains noticeable once mixed with other ingredients and frozen. Allow the coffee to cool completely to room temperature before moving forward with the next step.
In a mixing bowl, whisk the coconut milk until smooth, breaking apart any solid fat that may have separated within the can. Sift the cocoa powder over the coconut milk to prevent clumping, then whisk thoroughly until the powder dissolves completely, turning the mixture a smooth, even brown color throughout.
Pour the cooled brewed coffee into the coconut and cocoa mixture, whisking to combine everything into a uniform, deep brown liquid with a noticeable coffee aroma rising from the bowl. Add the maple syrup and sea salt, whisking one final time until fully incorporated with no separation visible anywhere in the base.
Taste the mixture at this stage, adjusting either the coffee strength or sweetness depending on personal preference; those wanting a bolder coffee flavor can add an extra teaspoon of brewed coffee, while those preferring sweeter results can increase the maple syrup slightly without affecting the overall texture.
Pour the finished mocha base into the pre-frozen Dash My Mug bowl, attach the paddle, and secure the lid firmly before starting the churn cycle. Run the machine for twenty to twenty-five minutes, checking texture around the eighteen-minute mark for thickness and overall consistency throughout the mixture.
The finished ice cream should look thick, glossy, and deep brown in color, holding its shape when tested with the back of a spoon similar to traditional coffee ice cream texture. Serve immediately for the boldest flavor, or freeze in a covered container for thirty minutes for a firmer, scoopable result.
Pro Tips
- Use espresso instead of regular brewed coffee for an even more concentrated, bold flavor within a smaller liquid volume.
- Sprinkle finely ground coffee beans over the finished dessert for added texture and a stronger visual coffee presence.
14. Cinnamon Apple Ice Cream
Prep Time: 12 minutes | Churn Time: 20-25 minutes | Serve: 1
Warm cinnamon and softened apple bring a cozy, comforting flavor to this dessert, tasting closer to apple pie filling than typical fruit-based frozen treats. Cooking the apple beforehand deepens its natural sweetness, making this recipe feel more like a seasonal comfort food than a standard summer dessert.
Ingredients
- ½ cup diced apple, peeled
- ⅓ cup full-fat coconut milk
- 1 tablespoon maple syrup
- ½ teaspoon ground cinnamon
- Pinch of sea salt
Instructions
Peel and core one medium apple, choosing a variety known for good baking qualities such as Honeycrisp or Granny Smith, since these hold their flavor well once cooked and blended. Dice the apple into small, even pieces to help it cook through quickly and evenly during the next step of preparation.
Place the diced apple into a small saucepan over medium heat along with one tablespoon of water and the ground cinnamon, stirring occasionally as the apple softens. Cook for about six to eight minutes, until the pieces turn tender enough to mash easily with a fork, releasing their natural juices into the pan.
Remove the softened apple from heat and mash it lightly with a fork, leaving some small chunks for texture rather than blending it into a completely smooth puree. Allow the mixture to cool for about ten minutes before combining it with the remaining ingredients to prevent warm apple from affecting the freezer bowl.
In a separate bowl, whisk together the coconut milk, maple syrup, and sea salt until smooth. Fold the cooled cinnamon apple mixture into the coconut milk base, stirring gently to distribute the apple pieces evenly throughout without breaking them down further than necessary for a rustic, textured result.
Pour the finished apple cinnamon base into the pre-frozen Dash My Mug bowl, attach the paddle, and secure the lid before beginning the churn cycle. Run the machine for twenty to twenty-five minutes, checking around the eighteen-minute mark for thickness, since the apple pieces add slight resistance to the paddle.
The finished ice cream should look thick and creamy with visible apple pieces distributed throughout, carrying a warm cinnamon aroma similar to baked desserts. Serve immediately while the cinnamon flavor feels most pronounced, or freeze briefly for a firmer texture that still keeps the apple pieces soft and tender.
Pro Tips
- Add a small pinch of nutmeg alongside the cinnamon for a more complex, autumn-inspired spice blend throughout the dessert.
- Save a few cooked apple pieces separately to fold in during the last five minutes of churning for extra texture in every bite.
15. Pumpkin Spice Dairy-Free Ice Cream
Prep Time: 10 minutes | Churn Time: 20-25 minutes | Serve: 1
Real pumpkin puree combines with warm baking spices to create a seasonal dessert that captures classic autumn flavor in frozen form. Coconut milk provides the creamy base needed to balance pumpkin’s earthy taste, while a blend of cinnamon, ginger, and clove rounds out the familiar spice profile.
Ingredients
- ⅓ cup pure pumpkin puree (not pie filling)
- ⅓ cup full-fat coconut milk
- 2 tablespoons maple syrup
- ½ teaspoon pumpkin pie spice
- Pinch of sea salt
Instructions
Measure out pure pumpkin puree, making sure the label specifies plain pumpkin rather than pre-sweetened pumpkin pie filling, since the filling variety already contains added sugar and spices that can throw off the balance of this particular recipe. Place the puree into a mixing bowl to begin the process.
Add the coconut milk to the pumpkin puree, whisking together until the two ingredients combine into a smooth, orange-toned mixture with no lumps of pumpkin remaining visible. Pumpkin puree tends to be fairly thick on its own, so thorough whisking helps loosen the texture into something closer to a pourable batter.
Sprinkle in the pumpkin pie spice blend, which typically includes cinnamon, ginger, nutmeg, and clove in a pre-mixed combination, saving the effort of measuring each spice individually. Whisk the spice blend into the base thoroughly, tasting as it goes to ensure the flavor feels balanced rather than overwhelming.
Add the maple syrup and sea salt, whisking one final time until the entire mixture turns a smooth, uniform orange color with a warm, spiced aroma rising from the bowl. Taste the base at this stage, adjusting sweetness or spice levels slightly depending on personal preference before moving to the churning step.
Pour the finished pumpkin base into the pre-frozen Dash My Mug bowl, attach the paddle, and secure the lid tightly before starting the churn cycle. Because pumpkin puree adds natural thickness to the base, this recipe may reach a thick consistency slightly faster than thinner, fruit-juice-based recipes in the collection.
Churn for twenty to twenty-two minutes, checking around the sixteen-minute mark for thickness and overall texture. The finished ice cream should look thick, smooth, and deep orange in color, holding its shape firmly when tested with a spoon, similar to traditional pumpkin pie filling in consistency.
Serve immediately for the warmest, most pronounced spice flavor, or freeze in a covered container for thirty minutes for a firmer, more scoopable texture suited to cooler weather. A light dusting of extra cinnamon on top makes a simple, fitting finishing touch for this seasonal flavor.
Pro Tips
- Roast fresh pumpkin at home and puree it for a deeper, more natural flavor compared to canned varieties, if time allows.
- Add crushed graham crackers during the last few minutes of churning for a texture reminiscent of pumpkin pie crust throughout the dessert.
16. Cherry Chocolate Ice Cream
Prep Time: 10 minutes | Churn Time: 20-25 minutes | Serve: 1
Dark sweet cherries pair with rich cocoa to create a bold, slightly tart dessert that tastes similar to a classic chocolate-covered cherry candy, only in creamy frozen form. Coconut milk carries both flavors smoothly, letting the natural cherry sweetness stand alongside chocolate’s deeper, more bitter notes.
Ingredients
- ½ cup pitted dark cherries, fresh or frozen
- ⅓ cup full-fat coconut milk
- 1 tablespoon unsweetened cocoa powder
- 2 tablespoons maple syrup
- Pinch of sea salt
Instructions
If using fresh cherries, wash and pit them carefully, removing every pit before blending to avoid any hard pieces ending up in the finished dessert. If using frozen cherries, no additional preparation is needed beyond measuring the correct amount, since they will soften naturally during the blending process.
Place the cherries into a blender along with two tablespoons of water, blending on high speed until the fruit breaks down into a smooth, deep red puree. Cherries can be slightly fibrous, so a few small texture pieces remaining within the puree is completely normal and does not affect the final result.
Add the coconut milk to the blender along with the cocoa powder, sifting the cocoa in first to prevent clumping before blending everything together. Continue blending until the mixture turns a deep, rich reddish-brown color, with the cherry and chocolate flavors fully combined into one smooth, uniform base.
Add the maple syrup and sea salt, blending one final time to incorporate everything evenly. Taste the mixture at this stage, adjusting sweetness depending on how tart the cherries were originally, since tart cherry varieties may need slightly more maple syrup to balance the cocoa’s natural bitterness.
Pour the finished cherry chocolate base into the pre-frozen Dash My Mug bowl, attach the paddle, and secure the lid before beginning the churn cycle. Run the machine for twenty to twenty-five minutes, checking around the eighteen-minute mark for thickness and overall color consistency throughout the base.
The finished ice cream should look thick, glossy, and deep reddish-brown, holding its shape softly when tested with a spoon similar to traditional chocolate ice cream texture. Serve immediately for the boldest cherry and chocolate flavor combination, or freeze briefly for a firmer, more traditional scoop.
Pro Tips
- Reserve a few whole cherry halves to fold in during the last five minutes of churning for bursts of fresh fruit throughout each bite.
- Add a few dairy-free chocolate chips alongside the cherries for extra texture and a stronger chocolate presence in every spoonful.
17. Tropical Passion Fruit Ice Cream
Prep Time: 10 minutes | Churn Time: 20-25 minutes | Serve: 1
Tangy passion fruit brings bold, tropical flavor to a coconut milk base, creating a dessert that tastes bright and slightly exotic compared to more familiar flavors within this collection. The seeds from fresh passion fruit add a distinctive crunch that many people find appealing rather than distracting.
Ingredients
- 2 fresh passion fruits, pulp scooped out
- ⅓ cup full-fat coconut milk
- 2 tablespoons maple syrup
- Pinch of sea salt
Instructions
Cut each passion fruit in half using a sharp knife, then scoop out the pulp and seeds using a small spoon, working carefully to collect as much of the juicy interior as possible without pressing into the tough outer skin, which should be discarded once fully scraped clean.
Place the scooped passion fruit pulp into a small bowl and set aside about one tablespoon of it separately for later use as a topping. The remaining pulp, seeds included, moves forward into the base recipe, since the small black seeds add pleasant texture rather than needing to be strained out.
In a mixing bowl, whisk together the coconut milk, maple syrup, and sea salt until smooth and fully combined. Fold the passion fruit pulp into the coconut milk mixture, stirring gently to distribute the seeds evenly throughout without breaking them apart or crushing them during the mixing process.
Taste the combined mixture, adjusting sweetness slightly if needed, since passion fruit carries a naturally tart, tangy flavor that some palates prefer balanced with a touch more maple syrup than other fruit-based recipes in this collection typically require for a similar level of sweetness.
Pour the finished tropical base into the pre-frozen Dash My Mug bowl, attach the paddle, and secure the lid before starting the churn cycle. Run the machine for twenty to twenty-five minutes, checking around the eighteen-minute mark for thickness, since the seeds add slight texture that affects paddle resistance slightly.
The finished ice cream should look thick and pale yellow, speckled throughout with small black passion fruit seeds, holding its shape softly when tested with a spoon. Serve immediately, topped with the reserved tablespoon of pulp for extra tang and visual appeal against the pale base underneath.
Pro Tips
- Choose passion fruits with wrinkled, dimpled skin rather than smooth skin, since wrinkled fruit tends to be fully ripe and sweeter overall.
- Strain half the pulp through a fine mesh sieve if a smoother texture is preferred, saving the seeds only for topping rather than mixing throughout.
18. Dairy-Free Pistachio Ice Cream
Prep Time: 12 minutes | Churn Time: 20-25 minutes | Serve: 1
Toasted pistachios blend into a creamy cashew milk base, creating a nutty, slightly sweet dessert with a naturally pale green color and satisfying crunch throughout. This flavor leans more sophisticated than others in the collection, making it a fitting choice for special occasions or dinner party desserts.
Ingredients
- ⅓ cup shelled pistachios, plus 2 tablespoons chopped for topping
- ⅓ cup unsweetened cashew milk
- 2 tablespoons maple syrup
- ¼ teaspoon almond extract
- Pinch of sea salt
Instructions
Toast the shelled pistachios in a dry skillet over medium heat for three to four minutes, stirring frequently to prevent burning and encourage even browning across all the pieces. Toasting deepens the natural nutty flavor considerably compared to using raw pistachios straight from the package without any additional preparation.
Allow the toasted pistachios to cool for a few minutes, then set aside two tablespoons of chopped pieces for topping later. Place the remaining pistachios into a blender or food processor, pulsing until they break down into a fine, slightly oily meal resembling coarse sand in texture.
Add the cashew milk to the blender along with the pistachio meal, blending on high speed until the mixture turns as smooth as possible, though a small amount of gritty texture from the nuts will likely remain, which adds pleasant character to the finished dessert rather than detracting from it.
Add the maple syrup, almond extract, and sea salt to the blender, blending one final time to combine everything evenly. The almond extract enhances the natural pistachio flavor significantly, even though almonds are not otherwise part of this recipe, so avoid skipping this small but important ingredient.
Pour the finished pistachio base into the pre-frozen Dash My Mug bowl, attach the paddle, and secure the lid before beginning the churn cycle. Run the machine for twenty to twenty-five minutes, checking around the eighteen-minute mark, since the nut meal can add slight resistance to the churning paddle.
The finished ice cream should look thick and pale green, flecked throughout with tiny pieces of pistachio, holding its shape firmly when tested with a spoon similar to traditional pistachio gelato texture found in specialty dessert shops. Serve immediately, topped with the reserved chopped pistachios for crunch and visual appeal.
Pro Tips
- Use unsalted, shelled pistachios specifically, since salted varieties can throw off the overall balance of sweetness and saltiness within the finished base.
- Grind pistachios only partway rather than into a fine powder, keeping small pieces intact for better texture once the dessert freezes fully.
19. Dark Chocolate Avocado Ice Cream
Prep Time: 10 minutes | Churn Time: 20-25 minutes | Serve: 1
Ripe avocado creates an unexpectedly rich, creamy texture in this dark chocolate dessert, adding healthy fats without contributing any noticeable flavor of its own once combined with cocoa powder. This recipe closes the collection with one of the richest, most indulgent textures found among all nineteen flavors.
Ingredients
- ½ ripe avocado, pitted and peeled
- ¼ cup unsweetened almond milk
- 2 tablespoons unsweetened cocoa powder
- 2 tablespoons maple syrup
- Pinch of sea salt
Instructions
Choose a ripe avocado that yields slightly to gentle pressure, since underripe avocado will not blend smoothly and can leave an unpleasant, grassy flavor within the finished base. Cut the avocado in half, remove the pit, and scoop the flesh directly into a blender using a spoon.
Add the almond milk to the blender along with the avocado, blending on high speed until the mixture turns completely smooth with no visible chunks of avocado remaining anywhere throughout the base. This step may take slightly longer than other recipes, since avocado has a naturally dense, thick texture.
Sift the cocoa powder into the blender to prevent clumping, then blend again until the entire mixture turns a deep, uniform brown color with no green avocado tones visible on the surface. The cocoa powder’s strong color and flavor fully mask any trace of avocado once properly combined.
Add the maple syrup and sea salt, blending one final time until smooth and fully incorporated. Taste the mixture at this stage, adjusting sweetness slightly if a richer, more dessert-like flavor feels necessary, since avocado’s natural fat content can sometimes mute sweetness compared to fruit-based bases in this collection.
Pour the finished chocolate avocado base into the pre-frozen Dash My Mug bowl, attach the paddle, and secure the lid tightly before starting the churn cycle. Because avocado adds significant natural fat and thickness, this recipe may reach a rich, dense texture faster than thinner, fruit-juice-based recipes.
Churn for eighteen to twenty-two minutes, checking around the fifteen-minute mark for thickness, since the avocado base tends to firm up more quickly than other recipes throughout this collection. The finished texture should look thick, glossy, and deep brown, similar to a rich chocolate mousse in both appearance and consistency.
Serve immediately for the richest, creamiest texture, since this base holds its smooth consistency exceptionally well even straight from the churn cycle. A few shavings of dark chocolate on top make a simple, elegant garnish that complements the dessert’s already rich, indulgent character.
Pro Tips
- Freeze the avocado half briefly for fifteen minutes before blending for a colder starting base that shortens overall churn time slightly.
- Add a pinch of espresso powder alongside the cocoa for a deeper, more complex chocolate flavor without any noticeable coffee taste.
How to Store Homemade Dairy-Free Ice Cream
1. Best storage containers – Small airtight containers with tight-fitting lids work best, since they limit air exposure and help preserve texture far better than open bowls covered loosely with plastic wrap.
2. How long it lasts – Homemade dairy-free ice cream stays at its best for about one to two weeks in the freezer, after which texture and flavor gradually start declining.
3. Preventing ice crystals – Press a piece of parchment paper directly against the surface before sealing the lid, since this small barrier keeps excess air from creating rough, icy patches over time.
4. Softening before serving – Let containers sit at room temperature for five to ten minutes before scooping, since dairy-free bases often freeze harder than traditional dairy versions due to lower fat content overall.
Conclusion
The Dash My Mug Ice Cream Maker turns dairy-free dessert making into something approachable, quick, and genuinely enjoyable, proving that skipping dairy never means skipping flavor or texture. From rich chocolate avocado to bright raspberry lemon sorbet, this collection covers a wide range of tastes suited to nearly every craving and season throughout the year.
Plant-based milks, fresh fruit, and simple mix-ins offer endless room for personal experimentation beyond these nineteen recipes. Swapping coconut milk for oat or cashew milk, testing new fruit pairings, or folding in favorite toppings creates opportunities to build entirely original flavors suited to individual taste preferences over time.
Readers are encouraged to bookmark this collection for future reference and return whenever a new frozen dessert craving strikes. Sharing favorite results, flavor combinations, or small tweaks discovered along the way helps build a broader, more creative community around dairy-free frozen treats made possible through one small, capable machine.