
Homemade ice cream does not need sugar to taste great. A small kitchen tool called the Dash My Mug Ice Cream Maker makes it simple to whip up a single serving in minutes, right on the counter.
These Sugar Free Dash My Mug Ice Cream Maker Recipes turn plain milk, cream, and sugar-free sweeteners into soft, creamy scoops with no added sugar and no need for a big ice cream machine.
Making sugar-free ice cream at home gives full control over what goes into the bowl. No hidden sugar, no strange additives, just clean and simple ingredients picked by hand. The Dash My Mug Ice Cream Maker also saves time and cleanup, since it churns one perfect portion right inside its own small cup.
These recipes suit many kinds of eaters. People managing diabetes can enjoy a cold treat without a blood sugar spike. Keto and low-carb fans get a dessert that fits their daily carb goals with ease.
Anyone watching their weight can enjoy a smaller, portion-controlled scoop guilt free. Families with mixed diets can also make one flavor for everyone, since sugar-free recipes taste just as rich and smooth as the classic kind.
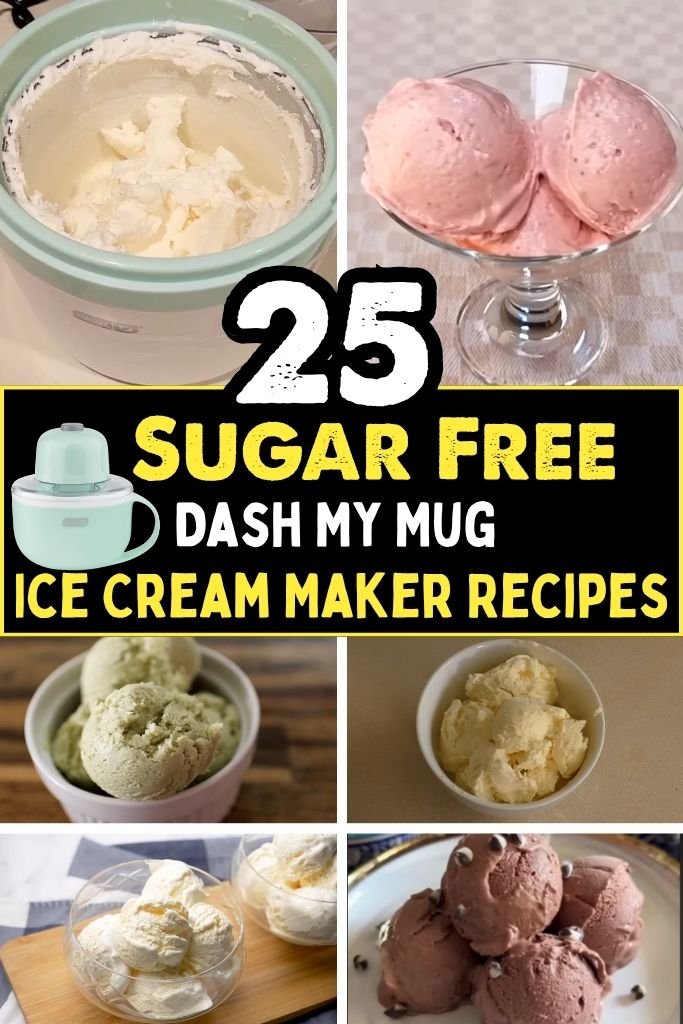
Why You’ll Love the Dash My Mug Ice Cream Maker
1. Perfect Single-Serve Portions — Every batch makes exactly one scoop-sized serving, so there is no leftover tub tempting anyone in the freezer. Portion control comes built right into the design.
2. Quick and Easy to Use — Pour the mixture in, snap on the lid, and let the machine run. Most flavors finish churning in under twenty-five minutes, start to finish.
3. Easy Cleanup — With only one small cup, one paddle, and one lid to rinse, cleanup takes seconds instead of the long scrub session a big ice cream machine usually needs.
4. Endless Flavor Possibilities — The same simple cream base can turn into chocolate, fruit, coffee, or dessert-inspired flavors with just a few swapped ingredients, so boredom never sets in.
Recipe 1: Classic Sugar-Free Vanilla Ice Cream
Prep Time: 5 minutes | Churn Time: 20 minutes | Serve: 1
A soft and creamy vanilla scoop sits at the top of every sugar-free dessert list, and it earns that spot fast. Real vanilla extract gives it a warm, rounded flavor, while a low-carb sweetener keeps the sugar count near zero. Heavy cream and milk blend into a smooth base that churns up thick in the Dash My Mug in under thirty minutes.
Ingredients
- 1/2 cup heavy cream
- 1/4 cup milk (whole or unsweetened almond milk)
- 2 tablespoons powdered erythritol or monk fruit sweetener
- 1/2 teaspoon pure vanilla extract
- Pinch of salt
Instructions
Start by chilling the mixing cup of the Dash My Mug Ice Cream Maker in the freezer overnight, or for at least eight hours. A fully frozen cup is the secret behind a thick, scoopable texture, so this step should never be skipped, or the mixture may stay runny. Pull the cup out only when ready to churn, since it warms up quickly at room temperature.
In a small bowl, pour the heavy cream and milk together, then add the powdered sweetener, vanilla extract, and a pinch of salt. Whisk the mixture by hand for about one minute, until the sweetener dissolves completely and no grainy bits remain at the bottom of the bowl. A smooth base at this stage leads to a smoother finished ice cream, so it helps to take the extra moment to whisk well.
Pour the mixed liquid into the frozen cup, filling it only up to the marked line, since the mixture expands as it churns. Snap the lid onto the cup, then attach the paddle piece according to the maker’s instructions. Place the cup onto the base and turn the machine on. Let it churn for around twenty minutes, checking the texture at the fifteen-minute mark by peeking through the lid.
During churning, the mixture moves from a liquid state to a soft, frosty texture as the frozen walls of the cup pull heat away from the cream. Around the eighteen-minute mark, the texture should look thick and hold soft peaks, similar to soft-serve. Stop the machine once the desired thickness forms, since over-churning can turn the mixture grainy or icy.
Remove the paddle carefully, then scoop the finished ice cream straight into a small bowl, or eat it right from the cup with a spoon. For a firmer scoop, place the finished ice cream in the freezer for fifteen to twenty minutes before serving. A few fresh berries or a light drizzle of sugar-free syrup on top add extra flavor. Store any leftover portion in a small airtight container in the freezer, and let it soften slightly on the counter before the next serving.
Flavor Variations
- Add 1/4 teaspoon almond extract for a nutty twist.
- Stir in a few drops of sugar-free caramel for a caramel vanilla blend.
- Mix in sugar-free chocolate chips after churning for a vanilla chip version.
Nutrition (per serving, approximate) Calories: 180 | Total Fat: 17g | Total Carbs: 4g | Net Carbs: 3g | Protein: 3g | Sugar: 0g
Tips
- Full-fat cream gives the creamiest texture.
- Keep the mixing cup in the freezer at all times, so it stays ready for the next batch.
- Swapping the vanilla for other extracts builds new flavors fast.
Recipe 2: Chocolate Lovers Sugar-Free Ice Cream
Prep Time: 5 minutes | Churn Time: 20 minutes | Serve: 1
Rich cocoa turns a plain cream base into a deep, dark treat that still fits a sugar-free plan. Unsweetened cocoa powder brings bold flavor without any added sugar, while a low-carb sweetener keeps the taste balanced instead of bitter. Heavy cream gives the scoop its thick, fudgy body once churned, and a small pinch of salt sharpens the chocolate flavor in every spoonful.
Ingredients
- 1/2 cup heavy cream
- 1/4 cup milk
- 1 tablespoon unsweetened cocoa powder
- 2 tablespoons powdered erythritol or monk fruit sweetener
- 1/4 teaspoon vanilla extract
- Pinch of salt
Instructions
Begin by freezing the mixing cup of the Dash My Mug Ice Cream Maker for at least eight hours before starting this recipe. The cup must feel solid and hard to the touch, with no soft spots anywhere on the inner wall, since a partly frozen cup will not churn the mixture properly.
While the cup stays in the freezer, combine the heavy cream, milk, cocoa powder, sweetener, vanilla extract, and salt in a mixing bowl. Cocoa powder tends to clump, so sifting it through a small strainer first, or whisking the dry ingredients together before adding the liquid, helps keep things smooth. Whisk everything together for about two minutes, until the mixture turns a smooth, even brown color with no dry cocoa specks floating on top.
Take the frozen cup from the freezer and pour the chocolate mixture inside, staying below the fill line marked on the cup wall. Attach the lid and paddle, then set the cup onto the base of the machine. Turn the machine on and let it run for close to twenty minutes total.
Check the mixture at the ten-minute mark through the lid window, noting how the edges start turning thick and frosty first, then the center follows a few minutes later. By the eighteen-minute mark, the mixture should hold its shape on a spoon and look like soft, glossy chocolate soft-serve. Turn the machine off right at this point, since chocolate mixtures can turn icy fast when churned too long, due to the added cocoa solids.
Remove the paddle, then use a spoon to scrape every bit of ice cream from the walls of the cup into a small serving bowl. For a firmer bite, place the bowl in the freezer for ten to fifteen minutes before eating. Topping the finished scoop with a few sugar-free chocolate chips, a spoon of nut butter, or crushed nuts adds welcome texture. Store leftovers in a sealed container in the freezer for up to one week, and let the portion sit on the counter for five minutes before the next serving to soften slightly.
Tips
- Sifting the cocoa powder first avoids lumps in the finished ice cream.
- A touch more sweetener gives a sweeter, dessert-style flavor.
- Crushed sugar-free cookies mixed in right after churning make a cookie chocolate blend.
Recipe 3: Strawberry Cheesecake Ice Cream
Prep Time: 5 minutes | Churn Time: 20 minutes | Serve: 1
Sweet strawberries and tangy cream cheese come together in this scoop, bringing classic cheesecake flavor into a cold, sugar-free treat. Softened cream cheese adds a rich, tangy base, while diced fresh strawberries add small pops of natural sweetness throughout each bite. A low-carb sweetener rounds out the flavor without raising the sugar count.
Ingredients
- 1/2 cup heavy cream
- 2 tablespoons softened cream cheese
- 2 tablespoons powdered erythritol or monk fruit sweetener
- 1/4 cup fresh strawberries, finely diced
- 1/4 teaspoon vanilla extract
- Pinch of salt
Instructions
Set the mixing cup of the Dash My Mug Ice Cream Maker in the freezer at least eight hours before starting, laying it flat so it freezes evenly on every side. A fully frozen cup gives the base something cold enough to pull heat from the cream quickly during churning.
Softening the cream cheese on the counter for about ten minutes makes it easy to stir with no hard lumps left. In a mixing bowl, blend the softened cream cheese with the heavy cream using a small whisk or fork, pressing out any remaining lumps against the side of the bowl. Add the sweetener, vanilla extract, and salt, then whisk again until the mixture turns smooth and slightly thick.
Dicing the fresh strawberries into small pieces, about the size of a pea, keeps them mixing evenly into the ice cream without freezing into large icy chunks. Fold the diced strawberries into the cream cheese mixture gently with a spoon, stirring only enough to spread them throughout the base.
Pour the finished mixture into the frozen cup, staying below the fill line, then attach the lid and paddle piece. Place the cup on the base and start the machine, letting it churn for close to twenty minutes. Around the fifteen-minute mark, check the texture through the lid, watching for the mixture to turn thick, pale pink, and soft around the edges.
Cream cheese mixtures often take slightly longer to thicken than plain cream bases, since the added fat and protein slow down freezing a little. Once the texture looks like thick soft-serve and holds together on a spoon, turning the machine off right away prevents an icy, grainy finish.
Scoop the finished ice cream into a small bowl, and crush a few sugar-free graham crackers over the top to bring back that familiar cheesecake crust flavor. Serving right away gives the softest texture, or a ten-minute freeze builds a firmer scoop. Store leftovers sealed tightly in the freezer for up to five days.
Tips
- Softening the cream cheese fully before mixing avoids lumps.
- Small, evenly diced strawberries freeze more evenly than large pieces.
- Crushed sugar-free graham crackers on top bring a true cheesecake feel.
Recipe 4: Cookies & Cream (Sugar-Free)
Prep Time: 5 minutes | Churn Time: 20 minutes | Serve: 1
Crushed sugar-free chocolate cookies fold into a smooth vanilla base, bringing back a familiar bakery-style flavor without any added sugar. Small cookie pieces spread throughout the mixture as it churns, so every bite carries a bit of crunch alongside the creamy base. A simple vanilla cream forms the backbone of this flavor, letting the cookie pieces stand as the true star of the bowl.
Ingredients
- 1/2 cup heavy cream
- 1/4 cup milk
- 2 tablespoons powdered erythritol or monk fruit sweetener
- 1/4 teaspoon vanilla extract
- Pinch of salt
- 2 sugar-free chocolate sandwich cookies, crushed
Instructions
Place the mixing cup of the Dash My Mug Ice Cream Maker in the freezer for a full eight hours before starting, keeping it flat and level to freeze evenly on all sides. Skipping this cooling step leaves the cup too warm to properly thicken the mixture during churning.
While the cup chills, whisk the heavy cream, milk, sweetener, vanilla extract, and salt together in a mixing bowl until the sweetener dissolves fully and the mixture turns smooth. Crush the sugar-free chocolate sandwich cookies into small pieces using the back of a spoon or a rolling pin, aiming for pieces roughly the size of a pea, since larger chunks can freeze too hard to bite through comfortably.
Set aside about half of the crushed cookie pieces for topping later, then stir the remaining pieces into the cream mixture, mixing gently so the pieces spread out evenly rather than clumping together at the bottom of the bowl.
Pour the mixture into the frozen cup, staying below the fill line, then snap the lid into place and attach the paddle. Set the cup onto the base and turn the machine on, letting it churn for close to twenty minutes.
Around the fourteen-minute mark, check the texture through the lid, noting the color turning a light speckled gray as the cookie pieces blend through the thickening cream. By the eighteen-minute mark, the mixture should hold soft peaks and look like thick soft-serve dotted with dark specks. Turn the machine off at this stage, since letting it run longer can make the cookie pieces turn hard and icy instead of soft and chewy.
Remove the paddle and scoop the finished mixture into a small bowl, sprinkling the reserved crushed cookie pieces over the top for extra crunch and a fresh burst of chocolate flavor. Serve right away for the softest bite, or freeze the bowl for ten minutes for a firmer, scoopable texture. Store any leftover portion sealed tightly in the freezer, and let it sit at room temperature for a few minutes before the next serving to soften back up.
Tips
- Crushing cookies small keeps every bite easy to chew.
- Saving some cookie pieces for the top adds fresh crunch.
- Sugar-free chocolate cookies work best for keeping this recipe low in carbs.
Recipe 5: Mint Chocolate Chip
Prep Time: 5 minutes | Churn Time: 20 minutes | Serve: 1
Cool mint and rich chocolate chips turn a plain cream base into a bright, refreshing scoop that still counts as a sugar-free treat. A few drops of mint extract carry a clean, cool flavor throughout the mixture, while chopped sugar-free chocolate adds small bursts of richness in every spoonful. Green food coloring is optional, only there for looks.
Ingredients
- 1/2 cup heavy cream
- 1/4 cup milk
- 2 tablespoons powdered erythritol or monk fruit sweetener
- 1/4 teaspoon peppermint extract
- Pinch of salt
- 2 tablespoons sugar-free chocolate chips, chopped small
- 1 drop green food coloring (optional)
Instructions
Freeze the mixing cup of the Dash My Mug Ice Cream Maker for at least eight hours ahead of time, checking that it feels hard and solid all the way through before starting the recipe. A cup that still feels cold but soft in the middle will not churn the mixture into a proper thick texture.
In a mixing bowl, combine the heavy cream, milk, sweetener, peppermint extract, and salt, whisking everything together until fully blended and smooth. Peppermint extract carries a strong flavor, so measuring carefully matters here, since too much can turn the flavor sharp and medicinal instead of cool and refreshing. Add a single drop of green food coloring at this point, or skip it entirely, since color has no effect on flavor.
Chop the sugar-free chocolate into small pieces using a sharp knife on a cutting board, aiming for pieces small enough to spread evenly through the mixture without clumping. Stir most of the chopped chocolate into the mint mixture, saving a small spoonful for topping the finished scoop later.
Pour the mixture into the frozen cup below the fill line, then attach the lid and paddle before placing the cup on the base. Turn the machine on and let it churn for close to twenty minutes total, checking the texture around the fifteen-minute mark.
The mixture should turn a soft, pale green with visible dark flecks throughout as the chocolate pieces spread during churning. Once the texture holds together on a spoon and looks like thick, soft mint soft-serve, turn the machine off right away, since chopped chocolate pieces can turn the mixture grainy fast when churned past this point.
Scoop the finished mint chocolate chip ice cream into a small bowl, topping it with the reserved chocolate pieces for extra crunch. Serve immediately for the softest texture, or freeze the bowl for ten to fifteen minutes for a firmer scoop. Store leftovers sealed tightly in the freezer for up to one week.
Tips
- Measuring peppermint extract carefully keeps the flavor cool instead of sharp.
- Chopping chocolate small helps it spread evenly through the mixture.
- Skipping the food coloring changes nothing about the flavor.
Recipe 6: Peanut Butter Swirl
Prep Time: 5 minutes | Churn Time: 20 minutes | Serve: 1
Smooth peanut butter swirls through a plain cream base, adding a nutty richness that pairs naturally with a sugar-free diet. Natural peanut butter works best here, since it carries a deeper flavor without any added sugar hiding inside. Warming the peanut butter slightly before swirling makes it easier to marble through the finished scoop.
Ingredients
- 1/2 cup heavy cream
- 1/4 cup milk
- 2 tablespoons powdered erythritol or monk fruit sweetener
- 1/4 teaspoon vanilla extract
- Pinch of salt
- 2 tablespoons natural peanut butter, no added sugar
Instructions
Place the mixing cup of the Dash My Mug Ice Cream Maker into the freezer for a full eight hours, laying it flat so every side freezes at the same rate. A cup that freezes unevenly can lead to a soft spot that never thickens properly during churning.
Whisk the heavy cream, milk, sweetener, vanilla extract, and salt together in a mixing bowl until the mixture turns smooth and the sweetener dissolves completely. Warm the peanut butter for about ten seconds, either in short bursts in the microwave or by stirring it briskly with a spoon, since a slightly loose peanut butter swirls through the mixture far more easily than a stiff, cold spoonful.
Pour the cream mixture into the frozen cup, staying below the fill line, then attach the lid and paddle before setting the cup onto the base of the machine. Turn the machine on and let it churn for around fifteen minutes before adding the peanut butter.
At the fifteen-minute mark, carefully open the lid and drizzle the warmed peanut butter over the surface of the partly churned mixture in a thin stream, moving in a slow spiral pattern. Close the lid again and let the machine run for another three to five minutes, just long enough to swirl the peanut butter through the mixture without fully blending it into one uniform color.
Checking the texture through the lid helps catch the right moment to stop, since the goal is visible ribbons of peanut butter running through the pale cream base rather than a solid tan color throughout. Once soft peaks form and the swirl pattern looks even, turn the machine off right away.
Remove the paddle gently to avoid disturbing the swirl pattern too much, then scoop the finished ice cream into a small bowl. A few chopped peanuts on top add extra crunch and reinforce the nutty flavor. Serve right away, or freeze for ten minutes for a firmer bite. Store leftovers sealed in the freezer for up to one week.
Tips
- Warming the peanut butter slightly makes it easier to swirl.
- Adding it partway through churning keeps visible ribbons instead of one blended color.
- Chopped peanuts on top add extra crunch.
Recipe 7: Salted Caramel
Prep Time: 5 minutes | Churn Time: 20 minutes | Serve: 1
Buttery caramel flavor meets a touch of sea salt in this scoop, balancing sweet and salty in every spoonful without any added sugar. A sugar-free caramel syrup carries the deep caramel flavor, while a light sprinkle of sea salt on top sharpens the taste and keeps it from turning flat. This flavor works well for anyone who misses classic caramel desserts.
Ingredients
- 1/2 cup heavy cream
- 1/4 cup milk
- 2 tablespoons sugar-free caramel syrup
- 1 tablespoon powdered erythritol or monk fruit sweetener
- Pinch of salt, plus extra sea salt for topping
Instructions
Freeze the mixing cup of the Dash My Mug Ice Cream Maker for a full eight hours before starting, making sure it sits flat in the freezer the entire time. A properly frozen cup should feel hard to the touch on every side, with no soft or slushy spots remaining anywhere near the base.
In a mixing bowl, whisk together the heavy cream, milk, sugar-free caramel syrup, sweetener, and a small pinch of salt. Caramel syrup already carries a good amount of sweetness, so tasting the mixture at this stage helps decide on adding more sweetener, since sugar-free caramel brands vary quite a bit in overall sweetness.
Pour the finished mixture into the frozen cup below the fill line, then snap the lid on and attach the paddle piece. Place the cup onto the base and turn the machine on, letting it churn for close to twenty minutes.
Check the texture around the fifteen-minute mark, watching the color turn a soft golden tan as the caramel blends fully through the thickening cream. By the eighteen-minute mark, the mixture should hold soft peaks and pull away cleanly from the paddle when checked. Turn the machine off at this point, since caramel mixtures can turn slightly chewy and hard when churned for too long, due to the added syrup.
Scoop the finished ice cream into a small bowl, then drizzle a little extra sugar-free caramel syrup over the top for a richer finish. Sprinkle a small pinch of coarse sea salt over the surface right before serving, since the salt should stay crunchy rather than dissolving into the cream. Serve right away for the softest texture, or freeze the bowl for ten minutes for a firmer scoop. Store leftovers sealed tightly in the freezer for up to five days, adding fresh salt again before each new serving.
Tips
- Tasting the mixture before churning helps balance sweetness levels.
- Coarse sea salt added right before serving stays crunchy longer.
- Extra caramel drizzle on top makes the flavor richer.
Recipe 8: Coffee Ice Cream
Prep Time: 5 minutes | Churn Time: 20 minutes | Serve: 1
Bold brewed coffee turns a simple cream base into a grown-up flavor with a natural energy boost built right in. Strong coffee or espresso carries deep, roasted flavor without any added sugar, while heavy cream smooths out the bitterness into a rounded, balanced taste. Serving this flavor after a meal or during a warm afternoon works well for coffee lovers.
Ingredients
- 1/2 cup heavy cream
- 1/4 cup strong brewed coffee, cooled
- 2 tablespoons powdered erythritol or monk fruit sweetener
- 1/4 teaspoon vanilla extract
- Pinch of salt
Instructions
Place the mixing cup of the Dash My Mug Ice Cream Maker in the freezer for a full eight hours before starting, checking that it feels solid all the way through with no give near the base. Brewing the coffee ahead of time matters too, giving it plenty of time to cool fully to room temperature, since warm coffee poured into the cold cup can slow down the churning process significantly.
In a mixing bowl, whisk together the heavy cream, cooled coffee, sweetener, vanilla extract, and salt until the mixture turns a smooth, even light brown color with no separation between the cream and coffee. Strong coffee works best for this recipe, since a weak brew can get lost once mixed with the cream and sweetener.
Pour the finished mixture into the frozen cup, staying below the fill line marked on the inside wall, then attach the lid and paddle before setting the cup onto the base. Turn the machine on and let it churn for around twenty minutes total.
Checking the texture at the fifteen-minute mark helps track progress, watching for the color to deepen slightly as the mixture thickens and air gets worked through the cream. By the eighteen-minute mark, the mixture should hold soft peaks and look like thick, glossy coffee soft-serve. Turn the machine off right at this stage, since coffee-based mixtures can turn icy fast once fully frozen through.
Remove the paddle carefully, then scoop the finished coffee ice cream into a small bowl. A light dusting of cocoa powder or a few crushed sugar-free chocolate-covered coffee beans on top adds extra flavor and a bit of crunch. Serve right away for a soft, creamy texture, or freeze the bowl for ten minutes for a firmer scoop. Store leftovers sealed tightly in the freezer for up to one week, letting the portion soften slightly on the counter before eating again.
Tips
- Cooling the coffee fully before mixing keeps the churning process quick.
- Strong, freshly brewed coffee gives the boldest flavor.
- A dusting of cocoa powder on top adds extra richness.
Recipe 9: Mocha Delight
Prep Time: 5 minutes | Churn Time: 20 minutes | Serve: 1
Coffee and cocoa team up in this scoop, blending two bold flavors into one rich, sugar-free treat. Brewed coffee brings deep roasted notes, while cocoa powder adds a chocolate layer underneath. Together they create a dessert with the taste of a coffeehouse drink, only cold and spoonable.
Ingredients
- 1/2 cup heavy cream
- 1/4 cup strong brewed coffee, cooled
- 1 tablespoon unsweetened cocoa powder
- 2 tablespoons powdered erythritol or monk fruit sweetener
- Pinch of salt
Instructions
Set the mixing cup of the Dash My Mug Ice Cream Maker in the freezer for a full eight hours before starting, laying it flat so every part of the cup reaches the same cold temperature. Brew the coffee early as well, giving it time to cool completely on the counter, since warm liquid poured into the frozen cup slows down the entire churning process.
In a mixing bowl, sift the cocoa powder to remove any clumps, then whisk it together with the heavy cream, cooled coffee, sweetener, and salt. Whisking for close to two minutes helps the cocoa dissolve fully into the liquid, leaving a smooth, dark brown mixture with no dry specks resting on the surface.
Pour the finished mixture into the frozen cup, staying below the fill line, then attach the lid and paddle before setting the cup onto the base of the machine. Turn the machine on and let it churn for around twenty minutes total, watching the clock closely near the later stages.
Around the fourteen-minute mark, open the lid briefly to check the texture, noting the color deepening slightly as the cocoa and coffee fully combine with the thickening cream. By the eighteen-minute mark, the mixture should hold its shape well on a spoon and look glossy, similar to rich mocha soft-serve. Turning the machine off right at this stage keeps the texture smooth, since mocha mixtures with both cocoa and coffee can freeze harder and faster than plain cream bases.
Remove the paddle carefully, scraping any mixture stuck to the sides back into the cup, then scoop the finished mocha ice cream into a small serving bowl. A light dusting of cocoa powder or a few coffee beans on top finishes the presentation nicely. Serve right away for the creamiest bite, or freeze the bowl for ten minutes for a firmer texture. Store any leftover portion sealed tightly in the freezer for up to one week, letting it soften slightly at room temperature before the next serving.
Tips
- Cooling the coffee fully speeds up the churning process.
- Sifting cocoa powder first keeps the mixture smooth and lump free.
- A dusting of cocoa on top adds a nice finishing touch.
Recipe 10: Lemon Cheesecake
Prep Time: 5 minutes | Churn Time: 20 minutes | Serve: 1
Bright lemon juice and tangy cream cheese meet in this scoop, bringing a fresh, citrus twist to a classic cheesecake flavor. Fresh lemon zest adds a fragrant top note, while the cream cheese base keeps the texture rich and smooth. This flavor works well on a warm day, when a lighter dessert sounds better than something heavy.
Ingredients
- 1/2 cup heavy cream
- 2 tablespoons softened cream cheese
- 2 tablespoons powdered erythritol or monk fruit sweetener
- 1 tablespoon fresh lemon juice
- 1/2 teaspoon lemon zest
- Pinch of salt
Instructions
Place the mixing cup of the Dash My Mug Ice Cream Maker in the freezer for a full eight hours before starting, checking beforehand that the cup sits flat and level the entire time. A tilted cup can freeze unevenly, leaving one side thinner than the rest.
Soften the cream cheese on the counter for about ten minutes until it turns smooth and easy to stir. In a mixing bowl, blend the cream cheese with the heavy cream using a fork or small whisk, pressing firmly against the side of the bowl to break up any remaining lumps. Add the sweetener, fresh lemon juice, lemon zest, and salt, then whisk again until the mixture turns smooth, pale, and fragrant.
Fresh lemon zest carries most of the citrus aroma, so grating it finely from the outer peel, while avoiding the bitter white pith underneath, keeps the flavor bright rather than sharp or soapy.
Pour the finished mixture into the frozen cup, staying below the fill line, then attach the lid and paddle before setting the cup onto the base. Turn the machine on and let it churn for close to twenty minutes, checking the texture around the fifteen-minute mark.
Cream cheese and citrus juice both slow down freezing slightly, so the mixture may take a touch longer than a plain cream base to thicken fully. Once the texture holds soft peaks and looks pale and creamy, similar to soft cheesecake filling, turn the machine off right away to avoid a grainy finish.
Scoop the finished lemon cheesecake ice cream into a small bowl, topping it with a few crushed sugar-free graham crackers or an extra pinch of lemon zest for a fresh finish. Serve right away for the softest bite, or freeze the bowl for ten minutes for a firmer scoop. Store leftovers sealed tightly in the freezer for up to five days.
Tips
- Grating zest from just the outer peel keeps the flavor from turning bitter.
- Softening cream cheese fully avoids lumps in the finished mixture.
- Crushed graham crackers on top bring back the cheesecake crust flavor.
Recipe 11: Raspberry Vanilla
Prep Time: 5 minutes | Churn Time: 20 minutes | Serve: 1
Sweet-tart raspberries swirl through a smooth vanilla base, adding natural fruit flavor and a soft pink color without any added sugar. Fresh or frozen raspberries both work well here, breaking down slightly during churning to spread flavor throughout the mixture. A touch of vanilla rounds out the tartness, keeping the overall flavor balanced.
Ingredients
- 1/2 cup heavy cream
- 1/4 cup milk
- 2 tablespoons powdered erythritol or monk fruit sweetener
- 1/4 teaspoon vanilla extract
- 1/4 cup fresh or frozen raspberries, mashed
- Pinch of salt
Instructions
Freeze the mixing cup of the Dash My Mug Ice Cream Maker for a full eight hours ahead of time, resting it flat on a level shelf so it chills evenly throughout. Skipping ahead to churning with a partly frozen cup usually leads to a thin, soupy result instead of a thick, creamy one.
While the cup chills, mash the raspberries with a fork in a small bowl, breaking them down into a rough puree with a few small chunks left for texture. Frozen raspberries work well for this step too, thawing slightly on the counter first to make mashing easier.
In a separate mixing bowl, whisk together the heavy cream, milk, sweetener, vanilla extract, and salt until smooth. Fold in the mashed raspberries gently, stirring just enough to spread the fruit through the mixture without overworking it into one solid pink color.
Pour the finished mixture into the frozen cup, staying below the fill line, then attach the lid and paddle before setting the cup onto the base of the machine. Turn the machine on and let it churn for close to twenty minutes total.
Raspberry seeds and small fruit pieces can slow down the thickening process slightly, so checking the texture starting around the fifteen-minute mark helps track progress closely. Once the mixture holds soft peaks and shows visible streaks of pink running through the pale base, turn the machine off right away, since overripe fruit mixtures can turn icy fast past this point.
Remove the paddle and scoop the finished raspberry vanilla ice cream into a small bowl, adding a few whole raspberries on top for a fresh finishing touch. Serve right away for the softest texture, or freeze the bowl for ten minutes for a firmer scoop. Store leftovers sealed tightly in the freezer for up to five days, stirring gently before the next serving to redistribute any settled fruit.
Tips
- Mashing raspberries first spreads the fruit flavor more evenly.
- Frozen raspberries work fine when thawed slightly before mashing.
- Fresh raspberries on top add color and a burst of tart flavor.
Recipe 12: Blueberry Cream
Prep Time: 5 minutes | Churn Time: 20 minutes | Serve: 1
Ripe blueberries bring a mild, sweet flavor and a soft purple color to this simple cream base, creating a fruity dessert without any added sugar. Cooking the blueberries down slightly before mixing brings out their natural sweetness and softens their skins. This scoop pairs a fruity flavor with a rich, creamy texture.
Ingredients
- 1/2 cup heavy cream
- 1/4 cup milk
- 2 tablespoons powdered erythritol or monk fruit sweetener
- 1/4 cup fresh or frozen blueberries
- 1/4 teaspoon vanilla extract
- Pinch of salt
Instructions
Place the mixing cup of the Dash My Mug Ice Cream Maker in the freezer for a full eight hours before starting, keeping it flat and undisturbed the entire time. A fully frozen cup provides the cold surface needed to thicken the mixture properly once churning begins.
In a small saucepan over low heat, warm the blueberries for about three to four minutes, stirring occasionally, until the skins soften and the berries release some juice. Mash the warmed berries lightly with a fork, then let the mixture cool completely to room temperature before moving forward, since warm fruit added to the frozen cup can slow down churning significantly.
In a mixing bowl, whisk together the heavy cream, milk, sweetener, vanilla extract, and salt until smooth. Fold the cooled blueberry mixture into the cream base gently, stirring just enough to spread the color and flavor throughout without turning the mixture completely purple.
Pour the finished mixture into the frozen cup, staying below the fill line, then attach the lid and paddle before setting the cup onto the base of the machine. Turn the machine on and let it churn for close to twenty minutes.
Checking the texture around the fifteen-minute mark helps track how the mixture thickens, watching for streaks of soft purple running through the pale cream base. Once the mixture holds soft peaks and looks like thick, fruity soft-serve, turn the machine off right away to keep the texture smooth rather than icy.
Scoop the finished blueberry cream ice cream into a small bowl, topping it with a few whole blueberries for extra color and flavor. Serve right away for the softest bite, or freeze the bowl for ten minutes for a firmer scoop. Store leftovers sealed tightly in the freezer for up to five days.
Tips
- Warming the blueberries first brings out more natural sweetness.
- Cooling the fruit fully before mixing keeps churning quick.
- Whole blueberries on top add fresh color and flavor.
Recipe 13: Coconut Ice Cream
Prep Time: 5 minutes | Churn Time: 22 minutes | Serve: 1
Rich coconut milk and shredded coconut bring a tropical flavor to this dairy-light scoop, giving it a naturally sweet and nutty taste without any added sugar. Full-fat coconut milk keeps the texture creamy, while toasted shredded coconut adds a light crunch throughout. Anyone looking for a dairy-light dessert option will find this flavor a good fit.
Ingredients
- 1/2 cup full-fat coconut milk
- 2 tablespoons heavy cream
- 2 tablespoons powdered erythritol or monk fruit sweetener
- 2 tablespoons shredded coconut, toasted
- 1/4 teaspoon vanilla extract
- Pinch of salt
Instructions
Freeze the mixing cup of the Dash My Mug Ice Cream Maker for a full eight hours before starting, resting it flat in the coldest part of the freezer. Coconut milk mixtures sometimes take slightly longer to thicken than dairy-only bases, so a fully frozen cup matters even more for this recipe.
Toast the shredded coconut in a dry skillet over medium-low heat for two to three minutes, stirring often, until it turns light golden brown and smells fragrant. Watch it closely near the end, since shredded coconut can burn quickly once it starts browning. Let the toasted coconut cool fully on a plate before moving forward.
In a mixing bowl, shake the can of coconut milk well, then whisk it together with the heavy cream, sweetener, vanilla extract, and salt until the mixture turns smooth and fully blended. Coconut milk can separate slightly in the can, so whisking thoroughly here helps keep the finished texture even.
Pour the mixture into the frozen cup, staying below the fill line, then attach the lid and paddle before setting the cup onto the base of the machine. Turn the machine on and let it churn for close to twenty-two minutes, slightly longer than a dairy-only recipe.
Checking the texture around the sixteen-minute mark helps track progress, watching for the mixture to turn thick and pale white as it churns. Once soft peaks form and the mixture holds its shape well on a spoon, turn the machine off right away.
Remove the paddle and fold most of the cooled toasted coconut into the finished mixture by hand, saving a small spoonful for topping. Scoop the ice cream into a small bowl, sprinkling the reserved coconut over the top for extra crunch. Serve right away for the softest texture, or freeze the bowl for ten minutes for a firmer scoop. Store leftovers sealed tightly in the freezer for up to five days.
Tips
- Toasting the coconut first adds deeper flavor and crunch.
- Shaking the coconut milk can well keeps the mixture smooth.
- Coconut-based batches may need a few extra minutes of churn time compared to dairy bases.
Recipe 14: Matcha Green Tea
Prep Time: 5 minutes | Churn Time: 20 minutes | Serve: 1
Earthy matcha powder brings a bold green color and a gentle grassy flavor to this simple cream base, creating a dessert with roots in Japanese tea culture. A small amount of matcha goes a long way, so measuring carefully keeps the flavor balanced rather than bitter. Vanilla rounds out the flavor slightly, softening any sharp edges.
Ingredients
- 1/2 cup heavy cream
- 1/4 cup milk
- 2 tablespoons powdered erythritol or monk fruit sweetener
- 1 teaspoon matcha powder
- 1/4 teaspoon vanilla extract
- Pinch of salt
Instructions
Place the mixing cup of the Dash My Mug Ice Cream Maker in the freezer for a full eight hours before starting, resting it flat so every side chills at the same rate. Matcha mixtures thicken best in a fully frozen cup, since the powder can slow down the process slightly compared to plain cream.
Sift the matcha powder through a small strainer into a mixing bowl, breaking up any clumps before adding liquid, since matcha tends to clump more than cocoa powder. Add a small splash of the milk first, whisking the two together into a smooth, thin paste, then slowly whisk in the remaining milk, heavy cream, sweetener, vanilla extract, and salt.
Whisking the paste first, before adding the rest of the liquid, keeps the matcha from clumping later in the process, leading to a smoother, more even green color throughout the finished mixture. Tasting the mixture at this point and adding a touch more sweetener helps, since matcha carries a naturally bitter edge that some sweeteners balance out better than others.
Pour the finished mixture into the frozen cup, staying below the fill line, then attach the lid and paddle before setting the cup onto the base. Turn the machine on and let it churn for close to twenty minutes.
Checking the texture around the fifteen-minute mark helps track the color turning a deeper, more even green as the matcha spreads fully through the thickening cream. Once the mixture holds soft peaks and looks like thick green soft-serve, turn the machine off right away, since matcha mixtures can turn slightly grainy when churned too long.
Remove the paddle and scoop the finished matcha ice cream into a small bowl, dusting a small pinch of extra matcha powder over the top for a stronger visual and flavor finish. Serve right away for the softest texture, or freeze the bowl for ten minutes for a firmer scoop. Store leftovers sealed tightly in the freezer for up to five days.
Tips
- Whisking matcha into a small amount of milk first prevents clumps.
- Tasting the mixture before churning helps balance the natural bitterness.
- A light dusting of matcha on top adds a stronger finish.
Recipe 15: Cinnamon Roll Ice Cream
Prep Time: 5 minutes | Churn Time: 20 minutes | Serve: 1
Warm cinnamon and a hint of vanilla bring the flavor of a fresh-baked cinnamon roll into a cold, sugar-free scoop. Ground cinnamon spreads its flavor throughout the cream base, while a small swirl of sugar-free cream cheese frosting mimics the classic topping. Every bite carries that familiar warm bakery scent.
Ingredients
- 1/2 cup heavy cream
- 1/4 cup milk
- 2 tablespoons powdered erythritol or monk fruit sweetener
- 1/2 teaspoon ground cinnamon
- 1/4 teaspoon vanilla extract
- Pinch of salt
- 1 tablespoon softened cream cheese, for swirling
Instructions
Place the mixing cup of the Dash My Mug Ice Cream Maker in the freezer for a full eight hours before starting, laying it flat so it freezes evenly without any warm spots forming near the base. A well-frozen cup makes a real difference in how thick this recipe turns out.
In a mixing bowl, whisk together the heavy cream, milk, sweetener, ground cinnamon, vanilla extract, and salt until the cinnamon spreads evenly and no dry clumps remain floating on the surface. Cinnamon can settle at the bottom of the bowl if left standing, so whisking again right before pouring keeps the flavor spread evenly through the mixture.
In a separate small bowl, stir the softened cream cheese with a tiny splash of milk until it turns loose and easy to drizzle, similar to a thin frosting.
Pour the cinnamon cream mixture into the frozen cup, staying below the fill line, then attach the lid and paddle before setting the cup onto the base. Turn the machine on and let it churn for around fifteen minutes before adding the cream cheese swirl.
At the fifteen-minute mark, open the lid and drizzle the loosened cream cheese over the surface in a thin spiral pattern, then close the lid and let the machine run for another three to five minutes to swirl it through without fully blending it in.
Checking the texture through the lid near the end helps catch the right moment to stop, watching for visible pale swirls running through the warm tan cinnamon base. Once soft peaks form and the swirl pattern looks even, turn the machine off right away to keep the ribbons of frosting intact.
Remove the paddle gently, then scoop the finished cinnamon roll ice cream into a small bowl. A light dusting of extra cinnamon on top brings back a fresh bakery scent right before serving. Serve immediately for the softest texture, or freeze the bowl for ten minutes for a firmer scoop. Store leftovers sealed tightly in the freezer for up to five days.
Tips
- Whisking cinnamon again right before pouring keeps it from settling.
- Loosening the cream cheese with a splash of milk makes it easier to swirl.
- A dusting of cinnamon on top brings back the bakery scent.
Recipe 16: Pumpkin Spice
Prep Time: 5 minutes | Churn Time: 22 minutes | Serve: 1
Warm pumpkin puree and a blend of fall spices bring a cozy, seasonal flavor to this scoop without any added sugar. Canned pumpkin puree carries natural sweetness and a smooth texture, while cinnamon, nutmeg, and ginger build a familiar spiced flavor. Autumn dessert flavors come through clearly in this cold, spoonable treat.
Ingredients
- 1/2 cup heavy cream
- 1/4 cup milk
- 2 tablespoons canned pumpkin puree
- 2 tablespoons powdered erythritol or monk fruit sweetener
- 1/4 teaspoon ground cinnamon
- Small pinch of ground nutmeg
- Small pinch of ground ginger
- Pinch of salt
Instructions
Place the mixing cup of the Dash My Mug Ice Cream Maker in the freezer for a full eight hours before starting, resting it flat and level for the entire chilling period. Pumpkin puree adds extra body to the mixture, so a fully frozen cup helps offset the thicker starting texture.
In a mixing bowl, whisk together the heavy cream, milk, pumpkin puree, sweetener, cinnamon, nutmeg, ginger, and salt until the mixture turns a smooth, even orange color with no visible streaks of puree remaining. Pumpkin puree can carry small fibrous bits, so pressing the mixture through a fine strainer at this stage creates a smoother finished texture, though this step can be skipped for a more rustic result.
Pour the finished mixture into the frozen cup, staying below the fill line, then attach the lid and paddle before setting the cup onto the base of the machine. Turn the machine on and let it churn for close to twenty-two minutes, slightly longer than a plain cream base due to the added puree.
Checking the texture around the sixteen-minute mark helps track the thickening process, watching for the color to deepen into a warm, spiced orange as it churns. Once the mixture holds soft peaks and looks like thick, spiced soft-serve, turn the machine off right away, since pumpkin mixtures can turn dense and heavy when churned too long.
Remove the paddle and scoop the finished pumpkin spice ice cream into a small bowl, adding a light dusting of extra cinnamon or a few crushed pecans on top for texture. Serve right away for the softest bite, or freeze the bowl for ten minutes for a firmer scoop. Store leftovers sealed tightly in the freezer for up to five days, stirring gently before the next serving since pumpkin mixtures can settle slightly over time.
Tips
- Straining the puree first gives a smoother texture, though it can be skipped.
- This flavor may need a few extra minutes of churn time due to the added puree.
- Crushed pecans on top add crunch and a seasonal touch.
Recipe 17: Banana Cream (No Added Sugar)
Prep Time: 5 minutes | Churn Time: 20 minutes | Serve: 1
Ripe bananas bring natural sweetness and a smooth texture to this scoop, cutting down on the need for extra sweetener. Mashed banana blends fully into the cream base, giving the finished ice cream a soft yellow color and a mild, fruity flavor. Using up bananas that have turned a little too ripe for eating plain works well with this recipe.
Ingredients
- 1/2 cup heavy cream
- 1/4 cup milk
- 1/2 medium ripe banana, mashed
- 1 tablespoon powdered erythritol or monk fruit sweetener (optional, to taste)
- 1/4 teaspoon vanilla extract
- Pinch of salt
Instructions
Place the mixing cup of the Dash My Mug Ice Cream Maker in the freezer for a full eight hours before starting, keeping it flat and undisturbed for the entire chilling period. A properly frozen cup matters even more in fruit-based recipes, since natural sugars in the fruit can slow down freezing slightly.
Mash the ripe banana with a fork in a small bowl until smooth, leaving no large lumps behind. Riper bananas, with a few brown spots on the peel, mash more easily and carry more natural sweetness than firmer, greener ones.
In a mixing bowl, whisk together the heavy cream, milk, vanilla extract, and salt, then fold in the mashed banana until fully blended. Tasting the mixture at this stage, before adding any sweetener, helps decide on the amount needed, since ripe bananas often need little to no added sweetener.
Pour the finished mixture into the frozen cup, staying below the fill line, then attach the lid and paddle before setting the cup onto the base of the machine. Turn the machine on and let it churn for close to twenty minutes total.
Checking the texture around the fifteen-minute mark helps track the color turning a soft, even pale yellow as the banana spreads fully through the cream. Once the mixture holds soft peaks and looks like thick banana soft-serve, turn the machine off right away, since banana mixtures can turn slightly icy when churned for too long.
Remove the paddle and scoop the finished banana cream ice cream into a small bowl, topping it with a few banana slices or a sprinkle of cinnamon for extra flavor. Serve right away for the softest bite, or freeze the bowl for ten minutes for a firmer scoop. Store leftovers sealed tightly in the freezer for up to three days, since banana-based mixtures tend to lose their best texture a little faster than other flavors.
Tips
- Riper bananas carry more natural sweetness and mash more easily.
- Tasting before adding sweetener helps avoid an overly sweet result.
- Banana-based batches taste best within the first three days.
Recipe 18: Chocolate Peanut Butter Cup
Prep Time: 5 minutes | Churn Time: 20 minutes | Serve: 1
Rich chocolate and creamy peanut butter come together in this scoop, recreating a favorite candy flavor without any added sugar. Cocoa powder builds a deep chocolate base, while swirled peanut butter adds pockets of nutty richness throughout. Sweet and salty balance out in nearly every bite of this pairing.
Ingredients
- 1/2 cup heavy cream
- 1/4 cup milk
- 1 tablespoon unsweetened cocoa powder
- 2 tablespoons powdered erythritol or monk fruit sweetener
- Pinch of salt
- 2 tablespoons natural peanut butter, no added sugar
Instructions
Place the mixing cup of the Dash My Mug Ice Cream Maker in the freezer for a full eight hours before starting, laying it flat so every part chills evenly. This combination recipe benefits from a fully frozen cup, since both cocoa and peanut butter add extra body to the mixture.
Sift the cocoa powder into a mixing bowl to remove any clumps, then whisk it together with the heavy cream, milk, sweetener, and salt until the mixture turns a smooth, even brown color. Warm the peanut butter for about ten seconds in the microwave, or stir it briskly with a spoon, until it turns loose enough to drizzle easily.
Pour the chocolate mixture into the frozen cup, staying below the fill line, then attach the lid and paddle before setting the cup onto the base of the machine. Turn the machine on and let it churn for around fifteen minutes before adding the peanut butter swirl.
At the fifteen-minute mark, open the lid and drizzle the warmed peanut butter over the surface of the mixture in a slow spiral pattern, then close the lid and let the machine run for another three to five minutes to swirl it through.
Checking the texture near the end helps catch the moment to stop, watching for visible tan ribbons of peanut butter running through the dark chocolate base rather than one blended color. Once soft peaks form and the swirl pattern looks even, turn the machine off right away to keep the ribbons distinct.
Remove the paddle gently, then scoop the finished chocolate peanut butter cup ice cream into a small bowl. A few chopped sugar-free chocolate peanut butter cups on top bring the flavor full circle. Serve right away for the softest bite, or freeze the bowl for ten minutes for a firmer scoop. Store leftovers sealed tightly in the freezer for up to one week.
Tips
- Warming the peanut butter first makes swirling much easier.
- Adding it partway through churning keeps distinct ribbons instead of one blended color.
- Chopped sugar-free candy on top finishes the flavor nicely.
Recipe 19: Pistachio Ice Cream
Prep Time: 5 minutes | Churn Time: 20 minutes | Serve: 1
Ground pistachios bring a nutty, slightly sweet flavor and a soft green tint to this creamy scoop. Real pistachio pieces add texture throughout, while a touch of almond extract deepens the overall nutty flavor. Classic gelato shops inspire this flavor, made simple here with a sugar-free twist.
Ingredients
- 1/2 cup heavy cream
- 1/4 cup milk
- 2 tablespoons powdered erythritol or monk fruit sweetener
- 2 tablespoons shelled pistachios, finely chopped
- 1/8 teaspoon almond extract
- Pinch of salt
Instructions
Place the mixing cup of the Dash My Mug Ice Cream Maker in the freezer for a full eight hours before starting, resting it flat so it chills evenly on every side. Pistachio pieces add texture later, so the frozen cup needs to reach full hardness for the best churning results.
Chop the shelled pistachios finely using a sharp knife or a small food processor, aiming for pieces small enough to spread easily through the mixture without turning into a paste. Set aside a small spoonful of chopped pistachios for topping the finished scoop later.
In a mixing bowl, whisk together the heavy cream, milk, sweetener, almond extract, and salt until smooth. Almond extract carries a strong flavor even in small amounts, so measuring carefully at this stage keeps the pistachio flavor from getting overpowered.
Stir most of the chopped pistachios into the cream mixture, mixing gently so the pieces spread evenly rather than sinking to the bottom of the bowl. Pour the finished mixture into the frozen cup, staying below the fill line, then attach the lid and paddle before setting the cup onto the base of the machine.
Turn the machine on and let it churn for close to twenty minutes, checking the texture around the fifteen-minute mark. The mixture should turn a soft, pale green with visible flecks of pistachio spread throughout as it thickens. Once soft peaks form and the mixture holds its shape well on a spoon, turn the machine off right away, since nut pieces can turn the mixture slightly grainy when churned too long.
Remove the paddle and scoop the finished pistachio ice cream into a small bowl, sprinkling the reserved chopped pistachios over the top for extra crunch and color. Serve right away for the softest bite, or freeze the bowl for ten minutes for a firmer scoop. Store leftovers sealed tightly in the freezer for up to one week.
Tips
- Chopping pistachios finely helps them spread evenly through the mixture.
- Measuring almond extract carefully keeps the flavor balanced.
- Saved pistachio pieces on top add extra crunch and color.
Recipe 20: Butter Pecan
Prep Time: 5 minutes | Churn Time: 20 minutes | Serve: 1
Toasted pecans and a rich, buttery flavor bring a classic Southern dessert taste to this sugar-free scoop. Toasting the pecans first deepens their natural flavor and adds a light crunch throughout the finished mixture. A small amount of butter blended into the cream base carries that familiar rich, buttery taste.
Ingredients
- 1/2 cup heavy cream
- 1/4 cup milk
- 2 tablespoons powdered erythritol or monk fruit sweetener
- 1 teaspoon unsalted butter, melted
- 1/4 teaspoon vanilla extract
- 2 tablespoons chopped pecans, toasted
- Pinch of salt
Instructions
Place the mixing cup of the Dash My Mug Ice Cream Maker in the freezer for a full eight hours before starting, keeping it flat and undisturbed the entire time. Toasted nut pieces add richness later, so a fully frozen cup helps the mixture thicken properly around them.
Toast the chopped pecans in a dry skillet over medium-low heat for three to four minutes, stirring often, until they turn fragrant and slightly darker in color. Let the toasted pecans cool completely on a plate before moving forward, since warm nuts can slightly melt the frozen cup if added too soon.
Melt the butter in a small dish, either in the microwave for a few seconds or on the stovetop over low heat, then let it cool for a minute so it does not warm the cream mixture too much.
In a mixing bowl, whisk together the heavy cream, milk, sweetener, melted butter, vanilla extract, and salt until the mixture turns smooth and fully blended, with no separated streaks of butter floating on top. Stir in most of the cooled toasted pecans, saving a small spoonful for topping later.
Pour the finished mixture into the frozen cup, staying below the fill line, then attach the lid and paddle before setting the cup onto the base of the machine. Turn the machine on and let it churn for close to twenty minutes.
Checking the texture around the fifteen-minute mark helps track the color turning a warm, pale tan as the butter and pecans spread through the thickening cream. Once soft peaks form and the mixture holds its shape well on a spoon, turn the machine off right away, since the added nuts can turn the texture slightly grainy past this point.
Remove the paddle and scoop the finished butter pecan ice cream into a small bowl, sprinkling the reserved toasted pecans over the top for extra crunch. Serve right away for the softest bite, or freeze the bowl for ten minutes for a firmer scoop. Store leftovers sealed tightly in the freezer for up to one week.
Tips
- Toasting pecans first brings out a deeper, richer flavor.
- Cooling melted butter slightly before mixing keeps the cream base cold.
- Reserved pecans on top add fresh crunch to every serving.
Recipe 21: Black Forest Ice Cream
Prep Time: 5 minutes | Churn Time: 20 minutes | Serve: 1
Rich chocolate, tart cherries, and a hint of vanilla come together in this scoop, drawing inspiration from the classic German cake. Cocoa powder builds a deep chocolate base, while chopped cherries add small bursts of tart, fruity flavor throughout. Together the two flavors create a dessert that feels special without any added sugar.
Ingredients
- 1/2 cup heavy cream
- 1/4 cup milk
- 1 tablespoon unsweetened cocoa powder
- 2 tablespoons powdered erythritol or monk fruit sweetener
- 1/4 cup fresh or frozen dark cherries, pitted and chopped
- 1/4 teaspoon vanilla extract
- Pinch of salt
Instructions
Place the mixing cup of the Dash My Mug Ice Cream Maker in the freezer for a full eight hours before starting, resting it flat so it chills evenly. This fruit and cocoa combination benefits from a fully frozen cup, since both ingredients add extra body to the mixture.
Pit the cherries carefully, then chop them into small pieces, about the size of a pea, so they spread evenly through the mixture without freezing into large icy chunks. Frozen cherries work well too, thawing slightly on the counter first to make chopping easier.
Sift the cocoa powder into a mixing bowl to remove clumps, then whisk it together with the heavy cream, milk, sweetener, vanilla extract, and salt until the mixture turns a smooth, even dark brown color. Fold the chopped cherries into the chocolate mixture gently, stirring just enough to spread the fruit evenly without turning the whole mixture pink.
Pour the finished mixture into the frozen cup, staying below the fill line, then attach the lid and paddle before setting the cup onto the base of the machine. Turn the machine on and let it churn for close to twenty minutes total.
Checking the texture around the fifteen-minute mark helps track the mixture thickening, watching for small dark red flecks running through the rich brown base. Once the mixture holds soft peaks and looks like thick, glossy chocolate soft-serve dotted with fruit, turn the machine off right away, since the added fruit can turn the mixture icy fast past this stage.
Remove the paddle and scoop the finished black forest ice cream into a small bowl, adding a few whole cherries on top for a fresh finishing touch. Serve right away for the softest texture, or freeze the bowl for ten minutes for a firmer scoop. Store leftovers sealed tightly in the freezer for up to five days, stirring gently before the next serving to redistribute any settled fruit.
Tips
- Chopping cherries small keeps every bite easy and even.
- Frozen cherries work fine when thawed slightly before chopping.
- Whole cherries on top add a fresh, fruity finish.
Recipe 22: Mango Coconut
Prep Time: 5 minutes | Churn Time: 22 minutes | Serve: 1
Sweet mango and rich coconut milk bring a tropical pairing to this dairy-light scoop, creating a bright and fruity flavor without any added sugar. Pureed mango carries natural sweetness throughout the mixture, while coconut milk keeps the texture smooth and creamy. Together they build a flavor that feels like a warm-weather escape in a small cup.
Ingredients
- 1/2 cup full-fat coconut milk
- 1/4 cup ripe mango, pureed
- 1 tablespoon powdered erythritol or monk fruit sweetener (optional, to taste)
- 1/4 teaspoon vanilla extract
- Pinch of salt
Instructions
Place the mixing cup of the Dash My Mug Ice Cream Maker in the freezer for a full eight hours before starting, resting it flat in the coldest part of the freezer. Coconut milk and fruit purees both add extra body, so a fully frozen cup matters even more for this recipe.
Puree the ripe mango in a small blender or food processor until smooth, with no large chunks remaining. Ripe mango carries plenty of natural sweetness on its own, so tasting the puree before adding sweetener helps decide the amount needed, or whether any is needed at all.
Shake the can of coconut milk well, then whisk it together with the mango puree, sweetener, vanilla extract, and salt in a mixing bowl until the mixture turns a smooth, even pale orange color with no streaks remaining.
Pour the finished mixture into the frozen cup, staying below the fill line, then attach the lid and paddle before setting the cup onto the base of the machine. Turn the machine on and let it churn for close to twenty-two minutes, slightly longer than a dairy-only recipe.
Checking the texture around the sixteen-minute mark helps track progress, watching for the mixture to turn thick and hold its shape well on a spoon. Fruit purees sometimes take a touch longer to fully set, so patience near the end pays off with a smoother finished texture. Once soft peaks form, turn the machine off right away.
Remove the paddle and scoop the finished mango coconut ice cream into a small bowl, topping it with a few small mango cubes or a sprinkle of toasted coconut for extra texture. Serve right away for the softest bite, or freeze the bowl for ten minutes for a firmer scoop. Store leftovers sealed tightly in the freezer for up to five days.
Tips
- Tasting the mango puree first helps decide on added sweetener.
- Shaking the coconut milk can well keeps the mixture smooth.
- Toasted coconut on top adds extra texture and flavor.
Recipe 23: Orange Creamsicle
Prep Time: 5 minutes | Churn Time: 20 minutes | Serve: 1
Bright orange zest and juice bring a citrus twist to a smooth vanilla cream base, recreating a favorite frozen treat from childhood summers. Fresh orange juice carries natural sweetness and tang, while the zest adds a fragrant top note that lingers after each bite. Vanilla ties the two flavors together into one balanced, creamy scoop.
Ingredients
- 1/2 cup heavy cream
- 2 tablespoons fresh orange juice
- 1/2 teaspoon orange zest
- 2 tablespoons powdered erythritol or monk fruit sweetener
- 1/4 teaspoon vanilla extract
- Pinch of salt
Instructions
Place the mixing cup of the Dash My Mug Ice Cream Maker in the freezer for a full eight hours before starting, keeping it flat and level the entire time. Citrus juice can slow down freezing slightly, so a fully frozen cup matters even more for this recipe.
Grate the orange zest finely from the outer peel, avoiding the bitter white pith underneath, then set it aside in a small dish. Squeeze fresh orange juice from the same orange, straining out any seeds or large pulp pieces before measuring the amount needed.
In a mixing bowl, whisk together the heavy cream, orange juice, orange zest, sweetener, vanilla extract, and salt until the mixture turns smooth and fully blended, with the zest spread evenly throughout rather than clumped in one spot.
Pour the finished mixture into the frozen cup, staying below the fill line, then attach the lid and paddle before setting the cup onto the base of the machine. Turn the machine on and let it churn for close to twenty minutes total.
Checking the texture around the fifteen-minute mark helps track progress, watching for small flecks of orange zest spread evenly through the pale, thickening cream. Once the mixture holds soft peaks and looks like thick, citrus-scented soft-serve, turn the machine off right away, since citrus mixtures can turn slightly icy when churned too long.
Remove the paddle and scoop the finished orange creamsicle ice cream into a small bowl, adding an extra pinch of orange zest on top for a fresh finishing touch. Serve right away for the softest texture, or freeze the bowl for ten minutes for a firmer scoop. Store leftovers sealed tightly in the freezer for up to five days.
Tips
- Grating zest from just the outer peel avoids a bitter flavor.
- Straining the juice keeps the texture smooth and seed free.
- An extra pinch of zest on top brightens the final presentation.
Recipe 24: Chocolate Hazelnut
Prep Time: 5 minutes | Churn Time: 20 minutes | Serve: 1
Toasted hazelnuts and rich cocoa come together in this scoop, recreating a favorite spread flavor without any added sugar. Toasting the hazelnuts first brings out a deeper, more rounded nutty taste, while cocoa powder builds the chocolate layer underneath. Together the two flavors create a rich, dessert-shop style treat.
Ingredients
- 1/2 cup heavy cream
- 1/4 cup milk
- 1 tablespoon unsweetened cocoa powder
- 2 tablespoons powdered erythritol or monk fruit sweetener
- 2 tablespoons hazelnuts, toasted and chopped
- 1/4 teaspoon vanilla extract
- Pinch of salt
Instructions
Place the mixing cup of the Dash My Mug Ice Cream Maker in the freezer for a full eight hours before starting, resting it flat so every side chills evenly. Toasted nut pieces add richness later, so the cup needs to reach full hardness for the best churning results.
Toast the hazelnuts in a dry skillet over medium-low heat for four to five minutes, stirring often, until the skins loosen and the nuts turn fragrant. Let them cool for a few minutes, then rub the warm nuts between a clean towel to remove most of the loose skins, since the skins can carry a slightly bitter taste. Chop the peeled hazelnuts into small pieces once fully cooled.
Sift the cocoa powder into a mixing bowl to remove clumps, then whisk it together with the heavy cream, milk, sweetener, vanilla extract, and salt until the mixture turns a smooth, even brown color. Stir in most of the chopped hazelnuts, saving a small spoonful for topping the finished scoop later.
Pour the finished mixture into the frozen cup, staying below the fill line, then attach the lid and paddle before setting the cup onto the base of the machine. Turn the machine on and let it churn for close to twenty minutes.
Checking the texture around the fifteen-minute mark helps track the mixture thickening, watching for small nut pieces spread evenly through the rich brown base. Once soft peaks form and the mixture holds its shape well on a spoon, turn the machine off right away, since the added nuts can turn the texture slightly grainy past this point.
Remove the paddle and scoop the finished chocolate hazelnut ice cream into a small bowl, sprinkling the reserved chopped hazelnuts over the top for extra crunch. Serve right away for the softest bite, or freeze the bowl for ten minutes for a firmer scoop. Store leftovers sealed tightly in the freezer for up to one week.
Tips
- Rubbing warm hazelnuts in a towel removes bitter skins easily.
- Sifting cocoa powder first keeps the mixture smooth.
- Reserved hazelnut pieces on top add fresh crunch.
Recipe 25: Birthday Cake Sugar-Free Ice Cream
Prep Time: 5 minutes | Churn Time: 20 minutes | Serve: 1
Sugar-free rainbow sprinkles and a hint of almond extract bring a festive, celebration flavor to this simple vanilla base. Almond extract carries a light, cake-like flavor often found in bakery frosting, while sprinkles add small pops of color throughout the mixture. Any regular day turns into a small celebration with this flavor.
Ingredients
- 1/2 cup heavy cream
- 1/4 cup milk
- 2 tablespoons powdered erythritol or monk fruit sweetener
- 1/4 teaspoon vanilla extract
- 1/8 teaspoon almond extract
- Pinch of salt
- 1 tablespoon sugar-free rainbow sprinkles
Instructions
Place the mixing cup of the Dash My Mug Ice Cream Maker in the freezer for a full eight hours before starting, keeping it flat and level the entire time. A fully frozen cup gives the base something cold enough to thicken quickly once churning begins.
In a mixing bowl, whisk together the heavy cream, milk, sweetener, vanilla extract, almond extract, and salt until the mixture turns smooth and fully blended. Almond extract carries a strong flavor even in small amounts, so measuring it carefully keeps the cake-like flavor balanced rather than overpowering.
Set aside about half of the sugar-free sprinkles for topping the finished scoop later, then stir the remaining sprinkles into the cream mixture gently, mixing just enough to spread the color throughout without letting the colors bleed and turn the mixture gray.
Pour the finished mixture into the frozen cup, staying below the fill line, then attach the lid and paddle before setting the cup onto the base of the machine. Turn the machine on and let it churn for close to twenty minutes total.
Checking the texture around the fifteen-minute mark helps track the small flecks of color spreading evenly through the thickening cream. Once the mixture holds soft peaks and looks like thick, speckled soft-serve, turn the machine off right away, since sprinkles left in the mixture too long can start to bleed their color and dull the bright speckled look.
Remove the paddle and scoop the finished birthday cake ice cream into a small bowl, topping it with the reserved sprinkles for a fresh burst of color. Serve right away for the softest texture and the brightest color, or freeze the bowl for ten minutes for a firmer scoop. Store leftovers sealed tightly in the freezer for up to five days, keeping in mind the sprinkle colors may soften slightly with time.
Tips
- Measuring almond extract carefully keeps the cake flavor balanced.
- Saving some sprinkles for the top keeps the brightest color.
- Serving right away gives the most vivid speckled look.
How to Store Homemade Sugar-Free Ice Cream
1. Best Containers — Small airtight containers with tight-fitting lids work best for storing single servings. Glass or BPA-free plastic containers keep out extra air, which helps stop ice crystals from forming on top of the ice cream.
2. How Long It Lasts — Most sugar-free flavors stay fresh in the freezer for about five to seven days. Fruit-based flavors like banana or berries tend to lose their best texture a little faster, so eating those within three days works best.
3. How to Soften Before Serving — Homemade sugar-free ice cream freezes harder than store-bought versions, since it skips the added stabilizers. Letting a frozen portion sit on the counter for five to ten minutes before serving brings back that soft, scoopable texture.
Conclusion
Homemade sugar-free ice cream brings together simple ingredients, quick prep, and full control over what ends up in the bowl.
The Dash My Mug Ice Cream Maker turns this whole process into an easy, single-serve routine that fits busy schedules and mixed dietary needs alike, from keto and low-carb eating to diabetes-friendly desserts. With twenty-five flavors to choose from, trying new mix-ins and flavor pairings keeps every batch feeling fresh and new.
Folding in extra fruit, swirling in nut butter, or testing a new spice blend opens up even more flavor combinations to explore. Bookmarking this recipe collection makes it simple to return for fresh ideas any time a craving strikes.
Sharing favorite flavor twists and variations in the comments below helps build an even bigger list of sugar-free ideas for everyone to try next.