
A food processor is one of those kitchen tools that changes the way you cook every single day. Once you bring one home, you start wondering how you ever managed without it.
Cuisinart food processor recipes make everything faster — from chopping onions to mixing dough to pureeing soups — and the results always look and taste like you spent way more time than you actually did.
Using a Cuisinart food processor for meal prep means less time standing at the cutting board and more time enjoying your meals with family.
These machines handle chopping, slicing, shredding, mixing, and pureeing with ease. Need to shred a block of cheese in seconds? Done. Want to make homemade hummus in under five minutes? Easy.
Whether you are cooking for one or feeding a whole crowd, a food processor takes the hard work out of your hands — literally. Keep reading to find 20 easy, tried-and-true recipes that will help you get the most out of your machine.

Why Choose a Cuisinart Food Processor for Everyday Cooking
Cuisinart food processors are a top pick for home cooks for good reason. Here is what makes them a smart choice for your kitchen:
1. Powerful performance for beginners and home cooks. You do not need to be a professional chef to use a Cuisinart. The motor is strong enough to handle tough ingredients like raw carrots, frozen fruit, and thick dough without struggling. Even on your first try, the results come out smooth and even.
2. Multiple blade attachments and functions. Cuisinart food processors come with several blade and disc attachments. The S-blade is great for chopping and mixing. The shredding disc works perfectly for cheese and vegetables. The slicing disc gives you clean, even cuts every time. Each attachment opens up a whole new set of recipes you can make.
3. Time-saving benefits for busy kitchens. What might take 15 minutes of hand-chopping takes about 30 seconds in a food processor. For weeknight dinners or big batch meal prep on Sundays, that time savings adds up fast.
4. Ideal for sauces, dough, vegetables, desserts, and meal prep. From a creamy pasta sauce to a flaky pie crust, from finely grated cauliflower rice to a thick cheesecake filling, a Cuisinart handles it all. It is truly one machine that does the work of many.
1. Fluffy Pancake Batter
Prep Time: 5 minutes | Cook Time: 15 minutes | Serves: 4
Making pancake batter in a food processor gives you a lump-free mix every single time. The blades blend the wet and dry ingredients together quickly and evenly, so your pancakes come out light, fluffy, and golden. Great for lazy weekend mornings when you want something good without too much cleanup.

Ingredients:
- 1 ½ cups all-purpose flour
- 2 teaspoons baking powder
- ½ teaspoon salt
- 2 tablespoons granulated sugar
- 1 cup whole milk
- 1 large egg
- 2 tablespoons melted butter
- 1 teaspoon vanilla extract
- Butter or oil for the pan
Instructions:
Start by adding the dry ingredients to the food processor bowl. Put in the all-purpose flour, baking powder, salt, and granulated sugar. Put the lid on securely and pulse the machine three or four times just to combine and aerate the dry mixture. This step helps keep the batter light and prevents dense pancakes.
Next, crack the egg into a small bowl and beat it lightly with a fork. Add the milk, melted butter, and vanilla extract to the beaten egg and stir them together briefly. You want everything slightly mixed before it goes into the processor so the fat distributes more evenly.
With the food processor running on low, slowly pour the liquid mixture through the feed tube. Let the machine run for about 10 seconds after all the liquid is in. Do not over-process the batter — a few small streaks of flour are totally fine and will cook out in the pan. Over-mixing develops the gluten in the flour, which makes pancakes tough instead of tender.
Remove the blade carefully and let the batter rest for five minutes while you heat your skillet or griddle over medium heat. Lightly grease the surface with butter or a neutral oil. When the pan is hot, pour about ¼ cup of batter per pancake onto the surface. Let each pancake cook undisturbed until you see bubbles forming across the entire surface and the edges look set — this usually takes about two to three minutes.
Flip each pancake only once using a wide spatula. Cook the second side for another one to two minutes until the bottom is golden brown. Resist the urge to press down on the pancakes with the spatula; pressing forces out the air and makes them flat.
Transfer cooked pancakes to a plate and keep them warm in a low oven (around 200°F) while you finish the rest of the batch. Serve with maple syrup, fresh berries, or a dusting of powdered sugar.
2. Homemade Hash Browns
Prep Time: 10 minutes | Cook Time: 15 minutes | Serves: 4
Crispy on the outside, soft in the middle — hash browns made at home are so much better than frozen ones. Using the shredding disc on your Cuisinart food processor makes this job incredibly fast, and you get perfectly even shreds every time.
Ingredients:
- 4 medium russet potatoes, peeled
- ½ teaspoon garlic powder
- ½ teaspoon onion powder
- ½ teaspoon salt
- ¼ teaspoon black pepper
- 2 tablespoons vegetable oil or clarified butter
- 1 small yellow onion (optional)
Instructions:
Peel the potatoes and cut them in half lengthwise so they fit through the feed tube of your Cuisinart food processor. Attach the shredding disc according to your machine’s instructions. Turn the processor on and feed the potato halves through the tube using the food pusher. If you are adding onion, shred it along with the potatoes at this stage.
Once all the potatoes are shredded, transfer them immediately to a large clean kitchen towel or several layers of paper towels. Gather the towel around the shredded potato and wring it out firmly over the sink. Getting as much moisture out as possible is the single most important step for crispy hash browns. Potatoes hold a lot of water, and any moisture left in the shreds will steam in the pan instead of crisping up. Wring the towel two or three times, rotating the potato bundle to make sure you are squeezing from every angle.
Once the potatoes are as dry as you can get them, transfer them to a large bowl. Add the garlic powder, onion powder, salt, and black pepper. Toss everything together with clean hands or a fork until the seasoning is evenly mixed in.
Heat the oil or clarified butter in a large cast iron or non-stick skillet over medium-high heat. Let the oil get hot before adding the potatoes — you want to hear a sizzle when the potato hits the pan. Add the shredded potato mixture in an even layer, pressing it down gently with a spatula to form a flat cake. Do not stir or move the potato for at least five to six minutes. You need to let the bottom form a crust before flipping.
Peek underneath with a spatula. When the bottom is deep golden brown and releases easily from the pan, it is ready to flip. You can flip the whole thing at once like a pancake, or break it into sections and flip each piece individually. Cook the second side for another four to five minutes until it matches the color of the first side.
Slide the hash browns onto a paper towel-lined plate to absorb any excess oil. Season with a little extra salt if needed and serve immediately alongside eggs, sliced avocado, or hot sauce.
3. Healthy Smoothie Bowl Base
Prep Time: 5 minutes | Cook Time: 0 minutes | Serves: 2
Thick, creamy, and packed with natural goodness — a smoothie bowl base made in a food processor comes out richer than anything you can make in a regular blender. The machine handles frozen fruit without adding extra liquid, so the result is genuinely thick and spoonable.
Ingredients:
- 2 cups frozen banana slices (about 2 medium bananas, sliced and frozen overnight)
- 1 cup frozen mixed berries
- ½ cup plain Greek yogurt
- 2 tablespoons almond butter or peanut butter
- 1 tablespoon honey or maple syrup
- ¼ cup milk of choice (add slowly as needed)
Toppings (optional):
- Granola, sliced fresh fruit, chia seeds, coconut flakes, or nut butter drizzle
Instructions:
Take the frozen banana slices and frozen berries out of the freezer and let them sit at room temperature for just two to three minutes. This short rest makes processing easier without warming the fruit too much. If they are rock solid straight from the freezer, the machine will have to work harder and the texture may become slightly gummy from over-processing.
Add the Greek yogurt to the food processor bowl first. The yogurt acts as the base and helps the frozen fruit move through the blades more smoothly. Add the nut butter and honey on top of the yogurt, then place the frozen banana and berries on top of everything.
Put the lid on securely and start the machine. It will sound loud and rough at first — that is completely normal when processing frozen fruit. The machine will break down the fruit in stages. Stop the machine every 20 to 30 seconds and scrape down the sides of the bowl with a spatula, pushing any large chunks back toward the blades.
Continue processing in short bursts. Only add milk one tablespoon at a time if the mixture seems too thick to process. The goal is to keep this as thick as possible — thinner than ice cream but much thicker than a drinkable smoothie. Adding too much liquid too fast will make the bowl watery and the toppings will sink.
Once the mixture is smooth and creamy with no large frozen chunks remaining, stop the machine and taste. Add more honey if you want extra sweetness, or a squeeze of lemon juice if you prefer a slightly tangy flavor.
Divide the base between two bowls immediately and add your toppings right away. The mixture will melt quickly at room temperature, so work fast and eat right away for the best texture.
4. Banana Oat Muffin Mix
Prep Time: 10 minutes | Cook Time: 22 minutes | Serves: 12 muffins
Soft, naturally sweet muffins that come together in minutes — these banana oat muffins are made almost entirely in the food processor. No mixer needed, and cleanup is simple. They are perfect for grab-and-go breakfasts or afternoon snacks.
Ingredients:
- 3 ripe bananas, peeled and broken into chunks
- 2 large eggs
- ¼ cup melted coconut oil or vegetable oil
- ¼ cup honey or maple syrup
- 1 teaspoon vanilla extract
- 1 ½ cups rolled oats
- 1 teaspoon baking powder
- ½ teaspoon baking soda
- ½ teaspoon cinnamon
- ¼ teaspoon salt
- ½ cup chopped walnuts or chocolate chips (optional)
Instructions:
Preheat your oven to 350°F. Line a 12-cup muffin tin with paper liners or grease each cup generously with oil or butter.
Place the banana chunks in the food processor bowl and process for about 20 seconds until smooth and slightly foamy. The riper your bananas are, the sweeter your muffins will be, so use bananas that have plenty of brown spots on the skin.
Add the eggs, melted coconut oil, honey, and vanilla extract to the processed bananas. Pulse the mixture four to five times just to combine. You do not need to process this long — just enough to blend everything together.
Add the rolled oats to the food processor and pulse three to four times. You want the oats broken down slightly but not completely powdered. Some texture from the oats is what gives these muffins their hearty quality. Then add the baking powder, baking soda, cinnamon, and salt and pulse two more times just to distribute the dry ingredients.
Remove the blade carefully and use a spatula to stir in the walnuts or chocolate chips if you are using them. Do not use the machine for this step — the blade will chop the add-ins too finely.
Let the batter rest for five minutes so the oats can absorb some of the liquid. The batter will thicken slightly during this time, which is exactly what you want. Use a large spoon or ice cream scoop to divide the batter evenly among the prepared muffin cups. Fill each cup about two-thirds full.
Bake on the middle rack of the oven for 20 to 22 minutes. To check for doneness, insert a toothpick into the center of a muffin — it should come out clean or with just a few moist crumbs. The tops should be golden and spring back when you press them lightly.
Let the muffins cool in the tin for five minutes before transferring them to a wire rack. They taste best slightly warm but store well in an airtight container at room temperature for up to three days, or in the freezer for up to two months.
5. Classic Hummus
Prep Time: 10 minutes | Cook Time: 0 minutes | Serves: 8
Homemade hummus from a Cuisinart food processor is on another level compared to store-bought. The texture is silky-smooth, the flavor is fresh, and you can control exactly how garlicky or lemony you want it. This is one of the most popular Cuisinart food processor recipes for a reason.

Ingredients:
- 1 can (15 oz) chickpeas, drained and rinsed (reserve the liquid)
- 3 tablespoons tahini (sesame paste)
- 3 tablespoons fresh lemon juice (about 1 large lemon)
- 2 garlic cloves, peeled
- 2 tablespoons olive oil, plus more for serving
- ½ teaspoon ground cumin
- ½ teaspoon salt
- 3–4 tablespoons reserved chickpea liquid or cold water
- Paprika and fresh parsley for garnish
Instructions:
The secret to ultra-smooth hummus is to process the tahini and lemon juice first, before adding anything else. Add the tahini and lemon juice to the food processor and run the machine for a full minute. You will notice the tahini lighten in color and turn almost fluffy. This step emulsifies the tahini and is what makes homemade hummus noticeably creamier than most recipes.
Add the peeled garlic cloves and process for another 30 seconds until the garlic is very finely minced. Now add the cumin and salt and pulse a few times to combine.
Add the drained chickpeas to the bowl. Run the machine for about two minutes, stopping once halfway through to scrape down the sides. At this stage the hummus will look thick and a little grainy. Do not stop here — keep going.
With the machine running, slowly pour in the reserved chickpea liquid (also called aquafaba) or cold water through the feed tube, one tablespoon at a time. Adding the liquid gradually while the machine is running creates a smoother, creamier result than adding it all at once. After adding three to four tablespoons, let the processor run for a full two minutes without stopping. This extended processing time is what creates that restaurant-quality texture.
Taste the hummus and adjust the seasoning. Add more lemon juice for brightness, more salt if needed, or an extra garlic clove if you like a stronger garlic flavor. If the texture is still thicker than you prefer, add one more tablespoon of cold water and process again.
Transfer the hummus to a serving bowl. Use the back of a spoon to create a shallow swirl on top. Drizzle generously with olive oil, sprinkle with paprika, and scatter a few fresh parsley leaves on top. Serve with warm pita bread, fresh vegetables, or crackers. Keeps in the fridge for up to five days in a sealed container.
6. Restaurant-Style Salsa
Prep Time: 10 minutes | Cook Time: 0 minutes | Serves: 8–10
Bright, fresh, and just the right amount of chunky — this salsa comes together in under two minutes in the food processor. The key is pulsing rather than blending, so you get a proper salsa texture instead of a smooth sauce.
Ingredients:
- 4 medium Roma tomatoes, quartered
- 1 can (14.5 oz) fire-roasted diced tomatoes, drained
- ½ white onion, roughly chopped
- 2 garlic cloves, peeled
- 1–2 jalapeños, stemmed (seeds removed for mild, seeds in for hot)
- ½ cup fresh cilantro, stems and leaves
- Juice of 1 lime
- 1 teaspoon salt
- ½ teaspoon cumin
- ½ teaspoon sugar (optional, to balance acidity)
Instructions:
Start with the aromatics that need the most processing. Add the garlic cloves and jalapeño to the food processor first. Pulse four to five times until they are finely chopped. Stopping at this stage and doing it separately ensures the jalapeño and garlic do not remain in large pieces once the other ingredients are added.
Add the roughly chopped onion and pulse two to three more times. You want the onion in small but still visible pieces — not mushy.
Add the fresh Roma tomatoes and pulse three to four times. Then add the drained fire-roasted tomatoes. Fire-roasted tomatoes add a smoky depth of flavor that makes this salsa taste like it came from a real Mexican restaurant.
Add the cilantro, lime juice, salt, cumin, and sugar if using. Pulse the entire mixture three to four more times, checking the texture after each pulse. The goal is a salsa that has some body and small chunks rather than a smooth puree.
Taste the salsa and adjust. More lime juice brightens it up, more salt rounds out the flavor, and more jalapeño adds heat. Transfer to a bowl or jar and refrigerate for at least 30 minutes before serving. The flavors come together and deepen as it chills. Salsa keeps in the fridge for up to five days.
7. Creamy Spinach Dip
Prep Time: 10 minutes | Cook Time: 0 minutes | Serves: 8
Cold, creamy, and full of flavor, this spinach dip is a crowd-pleaser at any gathering. Using a food processor means the spinach gets perfectly incorporated into the creamy base without any stringy pieces.
Ingredients:
- 10 oz frozen chopped spinach, thawed and squeezed very dry
- 1 cup sour cream
- ½ cup mayonnaise
- 1 packet (1 oz) dry vegetable soup mix
- 1 can (8 oz) water chestnuts, drained
- 3 green onions, roughly chopped
- ½ teaspoon garlic powder
- Salt and black pepper to taste
Instructions:
The most important prep step here is removing as much water as possible from the thawed spinach. After thawing the frozen spinach in the refrigerator overnight or in the microwave, place it in the center of a clean kitchen towel. Wrap the towel around the spinach and squeeze firmly over the sink, pressing and twisting to force out every drop of liquid. Repeat two to three times. Wet spinach will make the dip watery and thin, so this step is essential.
Add the sour cream and mayonnaise to the food processor bowl. Sprinkle the dry vegetable soup mix over the top. Pulse two or three times just to start combining.
Add the squeezed spinach, breaking it apart with your fingers as you add it so it does not go in as one large ball. Add the drained water chestnuts and roughly chopped green onions. The water chestnuts add a pleasant mild crunch to the finished dip.
Pulse the food processor six to eight times, checking the texture after every couple of pulses. You want the spinach finely broken up and evenly distributed through the creamy base, but you still want some visible texture from the water chestnuts and green onion.
Add the garlic powder and a pinch each of salt and black pepper. Pulse two more times to combine. Taste and adjust the seasoning. Transfer the dip to a serving bowl, cover tightly, and refrigerate for at least one hour before serving. The resting time allows the dry soup mix to fully hydrate and the flavors to blend together.
Serve cold with sliced sourdough bread, crackers, pita chips, or fresh vegetables. You can also hollow out a round loaf of bread and use it as an edible bowl for a fun presentation.
8. Homemade Guacamole
Prep Time: 10 minutes | Cook Time: 0 minutes | Serves: 6
Good guacamole does not need many ingredients — just ripe avocados and the right balance of flavors. The food processor helps you get a creamy base quickly while keeping some texture, so it tastes fresh and made-from-scratch every time.
Ingredients:
- 3 ripe avocados, halved and pitted
- Juice of 1 ½ limes
- 1 small jalapeño, stemmed and seeded (add seeds for more heat)
- 2 garlic cloves, peeled
- ½ small white onion, roughly chopped
- ¼ cup fresh cilantro leaves
- ½ teaspoon salt
- ¼ teaspoon ground cumin
- 1 medium Roma tomato, finely diced (added by hand at the end)
Instructions:
Scoop the avocado flesh out of the skin and place it directly into the food processor bowl. Squeeze the lime juice over the avocado immediately. The acid in the lime juice slows down browning, so do not skip this step or delay it.
Add the jalapeño and garlic cloves to the bowl. Because these two ingredients have strong, concentrated flavors, you want them finely processed and evenly distributed through the guacamole rather than left in noticeable chunks.
Add the roughly chopped onion, cilantro leaves, salt, and cumin. Put the lid on and pulse the food processor four to five times. Stop and check the texture. The goal is a guacamole that is mostly creamy with just a few small chunks of avocado still visible. Chunky guacamole has great texture and mouthfeel.
Continue pulsing one or two more times if needed, but stop before the mixture becomes completely smooth. Over-processing turns guacamole into more of a puree than a dip.
Remove the blade and use a spoon to stir in the finely diced Roma tomato. Do not add the tomato to the processor — it will get watery and make the guacamole too loose. Stirring it in by hand at the end keeps the tomato pieces intact and adds color and freshness.
Taste and adjust the seasoning. More lime juice adds brightness, more salt brings out the other flavors, and more jalapeño increases the heat. Transfer to a serving bowl and press a piece of plastic wrap directly onto the surface of the guacamole before refrigerating. Direct contact with plastic wrap prevents air from reaching the surface, which slows browning significantly. Serve within a few hours for best color and flavor.
9. Chicken Salad Sandwich Filling
Prep Time: 10 minutes | Cook Time: 0 minutes | Serves: 4
Tender, finely chopped chicken mixed with a creamy, flavorful dressing — this chicken salad is a quick lunch that beats anything from a deli counter. The food processor chops the cooked chicken perfectly in just a few pulses.
Ingredients:
- 2 cups cooked chicken breast (rotisserie or poached), cooled
- ½ cup mayonnaise
- 1 tablespoon Dijon mustard
- 1 tablespoon lemon juice
- 2 stalks celery, cut into 2-inch pieces
- ½ small red onion, roughly chopped
- 2 tablespoons fresh dill or parsley
- ½ teaspoon garlic powder
- Salt and black pepper to taste
- ½ cup halved red grapes or chopped apple (optional, for sweetness)
Instructions:
Cut the cooled cooked chicken into rough chunks, about 2 inches each. Cold chicken processes better than warm — it holds its texture and does not turn mushy. If you are using rotisserie chicken, remove the skin and pull the meat into large pieces by hand first.
Add the celery pieces to the food processor first. Pulse four to five times until the celery is roughly chopped. Remove the celery and set it aside in a large bowl. This step keeps you in control of the celery texture, preventing over-chopping.
Add the red onion and fresh herbs to the processor and pulse three to four times until finely chopped. Add these to the bowl with the celery.
Now add the chicken chunks to the processor. Pulse three to four times, checking after each pulse. You want the chicken in small, consistent pieces — not a paste. The texture should be similar to a good deli-style chicken salad where you can still see and feel the chicken pieces.
Add the mayonnaise, Dijon mustard, lemon juice, garlic powder, salt, and pepper directly to the bowl with the celery and onion mixture. Add the processor-chopped chicken on top. If you are including grapes or apple, add them now as well.
Use a large spoon to mix everything together gently until the dressing coats all the ingredients evenly. Taste and adjust — more mustard for sharpness, more lemon juice for brightness, more mayo if it seems dry. Cover and refrigerate for at least 20 minutes before serving so the flavors can settle together.
Serve on toasted sandwich bread, in a croissant, on crackers, or over a bed of lettuce. Keeps in the fridge for up to three days in a sealed container.
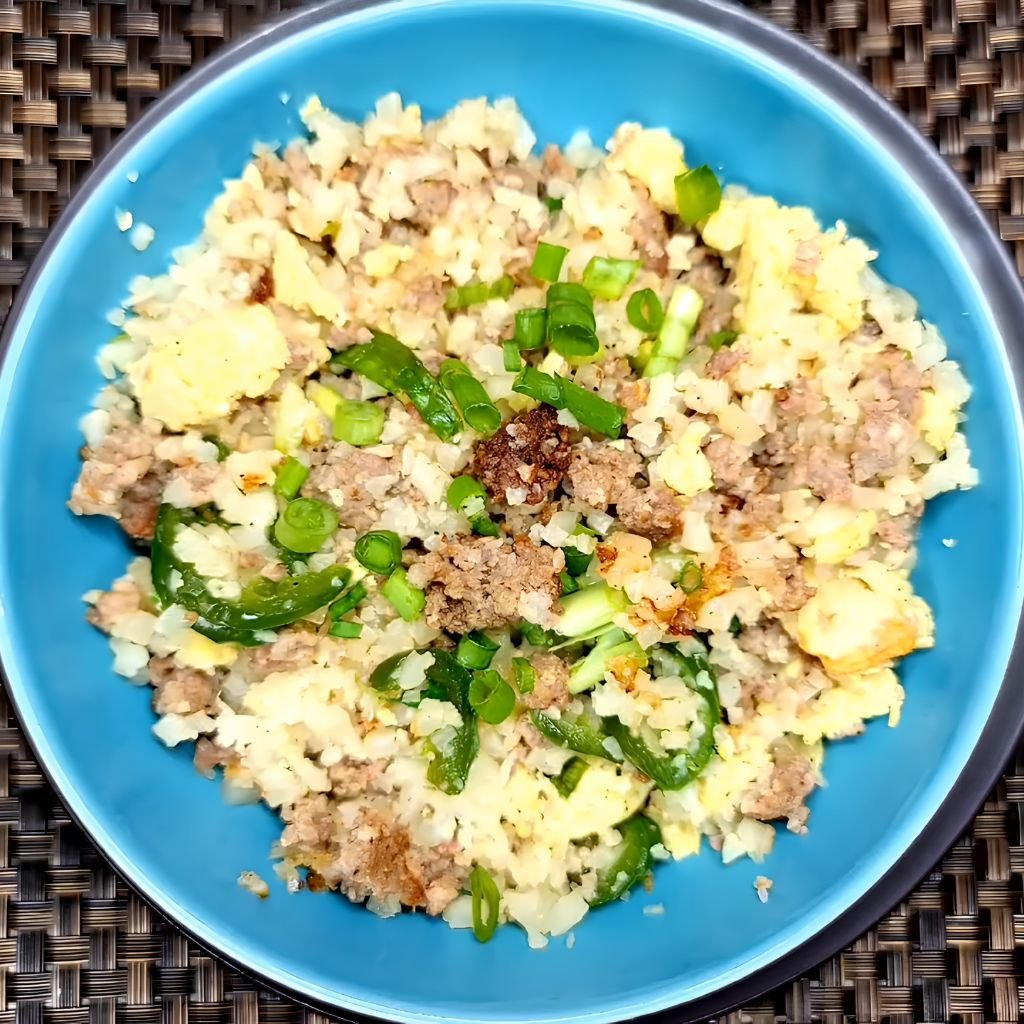
10. Cauliflower Rice Bowl
Prep Time: 10 minutes | Cook Time: 10 minutes | Serves: 4
Cauliflower rice is light, low-carb, and surprisingly satisfying. The food processor turns a whole head of cauliflower into perfect rice-sized pieces in about 30 seconds — no grater scraping required.
Ingredients:
- 1 large head of cauliflower, cut into florets
- 2 tablespoons olive oil or butter
- 3 garlic cloves, minced
- ½ teaspoon salt
- ¼ teaspoon black pepper
- ¼ teaspoon turmeric (optional, for color)
- 2 tablespoons chopped fresh parsley
- Lemon juice to taste
Bowl toppings (choose your favorites):
- Roasted vegetables, grilled protein, avocado slices, poached egg, or tahini drizzle
Instructions:
Cut the cauliflower into florets, removing the thick core and leaves. Make sure the florets are roughly the same size so they process evenly. Pat them dry with a paper towel — dry cauliflower processes into fluffier rice. Wet florets tend to clump together.
Working in batches, fill the food processor bowl no more than halfway with cauliflower florets. Do not overfill the bowl or the cauliflower on the bottom will get over-processed into a paste while the pieces on top are still large. Pulse the machine five to seven times, checking the texture after each burst. The cauliflower should look like grains of rice — coarse and fluffy, not wet or mushy.
Transfer the processed batch to a large bowl and continue with the remaining florets until everything is riced. Spread the cauliflower rice in a single layer on a clean kitchen towel or paper towels and press gently to remove some of the moisture. This step makes a big difference in the final texture.
Heat olive oil or butter in a large skillet over medium-high heat. Add the minced garlic and cook for one minute, stirring constantly, until fragrant. Add the cauliflower rice and spread it into an even layer across the pan. Let it cook undisturbed for two minutes to allow the bottom layer to get a little toasted color.
Stir and cook for another three to four minutes, stirring occasionally. Season with salt, pepper, and turmeric if using. The turmeric adds a warm golden color and a subtle earthy flavor. Cook until the cauliflower is tender but not mushy — it should still have a slight bite.
Remove from heat, squeeze a little lemon juice over the top, and scatter fresh parsley over everything. Serve immediately in bowls topped with your choice of roasted vegetables, protein, or sauces.
11. Broccoli Cheddar Soup Base
Prep Time: 10 minutes | Cook Time: 25 minutes | Serves: 6
Rich, creamy, and deeply satisfying — broccoli cheddar soup is pure comfort food. Using the food processor to puree the base makes it velvety-smooth without needing a separate blender or immersion blender.
Ingredients:
- 4 cups broccoli florets, steamed until tender
- 1 medium yellow onion, diced
- 3 garlic cloves, minced
- 3 tablespoons butter
- 3 tablespoons all-purpose flour
- 2 cups chicken or vegetable broth
- 2 cups whole milk or half-and-half
- 2 cups shredded sharp cheddar cheese
- ½ teaspoon mustard powder
- ½ teaspoon paprika
- Salt and black pepper to taste
Instructions:
Begin by cooking the onion. Melt the butter in a large pot or Dutch oven over medium heat. Add the diced onion and cook, stirring occasionally, for five to six minutes until the onion is soft and translucent. Add the garlic and cook for another minute, stirring constantly to prevent the garlic from burning.
Sprinkle the flour over the cooked onion and garlic. Stir continuously for one to two minutes, cooking the raw flour taste out. The mixture will look thick and paste-like — that is what you want. This is your roux, which will thicken the soup.
Slowly pour in the chicken broth while whisking constantly. Adding the liquid gradually while whisking prevents lumps from forming. Once all the broth is added, pour in the milk or half-and-half and continue whisking. Bring the mixture to a gentle simmer over medium heat, stirring frequently, until it thickens slightly — about five minutes.
While the broth base is heating, steam the broccoli florets until they are very tender. Transfer the steamed broccoli to the food processor bowl and add about one cup of the hot soup broth to help it move through the blades. Process until the broccoli is completely smooth, about one full minute.
Pour the smooth broccoli puree back into the pot with the rest of the soup base and stir to combine. Add the mustard powder and paprika. Reduce the heat to low.
Add the shredded cheddar cheese one handful at a time, stirring each addition until it melts completely before adding the next. This slow process prevents the cheese from clumping or turning greasy. Season with salt and black pepper to taste.
Serve hot with crusty bread or in a bread bowl. Garnish with a sprinkle of extra shredded cheddar and a few small broccoli florets on top.
12. Veggie Pasta Sauce
Prep Time: 15 minutes | Cook Time: 30 minutes | Serves: 6
A thick, hearty pasta sauce packed with vegetables — the food processor finely chops everything in seconds so the vegetables practically melt into the sauce as it simmers. Great for sneaking extra nutrition into a meal the whole family will enjoy.
Ingredients:
- 1 medium yellow onion, quartered
- 3 garlic cloves, peeled
- 2 medium carrots, peeled and cut into chunks
- 2 celery stalks, cut into chunks
- 1 medium zucchini, cut into chunks
- 1 red bell pepper, quartered and seeded
- 3 tablespoons olive oil
- 1 can (28 oz) crushed tomatoes
- 1 can (6 oz) tomato paste
- 1 teaspoon dried oregano
- 1 teaspoon dried basil
- ½ teaspoon red pepper flakes
- Salt and black pepper to taste
- 1 teaspoon sugar (to balance acidity)
Instructions:
Add the quartered onion and garlic cloves to the food processor and pulse five to six times until finely chopped. Transfer to a large bowl. Add the carrot and celery chunks to the processor and pulse four to five times. Add to the bowl. Process the red bell pepper and zucchini together with four to five pulses until finely chopped. Add to the bowl with the rest of the vegetables.
Heat olive oil in a large heavy-bottomed pot or Dutch oven over medium heat. Add all the processed vegetables at once. Cook, stirring occasionally, for eight to ten minutes. The vegetables will soften and release their moisture. Stir more frequently as they cook down and start to stick slightly to the pot — this is when the real flavor develops.
Add the tomato paste and stir it in, coating all the vegetables. Cook the tomato paste for two to three minutes, stirring constantly. Cooking the paste separately before adding liquid caramelizes the tomatoes and deepens the flavor of the entire sauce significantly.
Pour in the crushed tomatoes and stir to combine everything. Add the oregano, basil, red pepper flakes, salt, black pepper, and sugar. Stir well and bring the sauce to a gentle boil. Reduce the heat to low and let the sauce simmer uncovered for at least 20 minutes, stirring occasionally.
The longer the sauce simmers, the richer and more developed the flavor becomes. Taste and adjust seasoning before serving. Serve over your favorite pasta with freshly grated Parmesan cheese on top.
13. Homemade Pizza Dough
Prep Time: 15 minutes | Rest Time: 1 hour | Cook Time: 12 minutes | Serves: 2 pizzas (12 inch each)
Making pizza dough in a food processor is one of the easiest and fastest methods you can use. The machine does all the kneading work in about 60 seconds, and the results are just as good — or better — than hand-kneaded dough.
Ingredients:
- 3 cups all-purpose flour (plus extra for dusting)
- 2 ¼ teaspoons instant yeast (one standard packet)
- 1 teaspoon sugar
- 1 teaspoon salt
- 1 tablespoon olive oil
- 1 cup warm water (around 110°F — warm to the touch but not hot)
Instructions:
Add the flour, instant yeast, sugar, and salt to the food processor bowl. Pulse three to four times to combine the dry ingredients. It is important to use instant yeast (also called rapid-rise yeast) for this method, as it does not need to be activated in water first. If using active dry yeast, dissolve it in the warm water with the sugar and wait five minutes until it becomes foamy before proceeding.
Mix the olive oil into the warm water. With the food processor running on low or medium speed, slowly pour the water and oil mixture through the feed tube in a steady stream. Do not add it all at once — pouring it in gradually helps the dough come together evenly.
Once all the liquid is added, continue running the machine. The dough will start to form a rough mass and then clump together into a ball that rides around the bowl. Run the machine for exactly 60 seconds after the dough ball forms. This replicates several minutes of hand-kneading and develops the gluten structure needed for a good pizza crust.
Check the dough texture. It should be smooth, slightly tacky, and elastic. If it is too sticky to handle, add flour one tablespoon at a time through the feed tube while the machine is running. If it feels too dry and crumbly, add water one teaspoon at a time.
Coat a large bowl lightly with olive oil. Transfer the dough to the oiled bowl, turning it once to coat all sides. Cover the bowl tightly with plastic wrap or a clean kitchen towel and let the dough rise in a warm, draft-free spot for one hour until it doubles in size.
After rising, turn the dough out onto a lightly floured surface. Divide it in half and shape each portion into a ball. Let the dough balls rest for ten minutes, then stretch and shape into your desired pizza size. Add toppings and bake in a preheated oven at 500°F (or as hot as your oven will go) for 10 to 12 minutes until the crust is golden and crisp.
14. Creamy Pesto Pasta Sauce
Prep Time: 10 minutes | Cook Time: 0 minutes | Serves: 4
Fresh, vibrant, and full of basil flavor — homemade pesto made in a food processor is ready in under five minutes. Once you make your own, the jarred version will never be the same.
Ingredients:
- 2 cups fresh basil leaves, packed
- ½ cup grated Parmesan cheese
- ⅓ cup pine nuts (or walnuts as a more affordable swap)
- 3 garlic cloves, peeled
- ½ cup extra-virgin olive oil
- Juice of ½ lemon
- ½ teaspoon salt
- ¼ teaspoon black pepper
Instructions:
Add the pine nuts and peeled garlic cloves to the food processor first. Pulse five to six times until the nuts and garlic are coarsely chopped. Starting with these two ingredients gives them a head start, since they take longer to break down than the softer basil leaves. Stopping at the coarsely chopped stage gives your final pesto a little texture.
Add all of the packed basil leaves to the processor. At this point the bowl will look very full — that is normal, as the basil will compress quickly as soon as the machine starts. Pulse four to five times until the basil is broken down and combined with the nuts and garlic. Scrape down the sides of the bowl with a spatula to make sure everything is getting evenly processed.
Add the grated Parmesan cheese, lemon juice, salt, and black pepper. Pulse two to three more times to incorporate.
With the food processor running on low, slowly pour the olive oil in through the feed tube in a steady, thin stream. Adding the oil while the machine is running emulsifies the sauce and gives pesto its characteristic glossy, cohesive texture. Once all the oil is incorporated, process for another 20 seconds.
Remove the blade and taste the pesto. Adjust salt, lemon juice, or Parmesan as needed. The sauce should be bright green, aromatic, and balanced between the richness of the oil and nuts and the sharpness of the Parmesan and garlic.
To make a creamy pesto pasta sauce, stir two tablespoons of the pesto into ¼ cup of heavy cream or pasta cooking water for a silkier, lighter version. Toss with hot cooked pasta immediately. Store leftover pesto in a jar with a thin layer of olive oil poured over the surface to prevent browning. Keeps in the fridge for one week or in the freezer for three months.
15. Shredded Taco Filling
Prep Time: 10 minutes | Cook Time: 6 hours (slow cooker) or 40 minutes (stovetop) | Serves: 6–8
Tender, well-seasoned shredded meat for tacos is the kind of filling that disappears fast. The food processor makes quick work of chopping the aromatics so the flavor base comes together in seconds.

Ingredients:
- 2 lbs boneless chicken thighs or beef chuck roast
- 1 medium white onion, quartered
- 4 garlic cloves, peeled
- 1 can (14.5 oz) fire-roasted diced tomatoes
- 2 teaspoons chili powder
- 1 teaspoon ground cumin
- 1 teaspoon smoked paprika
- ½ teaspoon dried oregano
- ½ teaspoon salt
- ¼ teaspoon black pepper
- Juice of 1 lime
Instructions:
Add the quartered onion and peeled garlic cloves to the food processor. Pulse four to five times until they are finely chopped. You want them fine enough to blend into the sauce as the meat cooks, flavoring every bite throughout rather than sitting in large pieces.
If cooking on the stovetop, heat one tablespoon of oil in a large Dutch oven over medium-high heat. Add the processed onion and garlic and cook for three to four minutes until softened and starting to brown. Stir in all the dry spices — chili powder, cumin, smoked paprika, oregano, salt, and black pepper — and cook for one minute to toast the spices in the oil.
Add the fire-roasted tomatoes and lime juice, stirring to combine. Place the meat directly into the pot, spooning the tomato mixture over the top to coat.
For stovetop cooking: Cover the pot and reduce heat to low. Cook for 35 to 40 minutes for chicken thighs (or until internal temperature reaches 165°F), or two to two-and-a-half hours for beef chuck until it is fall-apart tender.
For slow cooker method: Transfer everything to a slow cooker after cooking the aromatics. Cook on high for three to four hours, or low for six to seven hours.
Once the meat is cooked through and tender, remove it from the pot and place it on a large cutting board. Use two forks to shred the meat, pulling in opposite directions. Return the shredded meat to the pot and stir it into the remaining sauce. Let it simmer on low for five minutes so the meat absorbs all the flavorful juices.
Serve in warm tortillas with your favorite taco toppings — fresh salsa, shredded cabbage, cotija cheese, lime wedges, and avocado slices.
16. Mashed Cauliflower
Prep Time: 10 minutes | Cook Time: 15 minutes | Serves: 4
Creamy, smooth mashed cauliflower is a lighter alternative to mashed potatoes that is just as comforting. The food processor gives it an incredibly silky texture that is hard to achieve any other way.
Ingredients:
- 1 large head cauliflower, cut into florets
- 3 tablespoons butter
- 3 tablespoons cream cheese, softened
- ¼ cup grated Parmesan cheese
- 2 garlic cloves, peeled
- ½ teaspoon salt
- ¼ teaspoon white pepper
- 2–3 tablespoons warm milk or heavy cream (as needed)
- Fresh chives or parsley for garnish
Instructions:
Fill a large pot with water, add a generous pinch of salt, and bring to a boil. Add the cauliflower florets and whole garlic cloves to the boiling water. Cook for twelve to fifteen minutes until the cauliflower is very soft and a fork slides in without any resistance. The cauliflower should be fully tender and almost falling apart — soft cauliflower is essential for smooth mashed cauliflower.
Drain the cooked cauliflower and garlic in a colander. This next step is crucial: spread the drained cauliflower out on a clean kitchen towel or paper towels and let it sit for three to four minutes. The steam will escape and some surface moisture will be absorbed. Skipping this step leads to watery mash, even after processing.
Transfer the cauliflower and softened garlic to the food processor bowl. Add the butter, cream cheese, and grated Parmesan. Run the machine for one full minute, stopping once to scrape down the sides. The mixture will quickly become creamy and smooth as the fat from the butter and cream cheese coats each cauliflower cell.
Season with salt and white pepper. Pulse two or three more times to incorporate. Check the consistency and add warm milk or cream one tablespoon at a time, processing briefly after each addition, until you reach your preferred texture. Some people like it very thick; others prefer it looser and more spoonable.
Taste and adjust salt if needed. Transfer to a serving bowl and top with a pat of butter, a sprinkle of fresh chives or parsley, and a little extra Parmesan. Serve immediately as a side dish alongside roasted chicken, grilled steak, or baked salmon.
17. Pie Crust Dough
Prep Time: 10 minutes | Rest Time: 1 hour | Cook Time: Varies | Serves: 1 double crust pie (or 2 single crusts)
Flaky, buttery pie crust made in a food processor is one of the easiest things you will ever make. The machine cuts the cold butter into the flour in seconds, and the result is a tender, flaky crust every single time.
Ingredients:
- 2 ½ cups all-purpose flour
- 1 tablespoon sugar
- 1 teaspoon salt
- 1 cup (2 sticks) cold unsalted butter, cut into ½-inch cubes
- 6–8 tablespoons ice-cold water
Instructions:
Place the cubed butter in the freezer for 15 minutes before you start. Cold — nearly frozen — butter is the secret to a flaky crust. The small pieces of cold butter create steam during baking, which is what makes all those beautiful flaky layers.
Add the flour, sugar, and salt to the food processor and pulse two to three times to combine the dry ingredients evenly.
Add all the cold butter cubes at once to the flour mixture. Pulse the machine eight to ten times in short, one-second bursts. After about eight pulses, check the mixture. The goal is to have the butter broken down into pieces that range from the size of peas to the size of small pebbles. You should still see distinct pieces of butter throughout the flour — this is exactly what you want. Do not process until the butter disappears into the flour, as this produces a mealy, crumbly crust instead of a flaky one.
With the machine running on low, add ice water through the feed tube one tablespoon at a time. Add six tablespoons first, then check the mixture by squeezing a small handful of dough between your fingers. If it holds together without crumbling, it is ready. If it still crumbles apart, add one more tablespoon of water and pulse twice. Add water sparingly — too much water develops the gluten and makes the crust tough.
Turn the dough out onto a lightly floured surface. It will look shaggy and not fully together — that is correct. Use your hands to press and fold the dough two or three times until it just holds together. Divide the dough in half and press each half into a flat disc. Wrap each disc tightly in plastic wrap and refrigerate for at least one hour, or overnight.
When ready to use, let the dough sit at room temperature for five minutes before rolling. Roll on a lightly floured surface from the center outward, rotating the dough a quarter turn after each roll to keep it even. Fill and bake according to your pie recipe.
18. Chocolate Cookie Dough
Prep Time: 15 minutes | Rest Time: 30 minutes | Cook Time: 12 minutes | Serves: 24 cookies
Rich, deeply chocolatey cookies with crispy edges and a fudgy center — the food processor brings this dough together quickly and produces a beautifully smooth, consistent texture throughout.
Ingredients:
- 1 ¾ cups all-purpose flour
- ½ cup unsweetened cocoa powder
- 1 teaspoon baking soda
- ½ teaspoon salt
- 1 cup (2 sticks) unsalted butter, room temperature and cut into pieces
- ¾ cup granulated sugar
- ¾ cup packed brown sugar
- 2 large eggs, room temperature
- 2 teaspoons vanilla extract
- 1 ½ cups chocolate chips or chopped chocolate
Instructions:
Add the flour, cocoa powder, baking soda, and salt to the food processor bowl. Pulse three times to combine. Remove this flour mixture to a bowl and set aside. Clean and dry the food processor bowl before the next step — any residual moisture can affect how the butter creams.
Add the softened butter to the clean food processor bowl along with the granulated sugar and brown sugar. Process for about one minute until the mixture becomes lighter in color and noticeably creamy. Stop the machine once halfway through to scrape down the sides.
Crack the eggs into a small bowl and beat lightly. Add the beaten eggs and vanilla extract to the butter and sugar mixture. Process for 30 seconds until everything is fully combined and the mixture looks smooth and slightly fluffy.
Add the reserved flour and cocoa mixture to the processor all at once. Pulse five to six times, stopping just as the flour disappears into the dough. A few streaks of flour are fine — they will mix in when you add the chocolate chips. Over-processing cookie dough makes the cookies tough.
Remove the blade and transfer the dough to a large bowl. Add the chocolate chips and use a spatula or clean hands to fold them in by hand, distributing them evenly through the dough.
Cover the bowl and refrigerate the dough for at least 30 minutes. Chilling the dough firms up the butter and allows the flour to hydrate fully, which improves both the texture and flavor of the finished cookies.
Preheat your oven to 375°F. Line baking sheets with parchment paper. Scoop the dough into balls about two tablespoons each and place them two inches apart on the prepared baking sheets. Bake for 11 to 12 minutes. The cookies will look slightly underdone in the center when you take them out — this is exactly right. They will firm up as they cool on the pan. Let them cool on the baking sheet for five minutes before transferring to a wire rack.
19. Cheesecake Filling
Prep Time: 15 minutes | Cook Time: 50 minutes | Serves: 10–12
Silky, smooth, and incredibly creamy cheesecake filling made in the food processor comes out without any lumps or air bubbles. The machine blends the cream cheese beautifully, giving you a bakery-quality result every time.
Ingredients:
- 3 packages (8 oz each) full-fat cream cheese, room temperature
- 1 cup granulated sugar
- 3 large eggs, room temperature
- 1 cup full-fat sour cream
- 1 tablespoon vanilla extract
- 1 tablespoon all-purpose flour
- Zest of 1 lemon (optional but recommended)
- 1 prepared graham cracker crust (9 or 10 inch)
Instructions:
The single most important step for smooth cheesecake is making sure all your ingredients are fully at room temperature. Cold cream cheese stays lumpy no matter how long you process it, and cold eggs can cause the filling to curdle slightly. Take the cream cheese, eggs, and sour cream out of the fridge at least one hour before you plan to start.
Preheat your oven to 325°F. Wrap the outside of your springform pan tightly with two layers of heavy-duty aluminum foil to prevent water from seeping in during the water bath baking method.
Add the softened cream cheese to the food processor. Process for a full one to two minutes until it is completely smooth, stopping once to scrape down the sides. Every lump you leave in the cream cheese will remain in the finished cheesecake, so take the time to get this completely smooth.
Add the granulated sugar and process for another 30 seconds. Add the flour and lemon zest if using, and pulse three times to incorporate.
Add the eggs one at a time, processing briefly after each addition — about 10 to 15 seconds per egg. Do not over-process after adding the eggs. Overworking the eggs incorporates too much air into the batter, which causes the cheesecake to puff up during baking and then crack as it cools.
Add the sour cream and vanilla extract. Pulse four to five times until just combined. The final batter should be smooth and pourable with no lumps.
Pour the filling over your prepared graham cracker crust in the springform pan. Place the springform pan inside a larger roasting pan and add hot water to the roasting pan until it comes about one inch up the side of the springform. This water bath (bain-marie) keeps the oven environment moist and prevents the cheesecake from cracking.
Bake at 325°F for 50 to 55 minutes. The center should jiggle slightly like gelatin when you gently shake the pan — it will firm up completely as it cools. Turn the oven off and crack the oven door open. Let the cheesecake sit in the cooling oven for one hour before removing. This slow, gradual cooling prevents surface cracks.
Refrigerate for at least four hours, or overnight, before serving.
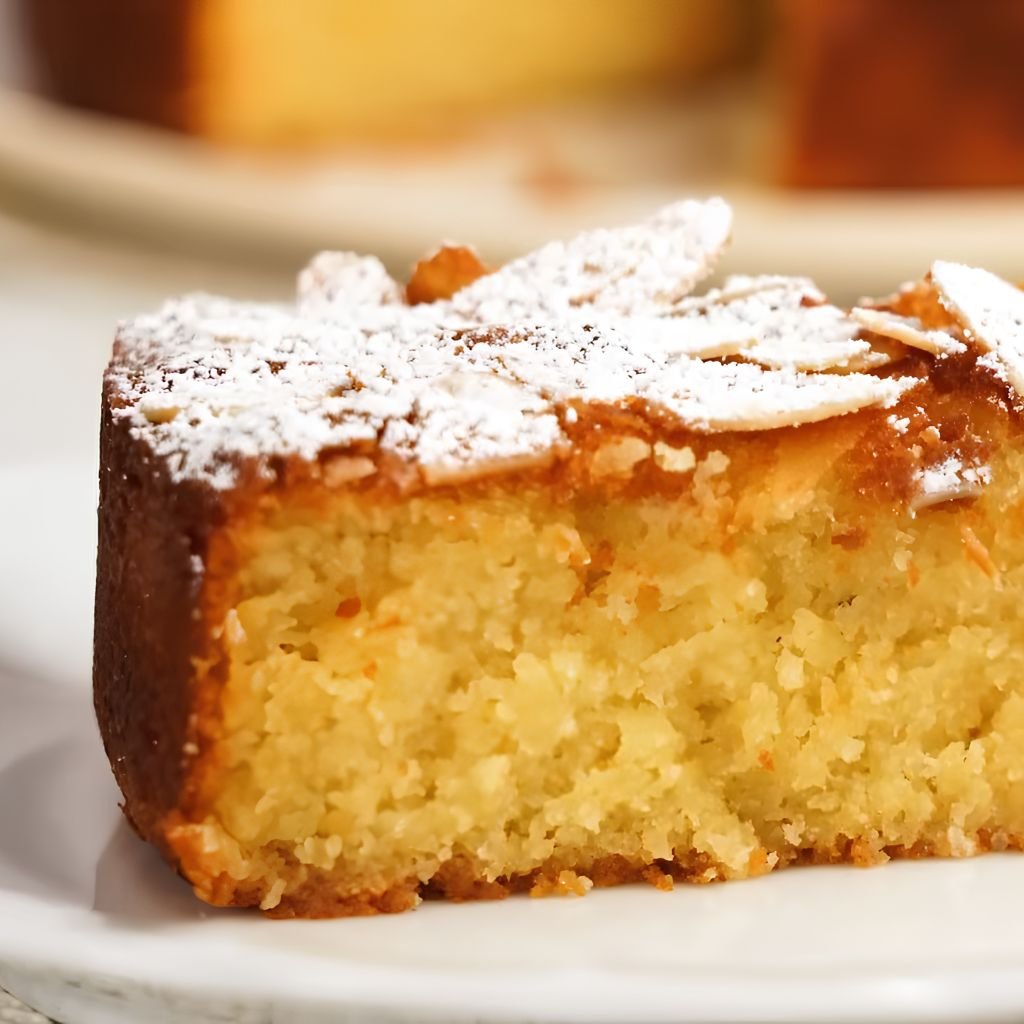
20. Almond Flour Cake Batter
Prep Time: 15 minutes | Cook Time: 30 minutes | Serves: 8
Moist, tender, and naturally gluten-free — almond flour cake batter comes together quickly in a food processor. The machine creates a beautifully uniform batter that bakes into a cake with a delicate, slightly dense crumb and a rich, nutty flavor.
Ingredients:
- 2 ½ cups almond flour (blanched and finely ground, not almond meal)
- ½ cup granulated sugar or coconut sugar
- 1 ½ teaspoons baking powder
- ¼ teaspoon salt
- 3 large eggs, room temperature
- ¼ cup melted butter or coconut oil, cooled
- ¼ cup plain Greek yogurt or sour cream
- 2 teaspoons vanilla extract
- Zest of 1 lemon or orange (optional, for brightness)
Instructions:
Preheat your oven to 350°F. Grease a 9-inch round cake pan generously with butter or coconut oil, then line the bottom with a circle of parchment paper. Almond flour cakes are more delicate than wheat flour cakes and benefit from the extra insurance of a parchment liner when it comes to unmolding.
Add the almond flour, sugar, baking powder, and salt to the food processor bowl. Pulse three times to combine the dry ingredients and break up any clumps in the almond flour. Almond flour can pack together during storage, so this step is important for an even batter.
Crack the eggs into a small bowl and check for any shell fragments. Add the eggs to the food processor along with the melted and cooled butter, Greek yogurt, vanilla extract, and citrus zest if using. Run the machine for about 30 to 40 seconds until the batter is completely smooth. Stop once to scrape down the sides to make sure there are no pockets of dry almond flour hiding along the edges of the bowl.
The batter will be slightly thicker than a typical wheat flour cake batter — this is normal for almond flour recipes. It should be pourable and smooth, not stiff.
Pour the batter into the prepared cake pan and use a spatula to spread it evenly to the edges and smooth the top. Tap the pan gently on the counter two or three times to release any air bubbles.
Bake on the middle rack of the oven for 28 to 32 minutes. Start checking at 28 minutes — almond flour can go from perfectly done to over-baked quickly because of its high fat content. The cake is done when the top is golden brown, the edges have pulled away from the sides of the pan slightly, and a toothpick inserted in the center comes out clean.
Remove from the oven and let the cake cool in the pan for 15 minutes before attempting to unmold. Run a thin knife around the edge of the cake, then invert it onto a cooling rack. Peel off the parchment paper and let it cool completely before frosting or serving. Dust with powdered sugar, top with whipped cream and fresh berries, or frost with a simple lemon glaze.
Expert Tips to Get the Best Results from Your Cuisinart Food Processor
Getting the most out of your machine comes down to a few key habits. Once these click, every recipe gets easier.
Choosing the Right Blade
- S-blade (standard chopping blade): Use this for chopping vegetables, making dips, mixing batters, and pureeing. It is the attachment you will reach for most often.
- Shredding disc: Perfect for cheese, potatoes, carrots, cabbage, and zucchini. Always use the food pusher and apply steady pressure for even shreds.
- Slicing disc: Great for cucumbers, mushrooms, peppers, and onions. Varying pressure on the pusher changes slice thickness.
- Dough blade (if included): Designed for heavier doughs like pizza and bread dough. The S-blade works for most Cuisinart food processor recipes, but the dough blade is gentler and reduces heat buildup.
Preventing Overprocessing
- Use the pulse function instead of running the machine continuously. Short bursts give you much more control over the final texture.
- Check the bowl after every three to four pulses when making chunky recipes like salsa or chicken salad.
- When making dough, stop the machine as soon as the dough comes together. Thirty to sixty additional seconds of processing is all you need — not minutes.
- For batters and fillings, add eggs last and process only until they are just combined. Eggs toughen batters quickly when over-mixed.
Achieving Perfect Texture
- Cut ingredients into similar-sized pieces before adding them to the bowl. Uneven sizes mean some pieces will be over-processed before the larger ones are done.
- Do not overfill the bowl. For most ingredients, fill the bowl no more than two-thirds full for the best results. Overfilling leads to uneven processing and can strain the motor.
- For smooth purees and dips, process in longer continuous runs rather than pulsing. For chunky results, always use short pulses.
- Adding liquid gradually while the machine runs creates smoother emulsified sauces and dressings compared to adding all the liquid at once.
Smart Storage and Meal Prep Tips
- Many food processor recipes store beautifully. Pesto, hummus, salsas, and dips keep in sealed containers in the fridge for up to five days.
- Cookie dough and pizza dough can be wrapped tightly and frozen for up to three months. Thaw overnight in the refrigerator before using.
- Batch-process vegetables on Sunday. Shredded cheese, sliced onions, and chopped carrots stored in airtight containers make weeknight cooking much faster.
- Rinse the food processor bowl and blade immediately after use. Dried food — especially sticky doughs and hummus — is much harder to clean than fresh residue.
Conclusion
Cuisinart food processor recipes prove just how versatile one kitchen machine can be. From silky morning smoothie bowls to crispy hash browns, from homemade pizza dough to rich cheesecake filling, these recipes cover breakfast, snacks, lunch, dinner, and dessert — all with the help of a single appliance. A food processor does not just save time; it changes the whole experience of cooking at home, making tasks that once felt tedious feel easy and even enjoyable.
No matter what kind of cook you are — a total beginner or someone who makes homemade meals every single night — there is something in this collection for you. The beauty of Cuisinart food processor recipes is that they grow with you. Start with the classics like hummus and salsa, then work your way up to homemade pizza dough and cheesecake filling. Every recipe uses simple ingredients and clear steps, so you always know exactly what you are doing.
Go ahead and try a few recipes from this list this week. You might be surprised how quickly a food processor becomes the tool you reach for first when you step into the kitchen. Bookmark this page so you can come back whenever you need a fresh idea, and share it with someone who could use a few new recipes to add to their routine.