
Cold desserts can be simple, quick, and made right at home with very little effort. Dash My Mug Ice-Cream Recipes bring an easy way to enjoy fresh ice cream without a big machine or long wait time.
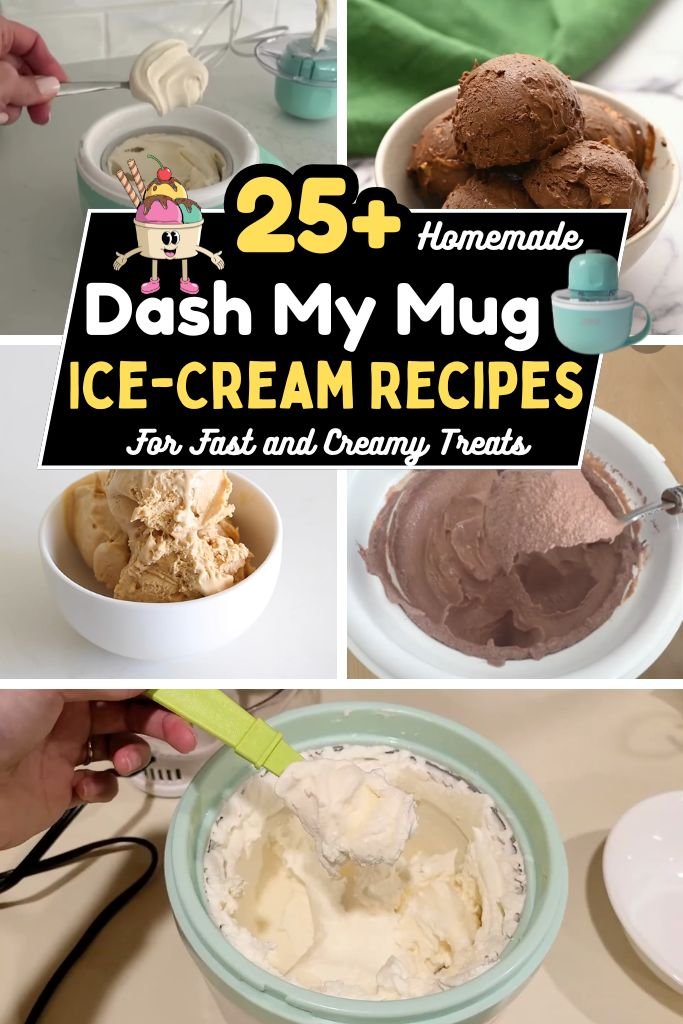
The Dash My Mug Ice Cream Maker is a small, personal device made for single servings. It fits on a kitchen counter and works fast, making it great for busy days or late-night cravings.
Mug ice-cream recipes are getting popular because they are quick and easy to prepare. No large batch, no long freezing time, and no waste. Each recipe makes just enough for one or two servings. That means fresh flavor every time.
Single-serve homemade ice cream also gives full control over ingredients. Less sugar, dairy-free options, or extra toppings can be added with ease. It may seem hard at first, but it’s actually quite simple!
For more frozen dessert ideas, check out these refreshing blends in our Ninja Slushi Recipes
collection, perfect for icy drinks and slushy-style treats.
This guide on Dash My Mug Ice-Cream Recipes shares over 25 creative ideas, along with helpful tips and flavor twists. From classic vanilla to bold matcha, there is something for every mood and season.
Why Choose Dash My Mug for Ice Cream?
Dash My Mug Ice-Cream Recipes work best with the Dash My Mug Ice Cream Maker because it is simple, fast, and made for small desserts. Here are the main reasons it stands out:
1. Small and easy design: The Dash My Mug Ice Cream Maker has a compact shape that fits easily in any kitchen. No heavy setup, no large space needed. It is made for quick use without confusion.
2. Perfect for single servings: One mug equals one serving. This helps control portion size and avoids extra leftovers. Each scoop stays fresh and ready to enjoy right away.
3. Fast freezing process: Traditional ice cream machines take a long time, but this one works much faster. The frozen mug base helps the mixture turn creamy in minutes, making Dash My Mug Ice-Cream Recipes ideal for quick cravings.
4. Simple for beginners: No special skills are needed. Just mix ingredients, pour into the mug, and churn. Even first-time users can make smooth ice cream without trouble.
5. Easy flavor testing: Small batches make it easy to try new ideas. Fruit, chocolate, coffee, or spice flavors can be tested without wasting ingredients.
1. Classic Vanilla Mug Ice Cream
Prep Time: 5 minutes | Churn Time: 15 minutes | Serve: 1
This smooth and creamy vanilla ice cream is a great starting point for anyone using Dash My Mug Ice-Cream Recipes. It has a rich texture and soft sweetness. This recipe works well on its own or as a base for adding fruits, nuts, or chocolate pieces.
Ingredients
- ½ cup heavy cream
- 2 tablespoons milk
- 2 tablespoons sugar
- ½ teaspoon vanilla extract
- Pinch of salt
Instructions
Start by placing the mug bowl in the freezer ahead of time so it is fully chilled. A cold base helps the mixture freeze faster and gives a smooth texture. Once ready, take a medium bowl and pour in the heavy cream and milk. Stir gently to combine the liquids. Add sugar and mix until it dissolves well. This step is important, as undissolved sugar can make the texture grainy.
Next, pour in the vanilla extract and a small pinch of salt. Stir again until the mixture looks even and smooth. The vanilla adds a soft aroma, while salt balances the sweetness. Make sure everything blends well before moving to the next step.
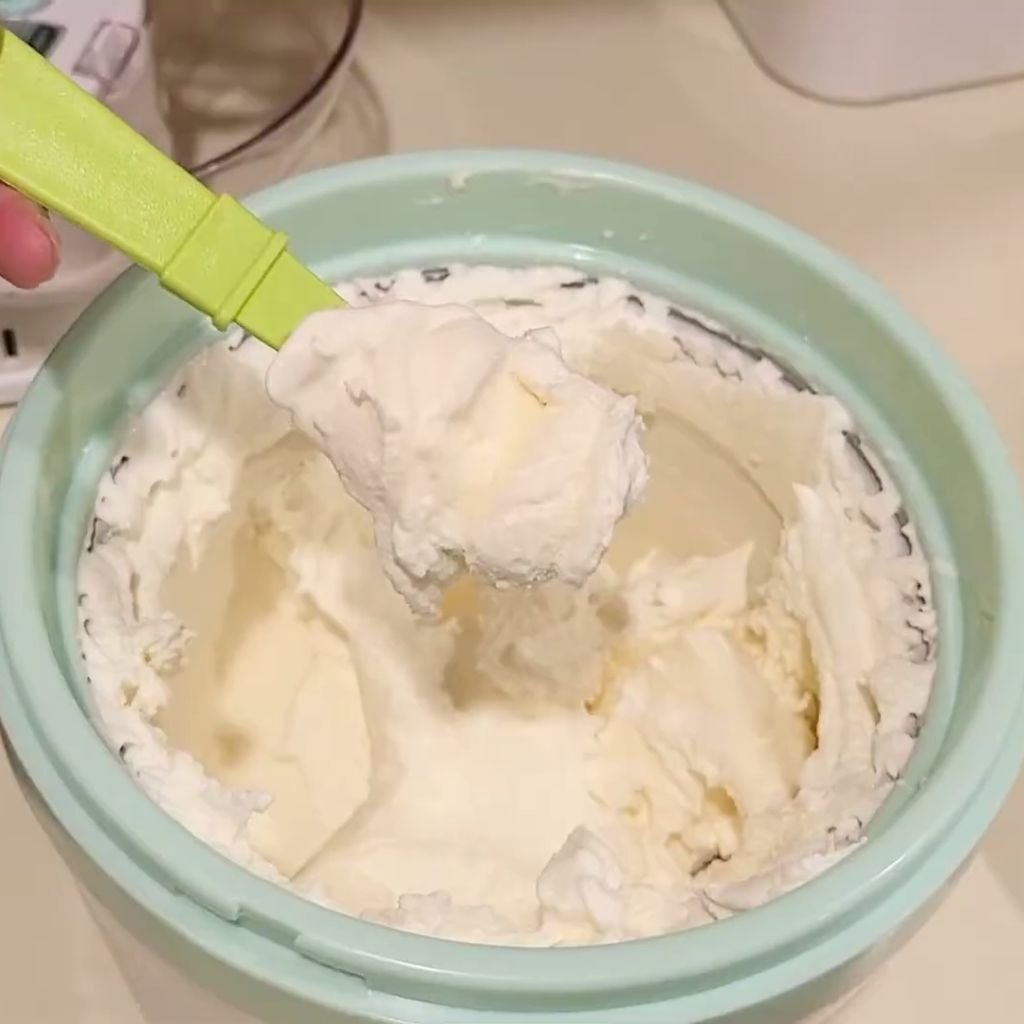
Now take the chilled mug from the freezer and pour the mixture inside. Turn on the Dash My Mug Ice Cream Maker and let it churn. During the first few minutes, the mixture will stay liquid. Slowly, it begins to thicken along the edges. Use a spoon to gently scrape the sides and mix it back into the center. This helps create a creamy texture without ice crystals.
Keep watching the texture change. After about 10 minutes, the mixture will look thicker, like soft-serve ice cream. Continue churning until it reaches the desired thickness. Some prefer it soft, while others like it firmer.
Once done, scoop into a bowl and serve right away. For a firmer result, place it in the freezer for another 10 minutes. Add toppings such as sprinkles or fruit for extra flavor. This simple recipe shows how easy Dash My Mug Ice-Cream Recipes can be when using basic ingredients.
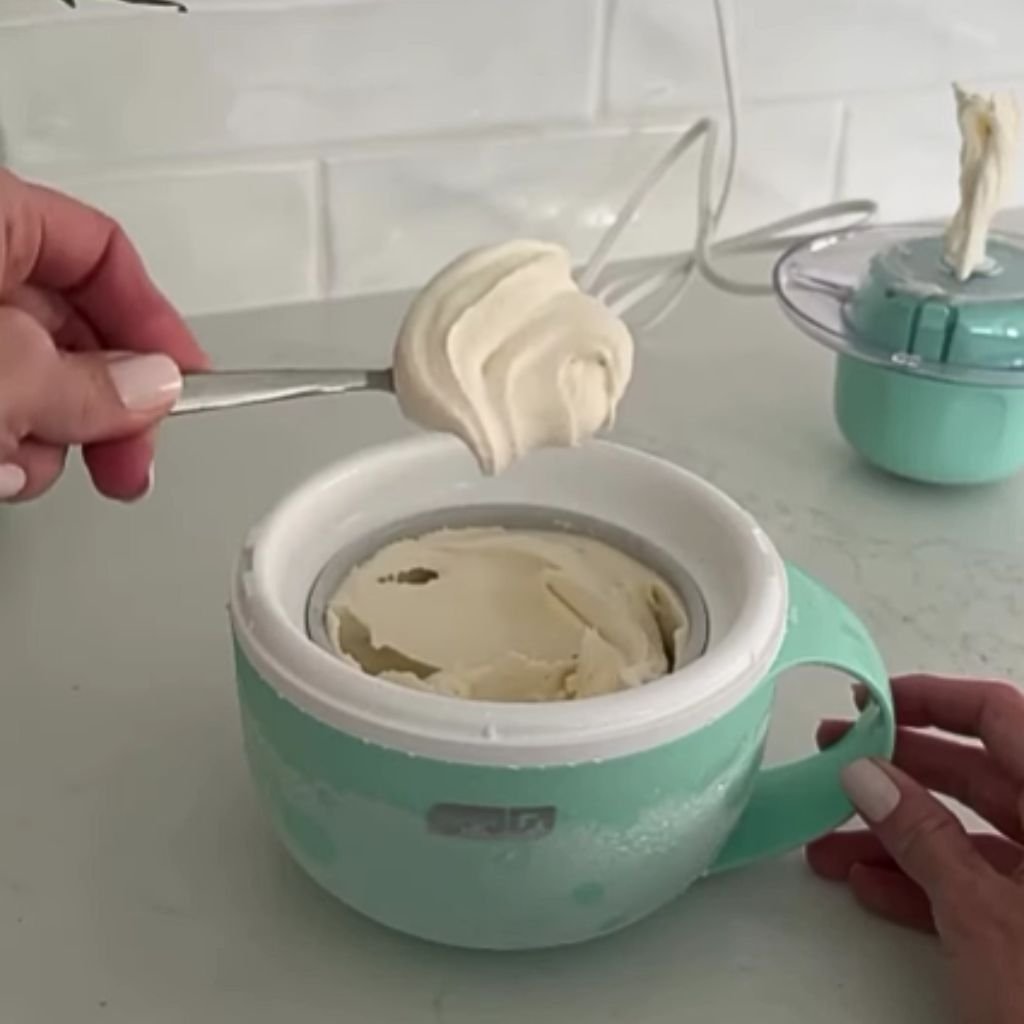
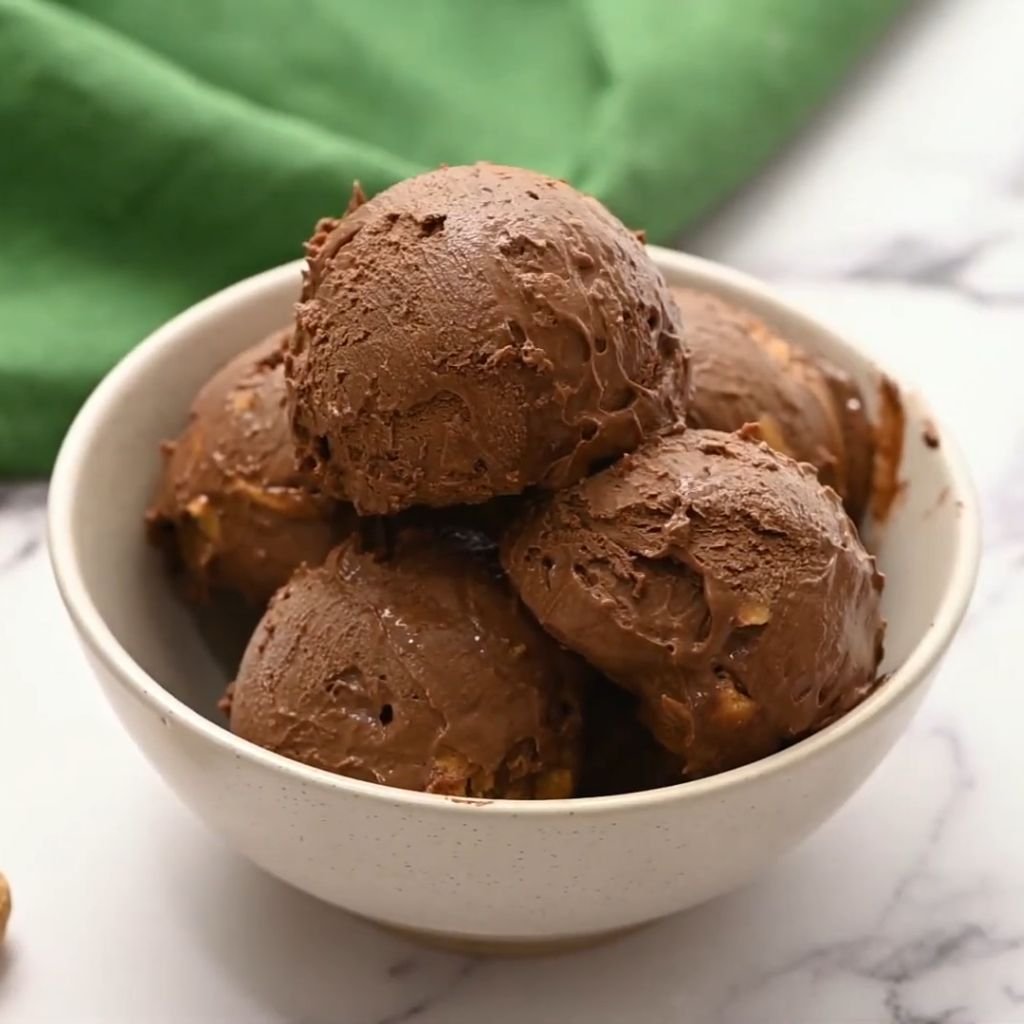
2. Rich Chocolate Mug Ice Cream
Prep Time: 5 minutes | Churn Time: 15 minutes | Serve: 1
This rich chocolate mug ice cream is deep in flavor and smooth in texture. It is perfect for chocolate lovers who want a quick treat. Made with simple ingredients, this recipe from Dash My Mug Ice-Cream Recipes delivers a bold and creamy result in minutes.
Ingredients
- ½ cup heavy cream
- 2 tablespoons milk
- 2 tablespoons sugar
- 1 tablespoon cocoa powder
- ¼ teaspoon vanilla extract
- Pinch of salt
Instructions
Begin by freezing the mug bowl ahead of time. A well-chilled bowl helps the ice cream form properly and keeps the texture creamy. Once the bowl is ready, take a mixing bowl and add the heavy cream and milk. Stir slowly until both are fully combined.
Add the sugar and cocoa powder next. Mix carefully to avoid lumps. Cocoa powder needs a bit more mixing, so take time to blend it fully into the liquid. Stir until the mixture turns a smooth chocolate color. This step makes sure the flavor spreads evenly.
Add vanilla extract and a pinch of salt. These small additions help bring out the deep chocolate flavor. Mix again until everything looks smooth and well combined.
Take the frozen mug and pour in the chocolate mixture. Turn on the machine and begin churning. At first, the mixture stays thin. After a few minutes, it starts to thicken along the sides. Use a spoon to gently stir and keep the mixture even. This helps avoid icy bits and keeps the texture creamy.
Continue the churning process. The mixture will slowly turn into a soft, creamy ice cream. Around the 12 to 15-minute mark, it should be ready. Watch closely to reach the texture that feels right.
Once done, scoop and serve immediately. For a firmer scoop, place it in the freezer for a short time. Add toppings like chocolate chips or crushed cookies for extra flavor. This recipe is a perfect example of how Dash My Mug Ice-Cream Recipes can turn simple ingredients into a rich dessert quickly.
3. Strawberry Delight Ice Cream
Prep Time: 5 minutes | Churn Time: 15 minutes | Serve: 1
Fresh strawberry flavor blends into a creamy base for a light and sweet treat. A soft pink color and smooth texture make it perfect for warm days. Great choice for fruit lovers who enjoy simple and fresh desserts from Dash My Mug Ice-Cream Recipes.
Ingredients
- ½ cup heavy cream
- 2 tablespoons milk
- 2 tablespoons sugar
- 3 tablespoons mashed fresh strawberries
- ¼ teaspoon vanilla extract
Instructions
Place the mug bowl in the freezer well before starting. A fully chilled bowl helps the ice cream set faster and keeps the texture soft and creamy. While waiting, wash the strawberries and mash them into a smooth pulp using a fork. Try to remove large chunks so the mixture stays even.
Take a mixing bowl and pour in the heavy cream and milk. Stir gently until both liquids combine well. Add sugar and mix until it fully dissolves. This step helps avoid any grainy texture later. Once smooth, add the mashed strawberries and stir slowly so the fruit blends into the base.
Pour in vanilla extract to bring out the fruit flavor. Mix again until the color looks even and soft pink. Make sure everything is fully combined before moving forward.
Now take the frozen mug and pour the strawberry mixture inside. Turn on the machine and let it churn. At the start, the mixture will look thin. After a few minutes, it begins to thicken near the edges. Use a spoon to gently scrape the sides and mix back into the center. This keeps the texture smooth and prevents ice bits from forming.
Continue churning and keep an eye on the texture. Around 10 to 15 minutes, the mixture becomes creamy like soft-serve. Let it churn a bit longer for a firmer scoop.
Once ready, scoop into a bowl and serve right away. Extra strawberry slices can be added on top for more flavor. A short freeze time can make it thicker. Recipes like this show how fresh fruit works well in Dash My Mug Ice-Cream Recipes.
4. Butterscotch Creamy Mug Ice Cream
Prep Time: 5 minutes | Churn Time: 15 minutes | Serve: 1
Smooth butterscotch flavor with a creamy base creates a rich and sweet dessert. Each bite has a soft caramel-like taste that feels warm and comforting. Perfect for anyone who enjoys classic sweet flavors in small portions.
Ingredients
- ½ cup heavy cream
- 2 tablespoons milk
- 2 tablespoons brown sugar
- 1 tablespoon butterscotch syrup
- Pinch of salt
Instructions
Start by freezing the mug bowl ahead of time. A cold surface helps the mixture freeze evenly and improves the final texture. While the bowl chills, prepare the ice cream base. Take a mixing bowl and add heavy cream and milk. Stir slowly until both liquids blend together.
Add brown sugar next. Mix until it dissolves fully into the liquid. Brown sugar gives a deeper, rich sweetness compared to regular sugar. Pour in the butterscotch syrup and stir again. The color will turn slightly golden as everything blends together.
Add a small pinch of salt. This step helps balance the sweetness and enhances the butterscotch flavor. Mix until the base looks smooth and even. Take time to ensure no lumps remain before moving on.
Remove the frozen mug from the freezer and pour in the mixture. Turn on the Dash My Mug Ice Cream Maker. The churning process begins slowly. At first, the mixture stays liquid. After a few minutes, it thickens near the sides. Use a spoon to gently move the mixture around so it freezes evenly.
Keep watching as the texture changes. It will slowly turn into a creamy, soft ice cream. Let it churn for about 12 to 15 minutes or until the desired thickness is reached. Some may prefer a soft texture, while others may want it firmer.
Once ready, scoop into a bowl and serve. Extra butterscotch syrup can be drizzled on top for added flavor. A few crushed cookies can also add texture. Recipes like this make Dash My Mug Ice-Cream Recipes feel rich and satisfying without much effort.
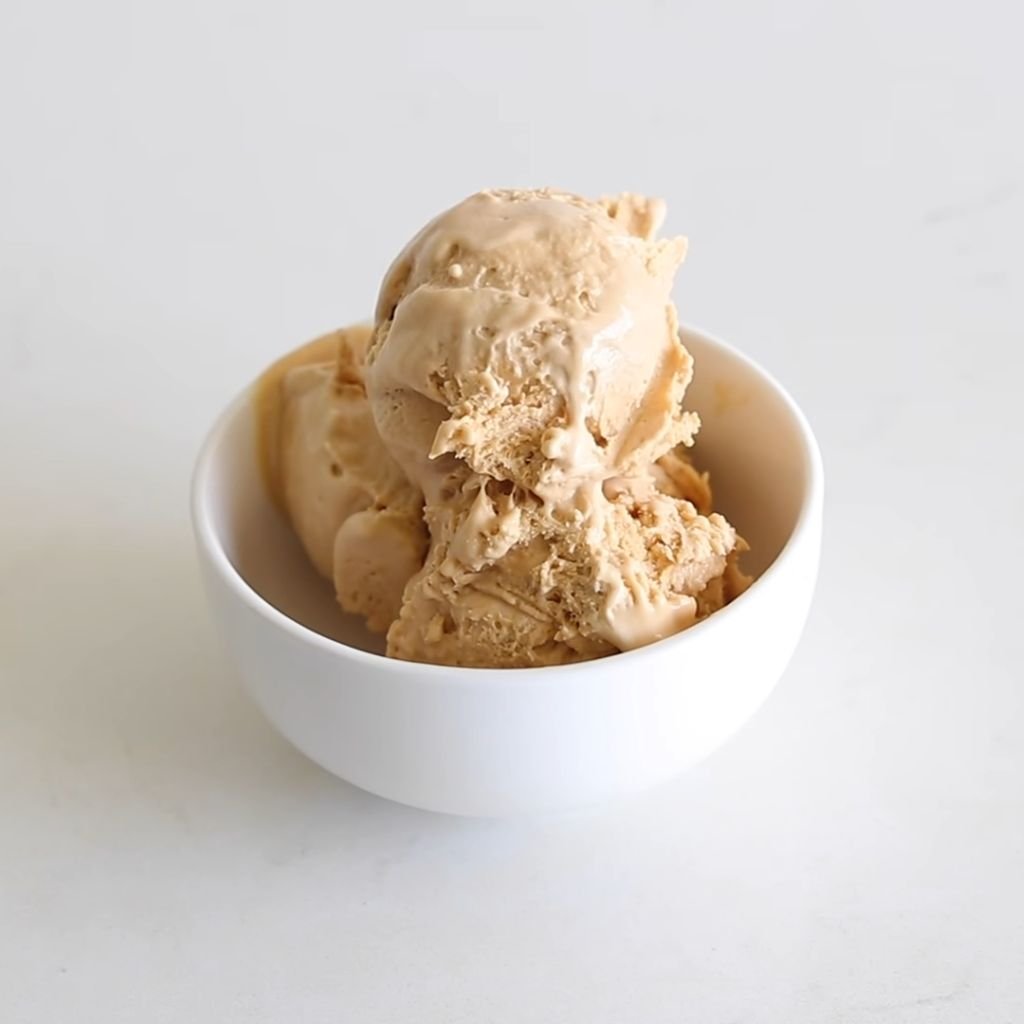
5. Coffee Ice Cream
Prep Time: 5 minutes | Churn Time: 15 minutes | Serve: 1
Bold coffee flavor mixed into a creamy base creates a smooth and rich dessert. A light hint of sweetness balances the deep taste. Great for coffee fans who want a quick cold treat using Dash My Mug Ice-Cream Recipes.
Ingredients
- ½ cup heavy cream
- 2 tablespoons milk
- 2 tablespoons sugar
- 1 teaspoon instant coffee powder
- ¼ teaspoon vanilla extract
Instructions
Place the mug bowl in the freezer ahead of time so it gets fully cold. A chilled base helps the mixture freeze faster and keeps the texture smooth. While the bowl chills, take a small cup and mix the instant coffee powder with one teaspoon of warm water. Stir until it dissolves fully and forms a strong coffee liquid. Set it aside to cool.
Take a mixing bowl and pour in the heavy cream and milk. Stir slowly until both combine well. Add sugar and mix until it dissolves completely. This step is important for a smooth finish. Once the sugar blends in, pour the cooled coffee mixture into the bowl. Stir gently so the flavor spreads evenly.
Add vanilla extract to soften the strong coffee taste. Mix again until the liquid looks smooth and light brown in color. Make sure there are no lumps before moving forward.
Now remove the frozen mug from the freezer and pour in the prepared mixture. Turn on the machine and begin churning. At first, the liquid will stay thin. After a few minutes, the edges will start to freeze. Use a spoon to gently scrape the sides and mix it back into the center. This keeps the ice cream creamy and even.
Keep the machine running while watching the texture. The mixture slowly thickens into a soft, creamy consistency. Let it churn for about 12 to 15 minutes or until it reaches the texture you like.
Once ready, scoop and serve right away. A sprinkle of cocoa powder or chocolate chips on top can add extra flavor. Recipes like this show how bold flavors work well in Dash My Mug Ice-Cream Recipes.
6. Mango Mug Ice Cream
Prep Time: 5 minutes | Churn Time: 15 minutes | Serve: 1
Sweet mango flavor blends into a creamy and smooth dessert. A bright color and fresh taste make it perfect for warm days. A simple and refreshing choice for fruit lovers using Dash My Mug Ice-Cream Recipes.
Ingredients
- ½ cup heavy cream
- 2 tablespoons milk
- 2 tablespoons sugar
- 3 tablespoons mango puree
- Pinch of salt
Instructions
Start by placing the mug bowl in the freezer well before making the recipe. A properly chilled bowl helps the ice cream freeze quickly and keeps the texture creamy. While waiting, prepare fresh mango puree by blending ripe mango pieces until smooth. Remove any fibers to keep the mixture soft.
Take a mixing bowl and add heavy cream and milk. Stir gently until both combine fully. Add sugar and mix until it dissolves well into the liquid. Smooth mixing at this stage helps prevent grainy texture later.
Now add the mango puree into the bowl. Stir slowly so the fruit blends evenly into the cream base. The mixture will turn a bright yellow color. Add a small pinch of salt to balance the sweetness and mix again until everything looks smooth.
Remove the frozen mug from the freezer and pour the mango mixture inside. Turn on the ice cream maker and allow it to churn. In the beginning, the mixture stays liquid. After a few minutes, it starts to thicken along the edges. Use a spoon to gently move the mixture so it freezes evenly.
Continue churning while checking the texture. The mixture will slowly turn creamy and soft. Let it churn for about 12 to 15 minutes or until it reaches the desired thickness.
Once ready, scoop into a bowl and serve immediately. Small mango cubes can be added on top for extra flavor. A short freeze time can make it firmer. Recipes like this highlight how fresh fruit shines in Dash My Mug Ice-Cream Recipes.
7. Banana Caramel Ice Cream
Prep Time: 5 minutes | Churn Time: 15 minutes | Serve: 1
Sweet banana mixed with smooth caramel creates a rich and creamy dessert. Soft texture and natural sweetness make it a great choice for a quick treat. A simple way to enjoy fruit and caramel together using Dash My Mug Ice-Cream Recipes.
Ingredients
- ½ cup heavy cream
- 2 tablespoons milk
- 1½ tablespoons sugar
- 3 tablespoons mashed ripe banana
- 1 tablespoon caramel sauce
- Pinch of salt
Instructions
Start by placing the mug bowl in the freezer ahead of time. A well-frozen bowl helps the ice cream set faster and gives a creamy texture. While the bowl chills, peel a ripe banana and mash it with a fork until smooth. Try to remove large lumps so the mixture blends well later.
Take a mixing bowl and pour in the heavy cream and milk. Stir gently until both liquids combine fully. Add sugar and mix until it dissolves completely. This step helps create a smooth base.
Now add the mashed banana into the mixture. Stir slowly so it blends evenly with the cream. Pour in the caramel sauce and mix again. The color will turn slightly golden, and the mixture will become thick and rich. Add a pinch of salt to balance the sweetness and stir until smooth.
Remove the frozen mug from the freezer and pour in the prepared mixture. Turn on the machine and let it churn. At first, the mixture stays liquid. After a few minutes, it begins to thicken near the edges. Use a spoon to gently scrape the sides and mix it back into the center. This helps keep the texture even and creamy.
Continue churning while watching the texture. The mixture slowly turns into soft, creamy ice cream. Let it churn for about 12 to 15 minutes or until it reaches the texture you prefer.
Once ready, scoop into a bowl and serve right away. A drizzle of extra caramel on top can add more flavor. A short freeze time can make it firmer. Recipes like this show how easy it is to mix fruit and sweet sauce in Dash My Mug Ice-Cream Recipes.
8. Blueberry Bliss Ice Cream
Prep Time: 5 minutes | Churn Time: 15 minutes | Serve: 1
Fresh blueberry flavor mixed into a creamy base gives a light and fruity dessert. A soft purple color and smooth texture make it a refreshing choice. Perfect for anyone who enjoys simple fruit ice cream made with Dash My Mug Ice-Cream Recipes.
Ingredients
- ½ cup heavy cream
- 2 tablespoons milk
- 2 tablespoons sugar
- 3 tablespoons mashed blueberries
- ¼ teaspoon vanilla extract
Instructions
Place the mug bowl in the freezer before starting the recipe. A fully chilled bowl helps the mixture freeze evenly and keeps the texture soft. While waiting, wash fresh blueberries and mash them with a fork until smooth. Try to break down the skins so the flavor spreads well.
Take a mixing bowl and add heavy cream and milk. Stir gently until both liquids combine. Add sugar and mix until it dissolves completely. This step helps avoid any grainy texture later.
Now add the mashed blueberries into the mixture. Stir slowly so the fruit blends evenly into the cream. The mixture will turn a soft purple color. Add vanilla extract to enhance the flavor and mix again until smooth.
Remove the frozen mug from the freezer and pour in the blueberry mixture. Turn on the machine and let it churn. In the beginning, the mixture will look thin. After a few minutes, it starts to thicken along the sides. Use a spoon to gently move the mixture so it freezes evenly.
Continue churning and watch the texture change. The mixture slowly becomes creamy and soft. Let it churn for about 12 to 15 minutes or until it reaches the desired thickness.
Once ready, scoop into a bowl and serve immediately. Extra blueberries can be added on top for more flavor. A short freeze time can make it firmer. Recipes like this show how fruit blends well in Dash My Mug Ice-Cream Recipes.
9. Pineapple Coconut Ice Cream
Prep Time: 5 minutes | Churn Time: 15 minutes | Serve: 1
Pineapple and coconut come together for a creamy and tropical-style dessert. Light sweetness with a smooth texture makes it a refreshing option for warm days. A simple mix that works well in Dash My Mug Ice-Cream Recipes.
Ingredients
- ½ cup heavy cream
- 2 tablespoons coconut milk
- 2 tablespoons sugar
- 3 tablespoons crushed pineapple (drained)
- 1 tablespoon shredded coconut
Instructions
Place the mug bowl in the freezer before starting. A well-chilled bowl helps the mixture freeze faster and keeps the texture smooth. While the bowl chills, prepare the pineapple by crushing small pieces and draining extra juice. Too much liquid can affect the texture, so this step is important.
Take a mixing bowl and add heavy cream and coconut milk. Stir gently until both combine fully. Add sugar and mix until it dissolves completely into the liquid. This creates a smooth base for the ice cream.
Now add the crushed pineapple into the mixture. Stir slowly so the fruit spreads evenly. Add shredded coconut and mix again. The mixture will look slightly thick with small coconut bits. Make sure everything blends well before moving forward.
Remove the frozen mug from the freezer and pour the mixture inside. Turn on the machine and let it churn. At first, the mixture will stay liquid. After a few minutes, the edges will begin to freeze. Use a spoon to gently scrape the sides and mix back into the center. This helps create a creamy texture.
Continue churning while checking the consistency. The mixture slowly thickens into soft ice cream. Let it churn for about 12 to 15 minutes or until it reaches your preferred texture.
Once ready, scoop into a bowl and serve right away. Extra coconut flakes can be added on top for more flavor. A short freeze time can make it firmer. Recipes like this bring a fresh twist to Dash My Mug Ice-Cream Recipes.
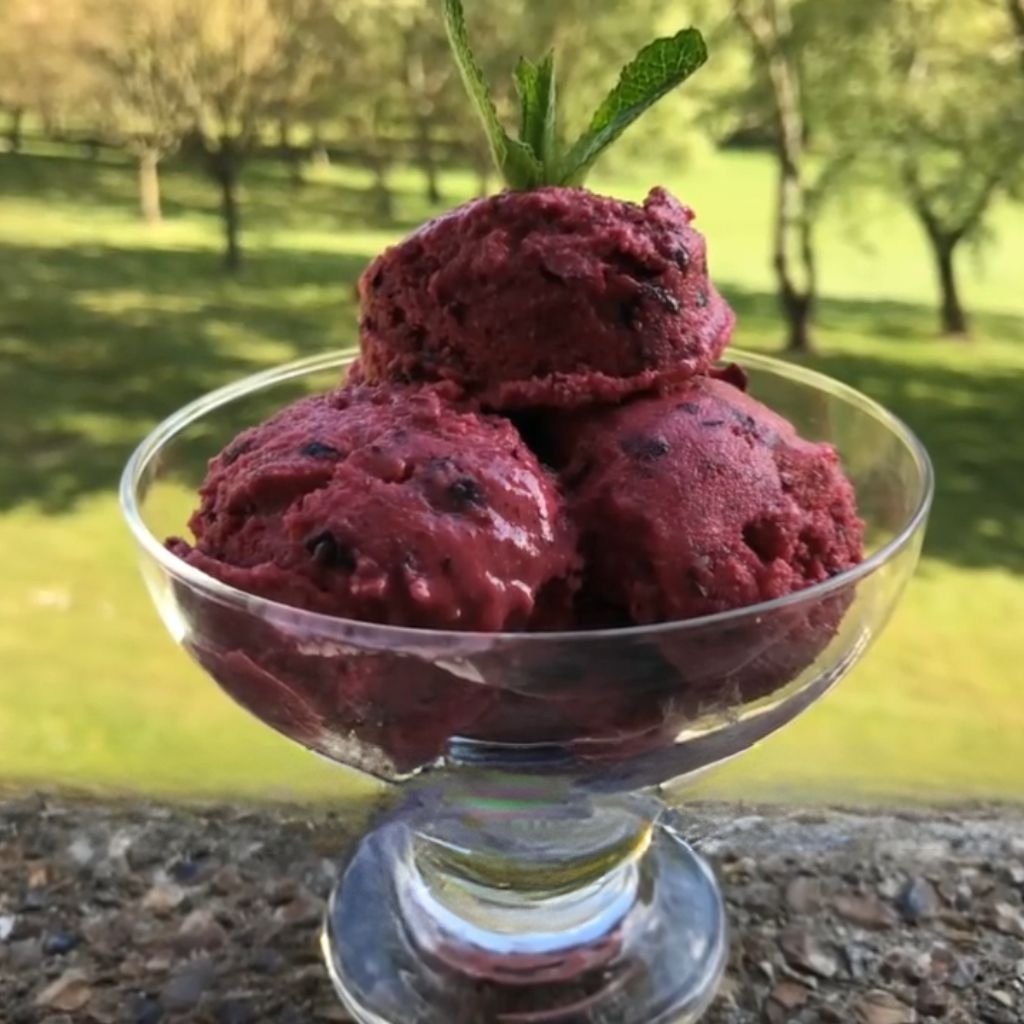
10. Mixed Berry Swirl Ice Cream
Prep Time: 5 minutes | Churn Time: 15 minutes | Serve: 1
A mix of berries creates a colorful and creamy dessert with a sweet and slightly tangy flavor. Soft swirls of fruit make every bite different. A great way to enjoy a blend of fruits using Dash My Mug Ice-Cream Recipes.
Ingredients
- ½ cup heavy cream
- 2 tablespoons milk
- 2 tablespoons sugar
- 3 tablespoons mixed berry puree (strawberry, blueberry, raspberry)
- 1 tablespoon berry jam
Instructions
Begin by placing the mug bowl in the freezer so it becomes fully chilled. A cold base helps the ice cream freeze evenly and keeps the texture soft. While the bowl chills, prepare the berry puree by blending fresh or frozen berries until smooth. Strain seeds if needed for a smoother result.
Take a mixing bowl and pour in the heavy cream and milk. Stir gently until both liquids combine well. Add sugar and mix until it dissolves completely. This step helps create a smooth and creamy base.
Add the berry puree into the mixture and stir slowly. The color will turn bright and rich. Mix until the fruit blends evenly into the cream. Keep the berry jam aside for later to create a swirl effect.
Remove the frozen mug from the freezer and pour the mixture inside. Turn on the machine and allow it to churn. At first, the mixture stays thin. After a few minutes, it begins to thicken along the edges. Use a spoon to gently move the mixture so it freezes evenly.
When the mixture starts to look creamy, add small drops of berry jam. Use a spoon to lightly swirl it into the ice cream. Do not mix too much, as the swirl effect adds texture and flavor.
Continue churning until the ice cream reaches a soft, creamy consistency. This usually takes about 12 to 15 minutes.
Once ready, scoop into a bowl and serve right away. Extra berries can be added on top for a fresh finish. Recipes like this show how colorful blends work well in Dash My Mug Ice-Cream Recipes.
11. Oreo Mug Ice Cream
Prep Time: 5 minutes | Churn Time: 15 minutes | Serve: 1
Crushed cookies blend into a creamy base for a rich and crunchy dessert. Sweet vanilla cream and chocolate cookie bits make a simple treat that feels smooth and fun to eat. A popular choice in Dash My Mug Ice-Cream Recipes for cookie lovers.
Ingredients
- ½ cup heavy cream
- 2 tablespoons milk
- 2 tablespoons sugar
- 4 Oreo cookies (crushed)
- ¼ teaspoon vanilla extract
Instructions
Place the mug bowl in the freezer before starting. A fully cold bowl helps the ice cream freeze faster and gives a creamy finish. While the bowl chills, crush Oreo cookies into small pieces. Some fine crumbs and some chunks give a better texture.
Take a mixing bowl and pour in heavy cream and milk. Stir gently until both liquids blend smoothly. Add sugar and mix until it dissolves completely. This step helps keep the texture soft and not grainy.
Add vanilla extract into the mixture and stir again. Slowly add crushed Oreo cookies and mix lightly. Do not overmix, as cookie pieces should stay visible for crunch in every bite.
Remove the frozen mug from the freezer and pour in the prepared mixture. Turn on the machine and start churning. At first, the mixture stays liquid. After a few minutes, it begins to thicken near the edges. Use a spoon to gently scrape the sides and mix it back into the center for even freezing.
Continue churning until the mixture turns creamy and thick. This usually takes around 12 to 15 minutes. The texture should look like soft-serve ice cream with cookie bits spread inside.
Once ready, scoop into a bowl and serve immediately. Extra cookie crumbs can be sprinkled on top for more crunch. A short freeze can make it firmer. Recipes like this show how easy it is to enjoy cookies in Dash My Mug Ice-Cream Recipes.
12. Brownie Fudge Ice Cream
Prep Time: 5 minutes | Churn Time: 15 minutes | Serve: 1
Rich chocolate base mixed with soft brownie pieces creates a thick and fudgy dessert. Each bite brings a deep chocolate taste with chewy texture. A perfect treat for chocolate fans using Dash My Mug Ice-Cream Recipes.
Ingredients
- ½ cup heavy cream
- 2 tablespoons milk
- 2 tablespoons sugar
- 2 tablespoons cocoa powder
- 2 tablespoons small brownie chunks
- ¼ teaspoon vanilla extract
Instructions
Start by freezing the mug bowl so it becomes very cold. A chilled base helps the ice cream set quickly and keeps it smooth. While waiting, cut brownies into small bite-size pieces. Keep them soft but firm enough to hold shape.
Take a mixing bowl and pour in heavy cream and milk. Stir gently until both liquids combine well. Add sugar and mix until it dissolves fully. This step ensures a smooth texture later.
Add cocoa powder and stir slowly until no lumps remain. The mixture should turn deep chocolate in color. Pour in vanilla extract and mix again to balance the flavor.
Now add brownie chunks and fold them gently into the mixture. Make sure the pieces are spread evenly without breaking too much.
Remove the frozen mug from the freezer and pour in the mixture. Turn on the machine and begin churning. At first, the mixture will look thin. After a few minutes, it starts to thicken along the edges. Use a spoon to gently mix the sides back into the center for even freezing.
Continue churning for about 12 to 15 minutes until the texture becomes thick and creamy. Brownie pieces will stay soft inside the ice cream.
Once ready, scoop into a bowl and serve right away. Extra brownie bits or chocolate drizzle can be added on top. Recipes like this make Dash My Mug Ice-Cream Recipes rich and satisfying.
13. Chocolate Chip Cookie Dough Ice Cream
Prep Time: 5 minutes | Churn Time: 15 minutes | Serve: 1
Creamy vanilla base mixed with soft cookie dough bites gives a sweet and chewy dessert. Each spoon brings smooth cream plus chocolate chips. A favorite choice in Dash My Mug Ice-Cream Recipes for dessert lovers.
Ingredients
- ½ cup heavy cream
- 2 tablespoons milk
- 2 tablespoons sugar
- ¼ teaspoon vanilla extract
- 3 tablespoons edible cookie dough (small chunks)
- 1 tablespoon mini chocolate chips
Instructions
Place the mug bowl in the freezer before starting. A cold bowl helps the ice cream set faster and keeps the texture smooth. While the bowl chills, prepare small cookie dough pieces and keep them chilled so they hold shape better.
Take a mixing bowl and pour in heavy cream and milk. Stir gently until both combine fully. Add sugar and mix until it dissolves completely. This helps create a smooth and creamy base.
Add vanilla extract and stir again. Slowly fold in cookie dough pieces and mini chocolate chips. Mix lightly so the dough stays in chunks and does not break apart. Even distribution gives better texture in every bite.
Remove the frozen mug from the freezer and pour in the mixture. Turn on the machine and start churning. At first, the liquid will look thin. After a few minutes, the edges begin to freeze. Use a spoon to gently scrape and mix it back into the center so everything freezes evenly.
Continue churning for about 12 to 15 minutes. The mixture slowly becomes thick and creamy. Cookie dough pieces stay soft while chocolate chips spread through the ice cream.
Once ready, scoop and serve right away. Extra chocolate chips can be added on top for more crunch. A short freeze makes it firmer. Recipes like this bring a bakery-style twist to Dash My Mug Ice-Cream Recipes.
14. Nutella Mug Ice Cream
Prep Time: 5 minutes | Churn Time: 15 minutes | Serve: 1
Smooth hazelnut chocolate spread blends into a creamy base for a rich and sweet dessert. Thick texture and deep flavor make it perfect for quick cravings. A simple treat from Dash My Mug Ice-Cream Recipes.
Ingredients
- ½ cup heavy cream
- 2 tablespoons milk
- 2 tablespoons sugar
- 2 tablespoons Nutella
- ¼ teaspoon vanilla extract
Instructions
Start by placing the mug bowl in the freezer so it becomes fully chilled. A cold base helps the mixture freeze evenly and creates a creamy texture. While waiting, measure all ingredients so the process stays smooth.
Take a mixing bowl and pour in heavy cream and milk. Stir gently until both liquids combine well. Add sugar and mix until it dissolves fully into the liquid base.
Add Nutella into the mixture. Stir slowly and carefully until it blends completely. The color will turn deep brown and glossy. Add vanilla extract and mix again until the texture looks smooth and even.
Remove the frozen mug from the freezer and pour in the prepared mixture. Turn on the machine and begin churning. At first, the mixture stays liquid. After a few minutes, it begins to thicken near the edges. Use a spoon to gently scrape the sides and mix it back into the center for even freezing.
Continue churning for about 12 to 15 minutes until the mixture becomes thick and creamy. The texture should look smooth and soft like gelato.
Once ready, scoop into a bowl and serve immediately. A drizzle of extra Nutella on top adds more richness. A short freeze makes it firmer. Recipes like this show how simple spreads become desserts in Dash My Mug Ice-Cream Recipes.
15. Chocolate Peanut Butter Ice Cream
Prep Time: 5 minutes | Churn Time: 15 minutes | Serve: 1
Chocolate base mixed with creamy peanut butter creates a thick and rich dessert. Sweet and salty notes balance each other in every spoon. A bold choice in Dash My Mug Ice-Cream Recipes for strong flavor lovers.
Ingredients
- ½ cup heavy cream
- 2 tablespoons milk
- 2 tablespoons sugar
- 1 tablespoon cocoa powder
- 1½ tablespoons peanut butter
- ¼ teaspoon vanilla extract
Instructions
Place the mug bowl in the freezer so it becomes very cold before starting. A chilled bowl helps the mixture freeze evenly and improves the final texture. While the bowl chills, warm the peanut butter slightly so it becomes easy to mix.
Take a mixing bowl and pour in heavy cream and milk. Stir gently until both liquids combine fully. Add sugar and mix until it dissolves completely. This step creates a smooth base for the ice cream.
Add cocoa powder and stir slowly until the mixture turns deep chocolate color. Make sure no lumps remain. Add vanilla extract and mix again for a balanced flavor.
Now add peanut butter into the mixture. Stir well until it blends smoothly into the chocolate base. The texture should look thick and creamy with a light swirl effect.
Remove the frozen mug from the freezer and pour in the mixture. Turn on the machine and begin churning. At first, the mixture stays liquid. After a few minutes, the edges start to freeze. Use a spoon to gently scrape and mix it back into the center so freezing stays even.
Continue churning for about 12 to 15 minutes. The mixture slowly becomes thick and creamy. Peanut butter blends fully with chocolate for a rich texture.
Once ready, scoop and serve right away. Extra peanut butter drizzle or chocolate chips can be added on top. A short freeze makes it firmer. Recipes like this bring bold flavor to Dash My Mug Ice-Cream Recipes.
16. Yogurt-Based Ice Cream
Prep Time: 5 minutes | Churn Time: 15 minutes | Serve: 1
Creamy yogurt creates a light and slightly tangy ice cream. Smooth texture with gentle sweetness makes it refreshing and simple. A healthier-style option in Dash My Mug Ice-Cream Recipes.
Ingredients
- ½ cup plain yogurt
- 2 tablespoons milk
- 2 tablespoons honey or sugar
- ¼ teaspoon vanilla extract
- 1 tablespoon fruit puree (optional)
Instructions
Start by placing the mug bowl in the freezer so it becomes fully chilled. A cold base helps the yogurt mixture freeze evenly and keeps the texture smooth. While waiting, prepare fruit puree if using for extra flavor.
Take a mixing bowl and pour in plain yogurt and milk. Stir gently until both combine into a smooth liquid base. Add honey or sugar and mix until fully dissolved. This step helps balance the slight tang of yogurt.
Add vanilla extract and stir again until the mixture looks even and creamy. For extra flavor, add fruit puree and mix lightly so it blends without overpowering the yogurt base.
Remove the frozen mug from the freezer and pour in the mixture. Turn on the machine and start churning. At first, the mixture will look thin. After a few minutes, it begins to thicken along the sides. Use a spoon to gently mix the frozen edges back into the center for even texture.
Continue churning for about 12 to 15 minutes until the mixture becomes creamy and soft. The texture should feel light compared to regular ice cream.
Once ready, scoop and serve immediately. Fresh fruit on top adds extra freshness. A short freeze makes it firmer. Recipes like this bring a lighter option into Dash My Mug Ice-Cream Recipes.
17. Sugar-Free Vanilla Ice Cream
Prep Time: 5 minutes | Churn Time: 15 minutes | Serve: 1
Smooth vanilla ice cream made without sugar keeps things light and simple. Soft sweetness comes from natural sweeteners. A clean and easy option inside Dash My Mug Ice-Cream Recipes for daily dessert moments.
Ingredients
- ½ cup heavy cream
- 2 tablespoons milk
- 1–2 tablespoons stevia or sugar-free sweetener
- ½ teaspoon vanilla extract
- Pinch of salt
Instructions
Place the mug bowl in the freezer so it becomes fully cold. A chilled base helps the ice cream freeze faster and keeps the texture smooth. While the bowl chills, prepare all ingredients for easy mixing.
Take a mixing bowl and pour in heavy cream and milk. Stir slowly until both liquids combine well. Add sugar-free sweetener and mix until it fully dissolves. This step is important to avoid any grainy texture in the final result.
Add vanilla extract and a small pinch of salt. Stir again until the mixture looks smooth and even. The vanilla gives a soft aroma while salt balances the flavor.
Remove the frozen mug from the freezer and pour in the prepared mixture. Turn on the machine and start churning. At first, the mixture stays liquid. After a few minutes, the edges begin to freeze. Use a spoon to gently scrape the sides and mix it back into the center so freezing stays even.
Continue churning for about 12 to 15 minutes until the texture becomes thick and creamy. The mixture should look soft and smooth without ice crystals.
Once ready, scoop and serve right away. A few nuts or fresh fruit can be added on top for extra texture. A short freeze can make it firmer. Recipes like this show simple sweetness in Dash My Mug Ice-Cream Recipes.
18. Vegan Coconut Ice Cream
Prep Time: 5 minutes | Churn Time: 15 minutes | Serve: 1
Rich coconut milk creates a creamy plant-based ice cream. Smooth texture with natural sweetness makes it a dairy-free favorite. A simple vegan option in Dash My Mug Ice-Cream Recipes.
Ingredients
- ½ cup coconut milk (full fat)
- 2 tablespoons coconut cream
- 2 tablespoons sugar or maple syrup
- ¼ teaspoon vanilla extract
- 1 tablespoon shredded coconut
Instructions
Start by placing the mug bowl in the freezer so it becomes fully chilled. A cold base helps the coconut mixture freeze evenly and keeps the texture creamy. While waiting, shake or stir the coconut milk well so it blends smoothly.
Take a mixing bowl and pour in coconut milk and coconut cream. Stir gently until both combine into a rich base. Add sugar or maple syrup and mix until fully dissolved. This step helps create a smooth sweetness throughout.
Add vanilla extract and shredded coconut. Stir slowly so coconut flakes spread evenly through the mixture. The texture should look creamy with small coconut bits inside.
Remove the frozen mug from the freezer and pour in the mixture. Turn on the machine and begin churning. At first, the liquid stays soft. After a few minutes, it starts to thicken along the edges. Use a spoon to gently mix the sides back into the center so everything freezes evenly.
Continue churning for about 12 to 15 minutes until the mixture becomes thick and creamy. The texture should look smooth with coconut bits spread throughout.
Once ready, scoop and serve immediately. Extra shredded coconut can be added on top for texture. A short freeze makes it firmer. Recipes like this bring plant-based style into Dash My Mug Ice-Cream Recipes.
19. Almond Milk Chocolate Ice Cream
Prep Time: 5 minutes | Churn Time: 15 minutes | Serve: 1
Chocolate flavor made with almond milk gives a smooth, dairy-light dessert. Soft texture and mild nutty taste make it easy to enjoy. A simple plant-based option in Dash My Mug Ice-Cream Recipes.
Ingredients
- ½ cup almond milk
- 2 tablespoons cocoa powder
- 2 tablespoons sugar or sweetener
- 1 tablespoon almond butter
- ¼ teaspoon vanilla extract
- Pinch of salt
Instructions
Place the mug bowl in the freezer so it becomes fully cold. A chilled bowl helps the mixture freeze faster and gives a smoother texture. While the bowl chills, prepare all ingredients for easy mixing.
Take a mixing bowl and pour in almond milk. Stir gently to keep it smooth. Add cocoa powder and mix slowly until it fully blends. Keep stirring until no dry powder remains. This step helps create a clean chocolate base.
Add sugar or sweetener and mix until it dissolves completely. Pour in almond butter and stir well until the mixture becomes creamy. The almond butter gives a soft nutty thickness.
Add vanilla extract and a small pinch of salt. Stir again until everything looks even and smooth. The mixture should appear silky with a light chocolate color.
Remove the frozen mug from the freezer and pour in the mixture. Turn on the machine and start churning. At first, the liquid stays thin. After a few minutes, it begins to thicken near the sides. Use a spoon to gently scrape and mix it back into the center so freezing stays even.
Continue churning for about 12 to 15 minutes until the texture becomes creamy and soft. The ice cream should look smooth and slightly thick.
Once ready, scoop and serve immediately. A few chopped almonds can be added on top for crunch. A short freeze makes it firmer. Recipes like this expand plant-based choices in Dash My Mug Ice-Cream Recipes.
20. Protein Mug Ice Cream
Prep Time: 5 minutes | Churn Time: 15 minutes | Serve: 1
High-protein ice cream made for a quick and filling dessert. Creamy texture with balanced sweetness makes it simple and satisfying. A fitness-friendly choice in Dash My Mug Ice-Cream Recipes.
Ingredients
- ½ cup milk or almond milk
- 1 scoop vanilla protein powder
- 2 tablespoons Greek yogurt
- 1 tablespoon peanut butter (optional)
- 1 tablespoon honey or sweetener
- ¼ teaspoon vanilla extract
Instructions
Start by placing the mug bowl in the freezer so it becomes fully chilled. A cold bowl helps the mixture set faster and improves texture. While it chills, gather all ingredients for smooth preparation.
Take a mixing bowl and pour in milk and Greek yogurt. Stir gently until both combine into a smooth base. Add protein powder slowly while mixing to avoid lumps. Stir until fully dissolved and creamy.
Add honey or sweetener and mix well. Pour in vanilla extract for added flavor. If using peanut butter, add it now and stir until the mixture becomes thick and smooth.
Remove the frozen mug from the freezer and pour in the mixture. Turn on the machine and begin churning. At first, the liquid will stay thin. After a few minutes, it starts to thicken along the edges. Use a spoon to gently scrape and mix the frozen parts back into the center so everything freezes evenly.
Continue churning for about 12 to 15 minutes until the mixture becomes creamy and thick. The texture should look smooth and slightly firm.
Once ready, scoop and serve right away. Extra peanut butter or banana slices can be added on top. A short freeze makes it firmer. Recipes like this bring a protein boost into Dash My Mug Ice-Cream Recipes.
21. Matcha Green Tea Ice Cream
Prep Time: 5 minutes | Churn Time: 15 minutes | Serve: 1
Earthy matcha green tea blends into a creamy base for a smooth and slightly bitter-sweet dessert. Light flavor and soft texture make it a calm and simple treat in Dash My Mug Ice-Cream Recipes.
Ingredients
- ½ cup heavy cream
- 2 tablespoons milk
- 2 tablespoons sugar
- 1 teaspoon matcha powder
- ¼ teaspoon vanilla extract
Instructions
Place the mug bowl in the freezer so it becomes fully cold. A chilled bowl helps the mixture freeze evenly and gives a creamy texture. While the bowl chills, sift matcha powder to remove lumps for a smoother mix.
Take a mixing bowl and pour in heavy cream and milk. Stir gently until both liquids combine well. Add sugar and mix until fully dissolved. This step helps keep the final texture smooth.
Add matcha powder slowly while stirring. Mix carefully until the color turns a soft green and no powder remains visible. Pour in vanilla extract and stir again to balance the earthy taste. The mixture should look smooth and even.
Remove the frozen mug from the freezer and pour in the mixture. Turn on the machine and begin churning. At first, the liquid stays thin. After a few minutes, it begins to thicken around the edges. Use a spoon to gently scrape the sides and mix it back into the center so freezing stays even.
Continue churning for about 12 to 15 minutes until the texture becomes creamy and soft. The ice cream should look smooth with a light green color.
Once ready, scoop and serve immediately. A light dusting of matcha powder can be added on top. A short freeze makes it firmer. Recipes like this bring unique flavor into Dash My Mug Ice-Cream Recipes.
22. Rose-Flavored Ice Cream
Prep Time: 5 minutes | Churn Time: 15 minutes | Serve: 1
Soft floral rose flavor blends into a creamy base for a light and fragrant dessert. Smooth texture and gentle sweetness make it special and simple in Dash My Mug Ice-Cream Recipes.
Ingredients
- ½ cup heavy cream
- 2 tablespoons milk
- 2 tablespoons sugar
- 1 teaspoon rose water
- A few drops pink food coloring (optional)
- ¼ teaspoon vanilla extract
Instructions
Place the mug bowl in the freezer so it becomes fully cold. A chilled bowl helps the mixture freeze quickly and keeps the texture smooth. While waiting, prepare all ingredients so mixing stays easy.
Take a mixing bowl and pour in heavy cream and milk. Stir gently until both combine fully. Add sugar and mix until it dissolves completely. This step helps create a clean and smooth base.
Add rose water and vanilla extract. Stir slowly so the floral flavor spreads evenly through the mixture. Add a few drops of pink coloring for a soft pink tone, then mix again until the color looks even.
Remove the frozen mug from the freezer and pour in the mixture. Turn on the machine and start churning. At first, the mixture stays liquid. After a few minutes, it begins to thicken near the edges. Use a spoon to gently scrape and mix it back into the center so freezing stays even.
Continue churning for about 12 to 15 minutes until the mixture becomes creamy and soft. The texture should look smooth with a light pink shade.
Once ready, scoop and serve right away. Rose petals or syrup can be added on top for decoration. A short freeze makes it firmer. Recipes like this add floral notes to Dash My Mug Ice-Cream Recipes.
23. Spiced Chai Ice Cream
Prep Time: 5 minutes | Churn Time: 15 minutes | Serve: 1
Warm chai spices mixed into a creamy base create a smooth and cozy dessert. Light sweetness with cinnamon and cardamom makes each spoon rich in flavor. A comforting choice in Dash My Mug Ice-Cream Recipes.
Ingredients
- ½ cup heavy cream
- 2 tablespoons milk
- 2 tablespoons sugar
- ½ teaspoon chai spice mix (cinnamon, cardamom, ginger)
- ¼ teaspoon vanilla extract
- Pinch of salt
Instructions
Place the mug bowl in the freezer so it becomes fully cold. A chilled bowl helps the mixture freeze evenly and gives a creamy texture. While the bowl chills, prepare the chai spice mix so it blends easily later.
Take a mixing bowl and pour in heavy cream and milk. Stir gently until both liquids combine well. Add sugar and mix until it fully dissolves. This step keeps the texture smooth and free from grainy bits.
Add chai spice mix slowly while stirring. Mix carefully so the spices spread evenly through the base. Pour in vanilla extract and add a small pinch of salt. Stir again until the mixture looks smooth and lightly spiced.
Remove the frozen mug from the freezer and pour in the mixture. Turn on the machine and start churning. At first, the liquid stays thin. After a few minutes, it begins to thicken around the edges. Use a spoon to gently scrape and mix it back into the center so freezing stays even.
Continue churning for about 12 to 15 minutes until the texture becomes thick and creamy. The ice cream should look smooth with soft spice aroma.
Once ready, scoop and serve immediately. A light dusting of cinnamon can be added on top. A short freeze makes it firmer. Recipes like this bring warm spice notes into Dash My Mug Ice-Cream Recipes.
24. Honey Lavender Ice Cream
Prep Time: 5 minutes | Churn Time: 15 minutes | Serve: 1
Floral lavender mixed with natural honey creates a soft and calming dessert. Smooth texture with gentle sweetness makes it light and unique. A delicate option in Dash My Mug Ice-Cream Recipes.
Ingredients
- ½ cup heavy cream
- 2 tablespoons milk
- 2 tablespoons honey
- ¼ teaspoon dried lavender (food grade)
- ¼ teaspoon vanilla extract
- Pinch of salt
Instructions
Place the mug bowl in the freezer so it becomes fully cold. A chilled base helps the mixture freeze evenly and keeps the texture smooth. While the bowl chills, warm milk slightly and steep lavender for a few minutes to release its flavor. Strain before use.
Take a mixing bowl and pour in heavy cream and infused milk. Stir gently until both combine well. Add honey and mix until it fully dissolves into the liquid base.
Add vanilla extract and a small pinch of salt. Stir again until the mixture looks smooth and even. The honey should blend fully without any streaks.
Remove the frozen mug from the freezer and pour in the mixture. Turn on the machine and begin churning. At first, the liquid stays thin. After a few minutes, it starts to thicken along the edges. Use a spoon to gently scrape and mix it back into the center so freezing stays even.
Continue churning for about 12 to 15 minutes until the texture becomes creamy and soft. The ice cream should look smooth with a light floral taste.
Once ready, scoop and serve immediately. A drizzle of honey or dried lavender bits can be added on top. A short freeze makes it firmer. Recipes like this add floral sweetness into Dash My Mug Ice-Cream Recipes.
25. Salted Caramel Pretzel Ice Cream
Prep Time: 5 minutes | Churn Time: 15 minutes | Serve: 1
Sweet caramel blends with salty crunch for a creamy dessert full of contrast. Soft ice cream base and crispy pretzel bits make each bite rich and textured. A bold finish in Dash My Mug Ice-Cream Recipes.
Ingredients
- ½ cup heavy cream
- 2 tablespoons milk
- 2 tablespoons sugar
- 1½ tablespoons caramel sauce
- ¼ cup crushed pretzels
- Pinch of salt
Instructions
Place the mug bowl in the freezer so it becomes fully cold. A chilled base helps the mixture freeze evenly and keeps the texture creamy. While the bowl chills, crush pretzels into small pieces. Keep some fine crumbs and some larger bits for texture balance.
Take a mixing bowl and pour in heavy cream and milk. Stir gently until both liquids combine well. Add sugar and mix until it fully dissolves. This step helps avoid grainy texture in the final ice cream.
Add caramel sauce into the mixture and stir slowly until the base turns smooth and golden. Add a small pinch of salt to enhance the caramel flavor and balance sweetness. Mix again until everything looks even.
Remove the frozen mug from the freezer and pour in the mixture. Turn on the machine and begin churning. At first, the mixture stays liquid. After a few minutes, it starts to thicken around the edges. Use a spoon to gently scrape and mix it back into the center so freezing stays even.
When the mixture begins to turn creamy, add crushed pretzels. Fold them in lightly so they stay crunchy and do not dissolve into the base.
Continue churning for about 12 to 15 minutes until the texture becomes thick and smooth. The ice cream should look creamy with visible pretzel bits inside.
Once ready, scoop and serve immediately. Extra caramel drizzle and pretzel pieces can be added on top. A short freeze makes it firmer. Recipes like this complete the variety in Dash My Mug Ice-Cream Recipes.
Storage & Serving Tips
1. How long mug ice cream lasts: Fresh mug ice cream stays good for about 2 to 3 days in the freezer. Texture stays best on the first day.
2. Best way to store leftovers: Place in a small airtight container. Press a cover on top to reduce ice crystals. Keep in the coldest part of the freezer.
3. Serving ideas and toppings: Soft serve can be eaten right after churning. Firmer texture comes after short freezing. Top with fruits, nuts, chocolate chips, syrup, or cookie crumbs for extra flavor.
Conclusion
Dash My Mug Ice-Cream Recipes bring simple joy into small servings with many flavor choices. From fruit-based blends to rich chocolate and nutty mixes, each recipe shows how easy homemade ice cream can be. The process stays quick, and the results stay fresh and creamy every time.
Trying different flavors helps build new ideas in the kitchen. Mixing fruits, spices, or sweet sauces creates many new combinations without stress. Each mug recipe gives space for creativity and personal taste.