
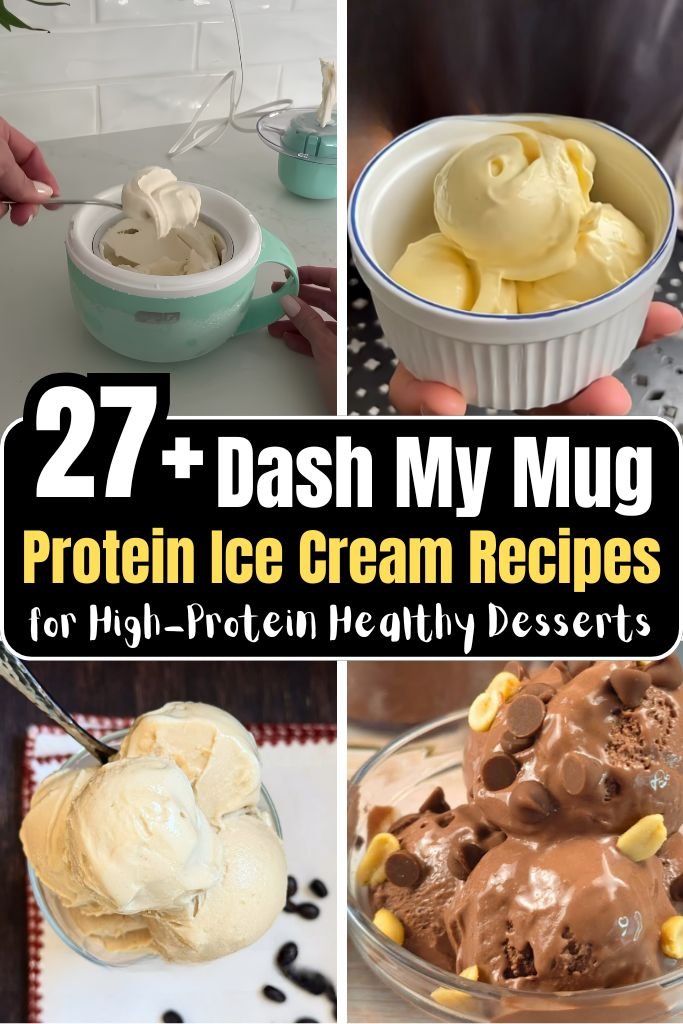
Making healthy frozen desserts at home does not have to be complicated. With Dash My Mug Protein Ice Cream Recipes, you can enjoy creamy, protein-packed ice cream right in your own kitchen using a simple little machine.
The Dash My Mug Ice Cream Maker is a compact, single-serving frozen dessert maker that fits right on your countertop. It is small, easy to use, and makes one perfect portion in just minutes — no big batch, no waste.
Protein ice cream has become a go-to healthy dessert for people who want something sweet without going overboard on sugar or calories. It fits well into active lifestyles, post-workout routines, and everyday clean eating. When you make it at home, you control every single ingredient — no preservatives, no mystery additives.
The best part of homemade protein ice cream is how flexible it is. You can swap flavors, change protein powder types, and adjust sweetness to match your goals.
The Dash My Mug machine handles the churning for you, so all you do is mix your ingredients, pour them in, and wait. Single-serving frozen desserts are that easy.
Why Choose Protein Ice Cream Instead of Traditional Ice Cream?
Traditional ice cream tastes great, but it often comes with high sugar, high fat, and very little nutritional value. Protein ice cream gives you something better. Here is why so many people are making the switch:
1. Higher protein content for muscle recovery — Each serving of protein ice cream can pack 15 to 30 grams of protein, depending on your ingredients. That is a huge jump compared to regular ice cream. Protein helps your muscles repair and grow after exercise, making this a smart post-workout treat.
2. Lower sugar and calorie options — Most protein ice cream recipes use natural sweeteners or sugar-free alternatives. You can cut the calorie count dramatically compared to store-bought ice cream, which often runs 250–400 calories per serving. Homemade versions can come in well under 200 calories.
3. Better satiety and appetite control — Protein keeps you full longer. When your dessert is high in protein, you are less likely to go back for seconds. That helps with portion control and managing cravings throughout the day.
4. Easy customization for dietary preferences — No matter your eating plan — keto, low-carb, gluten-free, or dairy-free — there is a protein ice cream recipe that works for you. You pick the protein powder, the milk, and the mix-ins. The Dash My Mug Protein Ice Cream Recipes in this guide cover a wide range of flavor options to match almost any preference.
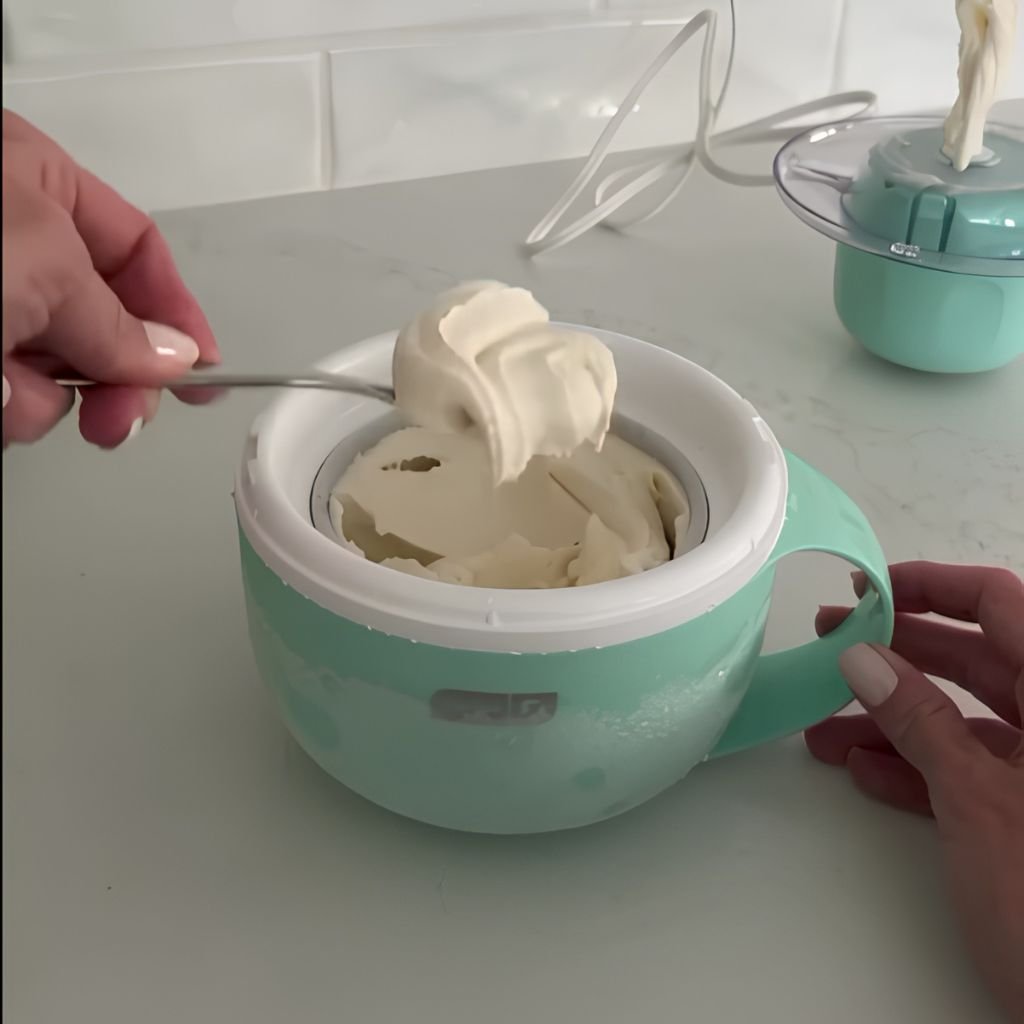
1. Classic Vanilla Protein Ice Cream
Prep Time: 5 minutes | Churn Time: 25–30 minutes | Serves: 1
A smooth, creamy vanilla base made with just a handful of clean ingredients. Perfect for beginners, this recipe is the foundation for so many other flavors. It is light, naturally sweet, and packed with protein to keep you full and satisfied after every spoonful.
Ingredients
- 1 scoop (30g) vanilla whey protein powder
- ¾ cup (180ml) unsweetened almond milk
- 2 tablespoons plain Greek yogurt (full fat or low fat)
- 1 tablespoon sugar-free vanilla pudding mix
- 1 teaspoon pure vanilla extract
- 1–2 teaspoons monk fruit sweetener or erythritol (adjust to taste)
- Pinch of salt
Instructions
Start by making sure your Dash My Mug freezer bowl is fully frozen. It should be in the freezer for at least 8 hours or overnight before you begin. A bowl that is not fully frozen will not churn your ice cream correctly, so planning ahead is important here.
Once your bowl is ready, grab a medium mixing bowl and a whisk. Add your vanilla whey protein powder first, then pour in the unsweetened almond milk. Whisk these together right away so the protein powder does not clump up at the bottom. Keep whisking until the powder is fully dissolved and the mixture looks smooth and even. This usually takes about 60 to 90 seconds of steady whisking.
Next, add the plain Greek yogurt to the bowl. The yogurt adds a creamy texture and a slight tang that balances the sweetness of the vanilla. Whisk again until the yogurt is completely mixed in with no lumps. If you see any small chunks, just keep whisking — they will break apart.
Now add your sugar-free vanilla pudding mix. This is one of the most important steps. The pudding mix contains a small amount of modified starch that helps your ice cream stay creamy and scoopable instead of turning into a hard, icy block. It makes a big difference in the final texture. Sprinkle it in and whisk until it is fully dissolved.
Pour in the vanilla extract and add your sweetener of choice. Start with one teaspoon of sweetener, then taste the mixture and add more if needed. Everyone has a different sweetness preference, and you want to get this right before freezing because flavors become slightly muted once the mixture is cold. Finally, add a small pinch of salt. Salt enhances sweetness and brings all the flavors together.
Whisk the whole mixture one more time until everything is smooth and well combined. Let the mixture sit for 2 to 3 minutes so the pudding mix can fully hydrate. You may notice the liquid thickens just slightly — that is exactly what you want.
Take your frozen Dash My Mug bowl out of the freezer and set it up according to the machine instructions. Pour the ice cream mixture into the bowl slowly and carefully. Turn the machine on and let it churn for 25 to 30 minutes. During this time, the machine will mix and freeze the liquid at the same time, turning it into soft, creamy ice cream.
After churning, the ice cream will have a soft-serve consistency. Eat it right away for the best texture. To make it firmer, transfer it to a small freezer-safe container and freeze for an additional 1 to 2 hours before serving.
Nutrition Information (Approximate)
- Calories: 175
- Protein: 26g
- Carbohydrates: 8g
- Fat: 3g
- Sugar: 2g
Recipe Tips
- Use full-fat Greek yogurt for a creamier result.
- If your mixture is too thick to pour, add 1 to 2 tablespoons of extra almond milk.
- Vanilla bean paste can replace vanilla extract for a stronger flavor and visible specks.
2. Chocolate Whey Protein Ice Cream
Prep Time: 5 minutes | Churn Time: 25–30 minutes | Serves: 1
Rich, deep chocolate flavor comes through in every bite of this easy single-serving recipe. Using chocolate whey protein and a touch of cocoa powder creates a bold, satisfying treat that feels indulgent without the guilt. Great for chocolate lovers who want their dessert to also support their fitness goals.
Ingredients
- 1 scoop (30g) chocolate whey protein powder
- ¾ cup (180ml) unsweetened almond milk or low-fat milk
- 1 tablespoon unsweetened cocoa powder
- 2 tablespoons plain Greek yogurt
- 1 tablespoon sugar-free chocolate pudding mix
- 1–2 teaspoons monk fruit sweetener
- ½ teaspoon vanilla extract
- Pinch of salt
Instructions
Before anything else, confirm that your Dash My Mug freezer bowl has been in the freezer for a full 8 to 12 hours. This step cannot be skipped. A cold bowl is what makes the churning process work properly.
In a clean mixing bowl, combine the chocolate whey protein powder and the unsweetened almond milk. Use a whisk and start mixing immediately so the powder does not settle and clump at the bottom. Whisk in circular and back-and-forth motions until the mixture is fully smooth. With chocolate protein powder, you may see a few small bubbles form on top — that is completely normal and nothing to worry about.
Once the milk and protein powder are fully combined, add the unsweetened cocoa powder. This is where the deep chocolate flavor really builds. Cocoa powder by itself can be a little bitter, which is actually a good thing here — it balances the sweetness of the protein powder and creates a more complex chocolate taste. Whisk the cocoa in thoroughly until no dry spots or clumps remain. Take your time with this step, as cocoa powder tends to resist mixing at first.
Add the plain Greek yogurt next. Yogurt adds creaminess and body to the base. It also adds a small amount of extra protein, which is a bonus. Whisk until the yogurt is completely smooth and blended into the chocolate liquid.
Sprinkle in the sugar-free chocolate pudding mix and stir well. Just like in other Dash My Mug Protein Ice Cream Recipes, the pudding mix is the key to a creamy, scoopable texture. Without it, frozen protein ice cream can turn out icy and grainy. The pudding mix prevents that from happening.
Add the vanilla extract and your sweetener. Taste the mixture and adjust sweetness as needed. The cocoa adds some bitterness, so you may want a little more sweetener than you think. Add the pinch of salt last, which enhances the chocolate flavor significantly.
Whisk everything together one final time and allow the mixture to rest for about 2 minutes so the pudding mix can activate. Pour the mixture slowly into the pre-frozen Dash My Mug bowl. Turn the machine on and churn for 25 to 30 minutes until you reach a soft-serve consistency.
Enjoy immediately with your choice of toppings or transfer to a small container and freeze for 1 to 2 hours for a firmer scoop.
Nutrition Information (Approximate)
- Calories: 185
- Protein: 27g
- Carbohydrates: 10g
- Fat: 3.5g
- Sugar: 2g
Recipe Tips
- Dark cocoa powder gives an even richer chocolate taste.
- Add a few sugar-free chocolate chips during the last 5 minutes of churning for texture.
- A tablespoon of espresso powder intensifies the chocolate flavor without adding coffee taste.
3. Cookies and Cream Protein Ice Cream
Prep Time: 5 minutes | Churn Time: 25–30 minutes | Serves: 1
Crushed chocolate sandwich cookies mixed into a creamy vanilla protein base — this one brings serious nostalgia to your healthy dessert routine. The crunchy cookie bits soften just slightly as they freeze into the ice cream, giving you that classic cookies-and-cream experience in a high-protein, single-serving format.
Ingredients
- 1 scoop (30g) vanilla whey protein powder
- ¾ cup (180ml) unsweetened almond milk
- 2 tablespoons plain Greek yogurt
- 1 tablespoon sugar-free vanilla pudding mix
- 1 teaspoon vanilla extract
- 1–2 teaspoons monk fruit sweetener
- 3 reduced-fat chocolate sandwich cookies (such as Oreo thins), crushed
- Pinch of salt
Instructions
Make sure your Dash My Mug bowl is completely frozen before starting. This machine requires a fully pre-frozen bowl to function correctly. Leave it in the freezer overnight for best results.
To a medium bowl, add the vanilla whey protein powder and pour in the almond milk gradually while whisking. Pouring the milk in slowly while whisking prevents the powder from forming chunks. Continue whisking until the mixture is fully smooth and has a slightly thickened look from the protein powder dissolving.
Mix in the Greek yogurt. Stir well until no streaks or lumps of yogurt remain in the liquid. The yogurt helps create a rich, dense base that turns creamy during churning.
Add the sugar-free vanilla pudding mix next and whisk until it is fully dissolved. This step is essential for achieving the right texture. Pudding mix creates a smooth, creamy final product rather than a hard or icy block. Stir in the vanilla extract, sweetener, and pinch of salt. Taste the liquid base and adjust the sweetness level to your liking before adding the cookie pieces.
Now prepare your cookies. Place them in a zip-lock bag and crush them using a rolling pin or the bottom of a heavy cup. You want a mix of fine crumbs and small chunky pieces — the combination creates a more interesting texture in the final ice cream. Do not crush them into pure dust because you want some solid bits to bite into.
Set the crushed cookies aside for now. Pour the protein base into the pre-frozen Dash My Mug bowl and begin churning. Let the machine run for about 20 minutes first to build up the creamy texture before adding the cookies.
After about 20 minutes of churning, pause the machine and add the crushed cookie pieces directly into the ice cream. Turn the machine back on and churn for another 5 to 8 minutes. This allows the cookie pieces to mix through the ice cream without getting over-mixed and losing their texture.
Once churning is complete, scoop the ice cream into a bowl and serve right away for soft-serve consistency. For a firmer result, transfer to a freezer container and freeze for 1 hour.
Nutrition Information (Approximate)
- Calories: 210
- Protein: 24g
- Carbohydrates: 18g
- Fat: 4g
- Sugar: 5g
Recipe Tips
- Use gluten-free chocolate sandwich cookies to make this recipe gluten-free.
- Crush the cookies fresh right before adding them to keep them crisp.
- Swap vanilla protein for birthday cake protein powder for a fun flavor twist.
4. Peanut Butter Protein Ice Cream
Prep Time: 5 minutes | Churn Time: 25–30 minutes | Serves: 1
Thick, nutty, and deeply satisfying — peanut butter protein ice cream is a crowd favorite for good reason. Natural peanut butter adds healthy fats and a bold, roasted flavor that pairs beautifully with a vanilla or peanut butter protein base. Every bite is dense and creamy, making you feel like you are eating something far more indulgent than it really is.
Ingredients
- 1 scoop (30g) vanilla or peanut butter whey protein powder
- ¾ cup (180ml) unsweetened almond milk
- 2 tablespoons natural peanut butter (no added sugar)
- 1 tablespoon sugar-free vanilla pudding mix
- 1 teaspoon vanilla extract
- 1–2 teaspoons monk fruit sweetener
- Pinch of salt
Instructions
Remove your Dash My Mug freezer bowl from the freezer only when you are fully ready to use it. Once it starts warming up, it loses its freezing power quickly, so prep your ingredients before pulling the bowl out.
Measure out the natural peanut butter and add it to your mixing bowl. Natural peanut butter is important here — avoid peanut butter with added oils or sugar because those versions make the base too sweet and can change the texture. Warm the peanut butter for about 10 seconds in the microwave to make it easier to whisk into the liquid.
Pour the almond milk into the bowl with the peanut butter first, then add the protein powder on top. This order makes mixing easier because the liquid helps the peanut butter loosen up before you add the dry powder. Whisk everything together using firm, consistent strokes. The peanut butter will resist mixing at first but will fully incorporate after about 1 to 2 minutes of whisking.
Once the peanut butter is fully blended into the liquid, add the sugar-free vanilla pudding mix and whisk until it is dissolved. Sprinkle in your sweetener, vanilla extract, and salt. Taste the mixture at this point and make any flavor adjustments. Peanut butter has a natural saltiness, so you may not need much additional salt. However, a very small pinch actually enhances the peanut flavor.
Let the mixture rest for 2 to 3 minutes so the pudding mix can hydrate fully. The mixture may thicken slightly — this is normal and actually a good sign that the pudding mix is working.
Pour the mixture carefully into the frozen Dash My Mug bowl and start the machine. Let it churn for 25 to 30 minutes. As the machine works, you will notice the mixture becoming thicker and more opaque, which means the ice cream is forming correctly.
When churning is done, the texture will be thick and creamy, similar to peanut butter soft-serve. Scoop it directly into a bowl and enjoy. A light drizzle of natural peanut butter on top adds a nice finishing touch.
Nutrition Information (Approximate)
- Calories: 280
- Protein: 28g
- Carbohydrates: 9g
- Fat: 14g
- Sugar: 2g
Recipe Tips
- Use powdered peanut butter (PB2) to cut the fat content while keeping the flavor.
- Swirl in a teaspoon of honey for extra sweetness before serving.
- Crushed peanuts make an excellent crunchy topping.
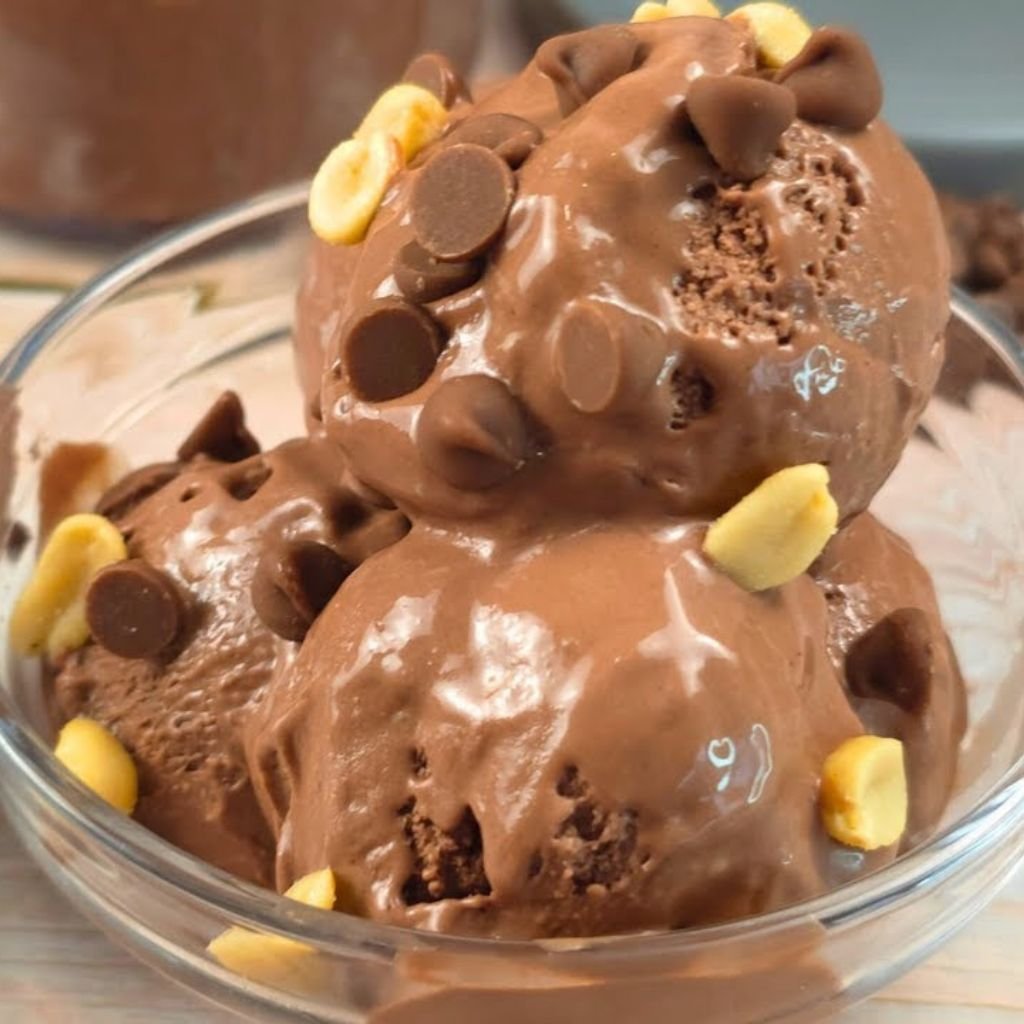
5. Chocolate Peanut Butter Swirl Protein Ice Cream
Prep Time: 7 minutes | Churn Time: 25–30 minutes | Serves: 1
Two of the greatest flavors in the world come together in one single-serving frozen dessert. A rich chocolate protein base gets ribbons of natural peanut butter swirled through it right before serving. The result is visually beautiful and absolutely delicious — a dessert that looks like it took effort but comes together in minutes.
Ingredients
- 1 scoop (30g) chocolate whey protein powder
- ¾ cup (180ml) unsweetened almond milk
- 1 tablespoon unsweetened cocoa powder
- 2 tablespoons plain Greek yogurt
- 1 tablespoon sugar-free chocolate pudding mix
- 1 teaspoon vanilla extract
- 1–2 teaspoons monk fruit sweetener
- Pinch of salt
- 1 tablespoon natural peanut butter (for swirling)
Instructions
Take the Dash My Mug freezer bowl out of the freezer right as you are ready to pour. Keep all other ingredients prepped and measured before removing the bowl so you can move quickly.
In a medium bowl, combine the chocolate whey protein powder and almond milk. Whisk vigorously until the protein powder is fully dissolved and no clumps remain. The mixture should be smooth and uniform in color — a deep brown from the chocolate protein powder.
Add the unsweetened cocoa powder to the bowl and whisk again. The cocoa powder intensifies the chocolate flavor and gives the ice cream a darker, richer look. Keep whisking until the cocoa is fully incorporated. This takes a little more effort than dissolving the protein powder, so be patient.
Mix in the Greek yogurt. The yogurt adds creaminess to the base and also adds a faint tang that works beautifully with chocolate. Whisk until the mixture is completely smooth with no yogurt lumps.
Add the sugar-free chocolate pudding mix and stir until dissolved. Then add vanilla extract, sweetener, and salt. Mix thoroughly one final time. Taste the base and adjust sweetness or salt as needed.
Let the mixture rest for 2 minutes so the pudding mix can fully activate. Pour the chocolate base into the pre-frozen Dash My Mug bowl and turn on the machine. Let it churn for the full 25 to 30 minutes.
While the ice cream is churning, warm the natural peanut butter in the microwave for 10 seconds to loosen it. When the ice cream is done churning, scoop it into a bowl right away.
Now create the swirl. Drizzle the warmed peanut butter over the top of the freshly churned ice cream in a zigzag pattern. Use a toothpick, skewer, or small spoon to gently swirl the peanut butter through the chocolate ice cream in circular motions. Do not over-stir — you want visible ribbons of peanut butter, not a full mix.
Serve immediately while the ice cream is still soft for the best swirl effect. This recipe is one of the most visually rewarding in all the Dash My Mug Protein Ice Cream Recipes collection.
Nutrition Information (Approximate)
- Calories: 265
- Protein: 27g
- Carbohydrates: 11g
- Fat: 11g
- Sugar: 2g
Recipe Tips
- Use dark chocolate protein powder for a more intense base flavor.
- Add a sprinkle of flaky sea salt on top to bring out the peanut butter and chocolate.
- Swap peanut butter for almond butter for a slightly different but equally delicious result.
6. Strawberry Cheesecake Protein Ice Cream
Prep Time: 7 minutes | Churn Time: 25–30 minutes | Serves: 1
Bright strawberry flavor meets the creamy richness of cheesecake in one pretty pink scoop. Fresh or frozen strawberries provide natural sweetness and color while a touch of cream cheese gives you that signature cheesecake flavor. Light, fruity, and packed with protein — a perfect summer dessert.
Ingredients
- 1 scoop (30g) vanilla or strawberry whey protein powder
- ½ cup (120ml) unsweetened almond milk
- ¼ cup fresh or frozen strawberries, thawed and mashed
- 2 tablespoons reduced-fat cream cheese, softened
- 1 tablespoon sugar-free cheesecake pudding mix
- 1 teaspoon vanilla extract
- 1–2 teaspoons monk fruit sweetener
- Pinch of salt
Instructions
Make sure your Dash My Mug bowl has been in the freezer for at least 8 hours. Fruit-based ice cream bases tend to freeze faster than plain dairy bases, so a fully frozen bowl is especially important here.
Start by preparing your strawberries. Place fresh or thawed frozen strawberries in a small bowl and mash them thoroughly with a fork until you have a chunky puree. You want a mix of small bits and smooth puree — not completely liquid. Some small strawberry pieces will give the final ice cream a nice burst of real fruit texture.
In your mixing bowl, combine the softened cream cheese and almond milk first. Use a whisk and press the cream cheese against the sides of the bowl while whisking to break it apart. Continue until the cream cheese is fully incorporated into the milk with no visible lumps. This step requires a bit of patience, but it is important for a smooth final texture.
Add the vanilla or strawberry protein powder to the cream cheese and milk mixture. Whisk until fully dissolved. The mixture will look pinkish if you are using strawberry protein powder, or light cream-colored if using vanilla. Either way, it will turn pink once the strawberries go in.
Mix in the mashed strawberries and stir to combine. The fruit adds moisture and natural sugar, so taste the mixture at this point before adding sweetener. You may need less sweetener than usual, depending on how sweet your strawberries are.
Add the sugar-free cheesecake pudding mix and whisk well. This special flavor pudding mix adds the tangy, creamy quality that makes this taste like real cheesecake ice cream. Stir in the vanilla extract, sweetener (adjust based on the sweetness of your berries), and pinch of salt.
Let the mixture rest for 2 minutes, then pour carefully into the frozen Dash My Mug bowl. Churn for 25 to 30 minutes. The strawberry pieces will freeze into the ice cream as it churns, creating a beautiful ripple effect.
Scoop and serve right away. A few fresh strawberry slices on top make a lovely garnish.
Nutrition Information (Approximate)
- Calories: 195
- Protein: 25g
- Carbohydrates: 11g
- Fat: 5g
- Sugar: 4g
Recipe Tips
- Use freeze-dried strawberry powder for a more intense berry flavor.
- Add a few crushed graham crackers on top for the full cheesecake experience.
- A squeeze of lemon juice in the base brightens the strawberry flavor.
7. Blueberry Vanilla Protein Ice Cream
Prep Time: 7 minutes | Churn Time: 25–30 minutes | Serves: 1
Plump, juicy blueberries folded into a creamy vanilla protein base create a naturally purple ice cream that is as beautiful as it is tasty. Blueberries are rich in antioxidants, which means this recipe gives you an extra health boost on top of all that protein. A simple, wholesome recipe you will come back to again and again.
Ingredients
- 1 scoop (30g) vanilla whey protein powder
- ¾ cup (180ml) unsweetened almond milk
- ¼ cup fresh or frozen blueberries
- 2 tablespoons plain Greek yogurt
- 1 tablespoon sugar-free vanilla pudding mix
- 1 teaspoon vanilla extract
- 1–2 teaspoons monk fruit sweetener
- Pinch of salt
Instructions
Start with a fully frozen Dash My Mug bowl, as always. While the bowl is getting ready, prepare your blueberries. If using frozen blueberries, let them thaw for about 10 minutes at room temperature. You want them soft enough to mash but not completely mushy.
Take half of your blueberries and mash them in a small bowl with a fork. Press down firmly to release the juices and break them into a chunky puree. Leave the other half of the blueberries whole. Using a mix of mashed and whole berries gives you a more interesting texture in the final ice cream — smooth parts and little bursts of fruit.
In your main mixing bowl, combine the vanilla protein powder and almond milk. Whisk firmly until the powder is fully dissolved and the mixture is smooth. Take your time here — properly dissolved protein powder makes a big difference in the creaminess of the final product.
Add the Greek yogurt to the bowl and whisk until fully blended. The yogurt contributes to a thick, creamy texture and adds a gentle tang that pairs nicely with the sweet blueberries.
Stir in the sugar-free vanilla pudding mix and dissolve it completely by whisking for about 30 to 45 seconds. This ingredient keeps the texture soft and creamy rather than icy during and after freezing.
Add the vanilla extract, sweetener, and salt. Taste the base and adjust sweetness as needed. Blueberries have a natural sweetness, especially when ripe, so you might need less sweetener than other recipes.
Fold in the mashed blueberries and stir gently to combine. Add the whole blueberries and stir just two or three more times so they are distributed but not completely broken up. Pour the mixture into the frozen Dash My Mug bowl and churn for 25 to 30 minutes.
The ice cream will take on a beautiful light purple color as it churns. When done, scoop into a bowl and top with a few fresh blueberries for a finishing touch.
Nutrition Information (Approximate)
- Calories: 185
- Protein: 25g
- Carbohydrates: 13g
- Fat: 3g
- Sugar: 6g
Recipe Tips
- Wild blueberries have a more intense flavor than regular blueberries and work great in this recipe.
- A drop of lemon extract in the base complements the berry flavor.
- Swirl in a teaspoon of sugar-free blueberry jam before serving for extra flavor.
8. Banana Protein Ice Cream
Prep Time: 5 minutes | Churn Time: 25–30 minutes | Serves: 1
Ripe banana brings a natural sweetness and thick, creamy texture to this protein ice cream. No need for added sweetener when your banana is perfectly ripe — it provides all the flavor and sugar you need. Smooth, naturally sweet, and loaded with potassium and protein, this recipe is a great post-workout recovery treat.
Ingredients
- 1 scoop (30g) vanilla or banana-flavored whey protein powder
- ½ cup (120ml) unsweetened almond milk
- 1 small ripe banana, mashed (about ½ cup mashed)
- 2 tablespoons plain Greek yogurt
- 1 tablespoon sugar-free vanilla or banana pudding mix
- 1 teaspoon vanilla extract
- Pinch of salt
- Optional: 1 teaspoon monk fruit sweetener (only if banana is not very sweet)
Instructions
Confirm that your Dash My Mug freezer bowl is completely frozen and ready. Banana-based ice cream freezes very well, but only when the bowl is properly cold from the start.
Pick a banana that is very ripe — the peel should be mostly yellow with many brown spots. The riper the banana, the sweeter and more flavorful the ice cream will be. Underripe bananas taste starchy and bland, so do not rush this step.
Peel the banana and place it in your mixing bowl. Mash it thoroughly with a fork, pressing in all directions until it becomes a smooth puree with minimal lumps. Some small bits are fine, but try to get it as smooth as possible. The natural starches and sugars in the banana will help the ice cream bind and become creamy during churning.
Pour the almond milk into the bowl with the mashed banana. Whisk to combine the two until the banana and milk are fully incorporated and the mixture looks uniform.
Add the vanilla protein powder and whisk until fully dissolved. The banana base will make the mixture thicker than a plain milk base, which is perfectly normal. Keep whisking until no dry protein powder remains.
Spoon in the Greek yogurt and mix well. Add the sugar-free pudding mix and whisk for 45 seconds to make sure it is evenly dissolved throughout the mixture. Add the vanilla extract and salt. Taste the base at this point — a ripe banana will naturally make the mixture sweet enough that you may not need additional sweetener at all. If it needs more sweetness, add a small amount of monk fruit sweetener.
Let the mixture sit for 2 minutes, then pour it into the frozen Dash My Mug bowl. Churn for 25 to 30 minutes. Banana ice cream turns out especially thick and creamy due to the natural texture of the banana. When done, serve immediately for a soft-serve style dessert, or freeze for 30 to 45 minutes for a scoopable version.
Nutrition Information (Approximate)
- Calories: 200
- Protein: 26g
- Carbohydrates: 17g
- Fat: 3g
- Sugar: 10g
Recipe Tips
- Freeze the banana first for a colder, thicker base that freezes faster.
- Add a sprinkle of cinnamon to bring out the banana flavor.
- Sliced fresh banana and a drizzle of almond butter make a great topping.
9. Chocolate Banana Protein Ice Cream
Prep Time: 6 minutes | Churn Time: 25–30 minutes | Serves: 1
Chocolate and banana is one of the most classic flavor combinations around, and for good reason — they bring out the best in each other. Ripe banana adds natural sweetness and creaminess to a rich chocolate protein base. The result is smooth, thick, and tastes like a frozen chocolate banana bar in ice cream form.
Ingredients
- 1 scoop (30g) chocolate whey protein powder
- ½ cup (120ml) unsweetened almond milk
- 1 small ripe banana, mashed
- 1 tablespoon unsweetened cocoa powder
- 2 tablespoons plain Greek yogurt
- 1 tablespoon sugar-free chocolate pudding mix
- 1 teaspoon vanilla extract
- Pinch of salt
Instructions
Before pulling your Dash My Mug bowl from the freezer, have all your ingredients prepped and ready to go. You want to work quickly once the bowl is out.
Begin with the banana. Peel a very ripe banana and mash it in your mixing bowl using a fork. Press and fold the banana repeatedly until you have a mostly smooth puree. The riper your banana, the more natural chocolate-sweetness contrast you will get once the cocoa is added. Set the mashed banana aside in the bowl.
Pour the almond milk over the mashed banana and whisk to combine. The banana will naturally break down more as you mix, which is exactly what you want.
Add the chocolate whey protein powder and the unsweetened cocoa powder to the bowl at the same time. Whisk both together with the banana-milk mixture. Chocolate protein powder plus real cocoa creates a deeply layered chocolate flavor — more complex than using just one or the other. Whisk firmly for about 90 seconds until both powders are fully dissolved and the mixture is a rich, dark brown.
Add the Greek yogurt and mix until fully incorporated. Then add the sugar-free chocolate pudding mix and whisk for an additional 45 seconds. This pudding mix plays a key role in the final texture of the ice cream, preventing it from turning hard and icy after freezing.
Stir in the vanilla extract and salt. Taste the mixture. At this point it should have a strong chocolate-banana flavor that is naturally sweet and slightly rich. Because the banana provides a lot of sweetness, you likely will not need any added sweetener. But if you prefer a sweeter result, a teaspoon of monk fruit sweetener works well.
Pour the mixture into your pre-frozen Dash My Mug bowl and begin churning. Let the machine run for the full 25 to 30 minutes. The banana and chocolate base becomes beautifully creamy as it churns.
Scoop into a bowl when done. This recipe tastes great on its own or with a light sprinkle of sea salt and some crushed dark chocolate on top.
Nutrition Information (Approximate)
- Calories: 215
- Protein: 27g
- Carbohydrates: 19g
- Fat: 4g
- Sugar: 11g
Recipe Tips
- Use a frozen banana for an even colder base and faster freeze.
- Add a tablespoon of sugar-free caramel drizzle on top for a turtle-banana ice cream vibe.
- Mix in a tablespoon of crushed walnuts for added crunch and omega-3s.
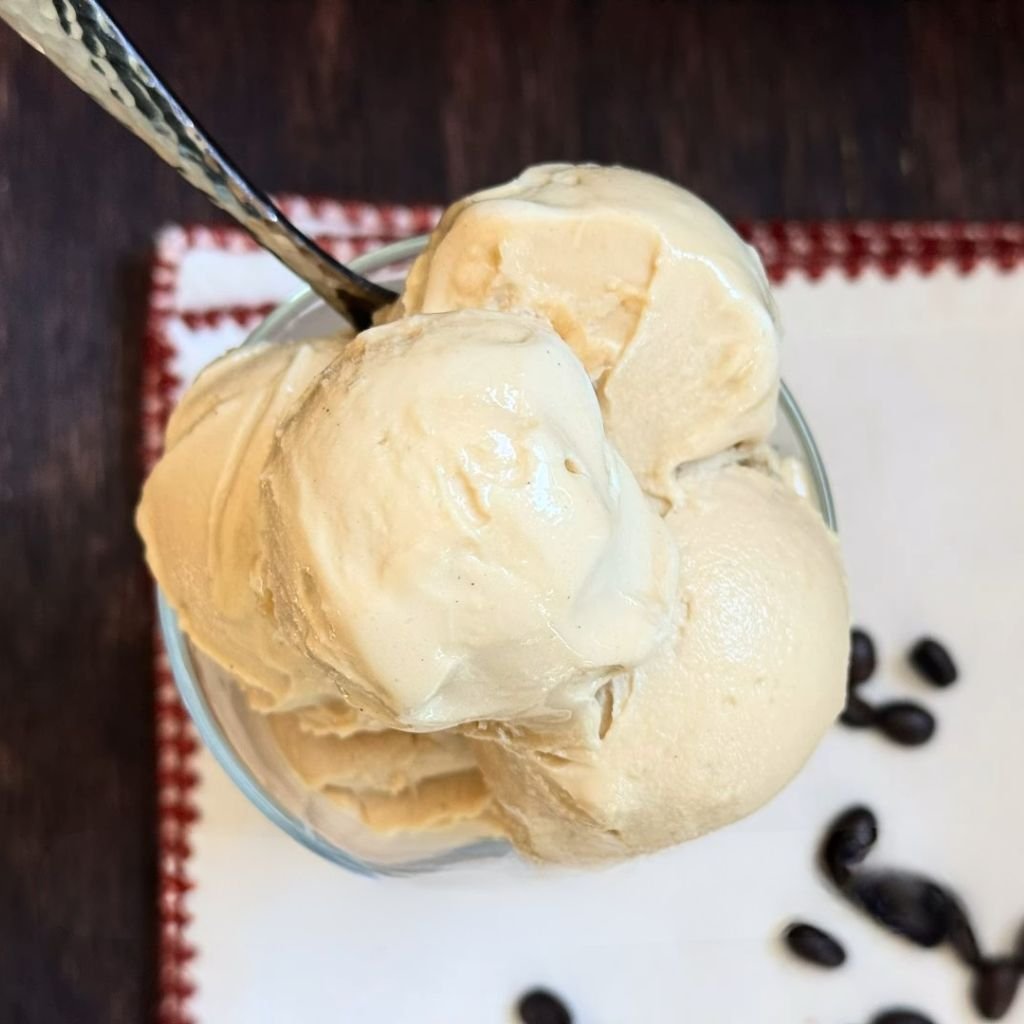
10. Mocha Coffee Protein Ice Cream
Prep Time: 6 minutes | Churn Time: 25–30 minutes | Serves: 1
Bold espresso meets rich chocolate in a creamy, caffeinated protein ice cream that doubles as your afternoon pick-me-up. Brewed coffee adds deep flavor without extra calories, while the chocolate protein base gives you that mocha coffeehouse taste you love. A smart, energizing treat for coffee and chocolate fans alike.
Ingredients
- 1 scoop (30g) chocolate whey protein powder
- ½ cup (120ml) cold brewed coffee or strong cold brew concentrate (diluted)
- ¼ cup (60ml) unsweetened almond milk
- 1 tablespoon unsweetened cocoa powder
- 2 tablespoons plain Greek yogurt
- 1 tablespoon sugar-free chocolate pudding mix
- 1 teaspoon vanilla extract
- 1–2 teaspoons monk fruit sweetener
- Pinch of salt
Instructions
Pull your Dash My Mug bowl from the freezer only when you are ready to pour. Have your cold brew coffee chilled before starting — hot or warm coffee will not work in this recipe and can prevent the mixture from freezing properly.
In your mixing bowl, pour in the cold brewed coffee and almond milk together. The coffee acts as part of the liquid base, replacing some of the almond milk. Cold brew is ideal here because it is smooth and low in acidity. Regular brewed coffee that has been chilled works too, but cold brew gives a deeper, smoother coffee flavor.
Add the chocolate whey protein powder to the coffee-milk liquid. Whisk briskly until the protein powder is fully dissolved. The coffee liquid helps the powder mix faster than plain almond milk in some cases, so this step should not take long.
Sift or sprinkle in the unsweetened cocoa powder. Whisk vigorously until the cocoa is fully blended into the liquid. You will notice the mixture turning a rich, dark mocha color. This is exactly what you want.
Add the Greek yogurt and whisk until smooth. Mix in the sugar-free chocolate pudding mix and stir for 45 seconds to ensure it is evenly distributed. The pudding mix is crucial for preventing icy texture in the finished product. Because coffee can sometimes cause a slightly more crystalline texture when frozen, the pudding mix helps counteract this and keeps everything creamy.
Stir in the vanilla extract, sweetener, and salt. Taste the base — it should have a strong mocha flavor that is balanced between coffee bitterness, chocolate richness, and light sweetness. Adjust sweetener to your preference.
Allow the mixture to rest for 2 minutes before pouring into the frozen Dash My Mug bowl. Churn for 25 to 30 minutes. The ice cream will develop a beautiful dark brown color as it churns.
When done, scoop into a bowl and enjoy immediately. A light dusting of cocoa powder or espresso powder on top makes a sophisticated garnish.
Nutrition Information (Approximate)
- Calories: 180
- Protein: 26g
- Carbohydrates: 9g
- Fat: 3.5g
- Sugar: 2g
Recipe Tips
- Use decaf cold brew if you want the flavor without the caffeine.
- A teaspoon of instant espresso powder stirred into the base adds even more coffee depth.
- Crushed dark chocolate-covered espresso beans on top are an amazing finishing touch.
11. Salted Caramel Protein Ice Cream
Prep Time: 6 minutes | Churn Time: 25–30 minutes | Serves: 1
Sweet, buttery caramel flavor with a perfectly placed hit of sea salt creates an ice cream experience that feels gourmet. Using sugar-free caramel syrup and caramel pudding mix, you get all the indulgence with none of the sugar crash. A sophisticated, craveable recipe that is one of the best Dash My Mug Protein Ice Cream Recipes for anyone who loves a sweet-salty flavor profile.
Ingredients
- 1 scoop (30g) vanilla or caramel whey protein powder
- ¾ cup (180ml) unsweetened almond milk
- 2 tablespoons plain Greek yogurt
- 2 tablespoons sugar-free caramel syrup
- 1 tablespoon sugar-free cheesecake or vanilla pudding mix
- 1 teaspoon vanilla extract
- ¼ teaspoon flaky sea salt (plus extra for topping)
- 1 teaspoon monk fruit sweetener (adjust to taste)
Instructions
Start with a fully frozen Dash My Mug bowl. While you are prepping, make sure your caramel syrup is at room temperature or slightly warmed so it blends easily into the cold almond milk.
In your mixing bowl, combine the vanilla or caramel protein powder with the almond milk. Whisk well until the protein is completely dissolved and the mixture is smooth. Caramel-flavored protein powder will give you an even stronger caramel taste, but vanilla works beautifully here too.
Pour the sugar-free caramel syrup into the bowl. The syrup adds both flavor and a slightly thicker consistency to the base. Whisk it in thoroughly until it is evenly distributed. You should be able to smell the caramel fragrance coming through at this point.
Add the Greek yogurt and mix until completely smooth. Spoon in the sugar-free pudding mix and whisk for 45 to 60 seconds, making sure no dry lumps remain in the mixture.
Add the vanilla extract and monk fruit sweetener. Now add the sea salt. This is an important step — start with ¼ teaspoon, mix it in, and taste. The salt should be noticeable but not overwhelming. It should make the caramel flavor pop rather than making the dessert actually taste salty. Add a tiny bit more if you enjoy a stronger salted caramel profile.
Rest the mixture for 2 minutes to allow the pudding mix to hydrate. Pour carefully into the frozen Dash My Mug bowl and churn for 25 to 30 minutes. As the ice cream churns, the caramel flavor intensifies slightly as the liquid concentrates into a frozen dessert.
Scoop into a bowl when done and finish with a light drizzle of extra caramel syrup and a pinch of flaky sea salt on top. The combination of cold creamy ice cream, warm caramel drizzle, and crunchy salt crystals is absolutely satisfying.
Nutrition Information (Approximate)
- Calories: 185
- Protein: 26g
- Carbohydrates: 8g
- Fat: 3g
- Sugar: 2g
Recipe Tips
- Sugar-free caramel coffee syrups from brands like Torani or DaVinci work perfectly in this recipe.
- A few sugar-free caramel candies crushed on top add texture.
- Use smoked sea salt instead of regular sea salt for a deeper, more complex flavor.
12. Mint Chocolate Chip Protein Ice Cream
Prep Time: 5 minutes | Churn Time: 25–30 minutes | Serves: 1
Cool, refreshing mint blended into a creamy protein base with crunchy chocolate chip pieces scattered throughout — this is the protein version of a classic. The mint flavor is bright and clean, the chocolate chips add texture, and the green color (if you choose to add it) makes it look just like the real thing. Refreshing, satisfying, and ready in under 35 minutes.
Ingredients
- 1 scoop (30g) vanilla whey protein powder
- ¾ cup (180ml) unsweetened almond milk
- 2 tablespoons plain Greek yogurt
- 1 tablespoon sugar-free vanilla pudding mix
- ¾ teaspoon pure peppermint extract (not mint flavoring — use pure extract for best results)
- 1–2 teaspoons monk fruit sweetener
- 2 tablespoons sugar-free mini chocolate chips
- Pinch of salt
- Optional: 1–2 drops green food coloring
Instructions
Your Dash My Mug bowl must be fully frozen. This is especially important for a mint ice cream base because the almond milk base is thinner than heavier cream-based recipes, and a cold bowl helps it freeze faster.
In your mixing bowl, pour the almond milk and add the vanilla protein powder. Whisk together until the protein powder is fully dissolved and the mixture is completely smooth.
Add the Greek yogurt and whisk until blended. Then add the sugar-free vanilla pudding mix and stir until dissolved. These two ingredients work together to create a thick, creamy texture that prevents the mint ice cream from turning icy.
Now add the peppermint extract. This is where you need to be careful. Peppermint extract is very strong — start with ½ teaspoon, mix it in, and taste. Add more in small amounts until you reach the level of mint flavor you enjoy. Most people find ¾ teaspoon to be the perfect amount — strong enough to taste clearly minty without being overpowering. Going too heavy on the extract can make the ice cream taste medicinal, so taste as you go.
Add the sweetener and salt. Mix well. If you want the classic green color, add 1 to 2 drops of green food coloring and stir until evenly distributed. This is entirely optional and only affects the appearance, not the flavor.
Set the chocolate chips aside. Pour the mint base into the frozen Dash My Mug bowl and start churning. Let it run for 20 minutes to develop the creamy texture first. After 20 minutes, add the mini chocolate chips to the machine and let it churn for another 5 to 8 minutes to mix them in evenly.
Scoop into a bowl and serve immediately for soft-serve consistency. The cold mint flavor and crunchy chocolate chips are a great combination right out of the machine.
Nutrition Information (Approximate)
- Calories: 195
- Protein: 25g
- Carbohydrates: 12g
- Fat: 4.5g
- Sugar: 3g
Recipe Tips
- Use chopped dark chocolate instead of chocolate chips for a more premium feel.
- A fresh mint leaf on top makes a beautiful garnish.
- Reduce the peppermint to ¼ teaspoon and add a tablespoon of cocoa powder for a chocolate mint swirl flavor.
13. Birthday Cake Protein Ice Cream
Prep Time: 6 minutes | Churn Time: 25–30 minutes | Serves: 1
Celebrate any day of the week with this festive, funfetti-style protein ice cream. Vanilla cake batter flavor, rainbow sprinkles mixed through the base, and a creamy, sweet finish make this one of the most fun recipes in the entire Dash My Mug Protein Ice Cream Recipes collection. Great for kids and adults alike — no birthday required.
Ingredients
- 1 scoop (30g) birthday cake or vanilla whey protein powder
- ¾ cup (180ml) unsweetened almond milk
- 2 tablespoons plain Greek yogurt
- 1 tablespoon sugar-free vanilla pudding mix
- 1 teaspoon vanilla extract
- ½ teaspoon butter extract (this gives the cake batter flavor)
- 1–2 teaspoons monk fruit sweetener
- 1 tablespoon rainbow sprinkles
- Pinch of salt
Instructions
Make sure your Dash My Mug bowl has been fully frozen for at least 8 hours. This recipe relies on a good, consistent churn to distribute the sprinkles evenly through the ice cream.
In your mixing bowl, add the birthday cake or vanilla protein powder and pour in the almond milk. Whisk the two together until smooth. Birthday cake protein powder often has small amounts of sprinkle flavor already built in, which pairs perfectly with the added sprinkles in this recipe.
Add the Greek yogurt and mix until combined. Stir in the sugar-free vanilla pudding mix and whisk for about 45 seconds until fully dissolved. The pudding mix creates the soft, creamy birthday cake ice cream texture you are going for.
This recipe has a secret ingredient — the butter extract. This small addition is what gives the ice cream a cake batter taste that goes beyond just vanilla. It mimics the buttery richness of real birthday cake frosting. Add ½ teaspoon, stir it in, and taste. You will notice right away how it transforms the flavor.
Add the vanilla extract, sweetener, and salt. Mix everything well. Taste the base and adjust sweetness as needed.
Set aside the sprinkles for now. Pour the base into the frozen Dash My Mug bowl and begin churning. Let it churn for 20 minutes first. Then open the lid and add the rainbow sprinkles directly into the churning ice cream. Close the lid and continue churning for another 5 to 8 minutes. This timing ensures the sprinkles mix in without fully dissolving and losing their color.
When done, scoop into a bowl and add extra sprinkles on top for the full birthday cake effect. This is one of those recipes that makes the Dash My Mug machine feel like pure magic.
Nutrition Information (Approximate)
- Calories: 185
- Protein: 25g
- Carbohydrates: 10g
- Fat: 3g
- Sugar: 4g
Recipe Tips
- Butter extract can be found in the baking section of most grocery stores.
- Add crushed vanilla wafer cookies on top for a cake crumble topping.
- White chocolate chips instead of sprinkles give a fancier look and taste.
14. Cinnamon Roll Protein Ice Cream
Prep Time: 6 minutes | Churn Time: 25–30 minutes | Serves: 1
Warm cinnamon swirled through a sweet cream cheese base creates an ice cream that tastes exactly like a freshly baked cinnamon roll — but cold, high in protein, and ready in minutes. A cinnamon sugar swirl folded in right before serving takes this recipe to the next level. Cozy, comforting, and surprisingly good for you.
Ingredients
- 1 scoop (30g) vanilla whey protein powder
- ¾ cup (180ml) unsweetened almond milk
- 2 tablespoons reduced-fat cream cheese, softened
- 1 tablespoon sugar-free cheesecake or vanilla pudding mix
- 1 teaspoon vanilla extract
- 1 teaspoon ground cinnamon
- 1–2 teaspoons monk fruit sweetener
- Pinch of salt
- For the swirl: 1 teaspoon monk fruit sweetener + ½ teaspoon ground cinnamon mixed together
Instructions
Remove your frozen Dash My Mug bowl from the freezer just before you start mixing. Prepare all your ingredients first so you are ready to move quickly.
In your mixing bowl, add the softened cream cheese. Make sure it is at room temperature — cold cream cheese will not blend smoothly with the almond milk and will leave lumps in your base. If you forgot to soften it, microwave it for 10 to 15 seconds to warm it slightly.
Pour the almond milk over the cream cheese and begin whisking. Use a firm, steady motion to break the cream cheese apart. Keep whisking until the mixture is completely smooth and the cream cheese has fully incorporated into the milk. This may take 1 to 2 minutes of steady whisking — it is worth every second.
Add the vanilla protein powder to the cream cheese-milk mixture and whisk until fully dissolved. The protein powder adds structure and thickness to the base while also boosting the protein content significantly.
Sprinkle in the ground cinnamon and stir well. The cinnamon should turn the base a golden-tan color and fill the kitchen with a warm, comforting aroma. Add the sugar-free pudding mix and whisk for another 45 seconds until dissolved.
Stir in the vanilla extract, sweetener, and salt. Taste the base — it should taste like sweet cinnamon cream. Adjust the cinnamon or sweetener as needed. Some people love a very strong cinnamon flavor; others prefer a subtle hint. Make it your own.
Mix together the separate swirl ingredients (monk fruit sweetener and extra cinnamon) in a small dish and set aside.
Pour the ice cream base into the frozen Dash My Mug bowl and churn for 25 to 30 minutes. When done, scoop the ice cream into your bowl. Working quickly while it is still soft, sprinkle the cinnamon-sweetener swirl mixture over the top and use a toothpick or small spoon to swirl it through the top layer of ice cream.
Serve immediately for the best texture and visual effect.
Nutrition Information (Approximate)
- Calories: 195
- Protein: 25g
- Carbohydrates: 9g
- Fat: 6g
- Sugar: 2g
Recipe Tips
- A drizzle of sugar-free cream cheese frosting on top is an amazing garnish.
- Crushed cinnamon toast cereal pieces add a fun crunch.
- Brown sugar monk fruit sweetener instead of regular sweetener enhances the cinnamon roll flavor even further.
15. Pumpkin Spice Protein Ice Cream
Prep Time: 6 minutes | Churn Time: 25–30 minutes | Serves: 1
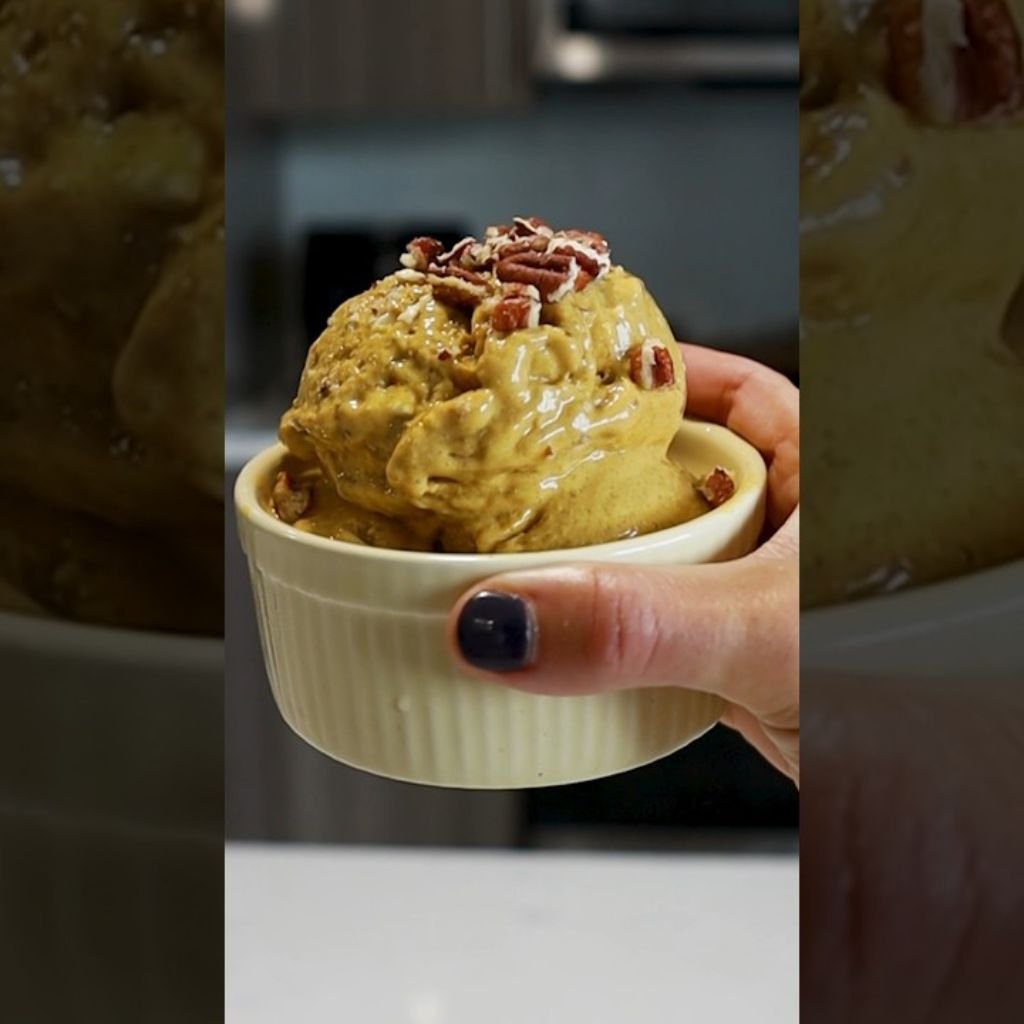
Real pumpkin puree makes this ice cream thick, naturally sweet, and full of fiber and vitamins. Paired with warm fall spices and a creamy protein base, this recipe is the ultimate seasonal treat. Enjoy it any time of year — pumpkin is available year-round in canned form and always ready to make this cozy, spiced recipe.
Ingredients
- 1 scoop (30g) vanilla whey protein powder
- ½ cup (120ml) unsweetened almond milk
- 3 tablespoons pure pumpkin puree (not pumpkin pie filling)
- 2 tablespoons plain Greek yogurt
- 1 tablespoon sugar-free cheesecake or vanilla pudding mix
- 1 teaspoon vanilla extract
- 1 teaspoon pumpkin pie spice
- ¼ teaspoon ground cinnamon
- 1–2 teaspoons monk fruit sweetener
- Pinch of salt
Instructions
Have your frozen Dash My Mug bowl ready. Pumpkin-based ice cream is denser than plain liquid bases, so a fully frozen bowl is extra important here to ensure proper churning.
Begin by adding the pure pumpkin puree to your mixing bowl. Use a fork or whisk to stir and loosen the puree before adding other ingredients. Make sure you are using plain pumpkin puree and not pumpkin pie filling — the filling has added sugar and spices already mixed in, and it will make your recipe too sweet and less accurate in its nutrition profile.
Pour the almond milk over the pumpkin puree and whisk together until they are fully combined. The mixture will look bright orange and thick at this stage. Add the vanilla protein powder and whisk thoroughly until dissolved. The pumpkin base absorbs the protein powder quickly, so this step should not take too long.
Spoon in the Greek yogurt and mix until no lumps remain. Add the sugar-free pudding mix and whisk for 45 seconds to ensure it is fully activated.
Add the pumpkin pie spice, extra cinnamon, vanilla extract, sweetener, and salt. Whisk everything together one final time. The mixture should now smell absolutely incredible — warm, spiced, and slightly sweet. Taste it and adjust the spice level and sweetness to your liking.
Because this base is denser than most, you may want to add an extra tablespoon of almond milk if the mixture feels too thick to pour easily into the machine.
Pour carefully into the frozen Dash My Mug bowl and churn for 25 to 30 minutes. The pumpkin base takes on a beautiful light orange color as it churns and freezes into ice cream.
Serve immediately for a thick, soft-serve style treat, or freeze for 45 minutes for a firmer scoop. A sprinkle of pumpkin pie spice on top is a nice finishing touch.
Nutrition Information (Approximate)
- Calories: 180
- Protein: 25g
- Carbohydrates: 13g
- Fat: 3g
- Sugar: 5g
Recipe Tips
- A dollop of sugar-free whipped cream on top makes this extra special.
- Add a tablespoon of pecans for a pecan pie-style pumpkin ice cream.
- Reduce the pumpkin to 2 tablespoons and add a tablespoon of cream cheese for a pumpkin cheesecake variation.
16. Apple Pie Protein Ice Cream
Prep Time: 10 minutes | Churn Time: 25–30 minutes | Serves: 1
Cinnamon-spiced apple pieces folded into a creamy vanilla protein base make this taste like apple pie in ice cream form. A short cook on the apples before mixing brings out their natural sugars and creates a soft, caramelized texture. Great for fall and winter, but honestly wonderful any time of year.
Ingredients
- 1 scoop (30g) vanilla whey protein powder
- ¾ cup (180ml) unsweetened almond milk
- ¼ cup apple, peeled and finely diced
- 2 tablespoons plain Greek yogurt
- 1 tablespoon sugar-free vanilla or cheesecake pudding mix
- 1 teaspoon vanilla extract
- 1 teaspoon ground cinnamon
- ¼ teaspoon nutmeg
- 1–2 teaspoons monk fruit sweetener
- Pinch of salt
- Cooking spray (for apple prep)
Instructions
Before starting your ice cream base, prepare the apple pieces. Peel and finely dice the apple into very small cubes — about ¼ inch in size. The small size helps them incorporate better into the ice cream during churning.
Heat a small non-stick pan over medium heat and spray with cooking spray. Add the diced apple, a sprinkle of cinnamon, and a teaspoon of monk fruit sweetener. Cook the apple for 3 to 4 minutes, stirring often, until the pieces are soft and slightly caramelized. You want them to be tender but not mushy. Remove from heat and let the cooked apple cool completely before adding to your ice cream base.
While the apple cools, prepare your protein base. In a mixing bowl, combine the vanilla protein powder and almond milk. Whisk until fully dissolved and smooth.
Add the Greek yogurt and mix until blended. Stir in the sugar-free pudding mix and whisk for 45 seconds. Add the vanilla extract, remaining cinnamon, nutmeg, sweetener, and salt. Whisk everything together and taste the base. It should taste like sweet vanilla with warm spice notes.
Once the cooked apple pieces have cooled to room temperature, fold them gently into the ice cream base. Stir just enough to distribute them through the liquid. Pour the entire mixture into the frozen Dash My Mug bowl and churn for 25 to 30 minutes.
The apple pieces will freeze into the ice cream as it churns, creating pockets of warm-spiced fruit texture throughout the creamy base. When done, scoop into a bowl and serve immediately.
Nutrition Information (Approximate)
- Calories: 195
- Protein: 25g
- Carbohydrates: 15g
- Fat: 3g
- Sugar: 7g
Recipe Tips
- Granny Smith apples provide a tart contrast to the sweet base; Honeycrisp are sweeter and work equally well.
- Add crushed graham crackers on top to mimic a pie crust topping.
- A drizzle of sugar-free caramel sauce over the finished ice cream elevates this to a next-level dessert.
17. Chocolate Brownie Protein Ice Cream
Prep Time: 6 minutes | Churn Time: 25–30 minutes | Serves: 1
Deep, fudgy chocolate flavor with small brownie pieces mixed through the ice cream creates a dessert that tastes like a frozen brownie sundae. Using dark cocoa powder and chocolate protein together builds an intense, multi-layered chocolate base. Bite into a brownie chunk and you get a chewy, dense contrast against the creamy ice cream — it is one of the most satisfying recipes in this guide.
Ingredients
- 1 scoop (30g) chocolate whey protein powder
- ¾ cup (180ml) unsweetened almond milk
- 1 tablespoon dark cocoa powder
- 2 tablespoons plain Greek yogurt
- 1 tablespoon sugar-free chocolate pudding mix
- 1 teaspoon vanilla extract
- 1–2 teaspoons monk fruit sweetener
- Pinch of salt
- 2–3 small pre-made brownie bites (sugar-free or regular), cut into small chunks
Instructions
Make sure your Dash My Mug bowl is ready and fully frozen. Cut your brownie bites into small pieces — about ½ inch cubes — and set them aside in the refrigerator or freezer while you prepare the base. Cold brownie pieces hold together better during churning than room-temperature ones.
In your mixing bowl, combine the chocolate whey protein powder and almond milk. Whisk firmly until the protein powder is completely dissolved. There should be no visible dry powder and no lumps in the mixture.
Add the dark cocoa powder to the bowl and whisk thoroughly. Dark cocoa powder has a more intense, almost bitter chocolate flavor compared to regular cocoa. This depth of flavor is what gives the brownie ice cream its fudgy character. Keep whisking until the cocoa is fully blended and the mixture is uniformly dark and smooth.
Mix in the Greek yogurt and stir until completely incorporated. Add the sugar-free chocolate pudding mix next and whisk for 45 to 60 seconds to make sure it is fully dissolved. This ingredient is the key to creamy texture in the final product.
Stir in the vanilla extract, sweetener, and salt. Taste the base — it should have a rich, fudgy chocolate flavor that is slightly sweet and very satisfying. Adjust sweetener if needed.
Pour the chocolate base into the frozen Dash My Mug bowl and start churning. Let it run for 20 minutes to build up the creamy ice cream texture first. After 20 minutes, pause the machine and add the cold brownie chunks into the ice cream. Turn the machine back on and churn for another 5 to 8 minutes to mix the brownie pieces through.
When churning is complete, scoop into a bowl and serve right away. A drizzle of sugar-free chocolate sauce and an extra brownie chunk on top makes this look and taste restaurant-quality.
Nutrition Information (Approximate)
- Calories: 230
- Protein: 26g
- Carbohydrates: 16g
- Fat: 5g
- Sugar: 5g
Recipe Tips
- Sugar-free brownie mixes are available at most grocery stores and work perfectly in this recipe.
- Freeze the brownie chunks for 30 minutes before adding them to keep them firmer during churning.
- Add a pinch of espresso powder to the base to deepen the chocolate flavor even more.
18. Raspberry White Chocolate Protein Ice Cream
Prep Time: 7 minutes | Churn Time: 25–30 minutes | Serves: 1
Tart raspberry and sweet white chocolate are a sophisticated flavor pairing that turns simple ingredients into something special. Fresh raspberry puree swirled into a white chocolate protein base creates ribbons of bright berry color through creamy, sweet ice cream. Light, fruity, and elegant — a lovely treat for any occasion.
Ingredients
- 1 scoop (30g) vanilla whey protein powder
- ¾ cup (180ml) unsweetened almond milk
- ¼ cup fresh or frozen raspberries, mashed
- 2 tablespoons plain Greek yogurt
- 1 tablespoon sugar-free white chocolate pudding mix
- 1 teaspoon vanilla extract
- 1–2 teaspoons monk fruit sweetener
- 2 tablespoons sugar-free white chocolate chips
- Pinch of salt
Instructions
Start with a fully frozen Dash My Mug bowl. Prepare your raspberries while the machine bowl is still safely in the freezer.
Place the fresh or thawed raspberries in a small bowl and mash them with a fork. Press until you have a rough puree with some small seeds remaining. If you prefer a smoother texture and want to remove the seeds, press the puree through a fine mesh strainer. Raspberry seeds are quite small and unobtrusive in ice cream, so straining is optional. Set the raspberry puree aside.
In your main mixing bowl, combine the vanilla protein powder and almond milk. Whisk until completely smooth. Add the Greek yogurt and mix until fully incorporated. Stir in the sugar-free white chocolate pudding mix and whisk for 45 seconds. This unique pudding mix gives the base a sweet, creamy white chocolate quality that pairs perfectly with the tartness of the raspberry.
Add the vanilla extract, sweetener, and salt. Taste the base — it should be sweet and creamy with a light vanilla-white chocolate quality. Adjust sweetener to taste. Raspberries are quite tart, so the balance of sweetness in the base is important.
Now gently fold in the raspberry puree, stirring just a few times to create swirl streaks rather than fully blending the raspberry into the base. Partial mixing creates a beautiful marbled appearance in the final ice cream.
Pour the mixture into the frozen Dash My Mug bowl and churn for 20 minutes. After 20 minutes, add the white chocolate chips and churn for another 5 to 8 minutes to distribute them through the ice cream.
Scoop into a bowl when done. The finished ice cream will have pink swirls from the raspberry and small white chocolate pieces throughout. A few fresh raspberries on top make the presentation stunning.
Nutrition Information (Approximate)
- Calories: 200
- Protein: 25g
- Carbohydrates: 13g
- Fat: 4.5g
- Sugar: 4g
Recipe Tips
- Freeze-dried raspberry powder can replace fresh raspberries for a more intense berry flavor without added moisture.
- A small drop of raspberry extract enhances the berry flavor further.
- Use dark chocolate chips instead of white chocolate for a raspberry dark chocolate version.
19. Coconut Protein Ice Cream
Prep Time: 5 minutes | Churn Time: 25–30 minutes | Serves: 1
Creamy coconut milk takes the place of almond milk in this tropical recipe, creating a rich, full-bodied ice cream with a natural coconut sweetness. Coconut protein or vanilla protein works well here, and a sprinkle of toasted coconut flakes on top adds texture and visual appeal. Simple, tropical, and absolutely delicious.
Ingredients
- 1 scoop (30g) vanilla or coconut whey protein powder
- ¾ cup (180ml) light coconut milk (canned)
- 2 tablespoons plain Greek yogurt
- 1 tablespoon sugar-free vanilla or coconut pudding mix
- 1 teaspoon coconut extract
- ½ teaspoon vanilla extract
- 1–2 teaspoons monk fruit sweetener
- 2 tablespoons unsweetened shredded coconut (plus extra for topping)
- Pinch of salt
Instructions
Have your Dash My Mug bowl fully frozen and ready. Using canned light coconut milk is important here — the light version has less saturated fat than full-fat coconut milk and still provides excellent coconut flavor without being too heavy for the single-serving machine.
Shake the canned coconut milk well before opening to ensure it is evenly mixed. Pour it into your mixing bowl. Add the vanilla or coconut protein powder and whisk until fully dissolved. Coconut milk has a naturally rich consistency, so the protein powder should dissolve fairly quickly into it.
Add the Greek yogurt and mix until smooth. Stir in the sugar-free pudding mix of your choice — vanilla pudding mix works great, but if you can find coconut-flavored pudding mix, that is even better. Whisk for 45 seconds until the pudding mix is fully incorporated.
Add the coconut extract, vanilla extract, sweetener, and salt. The coconut extract is an important flavor booster here — it amplifies the natural coconut flavor from the milk and gives the ice cream a more pronounced tropical taste. Start with ½ teaspoon and add more if you want a stronger coconut flavor.
Stir in the unsweetened shredded coconut. These small coconut pieces add texture and visual interest to the finished product. Taste the base one more time and adjust sweetener as needed.
Pour the coconut base into the frozen Dash My Mug bowl and churn for 25 to 30 minutes. The coconut milk creates an exceptionally creamy ice cream with a dense, rich texture. When done, scoop into a bowl and top with extra shredded coconut. Toast the coconut briefly in a dry pan before using as a topping for an extra layer of flavor.
Nutrition Information (Approximate)
- Calories: 210
- Protein: 25g
- Carbohydrates: 10g
- Fat: 8g
- Sugar: 4g
Recipe Tips
- Full-fat coconut milk can be used for an even creamier result — just know the calorie and fat count will increase.
- Add a squeeze of lime juice to the base for a piña colada-style variation.
- Mango pieces mixed in turn this into a tropical paradise ice cream.
20. Mango Protein Ice Cream
Prep Time: 6 minutes | Churn Time: 25–30 minutes | Serves: 1
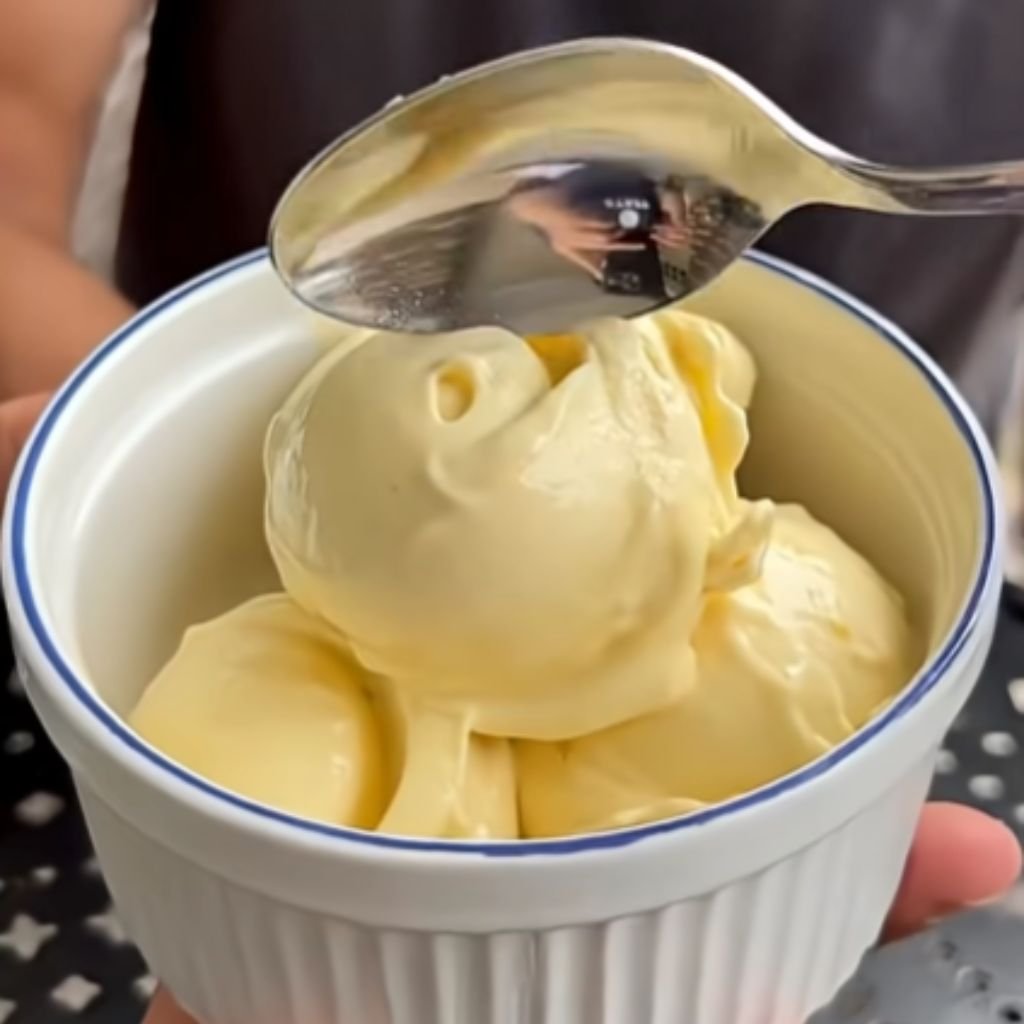
Bright, tropical mango flavor shines in this vibrant, sunny ice cream. Fresh or frozen mango puree brings natural sweetness and a beautiful golden color to the protein base. Light, refreshing, and packed with vitamins and protein — this recipe is summer in a bowl, no matter what time of year you make it.
Ingredients
- 1 scoop (30g) vanilla whey protein powder
- ½ cup (120ml) unsweetened almond milk
- ¼ cup fresh or frozen mango chunks, pureed
- 2 tablespoons plain Greek yogurt
- 1 tablespoon sugar-free vanilla pudding mix
- 1 teaspoon vanilla extract
- 1–2 teaspoons monk fruit sweetener (adjust based on mango sweetness)
- Pinch of salt
Instructions
Make sure your Dash My Mug bowl is fully frozen before you begin. If using frozen mango, let it thaw at room temperature for 10 to 15 minutes so it is soft enough to blend or mash.
Puree your mango chunks using a small blender, food processor, or by mashing with a fork. A blender or food processor will give you the smoothest result and the most vibrant orange color. If using a fork, mash as thoroughly as possible. Measure out ¼ cup of mango puree and set aside. If you have extra, save it for smoothies or overnight oats.
In your mixing bowl, add the vanilla protein powder and almond milk. Whisk together firmly until the protein powder is fully dissolved and the base is smooth. Add the Greek yogurt and mix well until no lumps remain.
Pour the mango puree into the protein base and stir to combine. The mixture should turn a beautiful light golden color. Stir until the mango puree is evenly distributed throughout the liquid.
Add the sugar-free vanilla pudding mix and whisk for 45 seconds until fully dissolved. Stir in the vanilla extract, sweetener, and salt. Taste the mixture carefully — mango sweetness varies a lot depending on the variety and ripeness, so you may need more or less sweetener than usual. A ripe, sweet mango might need no additional sweetener at all.
Allow the mixture to rest for 2 minutes. Then pour it carefully into the frozen Dash My Mug bowl and turn on the machine. Churn for 25 to 30 minutes. The mango puree will freeze beautifully into a creamy, golden ice cream.
When done, scoop into a bowl and enjoy immediately. A few fresh mango pieces and a squeeze of fresh lime juice on top is a wonderful finishing combination.
Nutrition Information (Approximate)
- Calories: 185
- Protein: 25g
- Carbohydrates: 14g
- Fat: 3g
- Sugar: 9g
Recipe Tips
- Alphonso mangoes are the sweetest and most flavorful variety — use them when available.
- A pinch of chili powder on top gives a Mexican-inspired sweet-heat contrast.
- Mango and coconut milk combined create an incredible tropical upgrade on this base.
21. Pineapple Coconut Protein Ice Cream
Prep Time: 7 minutes | Churn Time: 25–30 minutes | Serves: 1
Crushed pineapple and creamy coconut milk team up in this tropical duo that tastes like a frozen piña colada — without the alcohol or the guilt. Naturally sweet pineapple brightens up the rich coconut base and creates a refreshing, bright-tasting protein ice cream. Perfect for warm days when you want something light and tropical.
Ingredients
- 1 scoop (30g) vanilla or coconut whey protein powder
- ½ cup (120ml) light canned coconut milk
- 3 tablespoons crushed pineapple (canned in juice, drained well)
- 2 tablespoons plain Greek yogurt
- 1 tablespoon sugar-free vanilla pudding mix
- ½ teaspoon coconut extract
- ½ teaspoon vanilla extract
- 1–2 teaspoons monk fruit sweetener
- Pinch of salt
Instructions
Remove your Dash My Mug bowl from the freezer and get ready to work quickly. This recipe comes together fast once everything is prepped.
Drain the crushed pineapple very well. Place it in a small strainer and press with the back of a spoon to remove as much liquid as possible. Excess pineapple juice can make the ice cream base too watery, which affects the final texture. You want the pineapple pulp without most of the juice. Set the drained pineapple aside.
In your mixing bowl, pour the light coconut milk and add the vanilla or coconut protein powder. Whisk together until the powder is fully dissolved. Coconut milk creates a naturally creamy base that is ideal for tropical ice cream recipes.
Mix in the Greek yogurt until smooth. Add the sugar-free vanilla pudding mix and whisk for 45 seconds. Stir in the coconut extract, vanilla extract, sweetener, and salt. Taste the base — it should be mildly sweet with a clear coconut flavor.
Now fold in the drained crushed pineapple. Stir gently to distribute it through the base without breaking it down completely. The pineapple pieces should be visible in the liquid as you pour it into the machine.
Pour into the frozen Dash My Mug bowl and churn for 25 to 30 minutes. The pineapple and coconut combination creates a bright, fruity ice cream with small bits of pineapple frozen throughout.
Scoop into a bowl and enjoy immediately. A small umbrella pick in the bowl is a fun, festive touch. Toasted coconut flakes on top add texture and enhance the coconut flavor beautifully.
Nutrition Information (Approximate)
- Calories: 195
- Protein: 24g
- Carbohydrates: 14g
- Fat: 5g
- Sugar: 8g
Recipe Tips
- Use fresh pineapple instead of canned for a more vibrant, less syrupy flavor.
- Add a tiny pinch of salt flakes on top to contrast with the sweetness.
- Mix in a tablespoon of lime zest for a bright citrus lift.
22. Matcha Green Tea Protein Ice Cream
Prep Time: 6 minutes | Churn Time: 25–30 minutes | Serves: 1
Earthy, slightly bitter matcha green tea powder paired with creamy sweetness creates an ice cream that feels sophisticated and unique. Matcha is rich in antioxidants and contains a gentle natural caffeine boost. Combined with vanilla protein, the result is a vibrant green, lightly caffeinated, and genuinely delicious frozen treat that stands apart from every other recipe in this list.
Ingredients
- 1 scoop (30g) vanilla whey protein powder
- ¾ cup (180ml) unsweetened almond milk
- 1½ teaspoons ceremonial or culinary grade matcha powder
- 2 tablespoons plain Greek yogurt
- 1 tablespoon sugar-free vanilla pudding mix
- 1 teaspoon vanilla extract
- 2 teaspoons monk fruit sweetener (matcha is naturally bitter, so you may need a bit more)
- Pinch of salt
Instructions
Confirm your Dash My Mug bowl is fully frozen. Matcha ice cream is beautiful to look at and very unique in flavor, so take your time with this recipe and enjoy the process.
The key challenge with matcha is getting it to dissolve properly without clumping. Matcha powder is very fine but tends to form stubborn lumps when mixed with cold liquid. To prevent this, place the matcha powder in a small bowl and add just 1 tablespoon of warm (not hot) almond milk. Use a small whisk or fork to whisk the matcha and warm milk together until you have a smooth, lump-free paste. This is called “blooming” the matcha.
Once the matcha paste is smooth, pour in the remaining almond milk and whisk well. Add the vanilla protein powder and continue whisking until the protein powder is fully dissolved. The mixture should be an even, vibrant green color throughout.
Add the Greek yogurt and mix until smooth. Stir in the sugar-free vanilla pudding mix and whisk for 45 seconds. Because matcha is naturally bitter, you will likely need more sweetener than in other recipes. Start with 2 teaspoons and taste — add more if you prefer a sweeter result. Matcha ice cream should still have a slight earthy note, but it should not be overwhelmingly bitter.
Add the vanilla extract and salt. Whisk everything together one final time. Let the mixture rest for 2 minutes.
Pour the matcha base into the frozen Dash My Mug bowl and churn for 25 to 30 minutes. The ice cream will be a beautiful bright green color when it comes out. Scoop into a bowl and serve immediately.
Nutrition Information (Approximate)
- Calories: 175
- Protein: 25g
- Carbohydrates: 9g
- Fat: 3g
- Sugar: 2g
Recipe Tips
- Ceremonial grade matcha has a smoother, less bitter flavor than culinary grade.
- A sprinkle of matcha powder on top makes for a beautiful, professional-looking garnish.
- Add a tablespoon of red bean paste (anko) on the side for a traditional Japanese-inspired presentation.
23. Lemon Cheesecake Protein Ice Cream
Prep Time: 6 minutes | Churn Time: 25–30 minutes | Serves: 1
Bright lemon zest and fresh lemon juice cut through the richness of cream cheese in this tangy, refreshing protein ice cream. It has all the best qualities of a New York-style cheesecake — creamy, slightly tangy, and sweet — in a light frozen format. Zesty, smooth, and genuinely refreshing on a warm day.
Ingredients
- 1 scoop (30g) vanilla whey protein powder
- ½ cup (120ml) unsweetened almond milk
- 2 tablespoons reduced-fat cream cheese, softened
- 1 tablespoon fresh lemon juice
- 1 teaspoon lemon zest
- 1 tablespoon sugar-free cheesecake pudding mix
- 1 teaspoon vanilla extract
- 1–2 teaspoons monk fruit sweetener
- Pinch of salt
Instructions
Remove your fully frozen Dash My Mug bowl from the freezer just as you are ready to pour. Zest and juice your lemon first so it is ready to go.
To get the most zest from your lemon, run it under warm water and pat dry before zesting. Use a microplane or fine grater and only zest the yellow outer layer — the white pith beneath is bitter and you want to avoid it. Set the zest aside. Cut the lemon and squeeze out fresh juice, removing any seeds.
In your mixing bowl, place the softened cream cheese and pour in about half the almond milk. Whisk vigorously to break down the cream cheese into the milk. This step takes the most effort in the recipe. Keep whisking until the mixture is completely smooth with no cream cheese lumps visible. Add the remaining almond milk and whisk again.
Pour in the vanilla protein powder and whisk until fully dissolved. The cream cheese base will give this mixture a slightly thicker texture than a plain almond milk base, which is what you want — it creates a dense, creamy final product.
Add the fresh lemon juice and lemon zest. Whisk them into the base. You will notice the mixture brightens in color and the kitchen fills with a fresh citrus aroma. Add the sugar-free cheesecake pudding mix and whisk for 45 seconds. Stir in the vanilla extract, sweetener, and salt.
Taste the base carefully. It should be tangy from the lemon, creamy from the cream cheese, and sweet from the sweetener. Adjust as needed — more lemon juice for more tartness, more sweetener if it is too sour.
Pour into the frozen Dash My Mug bowl and churn for 25 to 30 minutes. Serve immediately for a soft-serve texture or freeze for 1 hour for a firmer result. A thin slice of lemon on the rim of the bowl and a sprinkle of zest on top make a gorgeous presentation.
Nutrition Information (Approximate)
- Calories: 190
- Protein: 25g
- Carbohydrates: 9g
- Fat: 6g
- Sugar: 2g
Recipe Tips
- Use Meyer lemon for a sweeter, less acidic lemon flavor.
- A tablespoon of crushed graham crackers on top mimics a cheesecake crust.
- Add a drop of lemon extract in addition to fresh juice for a more intense lemon punch.
24. Oreo Protein Ice Cream
Prep Time: 5 minutes | Churn Time: 25–30 minutes | Serves: 1
Crushed Oreo cookies mixed into a vanilla cream protein base is a simple recipe that delivers serious results. The vanilla filling from the cookies melts slightly into the ice cream, adding sweetness and creaminess, while the chocolate cookie pieces provide satisfying crunch. A recipe that is easy to make and impossible to resist.
Ingredients
- 1 scoop (30g) vanilla whey protein powder
- ¾ cup (180ml) unsweetened almond milk
- 2 tablespoons plain Greek yogurt
- 1 tablespoon sugar-free vanilla pudding mix
- 1 teaspoon vanilla extract
- 1–2 teaspoons monk fruit sweetener
- 3 Oreo cookies (or Oreo thins), crushed
- Pinch of salt
Instructions
Make sure your Dash My Mug bowl is fully frozen and ready to use. Crush your Oreo cookies before starting the ice cream base — place them in a sealed bag and use a rolling pin or the bottom of a mug to crush them into a mix of crumbs and small chunks. You want variety in the size of the pieces. Fine crumbs will blend into the ice cream while larger chunks provide satisfying bites. Set the crushed cookies aside.
In your mixing bowl, combine the vanilla protein powder and almond milk. Whisk firmly until the protein powder is completely dissolved. The base should be smooth and slightly thickened from the protein powder.
Add the Greek yogurt and mix until no lumps remain. Stir in the sugar-free vanilla pudding mix and whisk for 45 seconds. This ingredient is what keeps the Oreo ice cream creamy and scoopable rather than icy. Add the vanilla extract, sweetener, and salt. Taste the base and adjust sweetness — the Oreo cookies will also add some sweetness, so keep that in mind.
Pour the vanilla base into the frozen Dash My Mug bowl and start churning. Let the machine run for 20 minutes to build the creamy texture first. After 20 minutes, stop the machine and add the crushed Oreo pieces directly into the partially churned ice cream. Resume churning for another 5 to 8 minutes to mix the cookies through.
Adding the cookies near the end of churning rather than at the beginning keeps them from getting over-mixed and losing their texture. You want distinctly crunchy cookie pieces in the finished ice cream.
When done, scoop immediately into a bowl. Place a half Oreo cookie on top as a garnish. Serve right away for soft-serve, or freeze for 45 minutes for a firmer scoop.
Nutrition Information (Approximate)
- Calories: 215
- Protein: 24g
- Carbohydrates: 19g
- Fat: 4.5g
- Sugar: 7g
Recipe Tips
- Golden Oreos create a butterscotch-vanilla version of this recipe that is equally delicious.
- For a lower-sugar option, use Oreo thins instead of regular Oreos.
- Double Stuf Oreos add extra filling creaminess to the finished ice cream.
25. High-Protein Chocolate Chip Ice Cream
Prep Time: 5 minutes | Churn Time: 25–30 minutes | Serves: 1
Classic chocolate chip ice cream gets a protein upgrade in this straightforward, crowd-pleasing recipe. A creamy vanilla base dotted with chocolate chips is a timeless combination that never gets old. Simple ingredients, big flavor, and enough protein to make it a genuinely healthy choice — the perfect everyday Dash My Mug Protein Ice Cream Recipe for any craving.
Ingredients
- 1 scoop (30g) vanilla whey protein powder
- ¾ cup (180ml) unsweetened almond milk
- 2 tablespoons plain Greek yogurt
- 1 tablespoon sugar-free vanilla pudding mix
- 1 teaspoon vanilla extract
- 1–2 teaspoons monk fruit sweetener
- 3 tablespoons sugar-free or dark chocolate chips (mini chips work best)
- Pinch of salt
Instructions
Have your Dash My Mug bowl frozen and ready. Measure out the chocolate chips and place them in the freezer for 10 minutes before adding them to the ice cream. Cold chips hold their shape better during churning and create a more satisfying crunch in the final product.
In your mixing bowl, pour in the almond milk and add the vanilla protein powder. Whisk firmly and consistently until every bit of the powder is dissolved and the mixture is completely smooth. Proper whisking here ensures a creamy, lump-free ice cream base.
Add the Greek yogurt and whisk until fully blended into the liquid. Spoon in the sugar-free vanilla pudding mix and stir vigorously for 45 to 60 seconds. The pudding mix is your secret weapon for creating a creamy texture — it binds the water molecules in the mixture and prevents the ice cream from freezing into an icy, grainy mass.
Add the vanilla extract, sweetener, and salt to the bowl. Whisk everything together one more time until you have a uniform, smooth, sweet vanilla base. Taste it at this point — it should taste clean, sweet, and clearly vanilla-flavored. If it tastes flat, add a tiny extra pinch of salt, which will instantly enhance the other flavors.
Let the vanilla base rest for 2 minutes while the pudding mix fully hydrates. Take your cold chocolate chips out of the freezer and set them nearby.
Pour the vanilla base carefully into the frozen Dash My Mug bowl. Turn on the machine and let it churn for 20 minutes. This initial churning period develops the creamy structure of the ice cream before the chocolate chips are added.
After 20 minutes, open the lid and add the cold chocolate chips into the churning ice cream. Distribute them evenly as you drop them in. Close the lid and continue churning for another 5 to 8 minutes. This two-stage approach is the best method for getting evenly distributed chocolate chips that stay whole and crunchy throughout the ice cream.
When the machine finishes, scoop the chocolate chip ice cream into a bowl. It should be thick, creamy, and dotted throughout with chocolate pieces. Serve immediately for the soft-serve experience, or transfer to a small container and freeze for 1 hour for a scoopable consistency.
Nutrition Information (Approximate)
- Calories: 205
- Protein: 25g
- Carbohydrates: 13g
- Fat: 5g
- Sugar: 4g
Recipe Tips
- Use mini chocolate chips for more even distribution through every bite.
- Add a tablespoon of rainbow sprinkles alongside the chips for a fun confetti ice cream effect.
- A drop of almond extract mixed with the vanilla gives a subtle depth that makes this taste like premium ice cream.
Best Toppings for Protein Ice Cream
Great toppings can take your homemade protein ice cream from simple to spectacular. Here are the best options to keep on hand:
1. Fresh Fruits — Sliced strawberries, blueberries, raspberries, peach slices, or banana rounds add natural sweetness, color, and vitamins. Fresh fruit also adds a juicy contrast to the creamy ice cream texture. Choose fruits that complement your flavor — mango on coconut ice cream, berries on vanilla, bananas on peanut butter.
2. Protein Granola — A sprinkle of high-protein granola adds satisfying crunch and an extra protein boost on top of what is already in the ice cream. Look for granola made with oats and seeds that is low in added sugar. It also adds a hearty, filling quality to your dessert that makes the whole bowl feel more substantial.
3. Sugar-Free Chocolate Chips — A small handful of sugar-free chocolate chips scattered over any ice cream adds texture and a chocolate fix without loading on extra sugar. They work especially well on vanilla, peanut butter, and mint chocolate chip recipes, adding both visual appeal and a satisfying crunch.
4. Nut Butters — A drizzle of natural almond butter, peanut butter, or cashew butter over the top of your ice cream adds healthy fats, extra protein, and a rich, creamy flavor layer. Warm the nut butter slightly first so it drizzles rather than clumps. It is especially good on banana, peanut butter, and chocolate ice cream varieties.
5. Chopped Nuts and Seeds — Chopped almonds, walnuts, pecans, pumpkin seeds, or hemp seeds on top add crunch, texture, and important nutrients. Nuts and seeds are rich in healthy fats and minerals, making your dessert even more nutritious. Toasted versions have a deeper, more satisfying flavor that pairs beautifully with nearly every ice cream flavor in this guide.
Conclusion
Homemade protein ice cream is one of the smartest healthy swaps you can make for your sweet tooth. It gives you real dessert satisfaction — creamy, cold, sweet, and full of flavor — while also supporting your nutrition goals. With more protein, less sugar, and fewer calories than traditional ice cream, each recipe in this guide gives you a reason to feel good about what you are eating.
The best part about these Dash My Mug Protein Ice Cream Recipes is that there are 25 flavors to explore. You are never stuck eating the same thing twice. Start with the classics like vanilla or chocolate, then branch out into tropical options like mango or pineapple coconut. Try seasonal favorites like pumpkin spice or apple pie. Make a different flavor every day of the week and discover which ones become your personal favorites.
The Dash My Mug machine makes all of this incredibly easy and accessible. No churning by hand. No waiting hours for a big batch to freeze. Just mix, pour, churn, and enjoy — one perfect single serving at a time. It is the kind of kitchen tool that actually gets used, because the results are consistently good and the process is genuinely simple.
Healthy desserts do not have to be boring or taste like a compromise. These Dash My Mug Protein Ice Cream Recipes prove that eating well and enjoying what you eat can happen at the same time. Pick a recipe, freeze your bowl tonight, and make your first batch tomorrow. Once you try it, you will wonder how you ever went without it.