
An Iceman Slushie Machine is a countertop appliance that turns simple juice or drink mixes into a thick, icy slush in minutes, using a spinning auger and a built-in cooling cylinder instead of ice cubes or a blender.
Store-bought slushies often carry heavy syrup, added color, and a price tag that adds up fast, while a batch made at home lets the cook control sugar, fruit, and flavor from start to finish.
Homemade slushies also skip the long lines at a gas station counter and give a fresher, cleaner taste, since fruit and juice go straight into the tank without sitting on a shelf for days.
This collection of Iceman Slushie Machine recipes covers classic flavors, tropical blends, candy-inspired treats, and cool dessert-style drinks, built for parents making a treat for the kids, hosts planning a summer party, or anyone who wants a cold drink on a warm afternoon.
Each recipe below includes exact measurements, clear steps, and helpful tips so the machine gets used to its full potential, no matter the skill level in the kitchen.
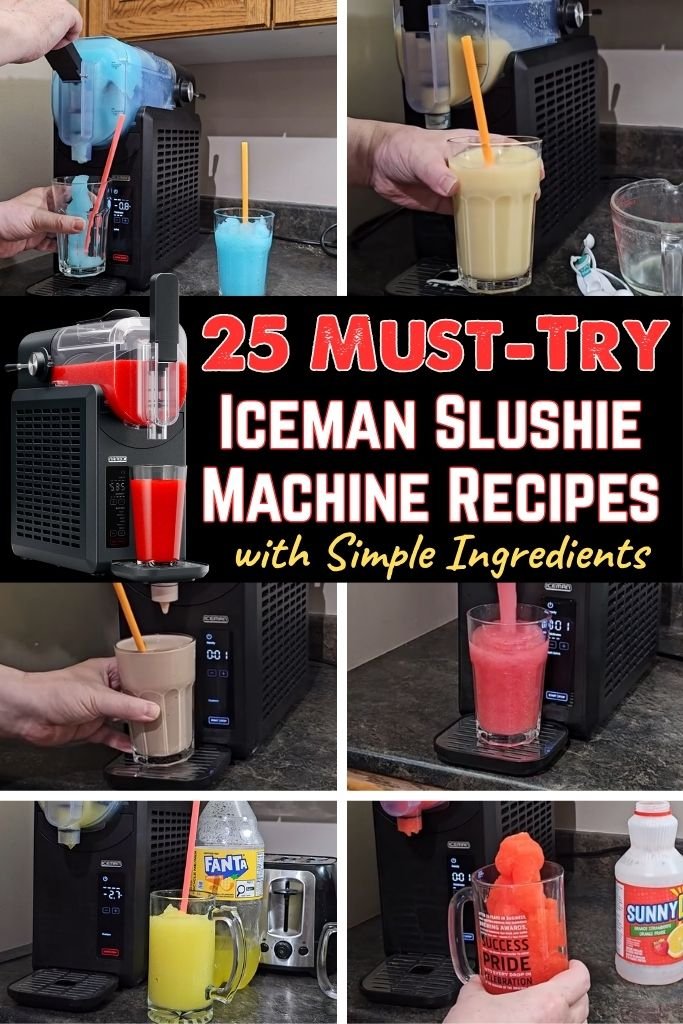
Why You’ll Love Making Slushies with an Iceman Slushie Machine
1. Quick preparation – Pour the mixture into the tank, pick a preset, and press start. Most batches finish in twenty to twenty-five minutes with almost no cleanup along the way.
2. Endless flavor combinations – Juice, soda, fresh fruit, or candy syrup can all go into the tank, so the flavor list never has to repeat itself.
3. Family-friendly and party-perfect – Kids can pick their own mix-ins, and a full tank keeps pouring refills for hours, which makes it a solid centerpiece for birthdays or backyard gatherings.
4. Saves money compared to convenience store slushies – A jug of juice and a bag of sugar cost far less than a week of gas station slush cups, and the tank makes several servings at once.
1. Classic Cherry Slushie
Prep Time: 10 minutes | Slush Time: 20-22 minutes | Serve: 4-6
A deep red classic built on real cherry juice and a splash of lemon, balanced enough for kids yet bold enough for a backyard cookout. Sweet-tart and smooth, it pours out thick and holds its color from the first cup to the last.
Ingredients
- 4 cups cherry juice (not concentrate)
- 1/2 cup granulated sugar
- 2 tablespoons fresh lemon juice
- 1/4 cup maraschino cherry syrup (from the jar)
- 1 cup cold water
- Pinch of salt
Instructions
Start by chilling the cherry juice in the refrigerator for at least two hours before making this recipe, since cold ingredients freeze faster and give a smoother texture once the machine finishes its cycle. In a large pitcher, combine the cherry juice, granulated sugar, fresh lemon juice, maraschino cherry syrup, and cold water. Stir the mixture with a long spoon for about a minute, making sure the sugar dissolves completely and no grains settle at the bottom of the pitcher, since leftover sugar crystals can clog the auger during mixing. Add a small pinch of salt to round out the sweetness and bring out the cherry flavor a bit more.
Before pouring, check that the tank drip tray sits fully in place and the auger is seated correctly on the cooling cylinder point, then slide the tank over the auger and lock it with the tank locking lever. Pour the cherry mixture through the fill hatch slowly, watching the tank markings closely so the level lands between the MIN and MAX lines. Filling past the MAX line can slow down the freezing process and cause uneven texture, while filling below MIN may leave the auger spinning without enough liquid to churn properly.
Plug in the machine and select the fruit slush preset, or choose the custom setting and adjust the thickness dial toward the thicker end, since cherry juice has a lighter body than cream-based mixtures and benefits from a slightly lower temperature setting. Press START/STOP and let the unit run its full cycle, which typically lands between nineteen and twenty-five minutes depending on how cold the juice was at the start.
Once the Ready light turns on and the machine beeps, place a cup beneath the dispenser nozzle and pull the handle down along its full length rather than tugging at the tip, since pulling only the end can strain the lever over time. Serve right away for the best texture, or let the machine hold the batch for up to four hours if serving happens in stages throughout an event.
Flavor Tips
Add a few drops of almond extract for a bakery-style cherry flavor, or toss in a spoonful of grenadine for extra color depth without adding much sweetness.
Variations
Swap half the cherry juice for cranberry juice to create a tarter version, or blend in a splash of cola for a cherry-cola slush that leans closer to soda fountain style.
2. Blue Raspberry Slushie
Prep Time: 8 minutes | Slush Time: 20-22 minutes | Serve: 4-6
Bright, electric blue, and loaded with candy-shop raspberry flavor, this one pulls straight from summer carnival memories without needing a food truck nearby. It comes out thick, sweet, and a little tangy from a touch of citrus mixed into the base.
Ingredients
- 3 cups blue raspberry drink mix (prepared according to package directions)
- 1 cup white grape juice
- 2 tablespoons lime juice
- 1/3 cup granulated sugar
- 1 cup cold water
Instructions
Prepare the blue raspberry drink mix according to the package directions first, then set it in the refrigerator to chill for roughly ninety minutes, since a warm base takes longer to freeze and can throw off the machine’s timing. While that chills, combine the white grape juice, lime juice, and granulated sugar in a separate bowl, stirring until every granule of sugar disappears into the liquid. White grape juice works well here because it carries sweetness without a strong flavor of its own, letting the raspberry stay front and center.
Once both mixtures reach a cold temperature, combine them together with the cold water in a large pitcher and stir thoroughly for about thirty seconds. Check the auger inside the machine to confirm it sits flush against the cooling cylinder, then attach the tank securely and flip the locking lever into place. Pour the combined blue raspberry mixture through the fill hatch, keeping a close eye on the tank so the liquid level rests between the MIN and MAX lines printed on the inside wall.
Select the “fruity” or “berry” preset on the control panel if the machine offers one, or use the custom thickness buttons to dial in a medium-thick consistency, since this drink mix tends to run a bit thinner than pure juice recipes. Hit START/STOP to begin the cycle. The display will track progress through the Time/Temperature screen, and the progress lights will fill in as the mixture gets colder and thicker. Expect the full process to take close to twenty minutes, though it can stretch a few minutes longer depending on how cold the mixture was at the start.
When the unit beeps and the Ready light comes on, place a cup under the nozzle and pull the dispenser handle down using its entire length for a clean, even pour. If the slush comes out too slowly or seems stuck, running a short cleaning cycle can loosen it by raising the internal temperature just enough to let it flow. Serve immediately for the coldest, thickest texture, since this candy-style flavor tends to soften faster than juice-based batches once it sits at room temperature.
Flavor Tips
A few frozen blueberries dropped into each cup before serving add texture and boost the blue color even further without watering down the flavor.
Variations
Mix in a splash of coconut cream for a tropical twist, or swap the lime juice for lemon juice to shift the tartness in a slightly different direction.
3. Strawberry Lemonade Slushie
Prep Time: 10 minutes | Slush Time: 20-24 minutes | Serve: 4-6
Sweet strawberries meet tart lemonade in a pink, refreshing slush that tastes like a summer porch drink turned into dessert. The berries add natural body to the texture, so it comes out thick without needing extra sugar.
Ingredients
- 2 cups fresh strawberries, hulled
- 3 cups lemonade (store-bought or homemade)
- 2 tablespoons granulated sugar (optional, depending on lemonade sweetness)
- 1 tablespoon lemon zest
- 1 cup cold water
Instructions
Wash the strawberries thoroughly and remove the green tops, then place them in a blender with a half cup of the lemonade and blend until completely smooth, with no visible chunks remaining. Strawberries carry natural pulp that can thicken the final drink nicely, but any leftover seeds or fiber should get strained out using a fine mesh sieve, since large particles can slow down the auger or create an uneven texture in the finished slush.
Pour the strained strawberry puree into a large pitcher along with the remaining lemonade, granulated sugar if the lemonade tastes too tart on its own, lemon zest, and cold water. Stir the combined mixture for close to a minute, tasting along the way to adjust sweetness or tartness before it goes into the machine, since flavors are much easier to correct now than after freezing.
Check that the tank drip tray sits properly beneath the tank and confirm the auger rests fully on the cooling cylinder point before locking the tank into place with the locking lever. Slowly pour the strawberry lemonade mixture through the fill hatch, watching closely so the liquid stays between the MIN and MAX markings, since strawberry puree has some thickness to it already and can make the level appear higher than it actually is.
Choose the fruit or lemonade preset if available, or select custom and set the thickness slightly higher than a typical juice recipe, because the strawberry puree naturally adds body to the mix. Press START/STOP and allow the cycle to run, watching the Progress Lights fill in as the machine works through its chilling stages. This batch tends to run closer to the twenty-four-minute mark due to the added fruit puree, which takes slightly longer to reach the target temperature than clear liquids.
Once the Ready light glows and the beep sounds, place a cup beneath the nozzle and pull the full length of the dispenser handle down for a steady, even pour. Garnish with a fresh strawberry slice on the rim if serving for guests, and enjoy the drink right away for the best pink color and thickest texture, since fruit-based batches can separate slightly if left sitting too long.
Flavor Tips
A splash of basil-infused simple syrup adds an unexpected herbal note that pairs nicely with the berries without overpowering the lemonade base.
Variations
Swap strawberries for raspberries for a deeper red color and a slightly more tart bite, or add a few mint leaves to the blender for a cooler, herbal finish.
4. Watermelon Slushie
Prep Time: 12 minutes | Slush Time: 20-22 minutes | Serve: 4-6
Light, juicy, and packed with real watermelon flavor, this recipe turns leftover melon into a cool treat instead of letting it go to waste. It tastes clean and naturally sweet, with barely any added sugar needed.
Ingredients
- 4 cups seedless watermelon chunks
- 2 tablespoons lime juice
- 2 tablespoons granulated sugar
- 1/2 cup cold water
- Pinch of salt
Instructions
Cut the watermelon into rough chunks and remove any remaining seeds before adding the pieces to a blender, since leftover seeds can create an unpleasant texture once frozen and churned. Blend the watermelon on high until it turns fully liquid, which usually takes less than a minute given how much natural juice the fruit already carries. Pour the blended watermelon through a fine mesh strainer into a large pitcher to remove any leftover pulp fibers, pressing gently with a spoon to extract as much liquid as possible without forcing solid bits through.
Add the lime juice, granulated sugar, cold water, and a small pinch of salt to the strained watermelon liquid, stirring the combination for about thirty seconds until everything blends evenly. The salt might seem like an odd addition, but a small amount sharpens the natural sweetness of the melon and keeps the flavor from tasting flat once frozen.
Place the tank drip tray in position and confirm the auger sits correctly against the cooling cylinder before sliding the tank into place and securing the locking lever. Pour the watermelon mixture slowly through the fill hatch, keeping the liquid level between the MIN and MAX lines, since watermelon juice is thinner than most other fruit bases and can rise or settle quickly during pouring.
Select the fruit preset or use the custom thickness control, and because watermelon juice runs on the lighter side, a slightly lower temperature setting helps the batch reach a proper slush consistency instead of coming out closer to a cold liquid. Press START/STOP and let the cycle run its course, checking the Time/Temperature display occasionally to track how far along the process has gone. Expect the cycle to land close to twenty minutes for this thinner base.
When the beep sounds and the Ready light turns on, place a cup beneath the dispenser and pull the handle down along its full length for a smooth, even pour. Serve the watermelon slush right away in chilled glasses for the most refreshing result, since this lighter fruit base tends to melt faster than thicker recipes once it leaves the tank.
Flavor Tips
A few drops of rosewater bring out a more floral side of the watermelon flavor, giving the drink a slightly more grown-up profile for adult gatherings.
Variations
Add crumbled feta cheese and a mint leaf on top for a savory-sweet twist inspired by summer salads, or blend in a small handful of raspberries for a two-toned pink and red slush.
5. Mango Pineapple Slushie
Prep Time: 10 minutes | Slush Time: 22-24 minutes | Serve: 4-6
Tropical mango and pineapple team up for a golden, thick slush that tastes like a beach vacation in a cup. The natural fruit sugars give it a rich body, so the texture comes out smooth and creamy without any dairy.
Ingredients
- 2 cups frozen mango chunks
- 2 cups pineapple juice
- 1/2 cup coconut water
- 2 tablespoons lime juice
- 2 tablespoons honey
Instructions
Combine the frozen mango chunks with the pineapple juice in a blender and process on high until the mixture turns completely smooth, with no visible fruit fibers remaining. Using frozen mango instead of fresh gives this recipe a head start on chilling, which shortens the time the machine needs to reach a proper slush consistency later in the process. Pour the blended mango and pineapple mixture into a large pitcher.
Add the coconut water, lime juice, and honey to the pitcher, stirring the combined mixture thoroughly until the honey fully dissolves and no streaks remain visible at the bottom. Coconut water adds a light tropical background note without overpowering the mango and pineapple, while the honey rounds out the tartness from the lime without making the drink taste overly sweet.
Check the machine setup before pouring anything into the tank: the drip tray should sit flush underneath, and the auger needs to rest completely on the point of the cooling cylinder. Slide the tank over the auger, lock it into place with the tank locking lever, and pour the mango pineapple mixture slowly through the fill hatch, watching the MIN and MAX markings closely, since this recipe carries more natural pulp and body than a simple juice blend.
Because this mixture already has some thickness from the mango and honey, select a preset closer to medium thickness rather than the thickest setting, or use the custom thickness buttons to fine-tune it. Press START/STOP to begin, and expect the cycle to run slightly longer than a thin juice recipe, typically landing between twenty-two and twenty-four minutes as the machine works through the denser mixture.
Watch the Progress Lights and Time/Temperature display as the cycle continues, and once the unit beeps with the Ready light lit, place a cup under the dispenser nozzle and pull the lever down along its complete length for a full, even pour. This tropical blend holds its texture well during the four-hour holding period, making it a strong pick for parties that run over several hours.
Flavor Tips
A dash of chili-lime seasoning sprinkled on the rim of the cup adds a spicy-sweet contrast that plays well against the tropical fruit base.
Variations
Blend in a few chunks of banana for extra creaminess, or swap the coconut water for coconut cream to create a richer, more dessert-like version of this slush.
6. Peach Slushie
Prep Time: 10 minutes | Slush Time: 20-22 minutes | Serve: 4-6
Ripe peaches bring a soft, sunny sweetness to this slush, landing somewhere between a fruit smoothie and a summer dessert. A touch of vanilla rounds out the flavor and gives the drink a slightly creamy finish.
Ingredients
- 3 cups frozen peach slices
- 2 cups peach nectar or juice
- 1/4 cup granulated sugar
- 1 teaspoon vanilla extract
- 1 cup cold water
Instructions
Place the frozen peach slices into a blender along with the peach nectar and blend on high speed until the mixture turns fully smooth, pausing once or twice to scrape down the sides so no large fruit chunks stay stuck near the blades. Using frozen peaches instead of fresh ones cuts down on freezing time later, since the fruit starts the process already cold rather than at room temperature. Pour the blended peach mixture into a large pitcher once it reaches a smooth, pourable consistency.
Stir in the granulated sugar and vanilla extract, mixing for close to a minute until the sugar dissolves completely and the vanilla spreads evenly through the liquid rather than settling near the top. Add the cold water gradually, tasting the mixture as it thins out, since peach nectar varies quite a bit in sweetness depending on the brand, and adjusting the water amount helps balance the final flavor before it goes into the machine.
Confirm the tank drip tray sits flush in its slot and check that the auger rests securely against the point of the cooling cylinder before locking the tank into position with the tank locking lever. Pour the peach mixture slowly through the fill hatch, tracking the liquid level against the MIN and MAX lines printed inside the tank, since the added fruit puree gives this batch a bit more body than a plain juice recipe.
Select a preset built for creamy or fruit-based drinks if the machine has one, or use the custom thickness setting and lean toward a slightly thicker target, since peach puree freezes into a denser texture than clear liquids. Press START/STOP and let the cycle run, watching the Time/Temperature display tick through the stages as the mixture cools. The process typically wraps up close to twenty minutes, though the added puree can push it a few minutes past that mark.
Once the Ready light comes on and the unit beeps, hold a cup beneath the dispenser nozzle and pull the handle down using its entire length for a steady, controlled pour. Serve the peach slush right away for the smoothest texture, since fruit purees like this one can settle or separate a bit if left sitting inside the tank for long stretches without being dispensed.
Flavor Tips
A sprinkle of cinnamon on top gives the drink a warm, cobbler-like flavor that pairs nicely with the natural peach sweetness.
Variations
Blend in a handful of raspberries for a peach-raspberry combination, or swap the vanilla extract for almond extract for a slightly nuttier finish.
7. Tropical Paradise Slushie
Prep Time: 12 minutes | Slush Time: 22-24 minutes | Serve: 4-6
This one pulls together mango, pineapple, and coconut into a single golden drink that feels like a vacation cup without needing a plane ticket. The blend of three tropical fruits gives it a rounded, layered flavor rather than one single fruit standing out.
Ingredients
- 1 cup frozen mango chunks
- 1 cup pineapple juice
- 1/2 cup coconut milk
- 2 tablespoons orange juice
- 2 tablespoons granulated sugar
Instructions
Add the frozen mango chunks and pineapple juice to a blender first, processing on high until the fruit breaks down completely and the mixture turns silky smooth with no visible pulp remaining. Pour the mango-pineapple blend into a large pitcher, then add the coconut milk, orange juice, and granulated sugar directly into the same pitcher rather than blending everything together, since coconut milk can turn slightly grainy if it spins too long in a blender.
Stir the combined mixture by hand using a long spoon for about a minute, making sure the coconut milk fully incorporates into the fruit blend rather than floating on top as a separate layer. Taste the mixture at this stage and add a touch more sugar if the pineapple juice used happens to run on the tart side, since brands vary quite a bit in natural sweetness.
Check that the tank drip tray sits properly in place beneath the tank, then confirm the auger rests flush against the cooling cylinder before sliding the tank into position and locking it with the tank locking lever. Pour the tropical mixture through the fill hatch slowly, watching the level against the MIN and MAX markings, since the coconut milk adds extra body that can make the liquid appear to rise faster than a thinner juice base.
Because this blend carries more richness than most fruit-only recipes, select a medium thickness setting rather than the thickest option, or dial it in manually using the custom thickness buttons on the control panel. Press START/STOP to start the cycle, and expect the process to run on the longer side, generally between twenty-two and twenty-four minutes, given the denser coconut milk base slows down the freezing slightly compared to clear liquids.
Watch the Progress Lights fill in as the machine works, and once the beep sounds with the Ready light lit, place a cup beneath the dispenser and pull the lever down along its full length for an even, steady pour. This tropical blend holds up well through the four-hour holding period, making it a solid choice for longer gatherings where guests serve themselves throughout the afternoon.
Flavor Tips
Toasted coconut flakes sprinkled on top add crunch and a slightly nutty aroma that plays well against the smooth, cold texture underneath.
Variations
Add a splash of dark rum extract for an adult-only version with a deeper flavor, or blend in fresh passion fruit pulp for a tangier tropical profile.
8. Green Apple Slushie
Prep Time: 8 minutes | Slush Time: 18-20 minutes | Serve: 4-6
Crisp and tart, this slush leans on real green apple flavor rather than sugary syrup, giving it a cleaner taste than most candy-style slushies. It works well as a lighter option for guests who prefer something less sweet.
Ingredients
- 4 cups green apple juice
- 2 tablespoons lemon juice
- 2 tablespoons granulated sugar
- 1/2 teaspoon ground cinnamon (optional)
- 1/2 cup cold water
Instructions
Pour the green apple juice into a large pitcher along with the lemon juice, stirring the two together for a few seconds before adding the granulated sugar. Green apple juice already carries a fair amount of natural sweetness, so start with a smaller amount of sugar and adjust upward only if the finished drink tastes too tart once tested. Stir the mixture for close to a minute until the sugar dissolves fully, leaving no visible grains at the bottom of the pitcher.
Add the ground cinnamon at this stage for a warmer, spiced version of the drink, whisking it in thoroughly so it disperses evenly rather than clumping together in one spot. Pour in the cold water last, stirring once more to bring the whole mixture together into a single, well-blended base ready for the machine.
Before pouring anything into the tank, confirm the drip tray sits in its proper place and check that the auger rests securely against the cooling cylinder point. Slide the tank over the auger and secure it using the tank locking lever, then pour the green apple mixture slowly through the fill hatch, keeping the liquid level between the MIN and MAX markings printed inside the tank wall.
Since this recipe uses a thin, clear juice base, select the standard fruit preset or use the custom setting with a slightly lower temperature target, which helps a thinner liquid like apple juice reach a proper slush texture rather than staying closer to a cold drink. Press START/STOP to begin, and expect this batch to finish a bit faster than thicker fruit purees, typically within eighteen to twenty minutes given how thin the base liquid runs.
Once the Ready light turns on and the beep sounds, place a cup beneath the dispenser nozzle and pull the handle down along its complete length for a smooth, controlled pour. Serve immediately for the crispest, coldest flavor, since this lighter apple base can lose its slush texture a little faster than heavier fruit purees once it warms slightly at room temperature.
Flavor Tips
A thin apple slice on the rim of the glass adds a nice visual touch and reinforces the fresh apple flavor with the first sip.
Variations
Swap the cinnamon for a pinch of nutmeg for a different spice profile, or blend in a small handful of green grapes for extra sweetness and a fuller body.
9. Orange Cream Slushie
Prep Time: 8 minutes | Slush Time: 20-22 minutes | Serve: 4-6
This one tastes like a frozen version of an orange creamsicle, pairing bright citrus juice with a splash of cream for a smooth, rich texture. It works well as a dessert-style drink after dinner or as an afternoon treat on a hot day.
Ingredients
- 3 cups orange juice
- 1/2 cup half-and-half or heavy cream
- 1/3 cup granulated sugar
- 1 teaspoon vanilla extract
- 1/2 cup cold water
Instructions
Combine the orange juice and granulated sugar in a large pitcher first, stirring for about a minute until the sugar fully dissolves into the juice without any grains settling near the bottom. Orange juice on its own can taste fairly one-dimensional once frozen, so building the sweetness at this stage helps balance the citrus once the cream gets added later in the process.
Slowly pour in the half-and-half or heavy cream while stirring continuously, since adding dairy too quickly to citrus juice can occasionally cause slight curdling if the juice happens to be very acidic. Stirring steadily while pouring helps the two liquids combine smoothly into a pale orange mixture with a light, creamy appearance. Add the vanilla extract and cold water, stirring once more until everything blends into a single, even mixture.
Check the machine setup before pouring the mixture in: the tank drip tray should sit flush beneath the tank, and the auger needs to rest fully against the cooling cylinder point. Lock the tank into place with the tank locking lever, then pour the orange cream mixture through the fill hatch slowly, watching the level against the MIN and MAX lines, since the added cream gives this batch noticeably more body than a plain juice recipe.
Select a creamy or dessert-style preset if the machine includes one, or use the custom thickness buttons and aim for a slightly thicker setting, since the dairy content freezes into a denser, richer texture compared to fruit juice alone. Press START/STOP and let the cycle run its course, checking the Time/Temperature display periodically. This creamier batch tends to land closer to twenty-two minutes rather than the shorter times seen with thinner juice recipes.
Once the machine beeps and the Ready light glows, place a cup beneath the dispenser and pull the handle down along its entire length for a smooth, even pour. The dairy content in this recipe means it holds its rich texture nicely throughout the four-hour holding period, though it works best served within the first couple of hours for the smoothest mouthfeel.
Flavor Tips
A dollop of whipped cream and an orange twist on top turn this into more of a dessert presentation for guests at a dinner party.
Variations
Swap orange juice for tangerine juice for a milder citrus flavor, or use coconut cream instead of dairy cream for a lactose-free version with a tropical edge.
10. Raspberry Lime Slushie
Prep Time: 10 minutes | Slush Time: 20-22 minutes | Serve: 4-6
Tart raspberries and sharp lime combine here for a slush that leans more tangy than sweet, making it a good match for spicy food or a hot afternoon outside. The color turns out a deep pink-red that looks as good as it tastes.
Ingredients
- 2 cups frozen raspberries
- 1/4 cup fresh lime juice
- 1/3 cup granulated sugar
- 2 cups cold water
- 1 tablespoon lime zest
Instructions
Add the frozen raspberries to a blender along with half of the cold water, blending on high until the berries break down completely into a smooth, deep red puree. Pour the raspberry puree through a fine mesh strainer into a large pitcher, pressing gently with the back of a spoon to push the liquid through while leaving the small seeds behind in the strainer, since raspberry seeds can create a gritty texture if they end up in the finished slush.
Add the fresh lime juice, granulated sugar, and lime zest to the strained raspberry liquid, stirring for close to a minute until the sugar dissolves fully and the zest spreads evenly through the mixture rather than clumping in one area. Pour in the remaining cold water, stirring once more to bring the batch to its final consistency before it goes into the machine.
Check that the drip tray sits properly beneath the tank and confirm the auger rests securely on the point of the cooling cylinder before sliding the tank into place and locking it with the tank locking lever. Pour the raspberry lime mixture slowly through the fill hatch, watching the liquid level against the MIN and MAX markings, since the strained puree still carries a bit more body than a plain juice base despite the added water.
Select the fruit or berry preset if the machine offers one, or use the custom thickness setting and aim for a medium-thick target, since this base sits somewhere between a thin juice and a thicker fruit puree. Press START/STOP to begin the cycle, and expect the process to run close to twenty minutes, watching the Progress Lights fill in as the mixture works its way toward a proper slush texture.
Once the Ready light illuminates and the beep sounds, place a cup beneath the dispenser nozzle and pull the handle down along its full length for a clean, even pour. Serve the raspberry lime slush right away for the boldest color and sharpest flavor, since the tartness can mellow out a little the longer the batch sits inside the tank.
Flavor Tips
A few fresh raspberries dropped into the finished cup add texture and make for a nicer presentation when serving guests.
Variations
Swap lime juice for lemon juice for a slightly softer tartness, or blend in a spoonful of honey in place of sugar for a rounder, less sharp sweetness.
11. Frozen Lemon Slush
Prep Time: 8 minutes | Slush Time: 18-20 minutes | Serve: 4-6
Sharp and refreshing, this one skips the usual fruit blends and focuses entirely on lemon, giving it a clean, old-fashioned soda shop flavor. It works well on its own or as a base mixed with other fruit for a layered drink.
Ingredients
- 1 cup fresh lemon juice
- 1 cup granulated sugar
- 3 cups cold water
- 1 tablespoon lemon zest
- Pinch of salt
Instructions
Combine the fresh lemon juice and granulated sugar in a saucepan over low heat, stirring constantly until the sugar dissolves completely into the juice and forms a smooth, slightly thick lemon syrup. Heating the sugar and juice together this way, rather than mixing them cold, helps the sugar break down fully without leaving grainy bits that could clog the auger later. Remove the saucepan from the heat once the syrup turns clear and let it cool to room temperature before moving forward.
Pour the cooled lemon syrup into a large pitcher, then add the cold water, lemon zest, and a small pinch of salt, stirring the combination for close to a minute until it blends into a single, pale yellow liquid. Taste the mixture at this point and adjust with a touch more water if the flavor feels too sharp, since lemon juice varies in strength depending on the fruit used.
Check the machine before pouring anything in: confirm the drip tray sits flush beneath the tank and the auger rests completely against the point of the cooling cylinder. Slide the tank into place and lock it using the tank locking lever, then pour the lemon mixture slowly through the fill hatch, watching the liquid level closely against the MIN and MAX markings, since this thin, clear base can shift quickly while pouring.
Select the standard fruit or citrus preset if available, or use the custom thickness buttons with a setting on the lower end, since a thin lemon base needs a slightly colder target temperature to reach a proper slush consistency compared to thicker fruit purees. Press START/STOP to start the cycle, and expect this batch to run on the shorter side, generally between eighteen and twenty minutes given how thin the liquid runs.
Once the beep sounds and the Ready light comes on, place a cup beneath the dispenser nozzle and pull the handle down using its full length for a smooth, controlled pour. Serve the lemon slush right away in a chilled glass for the sharpest, most refreshing flavor, since this thin base can lose its texture a bit faster than fruit purees with more natural body.
Flavor Tips
A few mint leaves crushed and stirred into the pitcher before freezing add a cooling herbal note that pairs nicely with the sharp citrus.
Variations
Blend in a cup of frozen strawberries for a strawberry lemon version, or swap half the water for iced tea to create an Arnold Palmer-style slush.
12. Kiwi Strawberry Slushie
Prep Time: 12 minutes | Slush Time: 20-22 minutes | Serve: 4-6
Green kiwi and red strawberry combine for a two-tone flavor that tastes tropical and fruity at the same time. The kiwi brings a slightly tangy edge that keeps the strawberry sweetness from feeling one-note.
Ingredients
- 4 kiwis, peeled and chopped
- 1 1/2 cups fresh strawberries, hulled
- 1/3 cup granulated sugar
- 2 cups cold water
- 1 tablespoon lime juice
Instructions
Place the peeled and chopped kiwis into a blender along with the strawberries, blending on high speed until the fruit turns fully smooth with no visible chunks remaining. Kiwi seeds are small and soft enough that most machines can handle them without straining, but running the mixture through a fine mesh strainer afterward gives a smoother final texture if a completely seedless drink is the goal.
Pour the blended fruit into a large pitcher, then add the granulated sugar, cold water, and lime juice, stirring the mixture for close to a minute until the sugar dissolves fully and no grains remain visible at the bottom. Taste the mixture at this stage, since strawberries vary quite a bit in natural sweetness depending on ripeness, and a bit more sugar or lime juice can help balance the flavor before the mixture goes into the machine.
Confirm the tank drip tray sits properly in place and the auger rests securely against the cooling cylinder point before locking the tank into position with the tank locking lever. Pour the kiwi strawberry mixture slowly through the fill hatch, watching the liquid level against the MIN and MAX markings, since the fruit puree carries more body than a plain juice base and can appear to fill faster than expected.
Select a fruit preset built for thicker purees if the machine offers one, or dial in a medium-thick setting using the custom thickness buttons, since this blend sits closer to a smoothie consistency than a clear juice. Press START/STOP to begin the cycle, watching the Time/Temperature display as the machine works through its stages. This batch generally finishes close to the twenty-two-minute mark due to the thicker fruit base.
Once the Ready light turns on and the unit beeps, place a cup beneath the dispenser nozzle and pull the lever down along its complete length for a steady, even pour. Serve the kiwi strawberry slush shortly after it finishes for the brightest color and smoothest texture, since fruit purees like this one can settle slightly if left inside the tank for extended periods without dispensing.
Flavor Tips
A thin kiwi slice on the rim of the glass makes for an easy garnish and hints at the flavor before the first sip.
Variations
Add a handful of pineapple chunks to the blender for a more tropical version, or swap strawberries for raspberries for a deeper red color and sharper tartness.
13. Grape Slushie
Prep Time: 8 minutes | Slush Time: 18-20 minutes | Serve: 4-6
Deep purple and bold in flavor, this slush leans on concord grape juice for a rich, candy-like taste that most kids ask for again. It comes together quickly since grape juice needs no blending or straining before it goes into the machine.
Ingredients
- 4 cups purple grape juice
- 2 tablespoons lemon juice
- 1/4 cup granulated sugar
- 1 cup cold water
- Pinch of salt
Instructions
Pour the grape juice into a large pitcher and add the lemon juice, stirring the two together for about thirty seconds before adding the granulated sugar. Grape juice already carries plenty of natural sweetness on its own, so taste the mixture before adding the full amount of sugar, cutting back slightly if the juice already tastes rich and sweet straight from the bottle.
Stir the mixture for close to a minute until the sugar dissolves completely, then add the cold water and a small pinch of salt, stirring once more to bring the batch together into a single, well-blended liquid. The salt helps sharpen the grape flavor slightly, keeping it from tasting flat once it freezes inside the machine.
Check that the drip tray sits flush beneath the tank and confirm the auger rests securely against the point of the cooling cylinder before sliding the tank into place and locking it with the tank locking lever. Pour the grape mixture slowly through the fill hatch, keeping the liquid level between the MIN and MAX lines printed inside the tank, since this thin, clear juice can shift quickly while pouring if the stream comes out too fast.
Select the standard fruit preset or use the custom thickness setting on the lower end, since a thin grape juice base needs a slightly colder target to reach a proper slush texture, similar to other clear juice recipes. Press START/STOP to begin, and expect the cycle to run on the shorter side, typically between eighteen and twenty minutes given how thin the base liquid runs.
Once the machine beeps and the Ready light glows, place a cup beneath the dispenser nozzle and pull the handle down using its complete length for a smooth, even pour. Serve the grape slush shortly after it finishes for the deepest color and coldest texture, since this juice base can lose some of its slush consistency if it sits too long once dispensed into a cup.
Flavor Tips
A few frozen grapes dropped into the cup before serving add a fun textural bite and keep the drink cold longer without watering it down.
Variations
Mix in a splash of blueberry juice for a deeper, more complex purple flavor, or swap the lemon juice for lime juice for a slightly different citrus edge.
14. Pineapple Coconut Slushie
Prep Time: 10 minutes | Slush Time: 22-24 minutes | Serve: 4-6
Pineapple and coconut come together here for a piña colada-style slush without any alcohol needed, making it a good option for kids and adults alike at the same gathering. The coconut milk gives it a rich, slightly creamy texture that sets it apart from the fruitier recipes in this collection.
Ingredients
- 3 cups pineapple juice
- 1 cup coconut milk
- 2 tablespoons granulated sugar
- 1 tablespoon lime juice
- 1/2 cup cold water
Instructions
Pour the pineapple juice into a large pitcher and add the coconut milk, stirring the two together gently with a long spoon rather than whisking vigorously, since coconut milk can separate slightly if agitated too fast before it has a chance to blend evenly with the juice. Add the granulated sugar and lime juice next, stirring for close to a minute until the sugar dissolves fully into the mixture without any grains settling near the bottom of the pitcher.
Add the cold water last, stirring once more to bring the batch to its final consistency. Taste the mixture at this point, adjusting the sugar slightly if the pineapple juice used happens to run tart, since brands vary quite a bit in natural sweetness and acidity levels.
Confirm the tank drip tray sits properly in place and check that the auger rests securely against the cooling cylinder point before sliding the tank over the auger and locking it with the tank locking lever. Pour the pineapple coconut mixture slowly through the fill hatch, watching the liquid level against the MIN and MAX markings closely, since the coconut milk adds noticeable body compared to a plain juice recipe.
Select a creamy or tropical preset if the machine includes one, or use the custom thickness buttons and aim for a medium-thick target, since the coconut milk freezes into a denser texture than clear juice alone. Press START/STOP to begin the cycle, watching the Progress Lights and Time/Temperature display as the machine works through its stages. This richer batch tends to run closer to twenty-four minutes given the added fat content from the coconut milk.
Once the Ready light comes on and the beep sounds, place a cup beneath the dispenser nozzle and pull the handle down along its entire length for a smooth, controlled pour. This tropical blend holds its creamy texture well through the four-hour holding period, making it a solid option for longer parties where guests serve themselves over several hours.
Flavor Tips
A rim of toasted coconut flakes pressed onto the edge of the glass before pouring adds crunch and reinforces the tropical flavor with every sip.
Variations
Add a splash of banana puree for a piña colada and banana hybrid, or blend in a few chunks of mango for a fuller tropical fruit profile.
15. Mixed Berry Slushie
Prep Time: 10 minutes | Slush Time: 20-22 minutes | Serve: 4-6
Strawberries, blueberries, and raspberries combine here for a deep purple-red slush loaded with natural berry flavor. Using three different berries together creates a rounder, more balanced taste than any single berry could give on its own.
Ingredients
- 1 cup fresh strawberries, hulled
- 1 cup fresh blueberries
- 1 cup fresh raspberries
- 1/3 cup granulated sugar
- 2 cups cold water
- 1 tablespoon lemon juice
Instructions
Combine the strawberries, blueberries, and raspberries in a blender along with half of the cold water, blending on high speed until the berries break down completely into a smooth, deep-colored puree. The three berries freeze at slightly different rates due to their different water content, so blending them together first evens out the base before it goes into the machine, giving a more consistent texture in the final slush.
Pour the blended berry mixture through a fine mesh strainer into a large pitcher, pressing gently with the back of a spoon to push the liquid through while leaving the small raspberry and blueberry seeds behind in the strainer. Add the granulated sugar and lemon juice to the strained liquid, stirring for close to a minute until the sugar dissolves fully and no grains remain at the bottom of the pitcher.
Pour in the remaining cold water, stirring once more to bring the mixture to its final consistency before checking the machine setup. Confirm the drip tray sits flush beneath the tank and the auger rests securely on the point of the cooling cylinder, then slide the tank into place and lock it with the tank locking lever.
Pour the mixed berry mixture slowly through the fill hatch, watching the liquid level against the MIN and MAX markings, since the strained berry puree still carries more body than a plain juice despite the added water. Select a fruit or berry preset if the machine offers one, or use the custom thickness setting and aim for a medium-thick target, since this base sits between a thin juice and a thicker puree.
Press START/STOP to begin the cycle, watching the Progress Lights fill in as the mixture works toward a proper slush texture, which usually takes close to twenty-two minutes for this berry blend. Once the Ready light illuminates and the beep sounds, place a cup beneath the dispenser nozzle and pull the handle down along its full length for a clean, even pour. Serve the mixed berry slush shortly after it finishes for the boldest color and best texture, since fruit purees like this one can settle a little if left sitting too long inside the tank.
Flavor Tips
A handful of fresh berries dropped into the finished cup adds texture and makes for an appealing presentation when serving guests at a gathering.
Variations
Add a few blackberries to the blender for a deeper, more complex berry flavor, or swap the lemon juice for a splash of pomegranate juice for extra tartness and color.
16. Pomegranate Slushie
Prep Time: 8 minutes | Slush Time: 20-22 minutes | Serve: 4-6
Deep red and slightly tart, this slush leans on pomegranate juice for a flavor that feels a bit more grown-up than the average fruit drink. It pairs well with sparkling water for a lighter version or stands strong on its own for a bolder taste.
Ingredients
- 4 cups pomegranate juice
- 2 tablespoons lime juice
- 1/4 cup granulated sugar
- 1 cup cold water
- Pomegranate seeds for garnish (optional)
Instructions
Pour the pomegranate juice into a large pitcher and add the lime juice, stirring the two together for about thirty seconds before adding the granulated sugar. Pomegranate juice carries a natural tartness that benefits from a bit of sweetness, so stir the sugar in gradually, tasting along the way to find a balance that suits the group being served, since preferences for tartness can vary quite a bit from one household to another.
Once the sugar dissolves fully with no visible grains left at the bottom of the pitcher, add the cold water and stir once more to bring the mixture to its final consistency. This diluting step keeps the finished slush from tasting overly concentrated, since pure pomegranate juice on its own can come across as fairly intense once frozen.
Check that the tank drip tray sits properly in place and confirm the auger rests securely against the point of the cooling cylinder before sliding the tank into position and locking it with the tank locking lever. Pour the pomegranate mixture slowly through the fill hatch, watching the liquid level closely against the MIN and MAX markings, since this thin, clear juice can rise or shift quickly during pouring.
Select the standard fruit preset or use the custom thickness setting on the lower end, since a thin pomegranate base needs a slightly colder target temperature to reach a proper slush consistency, similar to other clear juice recipes in this collection. Press START/STOP to begin the cycle, and expect the process to run close to twenty minutes given how thin the base liquid is.
Once the beep sounds and the Ready light comes on, place a cup beneath the dispenser nozzle and pull the handle down using its full length for a smooth, even pour. Top each cup with a spoonful of fresh pomegranate seeds if serving for guests, since the seeds add a nice crunch and visual contrast against the deep red slush underneath. Serve shortly after finishing for the boldest flavor and coldest texture.
Flavor Tips
A splash of orange juice blended into the base softens the tartness slightly and adds a citrus note that pairs nicely with the pomegranate.
Variations
Mix in a splash of ginger ale in place of some of the water for a slightly spiced, bubbly version, or swap lime juice for lemon juice for a different citrus edge.
17. Cranberry Citrus Slushie
Prep Time: 10 minutes | Slush Time: 20-22 minutes | Serve: 4-6
Tart cranberry juice meets bright orange and lime in this slush, giving it a holiday-adjacent flavor that works just as well in the middle of summer. The citrus keeps the cranberry from tasting one-note or overly sharp.
Ingredients
- 3 cups cranberry juice
- 1 cup orange juice
- 2 tablespoons lime juice
- 1/3 cup granulated sugar
- 1/2 cup cold water
Instructions
Combine the cranberry juice and orange juice in a large pitcher, stirring the two together for close to a minute so the flavors start to blend evenly rather than sitting in separate layers. Add the lime juice next, followed by the granulated sugar, stirring continuously until every grain of sugar dissolves fully into the combined juices with none settling near the bottom.
Taste the mixture at this stage, since cranberry juice varies quite a bit in tartness depending on whether it comes from a sweetened blend or a straight, unsweetened bottle. Adjust the sugar amount slightly if needed, then add the cold water and stir once more to bring the batch to its final consistency before moving to the machine.
Check that the drip tray sits flush beneath the tank and confirm the auger rests securely against the cooling cylinder point before sliding the tank into place and locking it with the tank locking lever. Pour the cranberry citrus mixture slowly through the fill hatch, watching the liquid level against the MIN and MAX markings, since this thin juice blend can shift quickly if poured too fast.
Select the standard fruit preset or use the custom thickness buttons with a setting on the lower end, since this thin, clear base needs a slightly colder target temperature to reach a proper slush texture. Press START/STOP to begin the cycle, watching the Time/Temperature display as the machine works through its stages, which usually takes close to twenty minutes for this type of juice blend.
Once the Ready light turns on and the unit beeps, place a cup beneath the dispenser nozzle and pull the lever down along its complete length for a steady, even pour. Serve the cranberry citrus slush shortly after it finishes for the brightest flavor, since the tartness can mellow out a bit if the batch sits too long inside the tank before being dispensed.
Flavor Tips
A rosemary sprig used as a garnish adds a subtle herbal aroma that pairs surprisingly well with the tart cranberry base.
Variations
Add a splash of ginger beer in place of some of the water for a spicier, bubbly version, or blend in a handful of fresh raspberries for extra sweetness and color.
18. Frozen Cola Slushie
Prep Time: 6 minutes | Slush Time: 18-20 minutes | Serve: 4-6
This one turns regular soda into a thick, icy treat that tastes like a gas station classic made at home for a fraction of the cost. It comes together fast since cola needs almost no extra preparation before going into the tank.
Ingredients
- 4 cups cola
- 1/4 cup granulated sugar (optional, depending on cola sweetness)
- 1 tablespoon lime juice
- 1/2 cup cold water
Instructions
Pour the cola into a large pitcher and let it sit uncovered for a few minutes to release some of the carbonation, since too much fizz can interfere with the machine’s ability to churn the mixture into a smooth, even texture. Stir the cola gently with a long spoon rather than whisking, which helps release bubbles without creating a foamy mess across the top of the pitcher.
Add the granulated sugar if the cola used tastes less sweet than desired, along with the lime juice, stirring the mixture for close to a minute until any added sugar fully dissolves. The lime juice cuts through the sweetness slightly and adds a bit of brightness that keeps the finished slush from tasting flat once frozen. Add the cold water last, stirring once more to bring the batch together.
Check the machine setup before pouring anything in: the drip tray should sit flush beneath the tank, and the auger needs to rest completely against the cooling cylinder point. Lock the tank into place with the tank locking lever, then pour the cola mixture slowly through the fill hatch, watching the liquid level against the MIN and MAX markings, since any remaining carbonation can cause the level to appear higher than it actually is at first.
Select the soda or cola preset if the machine offers one, or use the custom thickness setting with a lower temperature target, since cola runs thinner than most fruit-based recipes and needs a colder point to reach a proper slush consistency. Press START/STOP to begin, and expect this batch to finish quickly, generally within eighteen to twenty minutes given how thin the soda base runs.
Once the beep sounds and the Ready light comes on, place a cup beneath the dispenser nozzle and pull the handle down using its full length for a smooth, controlled pour. Serve the cola slush right away for the best fizzy-cold contrast, since this soda base can lose some of its texture faster than fruit purees once it sits at room temperature for a while.
Flavor Tips
A few drops of vanilla extract stirred into the mixture before freezing give the finished drink a flavor closer to a classic soda fountain float.
Variations
Swap regular cola for cherry cola for a fruitier twist, or add a splash of root beer for a half-and-half soda slush blend.
19. Root Beer Float Slushie
Prep Time: 8 minutes | Slush Time: 18-20 minutes | Serve: 4-6
This recipe captures the flavor of a classic root beer float in slush form, combining fizzy soda with a creamy vanilla note for a dessert-style drink. It works well after dinner or as a treat on a warm evening outside.
Ingredients
- 4 cups root beer
- 1/2 cup half-and-half
- 2 tablespoons granulated sugar
- 1 teaspoon vanilla extract
Instructions
Pour the root beer into a large pitcher and let it sit for a few minutes to release some carbonation before proceeding, since heavy fizz can interfere with the auger’s ability to mix the batch smoothly once it goes into the machine. Stir the root beer gently to help release bubbles without creating excess foam across the surface of the pitcher.
Add the granulated sugar and stir until fully dissolved, then slowly pour in the half-and-half while stirring continuously, since adding dairy too quickly to a carbonated drink can cause some fizzing and separation if not mixed carefully. Add the vanilla extract last, stirring once more until the mixture turns into a smooth, light tan liquid with no visible streaks of cream floating on top.
Check that the tank drip tray sits properly in place and confirm the auger rests securely against the cooling cylinder point before sliding the tank into position and locking it with the tank locking lever. Pour the root beer float mixture slowly through the fill hatch, watching the liquid level against the MIN and MAX markings closely, since the added cream gives this batch a bit more body than plain soda alone.
Select a creamy or dessert preset if the machine includes one, or use the custom thickness buttons and aim for a medium setting, since the dairy content freezes into a slightly denser texture than soda by itself. Press START/STOP to begin the cycle, watching the Progress Lights as the machine works through its stages, which typically takes close to twenty minutes for this blend.
Once the Ready light comes on and the beep sounds, place a cup beneath the dispenser nozzle and pull the handle down along its entire length for a smooth, even pour. Top with a small scoop of vanilla ice cream if serving for a true float-style presentation, and enjoy the drink shortly after it finishes for the richest flavor and coldest texture.
Flavor Tips
A drizzle of caramel sauce around the inside of the glass before pouring adds extra sweetness and a nice visual touch for serving guests.
Variations
Swap root beer for cream soda for a sweeter, more vanilla-forward version, or add a splash of chocolate syrup for a root beer float with a chocolate twist.
20. Rainbow Candy Slushie
Prep Time: 10 minutes | Slush Time: 20-22 minutes | Serve: 4-6
Bright and sweet, this slush pulls flavor from a mix of fruit-flavored candy dissolved right into the base, giving it a bold, colorful taste that kids tend to ask for by name. It works well as a fun option for birthday parties or any gathering with a younger crowd.
Ingredients
- 2 cups hard fruit-flavored candy, unwrapped
- 3 cups hot water
- 1 cup cold water
- 1 tablespoon lemon juice
- 1 cup ice (for cooling)
Instructions
Place the unwrapped hard candy into a heatproof bowl and pour the hot water over the top, stirring occasionally as the candy slowly dissolves into the water over the course of about ten minutes. Breaking the candy into smaller pieces beforehand using a rolling pin or the back of a heavy spoon speeds up this process considerably, since smaller pieces dissolve faster than whole candies sitting at the bottom of the bowl.
Once the candy has fully dissolved and the liquid turns into a smooth, colorful syrup with no solid pieces remaining, add the cup of ice directly into the bowl to cool the mixture down quickly. Stir until the ice melts completely, then pour the cooled candy syrup into a large pitcher along with the cold water and lemon juice, stirring once more to bring the batch to its final consistency.
Strain the mixture through a fine mesh strainer if any small bits of undissolved candy remain, since leftover solid pieces can damage the auger or clog the dispenser nozzle once the machine starts running. Check that the drip tray sits flush beneath the tank and the auger rests securely against the cooling cylinder point before locking the tank into place with the tank locking lever.
Pour the candy mixture slowly through the fill hatch, watching the liquid level against the MIN and MAX markings, since this syrup-based liquid behaves similarly to a thin juice once fully dissolved and strained. Select the standard fruit preset or use the custom thickness setting on the lower end, since this thinner base needs a slightly colder target to reach a proper slush consistency. Press START/STOP to begin, expecting the cycle to run close to twenty minutes.
Once the beep sounds and the Ready light turns on, place a cup beneath the dispenser nozzle and pull the handle down using its full length for a smooth, controlled pour. Serve right away for the boldest color and sweetest flavor, since this candy-based mixture can lose some of its vibrant color if left sitting too long before serving.
Flavor Tips
Rainbow sprinkles pressed around the rim of the glass before pouring make this drink feel more like a birthday treat for younger guests.
Variations
Mix two different candy flavors together for a swirled, two-tone effect, or add a few drops of food coloring to boost the color if the candy alone doesn’t turn out vibrant enough.
21. Cotton Candy Slushie
Prep Time: 5 minutes | Slush Time: 20 minutes | Serve: 4
Cotton candy syrup turns this frosty treat into a soft pink swirl with sweet carnival flavor kids request again and again. Sparkling lemon-lime soda keeps the taste light instead of heavy, and a small splash of blue raspberry syrup adds a playful color twist. Serve this drink at birthday parties, school events, or warm afternoons when everyone wants something cool and cheerful to sip.
Ingredients
- 3 cups lemon-lime soda, chilled
- 1/2 cup cotton candy flavored syrup
- 2 tablespoons blue raspberry syrup
- Extra ice cubes, for a thicker texture
- Pink and blue sprinkles, for topping
- Whipped cream, for topping
Instructions
Start by checking that the tank drip tray sits fully in place and the auger sits seated on the point of the cooling cylinder. Slide the tank over the auger and push it in firmly, then lock it with the tank locking lever to keep everything secure during the slushing process.
Pour the chilled lemon-lime soda into a large mixing pitcher. Add the cotton candy syrup and stir slowly until the color turns a soft pink and the syrup blends fully into the soda. Pour in the blue raspberry syrup last, giving the mixture one gentle stir so a marbled swirl forms instead of a single blended color.
Open the fill hatch door on top of the machine and pour the mixture into the tank. Keep the liquid level between the MIN and MAX markings printed on the tank wall. Cold ingredients slush faster and produce a smoother texture, so chill the soda ahead of time rather than using it at room temperature.
Choose a fruity preset on the control panel, or select the custom setting and use the thickness buttons to set a medium consistency, since this flavor tastes best with a soft, sippable texture rather than a dense one. Press START/STOP to begin the cycle. The machine will chill and mix the liquid for around 19 to 25 minutes, depending on the starting temperature and the preset chosen.
Watch the progress lights during the cycle. A quick dip in temperature followed by a fast rise near the end is a normal part of the cooling pattern, not a sign of trouble. Once the unit beeps and the ready light turns on, the slushie has reached its target texture.
Place a cup under the dispenser nozzle and pull the handle down along its full length to release a smooth, even pour. Top each cup with a small mound of whipped cream and a scatter of pink and blue sprinkles for a playful finish. Serve right away for the best texture, since the auger keeps mixing during the four-hour holding window, though the drink stays thickest in the first few minutes after it finishes.
Flavor Tips
- Use clear soda instead of cola-based soda so the pink and blue colors stay bright.
- Add a few drops of vanilla extract for a bakery-style cotton candy taste.
- Rim the cup with pink sugar sprinkles before pouring for extra sweetness on each sip.
Variations
- Swap blue raspberry syrup for grape syrup to create a purple cotton candy version.
- Add a splash of coconut cream for a tropical cotton candy twist.
- Mix in popping candy right before serving for a fizzy surprise in every spoonful.
22. Bubble Gum Slushie
Prep Time: 5 minutes | Slush Time: 20 minutes | Serve: 4
Bubble gum syrup gives this slushie a bright blue color and a sweet, nostalgic flavor that reminds people of childhood summers. A splash of cream soda rounds out the sweetness, while a few drops of almond extract add a subtle bakery note underneath the candy flavor. Kids love the color, and parents love how quickly it comes together on a hot afternoon.
Ingredients
- 3 cups cream soda, chilled
- 1/2 cup bubble gum flavored syrup
- 1/4 teaspoon almond extract
- Blue food coloring, a few drops (optional)
- Whipped cream, for topping
- Gumballs or bubble gum candy, for garnish
Instructions
Before starting, confirm the tank drip tray rests firmly in its slot and the auger sits properly seated on the cooling cylinder point. Slide the tank into place over the auger, pushing until it locks, then secure the tank locking lever so the unit stays sealed during operation.
In a large pitcher, combine the chilled cream soda with the bubble gum syrup. Stir gently until the syrup dissolves fully and the mixture turns a light golden color. Add the almond extract and stir again, tasting a small spoonful to check the sweetness level before adding the optional blue food coloring for a more vibrant, candy-shop appearance.
Lift the fill hatch door and pour the finished mixture into the tank, keeping the liquid between the MIN and MAX lines marked on the tank interior. Chilling the soda beforehand speeds up the slushing process and helps the machine reach the target temperature sooner, so pull the soda from the refrigerator rather than using it warm.
Select a candy or fruity preset on the control panel, or choose custom and adjust the thickness buttons toward a medium-thick setting, since bubble gum flavor pairs nicely with a denser, more scoopable texture. Press START/STOP to begin the chilling cycle, which typically runs between 19 and 25 minutes based on the starting temperature of the liquid and the chosen preset.
Keep an eye on the progress lights while the machine works. A brief drop in temperature followed by a quick climb near the end of the cycle is expected behavior, not a malfunction. Once the unit beeps and the ready light comes on, the slushie has finished chilling and reached its intended thickness.
Set a cup beneath the dispenser nozzle and pull the handle down along its entire length for a steady, even pour. Add a swirl of whipped cream on top and finish with a few gumballs or small pieces of bubble gum candy pressed into the cream for a playful touch. Serve immediately for the smoothest texture, keeping in mind the machine continues mixing during its four-hour holding period, though the drink tastes best soon after finishing.
Flavor Tips
- Use clear cream soda for the brightest, most vivid blue color.
- Add a tiny pinch of citric acid for a light tangy edge under the sweetness.
- Rim the cup with pink or blue sanding sugar before pouring for extra visual appeal.
Variations
- Swap almond extract for vanilla extract for a softer, more classic bubble gum flavor.
- Add a splash of grenadine for a pink bubble gum version with a fruity undertone.
- Mix in mini marshmallows right before serving for extra texture and sweetness.
23. Frozen Hot Chocolate Slushie
Prep Time: 5 minutes | Slush Time: 22 minutes | Serve: 4
Rich chocolate milk meets cocoa syrup in this creamy, dessert-style slushie that tastes like a chilled version of a favorite winter drink. A touch of cinnamon warms up the flavor, while chocolate syrup drizzled on top gives every glass a bakery-style finish. This treat works well after dinner or as a cool afternoon pick-me-up on a hot day.
Ingredients
- 3 cups chocolate milk, chilled
- 1/4 cup cocoa powder
- 2 tablespoons sugar
- 1/4 teaspoon ground cinnamon
- Whipped cream, for topping
- Chocolate syrup and shaved chocolate, for garnish
Instructions
Check that the tank drip tray fits securely in its place and the auger sits fully seated on the point of the cooling cylinder before beginning. Slide the tank over the auger and push firmly until it locks into position, then engage the tank locking lever to keep the unit sealed during the chilling cycle.
In a mixing bowl, whisk the cocoa powder and sugar together first to break up any clumps, since adding cocoa powder directly to liquid often leaves gritty spots. Slowly pour in the chilled chocolate milk while whisking continuously, allowing the cocoa mixture to dissolve smoothly rather than settling at the bottom. Add the ground cinnamon and whisk once more until the color turns deep and even throughout.
Open the fill hatch door and pour the finished mixture into the tank, checking that the liquid level stays between the MIN and MAX markings printed inside. Because chocolate milk tends to be thicker than soda-based mixtures, using cold milk straight from the refrigerator helps the machine reach its target temperature without extra strain, so avoid using room-temperature milk for this recipe.
Choose a creamy or dessert preset if your model includes one, or select custom and set the thickness buttons toward a thicker level, since chocolate slushies taste richer with a denser consistency. Press START/STOP to begin the cycle. Expect a slightly longer processing time with dairy-based mixtures, often landing near the higher end of the 19 to 25 minute range due to the natural thickness of chocolate milk.
Watch the progress lights as the cycle runs. A sudden dip in temperature followed by a quick rebound near the finish is a normal part of the cooling process and does not indicate a problem with the machine. Once the unit beeps and the ready light illuminates, the chocolate slushie has reached its finished texture.
Place a cup under the dispenser nozzle and pull the handle down along its full length for a smooth, controlled pour, since thick dairy mixtures can strain the lever if pulled only from the tip. Top the finished drink with whipped cream, a drizzle of chocolate syrup, and a sprinkle of shaved chocolate for a dessert-style presentation. Serve right away for the creamiest texture, since dairy-based slushies can separate slightly if left too long, even though the auger keeps mixing throughout the four-hour holding period.
Flavor Tips
- Use dark chocolate milk for a deeper, more intense cocoa flavor.
- Add a small pinch of sea salt to bring out the sweetness in the chocolate.
- Warm the cocoa and sugar mixture slightly before whisking for a smoother blend.
Variations
- Swap regular chocolate milk for peppermint-flavored chocolate milk during colder months.
- Add a spoonful of peanut butter for a chocolate-peanut butter version.
- Mix in mini marshmallows before serving for a s’mores-inspired twist.
24. Vanilla Milkshake Slushie
Prep Time: 5 minutes | Slush Time: 20 minutes | Serve: 4
Vanilla ice cream blended into milk creates a smooth, creamy base for this milkshake-style slushie that tastes rich without feeling too heavy. A splash of vanilla extract deepens the flavor, while a light drizzle of caramel on top adds a touch of buttery sweetness. This recipe suits anyone craving a classic soda-shop treat straight from a home kitchen.
Ingredients
- 2 cups whole milk, chilled
- 1 cup vanilla ice cream, softened slightly
- 1 teaspoon vanilla extract
- 2 tablespoons sugar
- Whipped cream, for topping
- Caramel sauce, for garnish
Instructions
Before starting, make sure the tank drip tray sits fully in place and the auger rests properly seated on the cooling cylinder point. Slide the tank over the auger and push it in completely, then lock it firmly with the tank locking lever so the unit stays sealed during the entire chilling cycle.
In a blender, combine the chilled milk, softened vanilla ice cream, vanilla extract, and sugar. Blend on low speed until the mixture turns smooth and no lumps of ice cream remain, then taste a small spoonful to check the sweetness level, adding a touch more sugar if a sweeter flavor is preferred.
Lift the fill hatch door and pour the blended mixture into the tank, keeping the liquid level between the MIN and MAX markings on the tank wall. Because this mixture already contains dairy fat from the ice cream, it may process slightly slower than plain soda mixtures, so using a well-chilled blend helps the machine reach its target temperature more efficiently.
Select a creamy or custom preset on the control panel and adjust the thickness buttons toward a medium-thick setting, since milkshake-style slushies taste best with a rich, spoonable texture rather than a thin, watery one. Press START/STOP to begin the cycle, which generally runs between 19 and 25 minutes, with dairy mixtures often landing closer to the higher end due to their natural density.
Monitor the progress lights throughout the cycle. A brief drop in temperature followed by a fast climb near the end is a normal part of the cooling pattern for this machine and should not cause concern. Once the unit beeps and the ready light turns on, the milkshake slushie has reached its intended thickness and temperature.
Position a cup beneath the dispenser nozzle and pull the handle down along its full length for a steady, even pour, since thicker dairy blends can put extra strain on the lever if pulled only from the tip. Finish each cup with a swirl of whipped cream and a generous drizzle of caramel sauce for a classic milkshake presentation. Serve promptly for the smoothest texture, keeping in mind that dairy-based mixtures hold up best within the first hour, even though the auger continues mixing throughout the four-hour holding window.
Flavor Tips
- Use full-fat milk for a richer, creamier finished texture.
- Add a pinch of salt to balance the sweetness and enhance the vanilla flavor.
- Toast the caramel sauce briefly for a deeper, more complex garnish flavor.
Variations
- Swap vanilla ice cream for chocolate ice cream for a chocolate milkshake version.
- Add crushed cookies for a cookies-and-cream twist on this classic flavor.
- Mix in a spoonful of malt powder for an old-fashioned malted milkshake taste.
25. Mint Lime Cooler Slushie
Prep Time: 5 minutes | Slush Time: 20 minutes | Serve: 4
Fresh lime juice and mint leaves come together in this cooling, herbal-citrus slushie that tastes bright and refreshing on a warm day. Sparkling water keeps the drink light, while a touch of honey balances the tartness of the lime without overwhelming the mint flavor. This recipe works well after a spicy meal or as a palate-cleansing treat during summer gatherings.
Ingredients
- 3 cups sparkling water, chilled
- 1/2 cup fresh lime juice
- 1/4 cup honey or simple syrup
- 15 fresh mint leaves, finely chopped
- Lime wheels, for garnish
- Mint sprigs, for garnish
Instructions
Check that the tank drip tray sits securely in place and the auger rests fully seated on the point of the cooling cylinder before beginning the process. Slide the tank over the auger and push it in until it locks, then secure it firmly with the tank locking lever to keep the unit sealed while it operates.
In a mixing pitcher, combine the sparkling water, fresh lime juice, and honey, stirring gently so the carbonation stays intact rather than fizzing out completely. Add the finely chopped mint leaves and stir once more, allowing the mint flavor to infuse into the liquid for a few minutes before pouring the mixture into the machine.
Open the fill hatch door and pour the finished mixture into the tank, checking that the liquid level remains between the MIN and MAX markings printed on the tank interior. Chilling the sparkling water ahead of time helps preserve its carbonation and allows the machine to reach the target temperature more quickly, so pull the water straight from the refrigerator rather than letting it sit at room temperature.
Choose a fruity or custom preset on the control panel and set the thickness buttons toward a lighter, more refreshing consistency, since mint and lime flavors taste best in a slushie that pours easily rather than one that sits too dense. Press START/STOP to begin the chilling cycle, which typically runs between 19 and 25 minutes depending on the starting temperature of the mixture and the preset selected.
Watch the progress lights during the cycle. A quick drop in temperature followed by a fast rise near the end is a normal part of the cooling behavior and does not signal a problem with the unit. Once the machine beeps and the ready light comes on, the mint lime slushie has finished chilling and reached its intended texture.
Place a cup under the dispenser nozzle and pull the handle down along its entire length for a smooth, even pour, avoiding any strain on the lever by not pulling from just the tip. Garnish each cup with a lime wheel and a small sprig of mint pressed against the rim for a fresh, polished presentation. Serve right away for the brightest flavor, since the mint and carbonation both taste best soon after finishing, though the auger keeps mixing during the four-hour holding period if leftovers remain in the tank.
Flavor Tips
- Muddle the mint leaves lightly before adding them for a stronger herbal flavor.
- Use fresh lime juice rather than bottled juice for the brightest, most natural taste.
- Add a few cucumber slices to the pitcher for an extra layer of refreshing flavor.
Variations
- Swap honey for agave syrup for a milder, more neutral sweetness.
- Add a splash of coconut water for a tropical twist on this cooling recipe.
- Mix in a few raspberries for a fruity mint-berry variation.
How to Store Leftover Slushies
1. Refrigeration – Pour leftover slushie into a sealed container and place it in the refrigerator for up to 24 hours. The texture will soften into a slushy liquid, but the flavor stays fresh.
2. Freezing leftovers – For longer storage, pour the mixture into a freezer-safe container or ice pop molds and freeze for up to one month.
3. Best way to re-slush frozen drinks – Let frozen leftovers thaw slightly at room temperature for 10-15 minutes, then blend briefly or run through the machine again on a short cycle to restore the icy texture.
4. Shelf life – Dairy-based slushies last up to 2 days refrigerated, while fruit and soda-based versions stay fresh for up to 3 days when sealed properly.
Conclusion
This collection of twenty-five slushie recipes gives home cooks plenty of options for every season, celebration, and craving, from classic fruit flavors to creamy dessert-style drinks.
Making slushies at home might seem like it requires special skill or extra effort, but it’s actually quite simple once the basic steps become familiar!
Each recipe uses common ingredients and straightforward preparation, so building confidence with the machine happens quickly. Readers are encouraged to experiment with different fruit combinations, syrups, and garnishes to create personal favorites beyond the recipes listed here.
Bookmarking this guide makes it easy to return whenever a new flavor idea comes to mind or a party calls for a fun frozen treat. Sharing favorite results and flavor combinations with friends and family can also turn slushie-making into a shared kitchen activity everyone looks forward to repeating.