
So you finally got a Ninja CREAMi sitting on your counter, and now you’re wondering what to actually make with it. Good news: this little machine can turn a few basic ingredients into some of the creamiest, most scoopable ice cream you’ve ever had at home. No churning drama, no icy chunks, and no need to babysit a bowl in the freezer for hours.
This guide is built around Ninja CREAMi Ice Cream Maker recipes that anyone can follow, even on the very first try. We’ll cover classic flavors, chocolate lovers’ favorites, fruity sorbets, lighter options, and a few playful mix-in creations that taste like something from a scoop shop.
Here’s a quick look at what makes this machine different. A traditional ice cream maker churns your base while it freezes, which takes anywhere from 20 to 45 minutes and often leaves you with a soft-serve texture that needs extra time in the freezer to firm up.
The Ninja CREAMi flips that process. You freeze the base solid first, then the machine shaves and re-blends that frozen block into a smooth, dense, scoopable treat in under three minutes.
That’s why homemade Ninja CREAMi recipes come out tasting fresher and creamier than most machines can manage, and it’s also why you can make more than plain ice cream. Sorbet, gelato, smoothie bowls, and milkshakes are all on the table too.
Below, you’ll find over 25 easy Ninja CREAMi Ice Cream Maker recipes, tips for getting the best texture every time, and answers to the small questions that trip up first-time users.
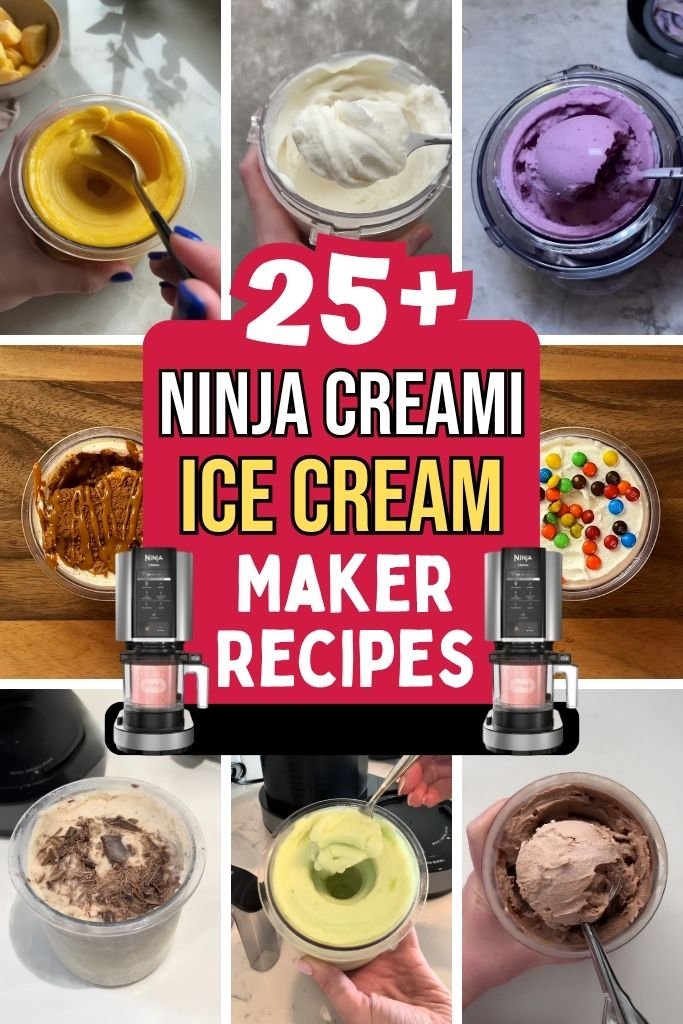
What Makes the Ninja CREAMi Ice Cream Maker Special?
1. It freezes first, then processes. Instead of churning liquid into ice cream, the CREAMi works on a pint that’s already frozen solid, which gives it a denser, richer texture.
2. The Creamerizer Paddle does the heavy lifting. This specially shaped paddle shaves through the frozen base in thin layers and re-blends it into a smooth consistency, similar to what you’d get from a proper scoop shop.
3. Freezing first and churning later makes a real difference. A traditional machine churns air into a cold liquid, which can leave you with a softer, sometimes icy result. The CREAMi’s method breaks down ice crystals after freezing, so the texture ends up smoother and more consistent from the first bite to the last.
4. The texture beats most traditional machines. Because the paddle processes the frozen base in such fine layers, you get a scoopable texture right out of the machine, not a soft-serve consistency that needs hours in the freezer to set.
5. It works for dairy and dairy-free bases alike. No matter which base you use, whole milk and heavy cream or a coconut milk and oat milk blend, the machine handles both with the same smooth result.
Choosing the Right Ninja CREAMi Program for Every Recipe
The CREAMi comes with several One-Touch Programs, and picking the right one makes a real difference in your final texture. Here’s a simple breakdown of when to use each preset.
Ice Cream
Pick this setting for classic, full-fat recipes made with heavy cream and whole milk. It produces a rich, scoopable base that’s ideal for traditional flavors like vanilla, chocolate, and strawberry.
Lite Ice Cream
Choose this preset for lower sugar recipes, keto-friendly bases, high-protein blends, or anything made with a lower fat content. It’s built for health-conscious versions of your favorite flavors without sacrificing texture.
Gelato
This preset works best for custard-based recipes that use egg yolks or a cooked base. It produces a dense, silky result that’s closer to Italian-style gelato than standard ice cream.
Sorbet
Use this setting for fruit-based frozen treats with no dairy involved. It’s a great choice when you want a naturally dairy-free dessert that’s still creamy and scoopable.
Smoothie Bowl
This preset is made for frozen fruit and vegetable blends, often combined with dairy, dairy alternatives, or juice. It’s a good pick for breakfast-style bowls or a thicker, spoonable smoothie.
Milkshake
Select this setting when you want to blend homemade or store-bought ice cream with milk and mix-ins for a thick milkshake in just a couple of minutes.
Mix-In
This program folds add-ins into a base that’s already been processed, or into a store-bought treat. It works well for:
- Cookies
- Brownies
- Chocolate chips
- Candy pieces
- Nuts
- Fruit
- Cereal
Re-Spin
Sometimes a processed base comes out crumbly rather than creamy, usually because the pint was very cold when it went in. Running the Re-Spin cycle gives the paddle one more pass through the base, which smooths out that crumbly texture into something scoopable without adding any extra ingredients.
Ninja CREAMi Tips for Perfect Ice Cream Every Time
- Freeze your pint for at least 24 hours before processing. This gives the base time to reach the right temperature all the way through.
- Always freeze the pint on a flat, level surface, since an angled freeze can lead to uneven processing.
- Never fill ingredients past the MAX FILL line marked on the pint.
- Use an upright freezer when possible, since chest freezers tend to run colder than the CREAMi is designed for.
- Match your base to the correct preset program so the machine processes it at the right speed and setting.
- When your finished base looks crumbly instead of creamy, run the Re-Spin cycle for a smoother result.
- Chill your ingredients in the fridge before freezing the pint, which helps the base freeze more evenly.
- Prepare a few pints at once and keep them frozen and ready, so you can process a fresh batch whenever you want one.
- Lock the Creamerizer Paddle securely into the lid before every processing cycle.
- Smooth the surface of any leftover ice cream before putting it back in the freezer, since an uneven surface can affect the next processing cycle.
25+ Ninja CREAMi Ice Cream Maker Recipes
1: Classic Vanilla Ice Cream
⏱ Time Prep Time: 10 minutes Churn Time: 2 minutes Total: 24 hours 12 minutes (includes freezing) Servings: 4
Why You’ll Love This Recipe This is the recipe every CREAMi owner should start with. It’s simple, only needs a handful of pantry staples, and gives you a base you can turn into almost any flavor later on. The vanilla flavor comes through clean and warm, without tasting flat or watery the way some homemade versions can.
Ingredients
- 1 cup whole milk
- 1/2 cup heavy cream
- 1/3 cup granulated sugar
- 2 teaspoons pure vanilla extract
- 1 pinch of salt
How to Make It in the Ninja CREAMi
- In a mixing bowl, whisk the whole milk, heavy cream, sugar, vanilla extract, and salt together until the sugar has fully dissolved. This should take about a minute of steady whisking.
- Pour the mixture into your CREAMi pint, keeping the liquid below the MAX FILL line.
- Snap the lid onto the pint and place it in the freezer on a flat shelf. Let it freeze for a full 24 hours before moving to the next step.
- Remove the lid, place the pint into the outer bowl, and lock the Creamerizer Paddle into place.
- Select the ICE CREAM program and let the machine run its full cycle without opening the lid early.
- Once the cycle ends, check the texture. When it looks crumbly rather than smooth, run the RE-SPIN program for one extra pass.
- Scoop right away for a soft texture, or let the pint rest in the freezer for 10 to 15 minutes when you prefer a firmer scoop.
Flavor Variations Stir in crushed graham crackers for a cheesecake-style crunch, or swap the vanilla extract for almond extract for a bakery-style twist.
Storage Tips Smooth the surface with the back of a spoon, snap the lid back on, and store in the freezer for up to two weeks for the best texture.
2: Chocolate Ice Cream
⏱ Time Prep Time: 10 minutes Churn Time: 2 minutes Total: 24 hours 12 minutes (includes freezing) Servings: 4
Why You’ll Love This Recipe Rich, dark, and just sweet enough, this chocolate base tastes closer to a scoop shop treat than anything from a store carton. Cocoa powder gives it deep flavor without making the base too heavy, so it processes into a smooth texture every time.
Ingredients
- 1 cup whole milk
- 1/2 cup heavy cream
- 1/3 cup granulated sugar
- 3 tablespoons unsweetened cocoa powder
- 1 teaspoon pure vanilla extract
- 1 pinch of salt
How to Make It in the Ninja CREAMi
- Add the cocoa powder and sugar to a mixing bowl first, whisking them together dry. This step keeps the cocoa from clumping once the liquid gets added.
- Slowly pour in the milk while whisking, followed by the heavy cream, vanilla, and salt, until the mixture turns a smooth, even brown color.
- Pour the base into your CREAMi pint, staying below the MAX FILL line, then snap the lid on tight.
- Freeze the pint flat for at least 24 hours so the base sets all the way through.
- Place the frozen pint into the outer bowl and lock the paddle into the lid before starting the machine.
- Choose the ICE CREAM program and let it run start to finish.
- Check the texture once the cycle stops. A quick RE-SPIN cycle helps when the base looks dry or crumbly around the edges.
Flavor Variations Add a spoonful of espresso powder to the dry mix for a mocha twist, or fold in chocolate chunks using the MIX-IN program after the first cycle.
Storage Tips Level off the surface before refreezing, and use within two to three weeks for the smoothest results.
3: Strawberry Ice Cream
⏱ Time Prep Time: 12 minutes Churn Time: 2 minutes Total: 24 hours 14 minutes (includes freezing) Servings: 4
Why You’ll Love This Recipe Made with real strawberries instead of syrup or flavoring, this recipe tastes bright and fresh in every bite. The fruit gets blended right into the base, so you get natural pink color and real strawberry flavor without any shortcuts.
Ingredients
- 1 cup fresh strawberries, hulled
- 3/4 cup whole milk
- 1/2 cup heavy cream
- 1/3 cup granulated sugar
- 1 teaspoon lemon juice
- 1 pinch of salt
How to Make It in the Ninja CREAMi
- Add the strawberries and sugar to a blender and pulse until the mixture turns into a smooth puree with no large chunks left.
- Pour in the milk, heavy cream, lemon juice, and salt, then blend again for about 20 seconds until fully combined.
- Pour the mixture into your CREAMi pint, keeping it below the MAX FILL line, and snap on the lid.
- Freeze the pint on a flat surface for a full 24 hours.
- Once frozen, place the pint in the outer bowl, lock the Creamerizer Paddle in place, and close the lid.
- Run the ICE CREAM program from start to finish without pausing it.
- When the texture looks icy or uneven after the first cycle, run RE-SPIN once more for a smoother finish.
Flavor Variations Fold in white chocolate chips after processing for a berries-and-cream style treat, or swap in raspberries for a tangier version.
Storage Tips Press the surface smooth before sealing, and store for up to two weeks to keep the fruit flavor tasting fresh.
4: Cookies and Cream Ice Cream
⏱ Time Prep Time: 10 minutes Churn Time: 3 minutes Total: 24 hours 13 minutes (includes freezing) Servings: 4
Why You’ll Love This Recipe This one brings back the classic combo of a creamy vanilla base loaded with crushed chocolate sandwich cookies. The cookies get folded in after processing, so they stay a little crunchy instead of turning soggy or mushy.
Ingredients
- 1 cup whole milk
- 1/2 cup heavy cream
- 1/3 cup granulated sugar
- 1 1/2 teaspoons pure vanilla extract
- 1 pinch of salt
- 6 chocolate sandwich cookies, roughly broken
How to Make It in the Ninja CREAMi
- Whisk the milk, heavy cream, sugar, vanilla, and salt together in a bowl until the sugar dissolves completely.
- Pour the base into your CREAMi pint below the MAX FILL line and snap the lid on securely.
- Freeze the pint flat for at least 24 hours before processing.
- Place the frozen pint in the outer bowl, lock in the paddle, and select the ICE CREAM program.
- Let the cycle run completely, then check the texture and run RE-SPIN when needed for a smoother base.
- Once the base looks creamy, sprinkle the broken cookie pieces on top and select the MIX-IN program to fold them in evenly.
- Scoop right away for the best mix of crunchy cookies and creamy base.
Flavor Variations Swap the vanilla base for chocolate for a double-chocolate cookies and cream version, or use golden sandwich cookies for a lighter flavor.
Storage Tips Smooth the top layer before refreezing, and eat within two weeks so the cookie pieces stay from getting too soft.
5: Mint Chocolate Chip Ice Cream
⏱ Time Prep Time: 10 minutes Churn Time: 3 minutes Total: 24 hours 13 minutes (includes freezing) Servings: 4
Why You’ll Love This Recipe Cool mint flavor paired with small chocolate chips makes this a favorite for warm afternoons. The mint flavor stays light rather than overpowering, and the chocolate chips add a little crunch in every spoonful.
Ingredients
- 1 cup whole milk
- 1/2 cup heavy cream
- 1/3 cup granulated sugar
- 3/4 teaspoon peppermint extract
- 1 pinch of salt
- 1/3 cup mini chocolate chips
How to Make It in the Ninja CREAMi
- Whisk together the milk, heavy cream, sugar, peppermint extract, and salt until the sugar dissolves and the mixture looks smooth.
- Pour the base into your CREAMi pint, keeping below the MAX FILL line, then snap the lid closed.
- Freeze the pint flat for a full 24 hours so it sets evenly.
- Place the pint in the outer bowl, lock in the Creamerizer Paddle, and select the ICE CREAM program.
- Let the full cycle run, then check the texture. Run RE-SPIN when the base looks crumbly rather than smooth.
- Add the mini chocolate chips on top of the processed base and run the MIX-IN program to fold them through evenly.
- Serve right away for the best texture, since the chips stay crunchy longest right after mixing.
Flavor Variations Add a few drops of green food coloring for a classic mint-green look, or swap chocolate chips for chopped chocolate cookie pieces.
Storage Tips Level the surface before refreezing and store for up to two weeks for the freshest mint flavor.
6: Chocolate Peanut Butter Ice Cream
⏱ Time Prep Time: 10 minutes Churn Time: 3 minutes Total: 24 hours 13 minutes (includes freezing) Servings: 4
Why You’ll Love This Recipe Chocolate and peanut butter always work well together, and this version keeps both flavors bold without one drowning out the other. The peanut butter gets swirled in after processing, so you get streaks of it running through every scoop.
Ingredients
- 1 cup whole milk
- 1/2 cup heavy cream
- 1/3 cup granulated sugar
- 3 tablespoons unsweetened cocoa powder
- 1 pinch of salt
- 3 tablespoons creamy peanut butter, slightly warmed
How to Make It in the Ninja CREAMi
- Whisk the cocoa powder and sugar together in a bowl first, then slowly add the milk while whisking to avoid clumps.
- Stir in the heavy cream and salt until the mixture looks smooth and evenly colored.
- Pour the base into your CREAMi pint below the MAX FILL line, snap on the lid, and freeze flat for 24 hours.
- Place the frozen pint into the outer bowl, lock in the paddle, and choose the ICE CREAM program.
- Once the cycle finishes, run RE-SPIN when the texture looks dry or uneven anywhere in the pint.
- Drizzle the warmed peanut butter over the top of the processed base in a swirl pattern, then run the MIX-IN program for a light fold rather than a full blend.
- Serve immediately for the best swirl effect, since the peanut butter can blend in fully when it sits too long before eating.
Flavor Variations Fold in chopped peanuts for extra crunch, or use almond butter instead of peanut butter for a different nutty flavor.
Storage Tips Smooth the surface before refreezing, and eat within two weeks since the peanut butter swirl can firm up over time.
7: Salted Caramel Ice Cream
⏱ Time Prep Time: 15 minutes Churn Time: 3 minutes Total: 24 hours 18 minutes (includes freezing) Servings: 4
Why You’ll Love This Recipe The mix of sweet caramel and a touch of salt makes this one taste far more grown-up than a typical vanilla base. Making your own caramel sauce sounds like extra work, but it only takes a few minutes on the stove and pays off in flavor.
Ingredients
- 1/2 cup granulated sugar
- 2 tablespoons water
- 1/4 cup heavy cream (for caramel)
- 1/2 teaspoon flaky sea salt
- 1 cup whole milk
- 1/2 cup heavy cream (for base)
- 1 pinch of salt
How to Make It in the Ninja CREAMi
- In a small saucepan over medium heat, combine the sugar and water and let it cook without stirring until it turns a deep amber color, about 5 to 7 minutes.
- Remove the pan from the heat and slowly pour in the 1/4 cup of heavy cream while whisking, since the mixture will bubble up quickly.
- Stir in the sea salt, then set the caramel sauce aside to cool to room temperature.
- In a separate bowl, whisk together the milk, remaining heavy cream, and a pinch of salt until combined.
- Pour the milk mixture into your CREAMi pint below the MAX FILL line, then drizzle in half of the cooled caramel sauce and give it a light stir.
- Snap the lid on and freeze the pint flat for 24 hours, keeping the rest of the caramel sauce in the fridge.
- Place the frozen pint in the outer bowl, lock the paddle in place, and run the ICE CREAM program.
- Once finished, drizzle the remaining caramel over the top and run MIX-IN for a light swirl before serving.
Flavor Variations Add a pinch more sea salt on top for extra crunch, or fold in chocolate chunks for a turtle-style version.
Storage Tips Cover and freeze for up to two weeks, and give it a quick RE-SPIN when the caramel swirl firms up the texture too much after storage.
8: Birthday Cake Ice Cream
⏱ Time Prep Time: 10 minutes Churn Time: 3 minutes Total: 24 hours 13 minutes (includes freezing) Servings: 4
Why You’ll Love This Recipe This one tastes like a scoop of celebration, with sweet vanilla flavor and colorful sprinkles folded through a creamy base. It’s a great pick for birthdays, but honestly works for any random Tuesday that needs a little extra cheer.
Ingredients
- 1 cup whole milk
- 1/2 cup heavy cream
- 1/3 cup granulated sugar
- 1 1/2 teaspoons pure vanilla extract
- 1/4 teaspoon almond extract
- 1 pinch of salt
- 3 tablespoons rainbow sprinkles
How to Make It in the Ninja CREAMi
- Whisk together the milk, heavy cream, sugar, vanilla extract, almond extract, and salt in a bowl until the sugar fully dissolves.
- Pour the mixture into your CREAMi pint, staying below the MAX FILL line, and snap the lid on tightly.
- Freeze the pint flat for a full 24 hours so it sets all the way through.
- Place the pint in the outer bowl, lock in the Creamerizer Paddle, and select the ICE CREAM program.
- Let the cycle run completely, then check the texture and run RE-SPIN once when the base looks crumbly.
- Sprinkle the rainbow sprinkles over the processed base and run the MIX-IN program for a quick, gentle fold.
- Serve right away, since the sprinkles hold their color and crunch best soon after mixing.
Flavor Variations Fold in small pieces of yellow cake for an extra bakery-style touch, or swap in chocolate sprinkles for a different look.
Storage Tips Smooth the top before refreezing, and eat within one to two weeks since the sprinkle color can fade over time.
9: Butter Pecan Ice Cream
⏱ Time Prep Time: 15 minutes Churn Time: 3 minutes Total: 24 hours 18 minutes (includes freezing) Servings: 4
Why You’ll Love This Recipe Toasted pecans and a buttery base give this recipe a warm, nutty flavor that feels a little more special than an everyday scoop. Toasting the pecans first makes a real difference, bringing out a deeper flavor than raw nuts ever could.
Ingredients
- 3/4 cup pecan halves, roughly chopped
- 1 tablespoon unsalted butter
- 1 cup whole milk
- 1/2 cup heavy cream
- 1/3 cup packed brown sugar
- 1 teaspoon pure vanilla extract
- 1 pinch of salt
How to Make It in the Ninja CREAMi
- Melt the butter in a small skillet over medium heat, then add the chopped pecans and toast for 3 to 4 minutes, stirring often until fragrant.
- Remove the pecans from the heat and let them cool completely on a plate before using.
- Whisk together the milk, heavy cream, brown sugar, vanilla, and salt in a bowl until the sugar dissolves.
- Pour the mixture into your CREAMi pint below the MAX FILL line, snap the lid on, and freeze flat for 24 hours.
- Place the frozen pint in the outer bowl, lock in the paddle, and run the ICE CREAM program until complete.
- Check the texture and run RE-SPIN when needed for a smoother finish.
- Add the cooled, toasted pecans on top of the base and run the MIX-IN program to fold them in evenly.
- Serve right away for the best crunch from the toasted pecans.
Flavor Variations Drizzle in a spoonful of caramel sauce along with the pecans for a butter pecan caramel twist.
Storage Tips Store covered for up to two weeks, and keep in mind the pecans may soften slightly the longer the pint sits in the freezer.
10: Coffee Ice Cream
⏱ Time Prep Time: 10 minutes Churn Time: 2 minutes Total: 24 hours 12 minutes (includes freezing) Servings: 4
Why You’ll Love This Recipe Strong coffee flavor makes this base taste like a frozen version of your morning cup, and it works well on its own or as a base for an affogato-style dessert with a shot of espresso poured over the top.
Ingredients
- 1 cup whole milk
- 1/2 cup heavy cream
- 1/3 cup granulated sugar
- 2 tablespoons instant espresso powder
- 1 teaspoon pure vanilla extract
- 1 pinch of salt
How to Make It in the Ninja CREAMi
- Whisk the espresso powder into the milk first until it fully dissolves, since this prevents gritty bits in the finished base.
- Add the heavy cream, sugar, vanilla, and salt to the same bowl, whisking until everything is smooth and evenly combined.
- Pour the mixture into your CREAMi pint, keeping below the MAX FILL line, and snap the lid on securely.
- Freeze the pint flat for a full 24 hours.
- Place the frozen pint into the outer bowl, lock in the Creamerizer Paddle, and select the ICE CREAM program.
- Let the cycle run completely without stopping it early.
- Check the texture once done, and run RE-SPIN when the base looks crumbly rather than smooth and scoopable.
Flavor Variations Fold in chocolate-covered espresso beans for extra crunch, or swirl in a spoonful of caramel sauce for a coffee caramel version.
Storage Tips Smooth the surface before refreezing and store for up to two weeks for the boldest coffee flavor.
11: Mocha Ice Cream
⏱ Time Prep Time: 10 minutes Churn Time: 3 minutes Total: 24 hours 13 minutes (includes freezing) Servings: 4
Why You’ll Love This Recipe This one blends coffee and chocolate into a single rich base, giving you the best of both flavors in one scoop. It’s a little more intense than plain coffee ice cream, thanks to the added cocoa powder mixed right in.
Ingredients
- 1 cup whole milk
- 1/2 cup heavy cream
- 1/3 cup granulated sugar
- 2 tablespoons unsweetened cocoa powder
- 1 tablespoon instant espresso powder
- 1 teaspoon pure vanilla extract
- 1 pinch of salt
How to Make It in the Ninja CREAMi
- Whisk the cocoa powder, espresso powder, and sugar together in a bowl until evenly blended, breaking up any small clumps.
- Slowly pour in the milk while whisking, followed by the heavy cream, vanilla, and salt, until the base looks smooth and glossy.
- Pour the mixture into your CREAMi pint below the MAX FILL line, snap on the lid, and freeze flat for 24 hours.
- Place the frozen pint into the outer bowl, lock in the paddle, and select the ICE CREAM program.
- Let the cycle run fully, then check the texture once it stops.
- Run RE-SPIN when the base looks dry or uneven, which gives the paddle one more smoothing pass.
- Scoop and serve, or fold in chocolate-covered coffee beans using the MIX-IN program for extra texture.
Flavor Variations Add a splash of cinnamon for a spiced mocha version, or swirl in a little sweetened condensed milk for extra richness.
Storage Tips Level the surface before refreezing, and store for up to two weeks for the best coffee and chocolate flavor balance.
12: Banana Pudding Ice Cream
⏱ Time Prep Time: 12 minutes Churn Time: 3 minutes Total: 24 hours 15 minutes (includes freezing) Servings: 4
Why You’ll Love This Recipe Ripe bananas and a touch of vanilla pudding flavor come together here for a base that tastes like a frozen version of the classic Southern dessert. Crushed vanilla wafers folded in at the end add the perfect finishing touch.
Ingredients
- 1 ripe banana, mashed
- 3/4 cup whole milk
- 1/2 cup heavy cream
- 1/3 cup granulated sugar
- 1 teaspoon pure vanilla extract
- 1 pinch of salt
- 6 vanilla wafer cookies, crushed
How to Make It in the Ninja CREAMi
- Mash the banana in a bowl until smooth, then whisk in the milk, heavy cream, sugar, vanilla, and salt until fully combined.
- Pour the mixture into your CREAMi pint, keeping below the MAX FILL line, and snap the lid on tightly.
- Freeze the pint flat for a full 24 hours before processing.
- Place the frozen pint in the outer bowl, lock the Creamerizer Paddle into place, and choose the ICE CREAM program.
- Let the cycle finish completely, then check the texture and run RE-SPIN when the base looks crumbly.
- Sprinkle the crushed vanilla wafers over the top of the processed base and run the MIX-IN program to fold them through.
- Serve right away for the best mix of creamy base and crunchy cookie pieces.
Flavor Variations Layer in a few slices of fresh banana on top before serving, or fold in a spoonful of caramel sauce for extra sweetness.
Storage Tips Smooth the surface before refreezing and eat within one week, since banana flavor can fade the longer it sits frozen.
13: Oreo Blizzard Style Ice Cream
⏱ Time Prep Time: 10 minutes Churn Time: 3 minutes Total: 24 hours 13 minutes (includes freezing) Servings: 4
Why You’ll Love This Recipe This recipe copies the thick, blended texture of a soft-serve blizzard treat, but made completely at home. The MILKSHAKE program gives it that thicker, blended consistency instead of a scoopable ice cream texture.
Ingredients
- 1 cup whole milk
- 1/2 cup heavy cream
- 1/3 cup granulated sugar
- 1 teaspoon pure vanilla extract
- 1 pinch of salt
- 8 chocolate sandwich cookies, roughly broken
How to Make It in the Ninja CREAMi
- Whisk together the milk, heavy cream, sugar, vanilla, and salt in a bowl until the sugar dissolves completely.
- Pour the mixture into your CREAMi pint below the MAX FILL line, snap the lid on, and freeze flat for 24 hours.
- Place the frozen pint into the outer bowl, lock in the paddle, and select the ICE CREAM program.
- Once the cycle finishes, run RE-SPIN when the base looks crumbly instead of smooth.
- Add half of the broken cookies on top of the processed base and select the MILKSHAKE program to blend everything into a thicker, softer texture.
- Scoop into a cup or bowl and press the remaining cookie pieces on top for extra crunch.
- Serve right away with a spoon, since this style is meant to be thicker and softer than regular scoopable ice cream.
Flavor Variations Drizzle chocolate syrup over the top before serving, or swap in chocolate chip cookies for a different flavor combination.
Storage Tips This style is best enjoyed fresh, though leftovers can be frozen for up to one week and re-processed with RE-SPIN before serving again.
14: Cheesecake Ice Cream
⏱ Time Prep Time: 12 minutes Churn Time: 3 minutes Total: 24 hours 15 minutes (includes freezing) Servings: 4
Why You’ll Love This Recipe Cream cheese gives this base a tangy richness that tastes just like a slice of cheesecake, minus the crust and the baking. Crushed graham crackers folded in at the end bring back that familiar cheesecake base flavor.
Ingredients
- 4 ounces cream cheese, softened
- 3/4 cup whole milk
- 1/2 cup heavy cream
- 1/3 cup granulated sugar
- 1 teaspoon pure vanilla extract
- 1 pinch of salt
- 1/3 cup graham cracker crumbs
How to Make It in the Ninja CREAMi
- Beat the softened cream cheese in a bowl until smooth, then slowly whisk in the milk a little at a time to avoid lumps.
- Add the heavy cream, sugar, vanilla, and salt, whisking until the mixture looks fully smooth and creamy.
- Pour the base into your CREAMi pint below the MAX FILL line, snap the lid on, and freeze flat for 24 hours.
- Place the frozen pint into the outer bowl, lock in the Creamerizer Paddle, and choose the ICE CREAM program.
- Let the cycle run completely, then check the texture and run RE-SPIN when the base looks uneven or crumbly.
- Sprinkle the graham cracker crumbs over the processed base and run the MIX-IN program to fold them in evenly.
- Serve right away for the best texture and crunch from the graham cracker pieces.
Flavor Variations Swirl in a spoonful of fruit preserves for a berry cheesecake version, or add a drizzle of caramel for extra sweetness.
Storage Tips Smooth the surface before refreezing and store for up to two weeks for the best flavor and texture.
15: Brownie Batter Ice Cream
⏱ Time Prep Time: 12 minutes Churn Time: 3 minutes Total: 24 hours 15 minutes (includes freezing) Servings: 4
Why You’ll Love This Recipe This base tastes like a spoonful of raw brownie batter, minus any concern about eating uncooked eggs, since this version skips them completely. Chunks of brownie folded in at the end make every bite feel extra indulgent.
Ingredients
- 1 cup whole milk
- 1/2 cup heavy cream
- 1/3 cup granulated sugar
- 1/4 cup unsweetened cocoa powder
- 1 teaspoon pure vanilla extract
- 1 pinch of salt
- 1/2 cup brownie pieces, cut small
How to Make It in the Ninja CREAMi
- Whisk the cocoa powder and sugar together dry in a bowl, then slowly add the milk while whisking to keep the mixture smooth.
- Stir in the heavy cream, vanilla, and salt until the base looks glossy and evenly mixed.
- Pour the mixture into your CREAMi pint below the MAX FILL line, snap the lid on, and freeze flat for 24 hours.
- Place the frozen pint into the outer bowl, lock the paddle into place, and select the ICE CREAM program.
- Let the full cycle run, then run RE-SPIN when the texture looks dry or uneven after the first pass.
- Add the brownie pieces on top of the processed base and run the MIX-IN program to fold them through evenly.
- Serve right away for the best contrast between the creamy base and the soft brownie chunks.
Flavor Variations Fold in mini chocolate chips along with the brownie pieces for extra chocolate flavor, or add a swirl of peanut butter for a different combination.
Storage Tips Smooth the top before refreezing and store for up to two weeks, though the brownie pieces taste best within the first week.
16: Mango Sorbet
⏱ Time Prep Time: 10 minutes Churn Time: 2 minutes Total: 24 hours 12 minutes (includes freezing) Servings: 4
Why You’ll Love This Recipe This sorbet tastes bright, sweet, and completely dairy-free, making it a good pick for anyone avoiding dairy or just craving something lighter. Ripe mango gives it natural sweetness, so you don’t need much added sugar at all.
Ingredients
- 2 cups ripe mango chunks, fresh or frozen and thawed
- 1/3 cup water
- 3 tablespoons granulated sugar
- 1 tablespoon lime juice
How to Make It in the Ninja CREAMi
- Add the mango chunks, water, sugar, and lime juice to a blender and blend until completely smooth, with no chunks remaining.
- Taste the mixture and add a touch more sugar when the mango isn’t very ripe or sweet.
- Pour the puree into your CREAMi pint below the MAX FILL line and snap the lid on tightly.
- Freeze the pint flat for a full 24 hours until solid all the way through.
- Place the frozen pint into the outer bowl, lock in the Creamerizer Paddle, and select the SORBET program.
- Let the cycle run completely without opening the lid early.
- Check the texture once done, and run RE-SPIN when the sorbet looks icy rather than smooth and scoopable.
Flavor Variations Add a small piece of fresh ginger before blending for a spicy kick, or swap in pineapple for a tropical variation.
Storage Tips Smooth the surface before refreezing and store for up to two weeks for the brightest fruit flavor.
17: Raspberry Sorbet
⏱ Time Prep Time: 10 minutes Churn Time: 2 minutes Total: 24 hours 12 minutes (includes freezing) Servings: 4
Why You’ll Love This Recipe Tart raspberries give this sorbet a bold, tangy flavor that balances out perfectly with a little added sugar. It’s a great option for warm days when a lighter, fruit-forward treat sounds better than a heavy ice cream base.
Ingredients
- 2 cups fresh or frozen raspberries, thawed when using frozen berries
- 1/3 cup water
- 1/4 cup granulated sugar
- 1 teaspoon lemon juice
How to Make It in the Ninja CREAMi
- Add the raspberries, water, sugar, and lemon juice to a blender and blend until fully smooth.
- Pour the mixture through a fine strainer into a bowl to remove the seeds, pressing with the back of a spoon to get out as much liquid as possible.
- Pour the strained puree into your CREAMi pint below the MAX FILL line and snap the lid on.
- Freeze the pint flat for a full 24 hours.
- Place the frozen pint into the outer bowl, lock in the paddle, and choose the SORBET program.
- Let the full cycle run, then check the texture once it stops.
- Run RE-SPIN when the sorbet looks grainy or icy instead of smooth.
Flavor Variations Mix in a splash of orange juice for a citrus twist, or blend in a few fresh mint leaves for a cooler finish.
Storage Tips Level the surface before refreezing, and store for up to two weeks for the best texture and tart flavor.
18: Pineapple Dole Whip Style Ice Cream
⏱ Time Prep Time: 8 minutes Churn Time: 2 minutes Total: 24 hours 10 minutes (includes freezing) Servings: 4
Why You’ll Love This Recipe This copies the sweet, tangy, soft-serve style treat known from theme park stands, but made right in your own kitchen. It’s naturally dairy-free and only needs a couple of ingredients to pull together.
Ingredients
- 2 cups frozen pineapple chunks, thawed slightly
- 1/2 cup pineapple juice
- 2 tablespoons granulated sugar
How to Make It in the Ninja CREAMi
- Add the pineapple chunks, pineapple juice, and sugar to a blender and blend until completely smooth.
- Pour the mixture into your CREAMi pint below the MAX FILL line and snap the lid on tightly.
- Freeze the pint flat for a full 24 hours until solid.
- Place the frozen pint into the outer bowl, lock in the Creamerizer Paddle, and select the SORBET program.
- Let the cycle run completely, then check the texture once finished.
- For a softer, soft-serve style texture, run the SMOOTHIE BOWL program right after the sorbet cycle for an extra pass.
- Scoop right away for a texture closest to the classic soft-serve version, since this style is best enjoyed fresh.
Flavor Variations Add a small splash of coconut cream for a creamier version, or top with fresh pineapple chunks before serving.
Storage Tips This one is best eaten fresh, though leftovers can be frozen for up to one week and re-processed before serving again.
19: Lemon Sorbet
⏱ Time Prep Time: 10 minutes Churn Time: 2 minutes Total: 24 hours 12 minutes (includes freezing) Servings: 4
Why You’ll Love This Recipe Sharp, sweet, and refreshing, this lemon sorbet works well as a light dessert or a palate cleanser between courses at a bigger meal. The flavor stays bold thanks to both lemon juice and a bit of lemon zest mixed in.
Ingredients
- 1 cup fresh lemon juice
- 1 tablespoon lemon zest
- 1 1/4 cups water
- 3/4 cup granulated sugar
How to Make It in the Ninja CREAMi
- In a small saucepan, combine the water and sugar over medium heat, stirring until the sugar fully dissolves into a simple syrup.
- Remove the syrup from heat and let it cool to room temperature, about 10 minutes.
- Stir the lemon juice and lemon zest into the cooled syrup until fully combined.
- Pour the mixture into your CREAMi pint below the MAX FILL line and snap the lid on tightly.
- Freeze the pint flat for a full 24 hours.
- Place the frozen pint into the outer bowl, lock in the paddle, and select the SORBET program.
- Let the cycle run completely, then run RE-SPIN when the texture looks icy rather than smooth and scoopable.
Flavor Variations Add a splash of vodka before freezing for a grown-up version with a softer texture, or mix in fresh mint for a cooler finish.
Storage Tips Smooth the surface before refreezing and store for up to two weeks for the brightest citrus flavor.
20: High Protein Vanilla Ice Cream
⏱ Time Prep Time: 8 minutes Churn Time: 2 minutes Total: 24 hours 10 minutes (includes freezing) Servings: 4
Why You’ll Love This Recipe Made with protein powder and Greek yogurt, this recipe gives you a lighter dessert that still tastes creamy and satisfying. It’s a solid pick for anyone tracking protein intake without wanting to give up dessert entirely.
Ingredients
- 1 cup unsweetened almond milk
- 1/2 cup plain Greek yogurt
- 1 scoop vanilla protein powder
- 2 tablespoons honey or sugar substitute
- 1 teaspoon pure vanilla extract
- 1 pinch of salt
How to Make It in the Ninja CREAMi
- Whisk together the almond milk, Greek yogurt, protein powder, honey, vanilla, and salt in a bowl until fully smooth with no lumps.
- Pour the mixture into your CREAMi pint below the MAX FILL line and snap the lid on securely.
- Freeze the pint flat for a full 24 hours.
- Place the frozen pint into the outer bowl, lock in the Creamerizer Paddle, and select the LITE ICE CREAM program.
- Let the cycle run completely, then check the texture once it stops.
- Run RE-SPIN when the base looks dry or crumbly, which is common with lighter, protein-based bases.
- Serve right away, or fold in fresh berries using the MIX-IN program for added flavor and fiber.
Flavor Variations Swap vanilla protein powder for chocolate for a richer flavor, or add a spoonful of peanut butter powder for a nutty twist.
Storage Tips Smooth the surface before refreezing and store for up to two weeks, running RE-SPIN again when the texture firms up too much.
21: Keto Chocolate Ice Cream
⏱ Time Prep Time: 10 minutes Churn Time: 2 minutes Total: 24 hours 12 minutes (includes freezing) Servings: 4
Why You’ll Love This Recipe This low-carb version swaps sugar for a keto-friendly sweetener and uses heavy cream to keep the texture rich, so you get bold chocolate flavor without the added carbs. It’s a solid option for anyone following a low-carb or keto style of eating.
Ingredients
- 1 cup heavy cream
- 1/2 cup unsweetened almond milk
- 1/3 cup granular keto-friendly sweetener
- 3 tablespoons unsweetened cocoa powder
- 1 teaspoon pure vanilla extract
- 1 pinch of salt
How to Make It in the Ninja CREAMi
- Whisk the cocoa powder and sweetener together dry in a bowl, then slowly add the almond milk while whisking until smooth.
- Stir in the heavy cream, vanilla, and salt until the base looks fully combined and glossy.
- Pour the mixture into your CREAMi pint below the MAX FILL line and snap the lid on tightly.
- Freeze the pint flat for a full 24 hours.
- Place the frozen pint into the outer bowl, lock in the Creamerizer Paddle, and select the LITE ICE CREAM program.
- Let the cycle run completely, then check the texture once it stops.
- Run RE-SPIN when the base looks crumbly, which happens more often with lower-sugar bases like this one.
Flavor Variations Add a few drops of peppermint extract for a keto mint chocolate version, or stir in sugar-free chocolate chips using the MIX-IN program.
Storage Tips Smooth the surface before refreezing and store for up to two weeks, keeping in mind lower-sugar bases can freeze slightly harder than traditional recipes.
22: Dairy-Free Coconut Ice Cream
⏱ Time Prep Time: 8 minutes Churn Time: 2 minutes Total: 24 hours 10 minutes (includes freezing) Servings: 4
Why You’ll Love This Recipe Full-fat coconut milk creates a naturally creamy base without any dairy at all, making this a great choice for anyone avoiding milk or cream. The coconut flavor comes through clean and rich, close to a tropical dessert.
Ingredients
- 1 can (13.5 oz) full-fat coconut milk
- 1/4 cup granulated sugar
- 1 teaspoon pure vanilla extract
- 1 pinch of salt
How to Make It in the Ninja CREAMi
- Shake the can of coconut milk well before opening, then pour it into a bowl along with the sugar, vanilla, and salt.
- Whisk everything together until the sugar fully dissolves and the mixture looks smooth.
- Pour the base into your CREAMi pint below the MAX FILL line and snap the lid on securely.
- Freeze the pint flat for a full 24 hours.
- Place the frozen pint into the outer bowl, lock in the Creamerizer Paddle, and select the ICE CREAM program.
- Let the cycle run completely, then check the texture once it finishes.
- Run RE-SPIN when the base looks icy or crumbly, since coconut milk can freeze a little harder than dairy.
Flavor Variations Fold in toasted coconut flakes for extra texture, or add chopped mango using the MIX-IN program for a tropical combination.
Storage Tips Smooth the surface before refreezing and store for up to two weeks for the richest coconut flavor.
23: Blueberry Cheesecake Ice Cream
⏱ Time Prep Time: 12 minutes Churn Time: 3 minutes Total: 24 hours 15 minutes (includes freezing) Servings: 4
Why You’ll Love This Recipe This one combines a tangy cream cheese base with a sweet blueberry swirl and a few crushed graham crackers, giving you three favorite flavors in a single scoop. It looks as good as it tastes, with purple streaks running through the creamy base.
Ingredients
- 3 ounces cream cheese, softened
- 3/4 cup whole milk
- 1/2 cup heavy cream
- 1/3 cup granulated sugar
- 1 teaspoon pure vanilla extract
- 1/2 cup fresh or frozen blueberries
- 2 tablespoons water
- 1 tablespoon sugar (for blueberry swirl)
- 1/4 cup graham cracker crumbs
How to Make It in the Ninja CREAMi
- In a small saucepan, combine the blueberries, water, and 1 tablespoon of sugar over medium heat, cooking for about 5 minutes until the berries break down into a thick sauce. Set aside to cool.
- Beat the softened cream cheese in a bowl until smooth, then whisk in the milk, heavy cream, remaining sugar, and vanilla until fully combined.
- Pour the cream cheese mixture into your CREAMi pint below the MAX FILL line and snap the lid on.
- Freeze the pint flat for a full 24 hours, keeping the cooled blueberry sauce covered in the fridge.
- Place the frozen pint into the outer bowl, lock in the Creamerizer Paddle, and select the ICE CREAM program.
- Once the cycle finishes, run RE-SPIN when needed for a smoother texture.
- Drizzle the blueberry sauce over the top, sprinkle the graham cracker crumbs on top of that, and run the MIX-IN program for a light swirl.
Flavor Variations Swap blueberries for blackberries or mixed berries for a different fruity swirl, or add a touch of lemon zest to the base for extra brightness.
Storage Tips Smooth the surface before refreezing and store for up to two weeks for the best mix of creamy base and fruity swirl.
24: Pumpkin Pie Ice Cream
⏱ Time Prep Time: 12 minutes Churn Time: 3 minutes Total: 24 hours 15 minutes (includes freezing) Servings: 4
Why You’ll Love This Recipe Warm spices and real pumpkin puree make this base taste like a frozen slice of pie, perfect for cooler months or anyone who loves fall flavors year-round. It comes together fast, with no baking required at all.
Ingredients
- 3/4 cup canned pumpkin puree
- 3/4 cup whole milk
- 1/2 cup heavy cream
- 1/3 cup packed brown sugar
- 1 teaspoon ground cinnamon
- 1/4 teaspoon ground nutmeg
- 1/8 teaspoon ground cloves
- 1 pinch of salt
How to Make It in the Ninja CREAMi
- Whisk together the pumpkin puree, milk, heavy cream, brown sugar, cinnamon, nutmeg, cloves, and salt in a bowl until fully smooth.
- Pour the mixture into your CREAMi pint below the MAX FILL line and snap the lid on tightly.
- Freeze the pint flat for a full 24 hours.
- Place the frozen pint into the outer bowl, lock in the Creamerizer Paddle, and select the ICE CREAM program.
- Let the cycle run completely, then check the texture once it stops.
- Run RE-SPIN when the base looks crumbly, since pumpkin puree can sometimes freeze a bit denser than a standard base.
- Serve right away, or fold in crushed graham crackers or gingersnap cookies using the MIX-IN program for extra crunch.
Flavor Variations Add a swirl of caramel sauce for a pumpkin caramel version, or top with crushed pecans for a bit of crunch.
Storage Tips Smooth the surface before refreezing and store for up to two weeks for the best spiced flavor.
25: Apple Pie Ice Cream
⏱ Time Prep Time: 15 minutes Churn Time: 3 minutes Total: 24 hours 18 minutes (includes freezing) Servings: 4
Why You’ll Love This Recipe Cooked cinnamon apples folded through a creamy vanilla base give this recipe the flavor of apple pie without turning on the oven. It’s a cozy dessert that works well any time of year, not just during apple season.
Ingredients
- 1 cup peeled, diced apple
- 1 tablespoon unsalted butter
- 2 tablespoons brown sugar
- 1/2 teaspoon ground cinnamon
- 1 cup whole milk
- 1/2 cup heavy cream
- 1/3 cup granulated sugar
- 1 teaspoon pure vanilla extract
- 1 pinch of salt
How to Make It in the Ninja CREAMi
- Melt the butter in a skillet over medium heat, then add the diced apple, brown sugar, and cinnamon, cooking for 5 to 6 minutes until the apples soften. Set aside to cool completely.
- Whisk together the milk, heavy cream, granulated sugar, vanilla, and salt in a separate bowl until the sugar dissolves.
- Pour the milk mixture into your CREAMi pint below the MAX FILL line and snap the lid on tightly.
- Freeze the pint flat for a full 24 hours, storing the cooled cooked apples covered in the fridge.
- Place the frozen pint into the outer bowl, lock in the Creamerizer Paddle, and select the ICE CREAM program.
- Once the cycle finishes, run RE-SPIN when the base looks crumbly rather than smooth.
- Add the cooled cinnamon apples on top of the processed base and run the MIX-IN program to fold them through evenly.
Flavor Variations Sprinkle crushed pie crust or graham crackers on top for extra texture, or add a drizzle of caramel sauce for a caramel apple twist.
Storage Tips Smooth the surface before refreezing and store for up to two weeks, though the apple pieces taste best within the first week.
Expert Tips for the Creamiest Ninja CREAMi Recipes
Getting a smooth, scoopable texture every time comes down to a few small habits. Here’s what makes the biggest difference.
- Don’t skip the 24-hour freeze. This step might feel like it’s taking forever, but it’s actually the part of the process that sets up that creamy final texture. Cutting it short usually leads to a base that’s still too soft to process well.
- Freeze pints level. A tilted pint freezes unevenly, which can throw off the whole processing cycle.
- Choose the correct preset. Matching your base to the right program, ICE CREAM, LITE ICE CREAM, or SORBET, gives you the best shot at a smooth result on the first try.
- Use Re-Spin for extra creaminess. A crumbly texture right after processing is completely normal and easy to fix with one more cycle.
- Add mix-ins after the first processing cycle. Folding in cookies, candy, or fruit too early can turn them to mush during processing, so save them for the MIX-IN step.
- Don’t overfill the pint. Staying below the MAX FILL line keeps the paddle able to move freely and process the base evenly.
- Let very hard pints sit for 2 to 5 minutes when needed. When a pint feels rock solid straight from the freezer, a short rest on the counter can help the machine process it more smoothly.
- Label freezer pints with the flavor and date. This small step saves a lot of guesswork later, especially once you start keeping a few flavors frozen and ready at once.
How to Store Homemade Ninja CREAMi Ice Cream
Homemade ice cream doesn’t need anything complicated for storage, just a few good habits to keep the texture right.
1. Freeze in the original pint with the lid on. The pint is built to fit the machine, so keeping ice cream in it makes future processing easy and mess-free.
2. Smooth the surface before refreezing. Pressing the top flat with the back of a spoon helps the next processing cycle turn out evenly.
3. Store for up to 2 to 3 weeks for the best texture. Homemade ice cream doesn’t have the same preservatives as store-bought versions, so it tastes best within this window.
4. Use Re-Spin after storing when the ice cream becomes crumbly. A quick cycle brings back that smooth, scoopable texture even after a week or two in the freezer.
5. Avoid repeated thawing and refreezing. Letting a pint melt and refreeze over and over can lead to ice crystals forming, which affects both texture and flavor.
Conclusion
Making your own frozen desserts at home might sound like it takes a lot of skill, but it’s actually quite the opposite! Once you get the hang of freezing a base and picking the right program, the whole process becomes second nature.
Try mixing up your own flavor combinations once you’ve worked through a few of these recipes. Swap fruits, add different mix-ins, or blend two flavors together to create something new.
Remember that your Ninja CREAMi can do far more than basic ice cream. Between sorbets, milkshakes, and smoothie bowls, there’s a lot more to explore beyond a simple vanilla base.
Save this collection of Ninja CREAMi Ice Cream Maker recipes for the next time a craving hits, and share your favorite flavor with someone who might enjoy it too. Bookmark this page so it’s easy to find whenever you need a little inspiration for your next batch.