
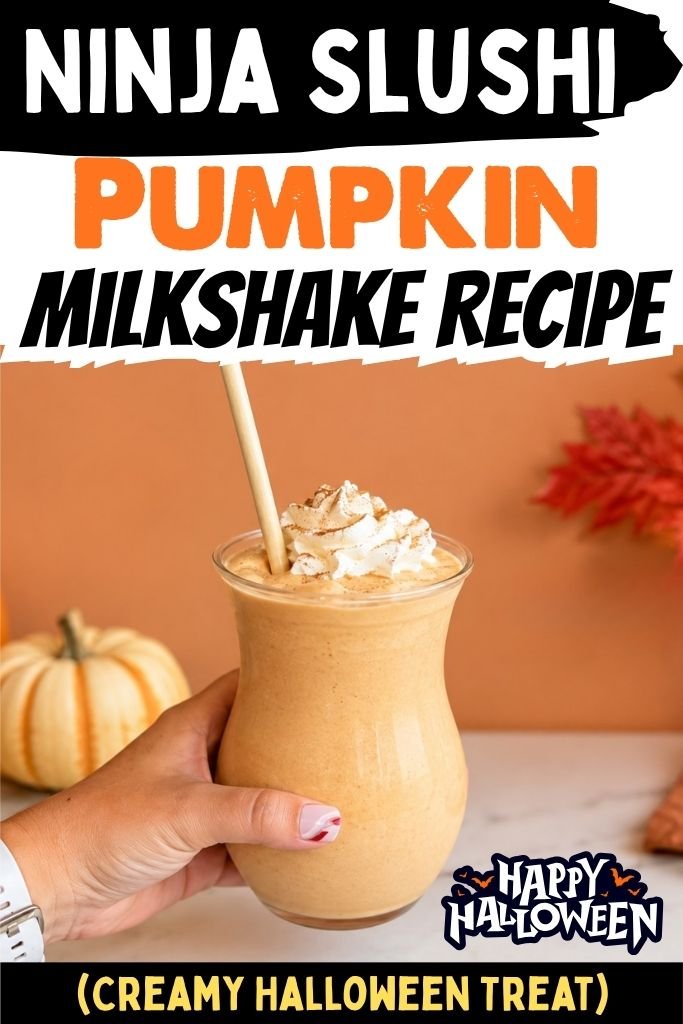
Fall is here, and it’s the best time to make a spooky, sweet treat everyone will love. This Ninja Slushi Pumpkin Milkshake Recipe turns simple kitchen items into a creamy, cold drink that feels just right for the spooky season.
It’s thick, smooth, and full of warm pumpkin spice flavor in every sip. You don’t need extra ice cubes or a lot of steps to get that perfect frozen texture.
The Ninja Slushi machine does the hard part for you, turning liquid ingredients into a rich, thick shake without melting fast or getting watery.
This drink works great for Halloween parties, spooky movie nights, or a cozy fall get-together with friends. Picture a table full of candy, pumpkin treats, and this creamy milkshake sitting right in the middle as the star drink.
The orange color alone makes it look like a true Halloween classic. Pumpkin puree, warm spices, and cold milk blend together to create a smooth, velvety drink that tastes like fall in a cup. Grab your Ninja Slushi and get ready to make a treat that looks spooky and tastes amazing.
Why You’ll Love This Halloween Pumpkin Milkshake
This Halloween pumpkin milkshake earns a top spot on the fall treat list for so many good reasons. It’s perfect for Halloween parties since it looks festive and tastes like a true seasonal treat.
The pumpkin spice flavor is bold and warm without being too strong, so even picky eaters enjoy it. Thanks to the Ninja Slushi, the drink turns out thick and creamy without needing a single ice cube, which keeps the flavor rich instead of watered down.
Making this milkshake is simple, so beginner cooks and kids in the kitchen can help pour ingredients and press buttons.
It’s also easy to customize with extra toppings, more spice, or a sweeter taste based on personal preference. This creamy treat fits right into any fall celebration, from classroom parties to backyard bonfires.
Why the Ninja Slushi Is Perfect for Halloween Milkshakes
The Ninja Slushi machine makes this pumpkin milkshake recipe simple and mess-free from start to finish. The Milkshake preset is built just for creamy, dairy-based drinks, so it knows exactly how to turn your pumpkin mix into a smooth, frozen treat.
Since the machine doesn’t need ice, the pumpkin flavor stays strong and never gets watered down like blender milkshakes often do. Every batch comes out with the same smooth, consistent texture, which means no more lumpy or uneven shakes.
The temperature control lets you choose a thinner drink for sipping through a straw or a thicker one for spooning like soft-serve.
This kind of control makes the machine a great pick for Halloween parties where guests may want different textures. It takes away the guesswork and gives a smooth, professional-style frozen drink right from your own counter.
Ninja Slushi Pumpkin Milkshake Ingredients & Substitutions
- Whole Milk – Whole milk gives this shake a rich, creamy base. Low-fat milk or oat milk also works, though the drink turns out a little lighter.
- Heavy Cream – Heavy cream makes the shake extra thick and creamy once it freezes in the machine. Half-and-half also works for a slightly lighter texture.
- Canned Pumpkin Puree – Pure pumpkin puree brings that warm, earthy pumpkin taste and pretty orange color. Grab plain pumpkin puree, not pumpkin pie filling, since that already has added sugar and spice mixed in.
- Pumpkin Pie Spice – This spice blend of cinnamon, nutmeg, ginger, and cloves gives the drink its warm, cozy fall flavor. A mix of cinnamon and nutmeg also works in a pinch.
- Brown Sugar or Maple Syrup – Either sweetener adds a warm, caramel-like sweetness that pairs nicely with pumpkin spice. Honey also works as a sweetener swap.
- Vanilla Extract – A small splash rounds out the flavor and adds a warm, sweet note to the milkshake.
- Pinch of Salt – A tiny pinch balances the sweetness and makes the pumpkin spice flavor pop.
- Whipped Cream – This topping adds a light, fluffy finish on top of the drink. Coconut whipped cream also works for a dairy-light option.
- Caramel Sauce – A drizzle on top adds extra sweetness and a nice look for parties. Chocolate syrup also works as a fun topping swap.
Kitchen Equipment You’ll Need
- Ninja Slushi machine – makes the frozen drink
- Measuring cups – for milk and pumpkin
- Measuring spoons – for spices and syrup
- Large mixing bowl – to combine ingredients first
- Whisk – blends everything smooth and even
- Rubber spatula – scrapes the bowl clean
- Serving cups – for pouring the finished milkshake
How to Make Ninja Slushi Pumpkin Milkshake
Step 1 | Gather and Measure Your Ingredients
Pour out all your ingredients so you have everything ready to go. Measure 3 cups of whole milk, ½ cup of heavy cream, 1 cup of canned pumpkin puree, 2 teaspoons of pumpkin pie spice, ¼ cup of brown sugar or maple syrup, 1 teaspoon of vanilla extract, and a small pinch of salt. Having your ingredients measured first makes the next steps go fast and smooth.
Step 2 | Mix the Pumpkin Milkshake Base
In a large mixing bowl, whisk together the milk, heavy cream, pumpkin puree, pumpkin pie spice, brown sugar, vanilla extract, and salt. Stir until the mixture turns smooth and fully blended, with no lumps of pumpkin left behind. The mix should look creamy and light orange in color.
Step 3 | Check the Ninja Slushi Machine Setup
Make sure the Ninja Slushi vessel, auger, and evaporator parts are locked in place correctly, with the drip tray attached to the front of the machine. Plug in the machine and open the top cover to get ready for pouring.
Step 4 | Pour the Mixture Into the Machine
Slowly pour your pumpkin milkshake base into the vessel through the fill port on top. Keep the amount between 16 ounces and 64 ounces total liquid, since that range keeps the machine working at its best. Close the cover once you finish pouring.
Step 5 | Select the Milkshake Preset
Turn on the power button, then choose the Milkshake preset on the control panel. This setting starts at the best temperature for a thick, dairy-based frozen drink. In case you like a thicker or thinner shake, adjust the temperature setting to match your taste.
Step 6 | Let the Machine Freeze the Mixture
Let the machine run and freeze your milkshake base, which can take between 15 and 60 minutes based on the amount poured. The lights on the control panel will pulse while freezing, then turn solid and beep once your drink reaches the right temperature.
Step 7 | Dispense the Milkshake
Place a cup under the dispensing handle on the drip tray, then slowly pull the handle to pour out your creamy pumpkin milkshake. Release the handle once your cup is full.
Step 8 | Add Toppings and Serve
Top each milkshake with whipped cream, a drizzle of caramel sauce, and a small sprinkle of extra pumpkin pie spice. Serve right away for the best cold, creamy texture.
Tips for Making the Best Pumpkin Milkshake
- Chill Your Ingredients First – Cold milk and cream help the mixture freeze faster and give a thicker final texture.
- Don’t Overfill the Machine – Stay within the 16 to 64 ounce range so the machine can freeze the mixture evenly.
- Adjust Sweetness to Taste – Add a little more brown sugar or maple syrup in case your pumpkin puree tastes extra earthy.
- Use Pure Pumpkin, Not Pie Filling – Pure pumpkin puree keeps the sweetness level in your control instead of using a pre-sweetened mix.
- Save Room for Toppings – Leave a little space at the top of the cup for whipped cream and caramel drizzle.
- Run the Machine on a Flat Surface – A steady, level counter helps the auger and evaporator work correctly.
Halloween Party Serving Ideas
Last Halloween, I set up a small drink station with this pumpkin milkshake sitting right beside a spread of spooky snacks, and it turned into the most popular drink on the table.
Watching everyone grab a cup and go back for seconds made it clear this creamy treat belongs at every fall party. Here are some ways to serve it alongside other Halloween favorites:
- Serve with Halloween cupcakes for a matching sweet spread.
- Pair with pumpkin cookies for double the fall flavor.
- Set it alongside caramel apples for a classic autumn combo.
- Add it to a candy charcuterie board as the featured drink.
- Bring it to haunted house parties for a spooky, creamy treat.
- Pour it during Halloween movie nights for cozy, spooky sipping.
Storage Tips
This pumpkin milkshake tastes best right after it comes out of the Ninja Slushi, since the texture stays thick and smooth.
In case you have extra left over, pour it into a sealed container and store it in the freezer for up to two days.
The mixture will freeze solid, so let it sit at room temperature for about ten minutes before stirring or blending again to bring back a creamy texture. Skip reheating this drink, since heat will melt the frozen texture that makes it special.
Frequently Asked Questions
1. Can I use fresh pumpkin instead of canned puree?
Yes, cooked and mashed fresh pumpkin works well, though canned puree gives a smoother, more consistent texture.
2. Is this pumpkin milkshake gluten-free?
Yes, all the ingredients in this recipe are naturally gluten-free, though it’s smart to check labels on store-bought spice blends.
3. Can I make this milkshake without dairy?
Yes, swap the milk and cream for oat milk or coconut cream for a dairy-light version with a similar creamy texture.
4. How much does this recipe make?
This recipe makes about four servings, though the amount changes based on cup size and how much you pour into the machine.
5. Can kids help make this milkshake?
Yes, kids can help measure ingredients, pour the mixture, and press the buttons on the machine under adult supervision.
Ninja Slushi Pumpkin Milkshake Recipe
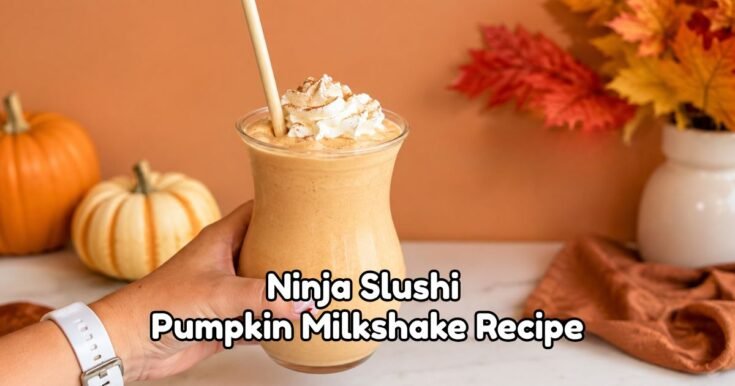
Make a creamy Ninja Slushi Pumpkin Milkshake in just 40 minutes with pumpkin puree, warm spices, and caramel for the perfect fall frozen treat.
Ingredients
- 3 cups whole milk
- ½ cup heavy cream
- 1 cup canned pumpkin puree
- 2 teaspoons pumpkin pie spice
- ¼ cup brown sugar or maple syrup
- 1 teaspoon vanilla extract
- 1 pinch salt
- Whipped cream, for topping
- Caramel sauce, for topping
- Extra pumpkin pie spice, for garnish (optional)
Instructions
- Gather and measure all of the ingredients. Measure the whole milk, heavy cream, pumpkin puree, pumpkin pie spice, brown sugar or maple syrup, vanilla extract, and salt.
- In a large mixing bowl, whisk together the milk, heavy cream, pumpkin puree, pumpkin pie spice, brown sugar, vanilla extract, and salt until smooth and creamy with no lumps remaining.
- Make sure the Ninja Slushi machine is assembled correctly with the vessel, auger, evaporator, and drip tray securely in place. Plug in the machine and open the fill port.
- Slowly pour the pumpkin milkshake mixture into the machine, keeping the liquid level between the minimum and maximum fill lines (16–64 ounces). Close the lid.
- Turn on the machine and select the Milkshake preset. Adjust the temperature if you prefer a thicker or thinner milkshake.
- Let the machine freeze the mixture until it reaches a thick, creamy consistency. This usually takes 15 to 60 minutes, depending on the amount of liquid.
- Place a serving glass beneath the dispensing handle and slowly dispense the frozen pumpkin milkshake.
- Top with whipped cream, a drizzle of caramel sauce, and a sprinkle of pumpkin pie spice if desired. Serve immediately and enjoy.
Nutrition Information:
Serving Size: 1Amount Per Serving: Calories: 245
This Ninja Slushi Pumpkin Milkshake Recipe brings warm pumpkin spice and creamy texture together in one cold, spooky treat.
It’s simple enough for beginners and tasty enough for any fall party. Try this recipe soon, and drop a comment below to share your thoughts. A star rating would mean so much too!