
A frozen drink maker can turn plain juice into a creamy, restaurant-style treat in a few short minutes. The Ninja SLUSHi Twist Smart Frozen Drink Maker has grown popular with home cooks because it skips the messy ice-crushing step and still produces a smooth, thick texture every time.
Instead of tossing ice cubes into a blender and hoping for the best, this machine uses a smart cooling system that freezes liquid slowly and evenly, so every cup comes out consistent from the first pour to the last.
Families like it for movie nights, parties love it for warm-weather gatherings, and anyone craving a cold treat can mix in their own flavors without any guesswork.
There is no ice blending needed, no watered-down taste, and no limit on creativity, since two flavors can be swirled together for a new combination each time.
This guide shares more than twenty easy Ninja SLUSHi Twist recipes, complete with ingredients and clear, step-by-step instructions, so making a cold frozen drink at home feels simple and enjoyable for anyone, any season.
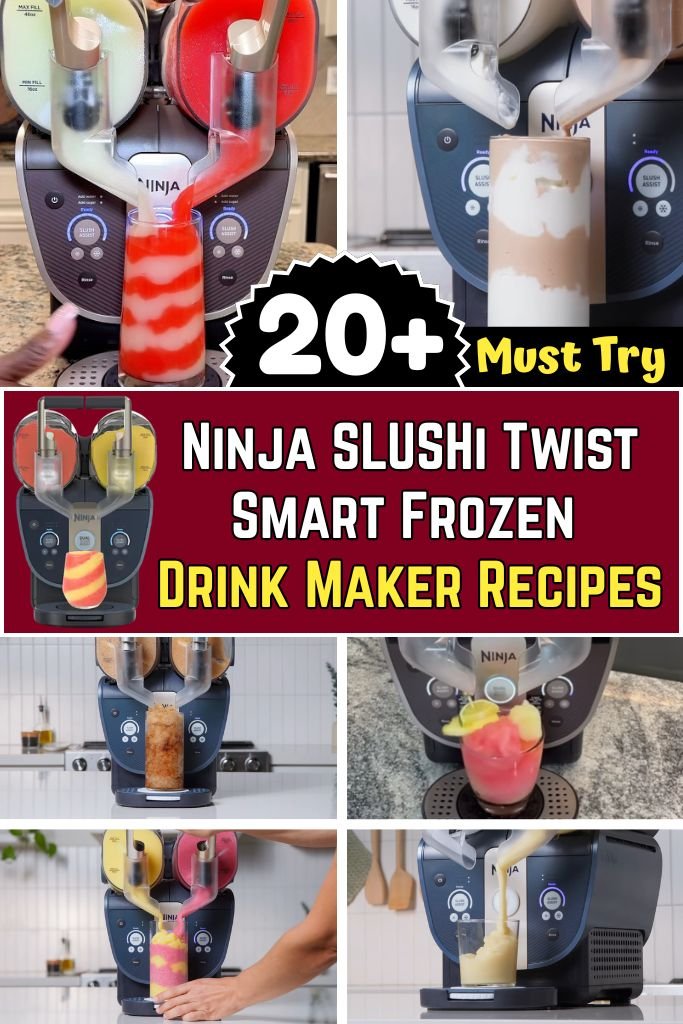
What Makes Ninja SLUSHi Twist Smart Frozen Drink Maker Different?
1. Smart freezing technology. The machine relies on a built-in cooling compressor along with rotating internal augers that scrape and fold liquid into fine, soft crystals instead of one solid block. Sugar in the recipe acts as a natural antifreeze, keeping the texture smooth rather than icy and hard.
2. Easier than a traditional blender. There is no need to crush ice cubes or clean out a loud, messy blender jar. Liquids go straight into the vessel, and the machine handles the freezing process on its own.
3. Suited for many drink styles. The smart sensors adjust to different sugar levels, which makes the machine a good match for fruit slushies, coffee-based frozen drinks, lemonades, mocktails, and dessert-style frozen beverages, all from the same two vessels.
1. Classic Strawberry Slush
Prep Time: 10 minutes | Slush Time: 20–25 minutes | Serve: 2–3 cups
Fresh strawberries blend into a naturally sweet, ruby-colored base that turns into a smooth frozen drink inside the Ninja SLUSHi Twist. A splash of lemon juice balances the sweetness of the berries, giving the finished slush a bright, fruity flavor. Sugar dissolved into the mixture helps the machine freeze the liquid into fine, even crystals rather than one solid block, so every scoop tastes fresh.
Ingredients
- 2 cups fresh strawberries, hulled and chopped
- 2 tablespoons lemon juice
- 1/3 cup granulated sugar
- 2 cups water or apple juice
Instructions
Start by rinsing the fresh strawberries under cool water and removing the green tops with a small knife. Cut each strawberry into quarters so they release their juice easily when mashed. Place the chopped strawberries into a mixing bowl, then use a fork or potato masher to break them down into a chunky puree. Small seeds and soft pulp are fine to leave in the mixture, since they will not change how the SLUSHi Twist freezes the liquid, though a fine strainer can be used at this stage for a smoother finish when a seedless drink is preferred.
Once the strawberries are mashed, stir the sugar directly into the fruit puree and let it sit for about five minutes. This short resting period allows the sugar to dissolve into the natural strawberry juice and pull out even more liquid from the fruit, creating a richer base flavor. Add the lemon juice next, stirring gently to combine, followed by the water or apple juice. Whisk the mixture until the sugar has fully dissolved and no dry granules remain at the bottom of the bowl.
Pour the finished strawberry base into one of the Ninja SLUSHi Twist vessels, checking that the liquid level stays below the 48 oz fill line marked on the container. Close the pouring cover securely on top of the vessel before turning the machine on. Press the power button, then select the SlushAssist setting so the built-in sensors can read the sugar content and adjust the internal temperature automatically for the right texture.
Allow the machine to run through its freezing cycle, which typically takes between twenty and twenty-five minutes depending on the room temperature and how cold the strawberry mixture was to begin with. The indicator light will flash steadily while the augers scrape and fold the liquid inside the vessel, breaking it into small, soft ice crystals rather than one frozen block. Once the light turns solid and the machine beeps, the strawberry slush is ready to pour.
Center a sturdy cup underneath the spinning drip tray, then pull the handle down slowly and steadily to release the frozen strawberry mixture into the cup. Serve right away for the best texture, and consider adding a few fresh strawberry slices on top for a simple finishing touch before handing the cup over to family or guests.
2. Mango Tropical Slush
Prep Time: 10 minutes | Slush Time: 20–25 minutes | Serve: 2–3 cups
Ripe mango chunks bring a warm golden color and a naturally sweet flavor to this tropical frozen drink. Lime juice adds a light citrus note that keeps the sweetness from feeling heavy, while a touch of extra sweetener helps the Ninja SLUSHi Twist form a smooth, scoopable texture. Mango juice thins the mixture just enough for the machine to freeze it evenly from edge to edge.
Ingredients
- 2 cups ripe mango chunks, fresh or thawed from frozen
- 1 1/2 cups mango juice
- 2 tablespoons lime juice
- 2 tablespoons sugar or honey
Instructions
Begin by checking the mango chunks for ripeness; the fruit should feel soft to the touch and smell sweet at the stem end. Frozen mango chunks work well too, as long as they are thawed completely and drained of extra liquid before blending, since too much water can throw off the balance of sugar needed for a good freeze. Place the mango pieces into a blender or food processor and puree until completely smooth, stopping once or twice to scrape down the sides so no chunks remain.
Pour the mango puree into a large pitcher, then add the mango juice, lime juice, and sweetener of choice. Stir the mixture thoroughly with a long spoon, tasting a small sample to check the balance between sweet and tangy flavors. Because sugar acts as a natural antifreeze inside the SLUSHi Twist, adding slightly more sweetener here will help the machine produce a softer, more scoopable texture rather than one that turns overly firm.
Carefully pour the finished mango base into one of the two vessels on the Ninja SLUSHi Twist, keeping the liquid under the 48 oz maximum fill line printed on the side. Secure the pouring cover, then press the power button followed by the SlushAssist button to begin the automatic freezing cycle. The internal sensors will read the sugar level in the mango mixture and set the compressor to the right cooling temperature without any extra guesswork needed.
While the machine works, the rotating augers inside the vessel will slowly fold and scrape the mixture along the cold walls, breaking the liquid into fine crystals instead of allowing it to harden into a solid block. This cycle usually takes about twenty to twenty-five minutes, though a warmer starting mixture may need a few extra minutes to reach the correct consistency. Watch for the flashing light to turn solid, along with a beep, which signals the mango slush has reached its ideal frozen texture.
Place a cup directly under the spinning drip tray and pull the handle down in one steady motion to dispense the tropical mango slush. For a colorful finish, drop a few extra mango chunks or a lime wedge on top before serving to family and friends at a summer gathering.
3. Watermelon Summer Slush
Prep Time: 10 minutes | Slush Time: 20 minutes | Serve: 2–3 cups
Juicy watermelon cubes create a light, hydrating base for this cool summer drink. A small amount of lime juice sharpens the natural sweetness of the melon, while sugar helps the Ninja SLUSHi Twist freeze the liquid into a soft, snow-like texture. Because watermelon holds so much natural water, this recipe turns into one of the lightest and most refreshing options on this list of frozen drink ideas.
Ingredients
- 4 cups seedless watermelon cubes
- 2 tablespoons lime juice
- 3 tablespoons sugar
- 1/2 cup water (optional, for a thinner texture)
Instructions
Cut a small watermelon into large chunks, then remove the rind and any visible seeds before cubing the flesh into pieces roughly one inch in size. Place the watermelon cubes into a blender and pulse several times until the fruit turns into a smooth, juicy liquid with no solid pieces remaining. Because watermelon naturally holds a large amount of water inside its flesh, this step usually produces enough liquid on its own without needing extra water added to the blender.
Pour the blended watermelon liquid through a fine mesh strainer set over a large bowl, pressing gently with the back of a spoon to remove any leftover pulp or fiber strands. A smoother liquid base helps the SLUSHi Twist freeze more evenly and produces a cleaner, icier texture once finished. Stir the sugar into the strained watermelon liquid until it fully dissolves, then add the lime juice for a touch of brightness that balances the melon’s natural sweetness.
Taste the mixture before pouring it into the machine, and add the optional half cup of water only when the liquid feels overly thick or syrupy. Since watermelon already contains plenty of natural sugar and water, most batches will not need this extra step, though personal preference can guide the final texture. Pour the finished watermelon mixture into a SLUSHi Twist vessel, staying below the 48 oz fill line, then close the cover securely.
Turn the machine on and press the SlushAssist button to start the freezing cycle. Because this mixture holds a slightly lower sugar content compared to some other fruit bases, keep an eye on the texture as the cycle runs, since watermelon slush can sometimes reach a thicker consistency a little faster than heavier fruit bases like mango or strawberry. The augers will scrape and fold the mixture continuously, keeping ice crystals small and light rather than clumped together.
Once the indicator light turns solid and the machine beeps, center a cup under the drip tray and pull the handle down slowly to release the watermelon slush. Serve the drink right away while it holds its coldest, lightest texture, and add a small watermelon wedge on the rim of the cup for a simple decorative touch that guests will enjoy on a warm afternoon.
4. Blue Raspberry Frozen Slush
Prep Time: 5 minutes | Slush Time: 20–25 minutes | Serve: 2–3 cups
Bright blue raspberry syrup turns plain lemonade into a bold, colorful party drink that looks as good as it tastes. The syrup carries most of the sweetness needed for the Ninja SLUSHi Twist to freeze properly, so only a small amount of an ice-free frozen drink base needs to be added. This recipe works well for birthday parties, school events, or any gathering that calls for a playful drink.
Ingredients
- 1 cup blue raspberry syrup
- 3 cups lemonade
- 1 cup ice-free frozen drink base (store-bought or homemade sugar syrup)
Instructions
Pour the blue raspberry syrup into a large pitcher first, since starting with the syrup makes it easier to judge how much lemonade will be needed to reach the right sweetness level. Add the lemonade slowly, stirring continuously with a long spoon so the deep blue color spreads evenly through the liquid instead of settling in clumps at the bottom of the pitcher.
Once the syrup and lemonade are fully combined, stir in the ice-free frozen drink base, which typically contains a concentrated sugar syrup designed to help machines like the SLUSHi Twist freeze liquid smoothly without turning into a solid chunk of ice. This base plays an important role here, since blue raspberry syrup alone may not carry quite enough sugar content for a soft, scoopable texture on its own.
Taste a small sample of the mixture at this point, adjusting with a touch more lemonade when the flavor tastes overly sweet, or a bit more syrup when a bolder color and flavor is wanted for the final drink. Once the balance feels right, pour the finished blue raspberry mixture into one of the SLUSHi Twist vessels, keeping the liquid level below the 48 oz maximum fill line printed on the container wall.
Secure the pouring cover on top, then turn the machine on and press the SlushAssist button to begin the freezing process. The internal sensors will detect the sugar content in the mixture and set the compressor to the ideal freezing temperature automatically. During the cycle, the rotating augers inside the vessel will continuously scrape the mixture along the cold walls, breaking it down into small, even ice crystals for a smooth, sippable finish.
This cycle generally takes between twenty and twenty-five minutes, though checking the manual temperature dial partway through can help fine-tune the thickness when a firmer texture is preferred for a party setting. Once the light turns solid and a beep sounds, the blue raspberry slush is ready to serve. Place a cup under the spinning drip tray, pull the handle down steadily, and pour the drink for guests. For an added colorful touch, rim the cup with sugar or a splash of grenadine before filling it with the finished slush.
5. Pineapple Coconut Slush
Prep Time: 10 minutes | Slush Time: 20–25 minutes | Serve: 2–3 cups
Sweet pineapple juice and creamy coconut milk combine into a tropical-style frozen drink that feels like a treat from a beachside cafe. Chunks of fresh pineapple add extra texture and natural sweetness once the mixture finishes freezing inside the Ninja SLUSHi Twist. Coconut milk brings a rich, smooth quality to the drink, balancing out the tangy pineapple flavor for a well-rounded frozen dessert-style beverage.
Ingredients
- 2 cups pineapple juice
- 1 cup coconut milk
- 1 cup fresh pineapple chunks
- 2 tablespoons sugar (optional, for extra sweetness)
Instructions
Shake the can of coconut milk thoroughly before opening it, since the thicker cream and lighter liquid inside tend to separate during storage. Pour the coconut milk into a large mixing bowl or pitcher, then whisk it briefly until the texture turns smooth and consistent throughout. A smooth coconut milk base helps the SLUSHi Twist freeze the mixture evenly, without any separated fat clumping together during the cycle.
Add the pineapple juice to the coconut milk, stirring slowly to combine the two liquids into one uniform tropical base. Chop the fresh pineapple chunks into small pieces, roughly the size of a fingertip, so they blend smoothly into the drink without clogging the machine’s internal parts during the freezing and dispensing process. Stir the chopped pineapple directly into the coconut and pineapple juice mixture.
Taste the combined base at this stage, adding the optional sugar only when the pineapple juice used was on the tart side or when a sweeter finished drink is preferred. Stir well until any added sugar fully dissolves into the liquid, leaving no gritty texture at the bottom of the bowl. Once the mixture tastes balanced, pour it carefully into one of the two SLUSHi Twist vessels, staying under the 48 oz fill line marked on the side of the container.
Close the pouring cover securely, then power on the machine and press the SlushAssist button. Because coconut milk carries natural fat content along with the sugar from the pineapple juice, the compressor may take a few extra minutes compared to lighter fruit juice recipes to reach the correct freezing point, so allow closer to twenty-five minutes for the best texture. The internal augers will continue folding and scraping the mixture throughout the cycle, keeping the coconut fat evenly distributed rather than separating out during freezing.
Watch for the indicator light to turn solid and listen for the beep that signals the drink has finished freezing. Place a sturdy cup under the spinning drip tray, then pull the handle down slowly to release the thick, creamy pineapple coconut slush into the cup. A small pineapple wedge or a light sprinkle of toasted coconut flakes on top rounds out the presentation nicely before serving to guests at a summer party or family cookout.
Citrus and Refreshing Frozen Drinks
6. Frozen Strawberry Lemonade
Prep Time: 10 minutes | Slush Time: 20–25 minutes | Serve: 2–3 cups
Sweet strawberries and tart lemon juice team up in this bright pink frozen lemonade that feels light on a warm day. Sugar smooths out the sharp lemon flavor while giving the Ninja SLUSHi Twist enough natural antifreeze to form a soft, even texture. Water thins the base just enough so the machine can freeze it into a snow-like consistency rather than a heavy, syrupy drink.
Ingredients
- 1 1/2 cups fresh strawberries, hulled
- 1/2 cup lemon juice
- 1/2 cup sugar
- 3 cups water
Instructions
Wash the strawberries under cool running water, then remove the leafy tops with a paring knife. Slice the berries into smaller pieces and place them into a blender along with a half cup of the water listed in the ingredients. Blend on high speed until the mixture turns into a smooth, seedless-looking liquid, pausing partway through to scrape down the sides of the blender so no larger chunks remain stuck near the blades.
Pour the blended strawberry liquid through a fine strainer into a large pitcher to catch any leftover seeds or pulp, pressing gently with a spoon to push as much liquid through as possible. Add the sugar directly into the warm strawberry liquid while it still holds a bit of blending heat, since this helps the sugar dissolve faster and more completely than adding it to a cold mixture. Stir continuously until no grainy texture remains at the bottom of the pitcher.
Add the lemon juice next, followed by the rest of the water, stirring the entire mixture until the color turns an even, light pink shade throughout. Taste a small spoonful at this point, adding a touch more sugar when the lemon flavor feels too sharp, or a splash more lemon juice when a tangier finished drink is wanted. Once the flavor balance feels right, pour the mixture into a large measuring cup for easier handling.
Carefully pour the strawberry lemonade base into one of the Ninja SLUSHi Twist vessels, keeping the liquid level below the 48 oz fill line printed on the container. Close the pouring cover, then press the power button followed by the SlushAssist button to begin the automatic freezing cycle. The built-in sensors will read the sugar content in the lemonade base and set the compressor temperature accordingly, without any manual adjustment needed at this stage.
As the cycle runs, the rotating augers will scrape the mixture continuously along the cold interior walls, breaking the liquid into fine, even crystals rather than one solid frozen mass. This process generally takes between twenty and twenty-five minutes. Once the indicator light turns solid and the machine beeps, center a cup under the spinning drip tray, pull the handle down steadily, and serve the strawberry lemonade slush right away with a lemon slice on the rim for a simple finishing touch.
7. Frozen Peach Lemonade
Prep Time: 10 minutes | Slush Time: 20–25 minutes | Serve: 2–3 cups
Soft, ripe peaches bring a mellow sweetness to this frozen lemonade twist, pairing naturally with the tart citrus base. Peach puree gives the drink a slightly thicker body compared to plain lemonade, which helps the Ninja SLUSHi Twist form a rich, velvety texture once frozen. A touch of sweetener rounds out the flavor, making this recipe a gentle, mellow option for warm afternoons on the porch.
Ingredients
- 2 cups peach puree (fresh or canned, drained)
- 3 cups lemonade
- 2 tablespoons sugar or honey, adjusted to taste
Instructions
When using fresh peaches, wash two or three ripe peaches, remove the pits, and chop the flesh into small pieces before blending until smooth. Canned peaches work as a shortcut too, as long as they are drained well first, since extra syrup or juice from the can can throw off the sugar balance needed for a proper freeze. Either way, the goal is a smooth, pourable peach puree with no large fruit chunks remaining.
Pour the peach puree into a large pitcher, then add the lemonade slowly while stirring with a long spoon. Mixing gradually rather than all at once helps the peach puree blend evenly into the lemonade instead of settling in a separate layer at the bottom of the pitcher. Continue stirring until the color turns a consistent, pale orange shade throughout the entire mixture.
Taste the combined lemonade and peach base, adding the sugar or honey only when the peaches used were on the tart side or when a sweeter finished drink is preferred. Stir thoroughly until any added sweetener fully dissolves, leaving a smooth, well-blended liquid with no separate layers or floating fruit pieces. Pour the finished mixture into a large measuring cup to make it easier to transfer into the machine.
Carefully pour the peach lemonade base into one of the two SLUSHi Twist vessels, staying below the 48 oz maximum fill line. Secure the pouring cover, then turn the machine on and press the SlushAssist button to start the freezing cycle. The internal sensors will detect the natural sugar content from the peaches and lemonade, adjusting the compressor to the correct freezing temperature without extra input needed.
While the cycle runs for roughly twenty to twenty-five minutes, the rotating augers will continuously fold and scrape the thickening liquid, keeping the texture soft and smooth rather than allowing it to harden unevenly. Watch for the light to turn solid and listen for the beep signaling the drink is ready. Place a cup under the spinning drip tray, pull the handle down slowly, and serve the peach lemonade slush with a thin peach slice resting on the rim of the cup.
8. Cherry Limeade Slush
Prep Time: 10 minutes | Slush Time: 20–25 minutes | Serve: 2–3 cups
Deep red cherry juice and sharp lime juice combine into a bold, tangy-sweet frozen drink with a fizzy finish. Sparkling water adds light bubbles to the base before freezing, giving the finished slush a slightly livelier texture once poured. This pairing of cherry and lime works well for warm-weather get-togethers, offering a bright, punchy flavor that differs from the sweeter fruit slushes on this list.
Ingredients
- 2 cups cherry juice
- 1/4 cup lime juice
- 1 1/2 cups sparkling water
- 2 tablespoons sugar (optional)
Instructions
Pour the cherry juice into a large pitcher first, checking the label when using a store-bought variety to confirm it does not already contain added carbonation or extra sweeteners that could change the final flavor balance. Add the lime juice next, stirring the two liquids together with a long spoon until the color turns a deep, even red throughout the pitcher.
Taste the combined cherry and lime mixture at this stage, adding the optional sugar only when the cherry juice used leans tart or unsweetened. Stir until any added sugar fully dissolves, leaving a smooth liquid with no gritty texture remaining. Once the flavor balance feels right, slowly pour in the sparkling water, stirring gently rather than briskly to avoid losing too much of the natural carbonation before the mixture goes into the machine.
Let the mixture settle for a minute or two so any large bubbles can rise and pop, since excess foam can make it harder to judge the true liquid level when pouring into the SLUSHi Twist vessel. Carefully pour the cherry limeade base into one of the two vessels, keeping the liquid below the 48 oz maximum fill line marked on the container.
Close the pouring cover, then power on the machine and press the SlushAssist button to begin the automatic freezing cycle. The internal sensors will read the sugar content in the cherry and lime base and adjust the compressor temperature accordingly. Because the sparkling water adds a slightly lighter body to the mixture compared to straight fruit juice, keep an eye on the texture partway through the cycle, since it may reach a soft, sippable consistency a little sooner than heavier fruit-based recipes.
The rotating augers will scrape and fold the mixture throughout the twenty to twenty-five minute cycle, keeping the ice crystals fine and light rather than clumped together. Once the indicator light turns solid and the machine beeps, center a cup under the spinning drip tray and pull the handle down slowly to release the finished cherry limeade slush. Serve right away while the light carbonation still holds, adding a lime wheel on the rim of the cup for a simple decorative touch.
9. Orange Creamsicle Frozen Drink
Prep Time: 10 minutes | Slush Time: 20–25 minutes | Serve: 2–3 cups
Orange juice and a splash of vanilla flavoring bring back the classic taste of a creamsicle in frozen drink form. Cream adds a smooth, rich quality to the mixture, softening the sharp citrus edge of the orange juice into something closer to a frozen dessert. This recipe pairs well with warm afternoons and works nicely as a lighter alternative to the coffee and chocolate drinks found later in this list.
Ingredients
- 3 cups orange juice
- 1 teaspoon vanilla flavoring
- 1 cup heavy cream or half-and-half
- 2 tablespoons sugar (optional, for extra sweetness)
Instructions
Pour the orange juice into a large mixing bowl or pitcher, checking that it has been well shaken or stirred first when using a carton that tends to separate during storage. Add the vanilla flavoring next, stirring it into the orange juice with a whisk so the flavor spreads evenly throughout the liquid rather than settling near the surface.
Slowly pour in the cream or half-and-half while continuing to whisk the mixture at a steady pace. Adding the cream gradually, rather than all at once, helps prevent the citrus acid in the orange juice from curdling the dairy, keeping the texture smooth instead of clumpy. Continue whisking until the mixture turns a soft, pale orange color with a fully blended, creamy appearance.
Taste the combined mixture at this point, adding the optional sugar only when the orange juice used leans tart or when a sweeter dessert-style drink is preferred. Whisk again until any added sugar dissolves completely, leaving a smooth liquid with no separated layers of cream or juice visible. Pour the finished mixture into a large measuring cup to make transferring it into the machine easier and less messy.
Carefully pour the orange creamsicle base into one of the two SLUSHi Twist vessels, staying below the 48 oz maximum fill line marked on the container wall. Close the pouring cover securely, then turn the machine on and press the SlushAssist button. Because this recipe contains dairy along with natural sugar from the orange juice, the compressor may take a little longer to reach the ideal freezing point compared to plain fruit juice recipes, so allow closer to twenty-five minutes for the best texture.
The rotating augers will continue folding and scraping the mixture throughout the cycle, keeping the cream evenly distributed rather than separating out during freezing. Once the indicator light turns solid and the machine beeps, place a cup under the spinning drip tray and pull the handle down slowly to release the finished orange creamsicle drink. Serve right away for the creamiest texture, adding a light dusting of orange zest on top for a simple finishing touch before handing the cup over to family or guests.
Coffee and Dessert-Inspired Ninja SLUSHi Recipes
10. Frozen Caramel Coffee
Prep Time: 10 minutes | Slush Time: 20–25 minutes | Serve: 2–3 cups
Cold brewed coffee turns into a smooth frozen treat once caramel syrup and milk join the mixture, creating a drink that tastes close to a coffee shop favorite made right at the counter. Milk softens the bitterness of the coffee, while caramel syrup adds sweetness along with the sugar content needed for the Ninja SLUSHi Twist to freeze the base into a soft, scoopable texture rather than a hard block.
Ingredients
- 3 cups cold brewed coffee, chilled
- 1 cup milk
- 1/2 cup caramel syrup
- Extra caramel syrup for drizzling (optional)
Instructions
Brew a strong pot of coffee ahead of time and let it cool completely in the refrigerator for at least two hours, since warm coffee added directly to the machine can slow down the freezing cycle and affect the final texture. Cold brew coffee also works well here and often produces a smoother, less bitter flavor compared to hot-brewed coffee that has been chilled quickly.
Once the coffee has cooled fully, pour it into a large pitcher along with the milk, stirring the two liquids together with a long spoon until the color turns a light, even brown throughout. Add the caramel syrup next, stirring continuously so the thick syrup blends smoothly into the coffee and milk mixture instead of settling in a sticky layer near the bottom of the pitcher.
Taste the combined mixture at this point, adding a bit more caramel syrup when a sweeter, richer flavor is preferred, since the sugar in the syrup plays an important role in how well the SLUSHi Twist freezes the coffee base. Stir until the mixture looks fully blended, with no separate streaks of syrup remaining visible on the surface.
Pour the finished caramel coffee base into one of the two SLUSHi Twist vessels, keeping the liquid level below the 48 oz maximum fill line marked on the container. Close the pouring cover securely, then power on the machine and press the SlushAssist button. Because this recipe contains dairy, the compressor may need a few extra minutes compared to fruit-based recipes, so plan for the freezing cycle to run closer to twenty-five minutes for the best results.
The rotating augers will continuously scrape and fold the coffee mixture along the cold interior walls, keeping the milk and caramel syrup evenly distributed rather than separating out during the freeze. Once the indicator light turns solid and the machine beeps, the caramel coffee slush is ready to pour. Place a cup under the spinning drip tray, pull the handle down slowly and steadily, and drizzle a little extra caramel syrup over the top before serving for a coffee shop style finish at home.
11. Mocha Frozen Coffee Drink
Prep Time: 10 minutes | Slush Time: 20–25 minutes | Serve: 2–3 cups
Rich chocolate syrup meets cold brewed coffee in this frozen mocha drink, giving the finished slush a deep, dessert-like flavor. Milk smooths out the bitterness from the coffee while helping the Ninja SLUSHi Twist reach a creamy, even texture. This recipe works well as an afternoon pick-me-up or as a cool alternative to a hot mocha on a warmer day.
Ingredients
- 3 cups cold brewed coffee, chilled
- 1/2 cup chocolate syrup
- 1 cup milk
- Whipped cream for topping (optional)
Instructions
Start with coffee that has been brewed and chilled ahead of time, since a colder starting liquid helps the SLUSHi Twist reach the correct freezing point more efficiently. Pour the chilled coffee into a large pitcher, then add the chocolate syrup, stirring with a long spoon until the syrup fully dissolves and the color turns a deep, even brown with no dark streaks remaining near the surface.
Add the milk next, stirring continuously so the dairy blends smoothly into the chocolate coffee base rather than sitting as a separate lighter layer on top. Taste the mixture at this stage, adding a bit more chocolate syrup when a richer, sweeter mocha flavor is preferred, since the added sugar also supports a smoother freeze once the mixture goes into the machine.
Once the flavor balance feels right, pour the finished mocha base into one of the two SLUSHi Twist vessels, staying below the 48 oz maximum fill line printed on the container. Secure the pouring cover on top, then turn the machine on and press the SlushAssist button to begin the freezing cycle. The internal sensors will read the sugar content in the chocolate syrup and adjust the compressor temperature to match.
Because this recipe includes both coffee and milk, allow the full twenty-five minute cycle to complete rather than checking too early, since dairy-based mixtures sometimes need slightly longer to reach a fully scoopable texture compared to plain fruit juice recipes. The rotating augers will keep folding and scraping the mixture throughout, preventing the chocolate syrup and milk from separating as the liquid thickens.
Once the light turns solid and the machine beeps, place a cup under the spinning drip tray and pull the handle down slowly to release the finished mocha slush. Top the drink with a small amount of whipped cream and an extra drizzle of chocolate syrup for a dessert-style presentation before serving to family or guests looking for a cold coffee treat.
12. Vanilla Cream Frozen Beverage
Prep Time: 5 minutes | Slush Time: 20–25 minutes | Serve: 2–3 cups
Milk and vanilla syrup combine into a simple, light dessert-style frozen drink that tastes similar to a soft-serve treat. Cream adds extra richness to the base, helping the Ninja SLUSHi Twist form a smooth, thick texture once the freezing cycle finishes. This recipe works well on its own or as a starting base for other flavor combinations added later.
Ingredients
- 2 1/2 cups milk
- 1/2 cup vanilla syrup
- 1/2 cup heavy cream
- 1 teaspoon vanilla extract (optional, for extra flavor)
Instructions
Pour the milk into a large mixing bowl or pitcher, then add the vanilla syrup, stirring with a whisk until the syrup dissolves completely and the mixture turns a smooth, pale color with no separate streaks visible. Whisking at a steady, even pace helps prevent the syrup from settling near the bottom of the container before the mixture goes into the machine.
Add the heavy cream next, whisking continuously so the cream blends smoothly into the milk and vanilla syrup rather than floating as a thicker layer on top. When using the optional vanilla extract, add it at this stage as well, stirring it in fully so the flavor spreads evenly throughout the entire mixture rather than concentrating in one area.
Taste the combined mixture, adjusting with a touch more vanilla syrup when a sweeter, more dessert-like flavor is preferred. Because this recipe relies mainly on dairy and syrup for sweetness rather than fruit, the sugar level plays an especially important role in how well the SLUSHi Twist freezes the base into a soft, creamy texture instead of a firmer one.
Pour the finished vanilla cream base into one of the two SLUSHi Twist vessels, keeping the liquid level below the 48 oz maximum fill line marked on the container wall. Close the pouring cover securely, then power on the machine and press the SlushAssist button to begin the automatic freezing process. Because the mixture contains a higher amount of dairy fat compared to fruit-based recipes, expect the cycle to run closer to twenty-five minutes for the best texture.
The rotating augers will continuously scrape and fold the thickening mixture along the cold interior walls, keeping the texture smooth and creamy rather than allowing ice crystals to clump together unevenly. Once the indicator light turns solid and the machine beeps, place a cup under the spinning drip tray and pull the handle down slowly to release the finished vanilla cream drink. Serve right away, either on its own or as a base for other flavored syrups stirred in just before serving.
13. Chocolate Milkshake-Style Frozen Drink
Prep Time: 5 minutes | Slush Time: 20–25 minutes | Serve: 2–3 cups
Chocolate milk and cocoa syrup combine into a thick, dessert-style frozen drink that tastes close to a classic milkshake. Cream adds an extra layer of richness, helping the Ninja SLUSHi Twist produce a thick, spoonable texture rather than a thin, watery one. This recipe works well as a treat for kids or as a simple dessert option after a family dinner.
Ingredients
- 3 cups chocolate milk
- 1/4 cup cocoa syrup
- 1/2 cup heavy cream
Instructions
Pour the chocolate milk into a large pitcher, then add the cocoa syrup, stirring with a long spoon until the syrup fully dissolves and the color turns a deep, even brown throughout the mixture. Because chocolate milk already carries a fair amount of sugar on its own, adding the cocoa syrup mainly deepens the chocolate flavor rather than changing the sweetness level by a large amount.
Add the heavy cream next, stirring continuously so the dairy blends smoothly into the chocolate mixture rather than settling as a thicker layer near the surface. Taste the combined mixture at this stage, adjusting with a bit more cocoa syrup when a deeper, richer chocolate flavor is preferred for a more dessert-like finished drink.
Once the flavor balance feels right, pour the finished chocolate mixture into one of the two SLUSHi Twist vessels, staying below the 48 oz maximum fill line printed on the side of the container. Secure the pouring cover, then turn the machine on and press the SlushAssist button to begin the freezing cycle. Because this recipe contains a higher amount of dairy and cream, plan for the cycle to run closer to twenty-five minutes rather than the shorter end of the range.
The rotating augers will continuously fold and scrape the thickening chocolate mixture along the cold interior walls, keeping the cream evenly distributed and preventing the mixture from separating as it thickens. Once the indicator light turns solid and the machine beeps, the chocolate milkshake-style drink is ready to pour.
Place a sturdy cup under the spinning drip tray, then pull the handle down slowly and steadily to release the thick chocolate slush into the cup. For a finishing touch, add a small amount of whipped cream on top along with a light drizzle of extra cocoa syrup before serving to family or guests looking for a cold chocolate dessert.
Party-Friendly Mocktail Ninja SLUSHi Recipes
14. Frozen Blue Lagoon Mocktail
Prep Time: 5 minutes | Slush Time: 20–25 minutes | Serve: 2–3 cups
Bright blue syrup and citrus lemonade combine into a striking mocktail that looks like something served at a beach resort. Citrus flavoring adds a light, tangy note that keeps the drink from tasting overly sweet once frozen. This colorful mocktail works well for pool parties, birthday events, or any gathering that calls for a drink with a bold, eye-catching look.
Ingredients
- 1 cup blue syrup
- 3 cups lemonade
- 1/4 cup citrus flavoring (such as orange or lime extract blend)
Instructions
Pour the blue syrup into a large pitcher first, then slowly add the lemonade while stirring continuously with a long spoon. Adding the lemonade gradually rather than all at once helps the deep blue color spread evenly through the liquid instead of settling in streaks near the bottom of the pitcher. Continue stirring until the entire mixture turns a consistent, bright blue shade throughout.
Add the citrus flavoring next, stirring it in fully so the tangy notes spread evenly rather than concentrating in one small area of the pitcher. Taste the combined mixture at this stage, adjusting with a touch more citrus flavoring when a brighter, tangier finished drink is preferred, or a bit more syrup when a deeper color and sweeter flavor is wanted instead.
Once the flavor balance feels right, pour the finished blue lagoon base into one of the two SLUSHi Twist vessels, keeping the liquid level below the 48 oz maximum fill line printed on the container. Close the pouring cover securely, then power on the machine and press the SlushAssist button to begin the automatic freezing cycle. The internal sensors will detect the sugar content from the syrup and lemonade, adjusting the compressor temperature accordingly.
The rotating augers will continuously scrape and fold the mixture along the cold interior walls throughout the twenty to twenty-five minute cycle, breaking the liquid into fine, even ice crystals rather than one solid frozen mass. Watching the manual temperature dial partway through can help fine-tune the thickness when a firmer texture is preferred for a party setting with a longer serving window.
Once the indicator light turns solid and the machine beeps, the blue lagoon mocktail is ready to pour. Place a cup under the spinning drip tray, pull the handle down slowly and steadily, and add a small citrus wedge on the rim of the cup for a simple decorative touch before serving to guests at a pool party or summer gathering.
15. Tropical Punch Slush
Prep Time: 10 minutes | Slush Time: 20–25 minutes | Serve: 2–3 cups
Fruit punch, pineapple juice, and orange juice combine into a bold, multi-fruit frozen drink with a bright tropical color. Each juice brings its own layer of sweetness, giving the Ninja SLUSHi Twist plenty of natural sugar to work with for a smooth, even freeze. This punch works well as a crowd-pleasing option for larger parties where several fruit flavors need to be represented in one drink.
Ingredients
- 2 cups fruit punch
- 1 cup pineapple juice
- 1 cup orange juice
Instructions
Pour the fruit punch into a large pitcher first, then add the pineapple juice, stirring the two liquids together with a long spoon until the color turns an even, deep reddish-orange throughout the pitcher. Add the orange juice next, continuing to stir so all three juices blend into one smooth, uniform tropical base rather than settling into separate layers.
Taste the combined mixture at this stage, adjusting the ratio slightly when one juice flavor feels stronger than the others. Since each juice carries its own natural sugar level, tasting before pouring the mixture into the machine helps confirm the final drink will freeze into a soft, scoopable texture rather than one that turns overly firm or too soft.
Once the flavor balance feels right, pour the finished tropical punch base into one of the two SLUSHi Twist vessels, keeping the liquid level below the 48 oz maximum fill line marked on the container wall. Close the pouring cover securely, then turn the machine on and press the SlushAssist button to begin the automatic freezing cycle.
The internal sensors will read the combined sugar content from the three juices and set the compressor to the correct freezing temperature without any extra adjustment needed. The rotating augers will continuously fold and scrape the mixture throughout the twenty to twenty-five minute cycle, keeping the ice crystals fine and light rather than clumped together in one section of the vessel.
Once the indicator light turns solid and the machine beeps, the tropical punch slush is ready to pour. Place a sturdy cup under the spinning drip tray, pull the handle down slowly, and serve right away for the best texture. A small pineapple wedge or orange slice on the rim of the cup adds a simple decorative touch for a party table.
16. Virgin Piña Colada Frozen Drink
Prep Time: 10 minutes | Slush Time: 20–25 minutes | Serve: 2–3 cups
Pineapple juice and coconut cream combine into a thick, dessert-like mocktail that captures the classic flavor of a piña colada without any alcohol. Milk lightens the texture slightly, helping the Ninja SLUSHi Twist reach a smooth, creamy consistency once the freezing cycle finishes. This recipe works well for family gatherings where a tropical-tasting drink is wanted for guests of any age.
Ingredients
- 2 cups pineapple juice
- 1 cup coconut cream
- 1/2 cup milk
Instructions
Shake the can of coconut cream thoroughly before opening it, since the thick cream tends to settle and separate during storage. Pour the coconut cream into a large mixing bowl, then whisk briefly until the texture turns smooth and free of lumps. A smooth coconut cream base helps the SLUSHi Twist freeze the mixture evenly, without any thick clumps forming during the cycle.
Add the pineapple juice to the coconut cream, whisking continuously so the two ingredients combine into one uniform, pale yellow liquid rather than settling into separate layers. Pour in the milk next, continuing to whisk until the entire mixture turns smooth and consistent from top to bottom, with no visible streaks of cream remaining near the surface.
Taste the combined base at this stage, noting that coconut cream already carries a fair amount of natural sweetness on its own, so most batches will not need any added sugar. Pour the finished piña colada mixture into one of the two SLUSHi Twist vessels, staying below the 48 oz maximum fill line printed on the side of the container.
Close the pouring cover securely, then power on the machine and press the SlushAssist button. Because this recipe combines coconut cream, pineapple juice, and milk, the compressor may take slightly longer to reach the correct freezing point compared to lighter fruit juice recipes, so allow closer to twenty-five minutes for the best texture. The rotating augers will continuously scrape and fold the mixture, keeping the cream evenly distributed rather than separating out during the freeze.
Once the indicator light turns solid and the machine beeps, place a cup under the spinning drip tray and pull the handle down slowly to release the finished piña colada drink. A small pineapple wedge or a light sprinkle of toasted coconut on top rounds out the presentation before serving to family or guests at a gathering.
17. Frozen Mojito Mocktail
Prep Time: 10 minutes | Slush Time: 20–25 minutes | Serve: 2–3 cups
Fresh mint leaves and lime juice combine into a cool, herbal mocktail with a light, refreshing finish. Sparkling water adds a bit of fizz to the base before freezing, giving the finished slush a slightly livelier texture compared to still fruit juice drinks. This mocktail works well as a lighter option at a party table full of sweeter, fruit-forward frozen drinks.
Ingredients
- 15–20 fresh mint leaves
- 1/2 cup lime juice
- 1/3 cup sugar or sweetener
- 3 cups sparkling water
Instructions
Rinse the fresh mint leaves under cool water, then pat them dry gently with a clean towel. Place the mint leaves into a small bowl along with the sugar or sweetener, then use the back of a spoon to gently press and muddle the leaves. This step releases the natural mint oils into the sugar, building a stronger herbal flavor base before the mixture goes into the pitcher.
Transfer the muddled mint and sugar mixture into a large pitcher, then add the lime juice, stirring thoroughly so the sugar dissolves completely into the citrus liquid. Continue stirring until no dry sugar granules remain at the bottom of the pitcher, since undissolved sugar can affect how evenly the SLUSHi Twist freezes the finished mixture later on.
Slowly pour in the sparkling water, stirring gently rather than briskly to preserve as much of the natural carbonation as possible before the mixture goes into the machine. Let the mixture rest for a minute or two so any large bubbles can settle, making it easier to judge the true liquid level when pouring into the vessel.
Strain the mixture through a fine mesh strainer into a separate pitcher when a smoother, leaf-free drink is preferred, or leave small mint pieces in for extra texture and flavor. Pour the finished mojito base into one of the two SLUSHi Twist vessels, keeping the liquid below the 48 oz maximum fill line marked on the container.
Close the pouring cover, then power on the machine and press the SlushAssist button to begin the freezing cycle. Because the sparkling water gives this mixture a lighter body, keep an eye on the texture partway through, since it may reach a soft, sippable consistency a little sooner than heavier fruit-based recipes. Once the light turns solid and the machine beeps, place a cup under the spinning drip tray, pull the handle down slowly, and add a fresh mint sprig on top before serving.
Creative Seasonal Ninja SLUSHi Recipes
18. Apple Cinnamon Frozen Drink
Prep Time: 10 minutes | Slush Time: 20–25 minutes | Serve: 2–3 cups
Warm cinnamon spice meets cool apple juice in this frozen drink, bringing a fall-inspired flavor to a cold treat. Caramel syrup adds an extra layer of sweetness, giving the Ninja SLUSHi Twist enough sugar content to freeze the mixture into a soft, even texture. This recipe works well for cooler months when a lighter, spiced drink feels more fitting than a heavier fruit slush.
Ingredients
- 3 cups apple juice
- 1/2 teaspoon ground cinnamon
- 1/4 cup caramel syrup
Instructions
Pour the apple juice into a large pitcher, then add the ground cinnamon, whisking the spice into the liquid thoroughly so it does not clump together near the surface. Ground cinnamon can sometimes float on top of a liquid when stirred too gently, so a firm whisking motion for about thirty seconds helps distribute the spice evenly throughout the entire pitcher.
Add the caramel syrup next, stirring continuously until the syrup fully dissolves and the mixture turns an even, warm amber color with no separate streaks remaining visible. Taste the combined mixture at this stage, adjusting with a touch more cinnamon when a bolder spice flavor is preferred, or a bit more caramel syrup when a sweeter finished drink is wanted instead.
Once the flavor balance feels right, let the mixture sit for a minute or two before pouring, since this short rest allows any remaining cinnamon particles to settle and blend more fully into the liquid rather than floating unevenly near the top. Give the pitcher one more gentle stir before transferring the mixture into a large measuring cup.
Carefully pour the apple cinnamon base into one of the two SLUSHi Twist vessels, keeping the liquid level below the 48 oz maximum fill line marked on the container. Close the pouring cover securely, then power on the machine and press the SlushAssist button to begin the automatic freezing cycle. The internal sensors will read the sugar content from the caramel syrup and apple juice, adjusting the compressor temperature to match.
The rotating augers will continuously scrape and fold the mixture along the cold interior walls throughout the twenty to twenty-five minute cycle, keeping the cinnamon evenly distributed rather than settling at the bottom of the vessel. Once the indicator light turns solid and the machine beeps, place a cup under the spinning drip tray, pull the handle down slowly, and add a light sprinkle of cinnamon on top before serving for a cozy, fall-inspired finish.
19. Pumpkin Spice Frozen Drink
Prep Time: 10 minutes | Slush Time: 20–25 minutes | Serve: 2–3 cups
Pumpkin puree and warm pumpkin spice combine with milk into a thick, dessert-style frozen drink built for cooler weather. Sweetener balances the earthy pumpkin flavor, giving the Ninja SLUSHi Twist enough sugar to form a smooth, creamy texture once frozen. This drink pairs well with a holiday table or a quiet afternoon when a spiced, dessert-like treat sounds appealing.
Ingredients
- 1 cup pumpkin puree (not pumpkin pie filling)
- 2 1/2 cups milk
- 1 teaspoon pumpkin spice blend
- 1/3 cup sugar or sweetener
Instructions
Check the pumpkin puree label closely before starting, since plain pumpkin puree and pumpkin pie filling look similar but contain very different amounts of added sugar and spice. Place the plain pumpkin puree into a large mixing bowl, then add the milk gradually, whisking continuously so the thick puree blends smoothly rather than leaving small lumps floating in the liquid.
Add the pumpkin spice blend next, whisking it into the mixture thoroughly so the warm spice flavor spreads evenly throughout rather than concentrating near the surface. Add the sugar or sweetener, continuing to whisk until it fully dissolves and the mixture turns a smooth, light orange color with a consistent, well-blended texture from top to bottom.
Taste the combined base at this stage, adjusting with a touch more spice blend when a bolder, more warming flavor is preferred, or a bit more sweetener when the pumpkin flavor tastes too earthy on its own. Once the flavor balance feels right, pour the mixture through a fine strainer when any small pumpkin puree lumps remain, ensuring a smoother finished texture once frozen.
Pour the finished pumpkin spice base into one of the two SLUSHi Twist vessels, staying below the 48 oz maximum fill line printed on the container wall. Close the pouring cover securely, then power on the machine and press the SlushAssist button. Because this recipe combines dairy with a thicker pumpkin puree, allow the full twenty-five minute cycle to complete for the best texture, since thicker mixtures sometimes need slightly longer to reach a fully scoopable consistency.
The rotating augers will continuously fold and scrape the mixture throughout the cycle, keeping the pumpkin puree evenly distributed rather than settling near the bottom of the vessel. Once the indicator light turns solid and the machine beeps, place a cup under the spinning drip tray and pull the handle down slowly to release the finished pumpkin spice drink. A light dusting of extra pumpkin spice on top adds a simple finishing touch before serving.
20. Holiday Cranberry Frozen Slush
Prep Time: 10 minutes | Slush Time: 20–25 minutes | Serve: 2–3 cups
Tart cranberry juice meets sweet orange juice and a splash of lime in this festive frozen drink built for holiday gatherings. The tartness of the cranberry balances nicely against the citrus, giving the Ninja SLUSHi Twist a well-rounded base of natural sugar and acidity to freeze evenly. This deep red slush works well as a seasonal centerpiece drink for a holiday table or winter party.
Ingredients
- 2 1/2 cups cranberry juice
- 1 cup orange juice
- 2 tablespoons lime juice
Instructions
Pour the cranberry juice into a large pitcher first, then add the orange juice, stirring the two liquids together with a long spoon until the color turns a deep, even red throughout the pitcher. Add the lime juice next, continuing to stir so all three juices blend into one smooth, well-combined base rather than settling into separate layers near the surface.
Taste the combined mixture at this stage, adjusting the ratio slightly when the cranberry flavor feels too tart or the orange flavor feels too dominant. Because cranberry juice tends to carry a sharper, more tart flavor compared to the other juices used throughout this list, tasting before pouring helps confirm the balance feels right for a holiday gathering with guests of different taste preferences.
Once the flavor balance feels right, pour the finished cranberry mixture into a large measuring cup to make transferring it into the machine easier and less messy. Carefully pour the mixture into one of the two SLUSHi Twist vessels, keeping the liquid level below the 48 oz maximum fill line marked on the container wall.
Close the pouring cover securely, then turn the machine on and press the SlushAssist button to begin the automatic freezing cycle. The internal sensors will read the combined sugar and acid content from the three juices, adjusting the compressor to the correct freezing temperature without any manual input needed at this stage.
The rotating augers will continuously scrape and fold the mixture along the cold interior walls throughout the twenty to twenty-five minute cycle, breaking the liquid into fine, even ice crystals rather than one solid frozen block. Once the indicator light turns solid and the machine beeps, the holiday cranberry slush is ready to pour. Place a cup under the spinning drip tray, pull the handle down slowly, and add a few fresh cranberries on top for a simple, festive finishing touch before serving to family and guests.
How to Customize Ninja SLUSHi Twist Recipes
1. Make recipes healthier. Cut back on added sugar where possible, lean on fresh fruit instead of syrups for natural sweetness, and choose lower-sugar juices when a lighter drink is the goal.
2. Build new flavor combinations. Mix two or more fruits together in one base, pair a sweet fruit with a citrus juice for balance, or add fresh herbs like mint or basil for a more unique twist on a familiar recipe.
3. Adjust texture and thickness. Change the ratio of liquid to fruit for a thinner or thicker base, stir in a creamy ingredient like milk or coconut milk for a richer feel, and experiment with how strong or mild each flavor tastes before freezing.
Conclusion
The Ninja SLUSHi Twist Smart Frozen Drink Maker makes it simple to turn everyday juices, coffee, and milk into a smooth, restaurant-style frozen drink without the mess of a traditional blender.
It may seem like a small kitchen gadget with limited uses, but it’s actually quite the opposite, since the smart cooling system and twin vessels open the door to dozens of flavor combinations from fruity slushies to creamy dessert drinks! Trying new fruit pairings, spice blends, or a splash of cream can turn any basic recipe into something new worth repeating.
These twenty recipes offer a solid starting point, but nothing here is fixed in stone. Swapping juices, adjusting sweetness, or blending two flavors together in the same cup can match the season, the occasion, or personal taste. A summer cookout, a holiday table, or a quiet afternoon at home each calls for something a little different, and the Ninja SLUSHi Twist adapts easily to any of them.