
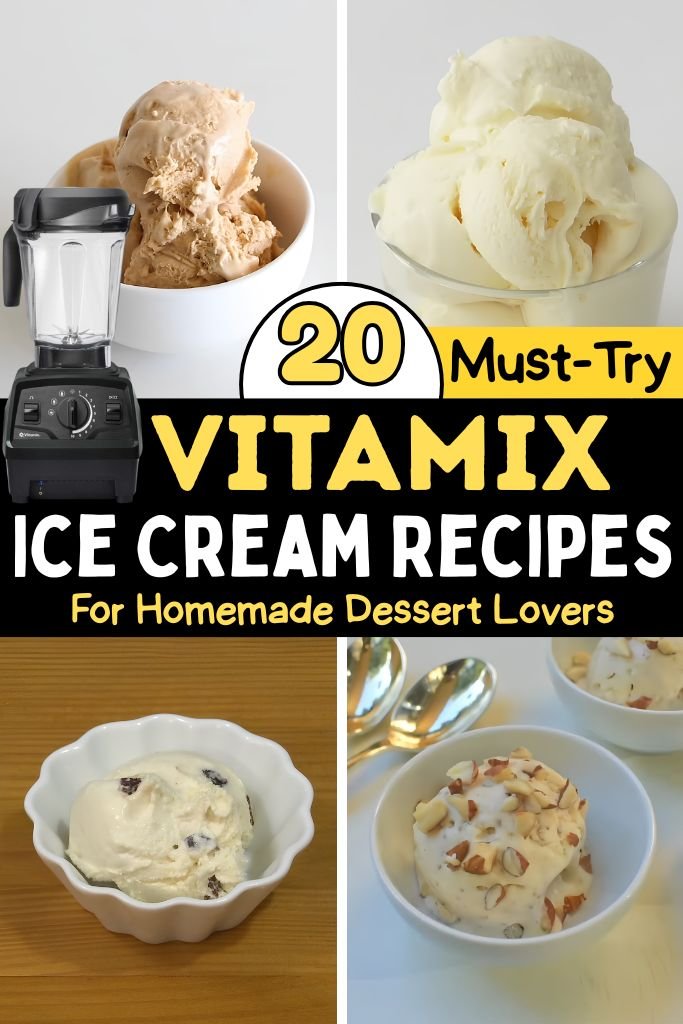
Making ice cream at home is one of the most rewarding things you can do in your kitchen. With Vitamix ice cream recipes, you get thick, creamy, smooth frozen desserts in just minutes — no churning, no waiting overnight, no complicated steps.
A Vitamix blender turns simple ingredients like frozen fruit, cream, and natural sweeteners into something that tastes better than store-bought.
Homemade ice cream means you control what goes in it — no preservatives, no mystery ingredients, just real food. The Vitamix is built to handle frozen foods with ease.
Its powerful motor and sharp blades break down ice and frozen fruit into a perfectly smooth texture every single time.
You can go dairy-free, low-sugar, high-protein, or totally indulgent — whatever works for you and your family.
Why Use a Vitamix for Making Ice Cream?
1. Powerful motor and high-speed blades — The Vitamix motor runs at speeds strong enough to crush frozen chunks into silky smooth cream in under two minutes. Regular blenders can’t do this without burning out.
2. Creates smooth and creamy textures — The tamper tool pushes ingredients into the blades evenly, so you get a consistent, velvety texture with no icy chunks or unblended spots.
3. Faster than traditional ice cream makers — Traditional ice cream makers need 20–45 minutes of churning plus freezing time. With a Vitamix, most recipes are done in 60–90 seconds.
4. Ideal for healthy frozen desserts — You can blend banana nice cream, protein-packed frozen yogurt, fruit sorbets, and dairy-free options just as easily as the classic creamy versions.
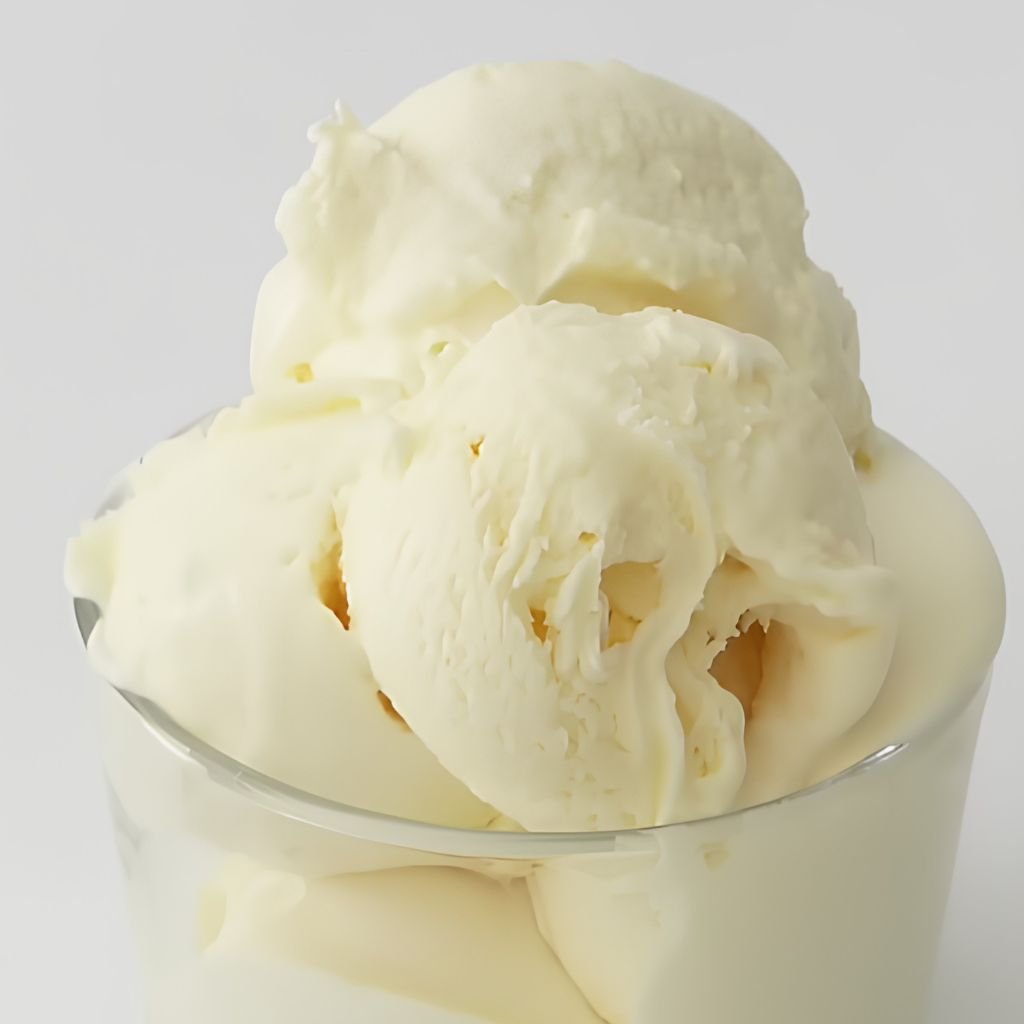
1. Classic Vanilla Vitamix Ice Cream
Prep Time: 10 minutes | Cook Time: 0 minutes | Serves: 4
Smooth, creamy, and made with real vanilla — this classic frozen dessert is the foundation of all great Vitamix ice cream recipes. It uses just a few pantry staples and comes together in under two minutes. Perfect as a simple scoop on its own or as a base for toppings and mix-ins.
Ingredients
- 2 cups heavy whipping cream
- 1 cup whole milk
- ¾ cup granulated sugar
- 2 teaspoons pure vanilla extract
- 1 pinch of salt
- 3 cups ice cubes
Instructions
Start by gathering all your ingredients and placing them near the blender so everything is ready to go. The key to getting a great texture with this recipe is making sure your liquids are cold before you start. If your cream and milk have been sitting out, pop them back in the fridge for 10 minutes before blending.
Pour the heavy whipping cream into the Vitamix container first. Adding the liquids at the bottom helps the blades move freely when you start blending. Follow with the whole milk, then pour in the granulated sugar. The sugar dissolves better when added directly to the liquid rather than on top of ice.
Add the vanilla extract next. Use pure vanilla extract, not imitation — it makes a noticeable difference in flavor. Sprinkle in the pinch of salt. It might seem like a small amount, but salt enhances the sweetness and rounds out the flavor beautifully.
Now add the ice cubes on top of the liquid mixture. Place the lid firmly on the container and lock it in place. Insert the tamper through the lid opening — you will need it.
Start the Vitamix on the lowest speed setting, then gradually increase to the highest speed. As the machine runs, use the tamper to press the ice cubes down toward the blades. Move the tamper in a circular pattern, pushing from the outside edges toward the center. This step is important — without the tamper, the ice will just spin on top without blending properly.
Blend on high for about 45 to 60 seconds. You will hear the motor tone change as the ice cream comes together. The sound gets slightly deeper and the machine may vibrate a little differently — this tells you the mixture is thickening up. Stop blending as soon as the mixture is smooth and thick.
Do not over-blend. If you run the machine too long, the heat from the motor will start melting the ice cream. Serve immediately as soft-serve, or transfer to a freezer-safe container and freeze for 1 to 2 hours for a firmer scoop-ready texture.
Scoop into bowls or cones and serve right away.
Variations
- Vanilla Bean — Scrape the seeds of 1 vanilla bean pod into the mix instead of extract for a more intense flavor with visible specks.
- Extra Rich — Replace whole milk with half-and-half for a denser, richer final product.
- Low-Sugar — Swap granulated sugar for 3 tablespoons of honey or pure maple syrup.
2. Chocolate Vitamix Ice Cream
Prep Time: 10 minutes | Cook Time: 0 minutes | Serves: 4
Deep, rich, and packed with real chocolate flavor. This is the kind of chocolate ice cream that feels like a treat every single time. The cocoa gives it an intense color and bold taste, while the cream keeps it smooth and scoopable. One of the easiest Vitamix ice cream recipes for chocolate lovers.
Ingredients
- 2 cups heavy whipping cream
- ¾ cup whole milk
- ½ cup unsweetened cocoa powder
- ¾ cup granulated sugar
- 1 teaspoon pure vanilla extract
- 1 pinch of salt
- 3 cups ice cubes
Instructions
Before you start, measure out the cocoa powder and sugar separately. These two dry ingredients tend to clump when they hit cold liquid, so you’ll want to whisk them together first in a small bowl. This simple step prevents dry pockets from forming in your blended ice cream.
Pour the heavy whipping cream into the Vitamix container, followed by the whole milk. Add the vanilla extract. Now, add the whisked cocoa and sugar mixture directly into the liquid. Place the lid on the Vitamix and pulse the machine two or three times on low speed, just to help the cocoa start mixing into the cream before adding ice. This prevents the dry powder from flying up when the machine starts at higher speed.
Remove the lid, add the ice cubes, and place the lid back on firmly. Insert the tamper through the lid opening.
Turn the Vitamix on at the lowest speed and slowly increase to the highest speed over about 5 seconds. Use the tamper to push the ice down toward the blades continuously as the machine runs. Work in a circular motion — start at the outer edges and push inward toward the center.
Blend on high for about 45 to 60 seconds. You’ll notice the mixture turning a deep, glossy chocolate color as it comes together. The sound of the motor will deepen and the mixture will visibly thicken through the container walls. That’s your cue that it’s nearly done.
Stop blending as soon as the texture is smooth and creamy. Over-blending will cause the ice cream to lose its thick, cold texture. Taste a small spoonful — if you want a sweeter result, you can add a tablespoon of powdered sugar and blend for 5 more seconds.
Serve immediately as a soft, thick consistency, or spoon into a lidded container and freeze for 1 to 2 hours for firmer scoops.
Variations
- Double Chocolate — Fold in ¼ cup of mini chocolate chips after blending.
- Mexican Chocolate — Add ½ teaspoon of cinnamon and a tiny pinch of cayenne pepper for a warm, spicy kick.
- Dairy-Free — Use full-fat coconut milk in place of both the cream and whole milk.
3. Strawberry Banana Ice Cream
Prep Time: 10 minutes | Cook Time: 0 minutes | Serves: 3–4
Two classic fruits come together in this naturally sweet frozen dessert. The strawberries bring a bright, slightly tart flavor, and the frozen banana adds creaminess without needing much dairy. Great for kids, great for snacks, and simple enough to make any day of the week.
Ingredients
- 2 cups frozen strawberries
- 2 medium ripe bananas, sliced and frozen
- ½ cup whole milk or coconut milk
- 2 tablespoons honey or maple syrup
- 1 teaspoon lemon juice
- ½ teaspoon vanilla extract
Instructions
The night before, or at least 4 hours ahead, peel your ripe bananas and slice them into 1-inch rounds. Lay them on a baking sheet lined with parchment paper and freeze until solid. The bananas must be fully frozen before blending — partially frozen bananas won’t give you that thick, creamy texture. Do the same with strawberries if you’re using fresh ones instead of pre-frozen.
When you’re ready to blend, take the frozen bananas and strawberries out of the freezer. Let them sit at room temperature for 3 to 5 minutes. This small step makes the Vitamix motor work a little less hard and helps everything blend more evenly.
Pour the milk or coconut milk into the Vitamix container first. Add the honey or maple syrup, lemon juice, and vanilla extract to the liquid. The lemon juice brightens the strawberry flavor and keeps the color vibrant.
Add the frozen strawberries on top, then add the frozen banana slices last. Place the lid on securely and insert the tamper.
Start the Vitamix on the lowest speed. Increase the speed gradually to the highest setting over about 5 to 8 seconds. Immediately begin using the tamper to push the frozen fruit down toward the blades. The frozen chunks will resist at first — keep working the tamper in a firm, steady circular motion.
Blend on high speed for 45 to 60 seconds. The mixture will go from chunky and pink to a smooth, thick, sorbet-like consistency. The color will be a beautiful deep pink or light red depending on your strawberries. When the sound of the motor changes and the mixture moves smoothly without resistance, it’s ready.
Do not walk away from the machine during this process. It blends quickly and can go from perfect to over-blended in less than 10 seconds. Serve right away for a soft, thick texture.
Variations
- All-Fruit — Skip the milk entirely and add a splash more lemon juice for a dairy-free frozen sorbet.
- Tropical Twist — Add ½ cup of frozen mango chunks to the mix.
- Protein Boost — Blend in one scoop of vanilla protein powder with the liquids.
4. Mint Chocolate Chip Ice Cream
Prep Time: 10 minutes | Cook Time: 0 minutes | Serves: 4
Cool, refreshing, and studded with chocolate pieces — mint chocolate chip is a classic for a reason. The mint flavor in this recipe comes from real peppermint extract, which gives it a clean, natural taste. The chocolate chips are folded in at the end so every spoonful gets a good mix of creamy mint and chocolatey crunch.
Ingredients
- 2 cups heavy whipping cream
- 1 cup whole milk
- ¾ cup granulated sugar
- 1 teaspoon pure peppermint extract
- ½ teaspoon vanilla extract
- A few drops of green food coloring (optional)
- 3 cups ice cubes
- ½ cup mini chocolate chips (stirred in after blending)
Instructions
Gather all your ingredients before you start. Peppermint extract is stronger than most extracts, so measure it carefully — a little too much can make the ice cream taste like mouthwash rather than a dessert. Stick to exactly 1 teaspoon for the right balance.
Pour the heavy whipping cream into the Vitamix container, followed by the whole milk. Add the sugar, peppermint extract, and vanilla extract. If you want the classic green color, add 2 to 3 drops of green food coloring now. The color is purely optional but makes the presentation fun and recognizable.
Place the lid on the container firmly and pulse the machine two times on low just to mix the liquids together slightly. Open the lid and add the ice cubes on top. Lock the lid back in place and insert the tamper through the opening.
Turn the Vitamix on at the lowest speed, then increase slowly to the highest speed. Use the tamper to press the ice cubes down firmly toward the blades. Work in a steady circular motion — push from the edges toward the center to keep the frozen material moving through the blades consistently.
Blend on high for about 45 to 60 seconds until the mixture is completely smooth and thick. The finished ice cream should have a soft, creamy texture that holds its shape when spooned. You will notice the machine start to strain slightly as the ice cream gets thicker — this is normal and means it’s almost done.
Stop the machine and remove the tamper and lid. Using a spatula, quickly fold in the mini chocolate chips by hand. Do not blend the chips into the mixture — blending will chop them too small. You want little pieces throughout the ice cream for texture.
Serve immediately for a soft consistency, or transfer to a container and freeze for 1 to 2 hours for firmer scoops. The chips may sink a bit during freezing, so give it a gentle stir before scooping if you’ve frozen it.
Variations
- Dark Chocolate Chips — Use dark chocolate chips instead of semi-sweet for a more intense contrast.
- Mint Oreo — Fold in crushed mint Oreo cookies along with or instead of the chips.
- No Food Coloring — The ice cream tastes exactly the same without the green color — skip it for a natural white version.
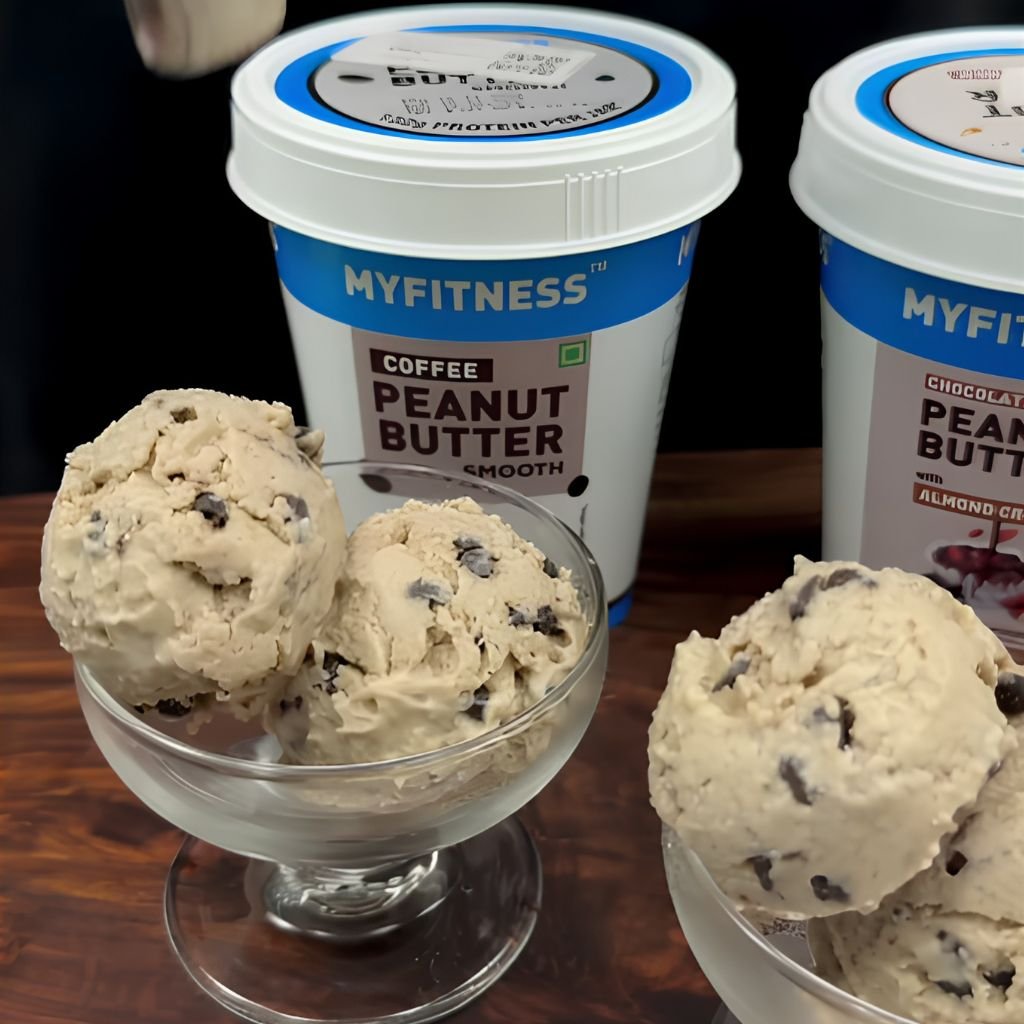
5. Peanut Butter Banana Ice Cream
Prep Time: 5 minutes | Cook Time: 0 minutes | Serves: 2–3
Creamy, nutty, and naturally sweet — this two-ingredient base turns into something that feels totally indulgent. The frozen banana provides the creamy texture, and the peanut butter adds richness and protein. No added sugar needed because ripe bananas are naturally sweet enough on their own.
Ingredients
- 3 ripe bananas, sliced and frozen
- 3 tablespoons creamy peanut butter
- ¼ cup unsweetened almond milk or regular milk
- ½ teaspoon vanilla extract
- 1 pinch of salt
Instructions
Make sure your bananas are fully ripe before you freeze them. Ripe bananas have brown spots on the peel — those are sweeter and creamier than yellow bananas. Slice them into 1-inch pieces, lay them flat on a parchment-lined baking sheet, and freeze for at least 4 hours or overnight.
When ready, remove the frozen banana slices from the freezer. Let them sit on the counter for 3 minutes — this brief thaw time prevents them from being too hard for the blender and ensures smoother blending.
Pour the almond milk or regular milk into the Vitamix container. Add the peanut butter, vanilla extract, and salt. The salt is important here — it balances the sweetness from the banana and brings out the peanut butter flavor significantly.
Add the frozen banana slices on top of the peanut butter mixture. Secure the lid and insert the tamper.
Start on low speed and increase gradually to high over about 5 seconds. Use the tamper immediately to push the frozen banana chunks toward the blades. The bananas will be quite firm at first and will need consistent pressure from the tamper to blend properly. Work in a wide circular motion, covering the entire surface of the mixture.
Blend on high for 45 to 60 seconds. The mixture will go from chunky to smooth very quickly once the banana starts breaking down. Watch the color shift from yellow-white chunks to a uniform pale cream. When the mixture looks like thick, glossy soft-serve with no visible chunks, it’s ready.
Stop the machine right away. Over-blending this recipe causes the natural sugars in the banana to heat up and can make the texture thin and runny. Taste it and adjust — if you want more peanut butter flavor, add another tablespoon and pulse two or three times.
Serve right away as soft-serve or freeze for up to 1 hour for a thicker consistency.
Variations
- Chocolate Peanut Butter — Add 1 tablespoon of cocoa powder for a chocolate-peanut butter combo.
- Honey Roasted — Use honey roasted peanut butter for a slightly sweeter, caramelized flavor.
- PB&J Style — Swirl in 2 tablespoons of strawberry jam after blending.
6. Mango Coconut Ice Cream
Prep Time: 10 minutes | Cook Time: 0 minutes | Serves: 4
Tropical, creamy, and totally dairy-free. This combination of ripe mango and coconut cream makes a rich, smooth frozen dessert that tastes like a beach vacation. The coconut cream gives it a dense, silky body and the mango provides natural sweetness so you barely need any added sugar.
Ingredients
- 3 cups frozen mango chunks
- 1 cup full-fat coconut cream (chilled)
- 2 tablespoons honey or agave syrup
- 1 tablespoon lime juice
- ½ teaspoon vanilla extract
- 1 pinch of salt
Instructions
For best results, chill your can of coconut cream in the refrigerator overnight before using it. Cold coconut cream is thicker and denser, which gives the final ice cream a much richer, creamier texture than room-temperature coconut cream would.
Take your frozen mango out of the freezer about 3 to 5 minutes before blending. Letting it soften just slightly on the outside makes it blend more smoothly and reduces strain on the motor.
Open the chilled coconut cream and pour it into the Vitamix container. Add the honey or agave syrup, lime juice, vanilla extract, and salt. The lime juice is key — it adds a bright, slightly tart contrast that makes the mango flavor pop. Without it, the ice cream can taste a little flat.
Add the frozen mango chunks on top of the coconut cream base. Secure the lid tightly and insert the tamper.
Turn the machine to the lowest speed and then ramp up to the highest speed within about 6 to 8 seconds. Begin tamping immediately. Mango can be quite hard when frozen, so use firm, deliberate pressure with the tamper. Push down from the center first, then work in circular strokes to keep the mixture flowing toward the blades.
Blend on high for 45 to 60 seconds. The mixture will gradually turn from orange chunks to a thick, glossy, pale orange-yellow cream. Keep using the tamper throughout because coconut cream is thick and heavy — it needs help moving through the blades evenly. When everything is uniformly smooth with no chunks remaining, the ice cream is done.
Stop the machine and taste immediately. Add an extra drizzle of honey if you want it sweeter, or a little more lime juice if you want more brightness. Stir with a spatula to incorporate any last-minute additions.
Scoop into bowls and top with toasted coconut flakes or fresh lime zest for a beautiful finish. Serve right away for a soft-serve texture or freeze in a covered container for up to 2 hours.
Variations
- Mango Pineapple — Replace ½ cup of mango with frozen pineapple for a more tropical flavor.
- Spiced Mango — Add ¼ teaspoon of ground cardamom or a pinch of chili powder for an Indian-inspired spin.
- Creamy Base Swap — Use canned coconut milk instead of coconut cream for a lighter, less rich version.
7. Cookies and Cream Ice Cream
Prep Time: 10 minutes | Cook Time: 0 minutes | Serves: 4
Creamy vanilla ice cream loaded with chunks of chocolate sandwich cookies — this one is a crowd-pleaser every single time. The vanilla base is smooth and rich, and the crushed cookies add a satisfying crunch in every bite. It’s simple, familiar, and always gets rave reviews.
Ingredients
- 2 cups heavy whipping cream
- 1 cup whole milk
- ¾ cup granulated sugar
- 2 teaspoons vanilla extract
- 1 pinch of salt
- 3 cups ice cubes
- 12–14 chocolate sandwich cookies (Oreos), roughly crushed
Instructions
Before you start blending, take your cookies and place them in a zip-lock bag. Seal the bag and use a rolling pin or the bottom of a heavy cup to crush the cookies into uneven pieces — a mix of small crumbs and larger chunks works best. You don’t want the cookies to be completely powdered because the textural contrast is part of what makes this flavor so enjoyable. Set the crushed cookies aside.
Pour the heavy whipping cream into the Vitamix container. Add the whole milk, then the granulated sugar. Pour in the vanilla extract and add the pinch of salt. Place the lid on the container and give it two or three low-speed pulses just to start combining the liquid ingredients.
Remove the lid and add the ice cubes. Secure the lid again and insert the tamper through the opening.
Start the machine on the lowest speed and increase gradually to the highest speed. Begin using the tamper right away to push the ice cubes down into the blades. Use steady, circular tamping motions — start from the outside of the container and work toward the center to keep the ice moving through the blades.
Blend on high speed for about 45 to 60 seconds until the mixture is thick, smooth, and creamy. The ice cream is ready when you see a uniform, dense texture with no visible ice chunks. The sound of the motor will also change slightly as the mixture thickens — it becomes a little more labored, which tells you the ice cream is at the right consistency.
Turn off the machine and remove the lid and tamper. Using a silicone spatula, fold in the crushed cookies by hand — do not blend them in. You want to preserve the texture of the cookie pieces. Stir from the bottom of the container upward, distributing the cookie chunks throughout the ice cream evenly.
Serve immediately for a soft, thick consistency with visible cookie pieces throughout. To freeze for later, transfer to a sealed container and press a sheet of plastic wrap directly onto the surface before putting the lid on — this helps prevent ice crystals from forming. Freeze for 1 to 2 hours.
Variations
- Double Stuffed — Use double-stuffed sandwich cookies for extra creamy cookie flavor in every bite.
- Mint Cookies and Cream — Add ½ teaspoon of peppermint extract to the base before blending.
- Peanut Butter Cookies and Cream — Swirl in 2 tablespoons of peanut butter to the finished ice cream before folding in the cookies.
8. Blueberry Cheesecake Ice Cream
Prep Time: 10 minutes | Cook Time: 0 minutes | Serves: 4
The tangy richness of cream cheese meets the sweet, jammy flavor of blueberries in one of the most unique Vitamix ice cream recipes on this list. It’s thick, creamy, and has that unmistakable cheesecake flavor — without the baking. Add a handful of crushed graham crackers at the end for the full cheesecake experience.
Ingredients
- 2 cups frozen blueberries
- 4 oz cream cheese, softened
- ½ cup heavy whipping cream
- ½ cup whole milk
- ½ cup granulated sugar
- 1 teaspoon vanilla extract
- 1 tablespoon lemon juice
- 2 cups ice cubes
- ½ cup crushed graham crackers (stirred in after blending)
Instructions
Take the cream cheese out of the refrigerator at least 20 minutes before you plan to blend. Softened cream cheese blends much more smoothly than cold cream cheese — cold cream cheese can leave small lumps in the final ice cream that are hard to break up in a thick, cold mixture. You want it to be soft and easy to scoop but not melted.
Place the softened cream cheese into the Vitamix container first. Pour in the heavy whipping cream and the whole milk. Add the granulated sugar, vanilla extract, and lemon juice. The lemon juice is essential in this recipe — it’s what gives the ice cream that authentic cheesecake tang that you’d expect from a real cheesecake.
Secure the lid and blend on medium-low speed for about 15 seconds, just until the cream cheese is fully incorporated into the liquid. Stop the machine and remove the lid. Add the frozen blueberries and ice cubes on top of the cream cheese mixture. Secure the lid again and insert the tamper.
Start the machine on low speed and gradually increase to the highest speed. Begin tamping immediately — frozen blueberries can be firm and will roll around on top without the tamper guiding them into the blades. Push down with steady pressure and work in a smooth circular motion.
Blend on high for 45 to 60 seconds. The mixture will turn a stunning deep purple-blue color as the blueberries break down. Keep tamping throughout because the cream cheese makes the mixture thicker than a standard ice cream base and it needs consistent help moving through the blades.
Once the ice cream is completely smooth and uniformly colored with no chunks remaining, stop the machine. Taste a spoonful — the tangy, creamy, blueberry-cheesecake flavor should be very pronounced. If you want it sweeter, blend in an extra tablespoon of sugar for 5 seconds.
Fold in the crushed graham crackers using a spatula, mixing gently to preserve the texture. Serve immediately or freeze for up to 2 hours in a covered container.
Variations
- Strawberry Cheesecake — Swap blueberries for frozen strawberries for a different fruit flavor.
- No Graham Crackers — Skip the crackers for a smoother, creamier blueberry cheesecake scoop.
- Extra Tangy — Add an extra teaspoon of lemon juice for a more pronounced tart flavor.
9. Coffee Ice Cream
Prep Time: 10 minutes | Cook Time: 0 minutes | Serves: 4
Bold espresso flavor in a smooth, creamy frozen dessert — coffee ice cream is a perfect after-dinner treat. The espresso powder gives deep coffee notes without making the ice cream taste bitter. Great on its own or served alongside a warm brownie.
Ingredients
- 2 cups heavy whipping cream
- 1 cup whole milk
- ¾ cup granulated sugar
- 2 tablespoons instant espresso powder
- 1 teaspoon vanilla extract
- 1 pinch of salt
- 3 cups ice cubes
Instructions
Measure the instant espresso powder and add it to a small bowl with 2 tablespoons of warm water. Stir until the powder is fully dissolved into a concentrated liquid. Dissolving it first prevents any bitter, unblended espresso pockets in the final ice cream. This step takes just 30 seconds and makes a real difference in the smoothness of the final flavor.
Pour the heavy whipping cream into the Vitamix container, followed by the whole milk. Add the granulated sugar, dissolved espresso mixture, vanilla extract, and salt. The vanilla balances the bitterness of the espresso and gives the ice cream a well-rounded, full flavor profile.
Secure the lid and give the machine two to three low-speed pulses to start combining the liquids. Open the lid carefully and add the ice cubes. Lock the lid back in place and insert the tamper.
Start the machine on its lowest speed, then increase to the highest speed over about 5 to 6 seconds. Begin tamping as soon as you increase the speed. Use firm, deliberate downward pressure with the tamper to push the ice into the liquid mixture and toward the blades. Work in a circular motion covering the full diameter of the container.
Blend on high for 45 to 60 seconds. The ice cream will turn a warm, tan-brown color as the espresso and cream blend together. You’ll see the texture change from icy and chunky to thick and smooth through the container walls. When the motor tone deepens and the mixture stops splashing and starts moving as a thick mass, it’s ready.
Stop the machine immediately. Over-blending coffee ice cream can make it slightly bitter because the heat from the motor intensifies the espresso flavor. Taste it before serving — if you want a stronger coffee flavor, you can add an extra ½ teaspoon of espresso powder and pulse 4 to 5 times.
Serve right away as soft-serve or transfer to a container and freeze for a firmer texture. This ice cream pairs beautifully with chocolate sauce or a sprinkle of coarse sea salt.
Variations
- Mocha — Stir in 2 tablespoons of cocoa powder with the espresso powder for a chocolate-coffee combo.
- Caramel Latte — Drizzle caramel sauce over the finished ice cream before serving.
- Decaf Version — Use decaf espresso powder for the same flavor without the caffeine.
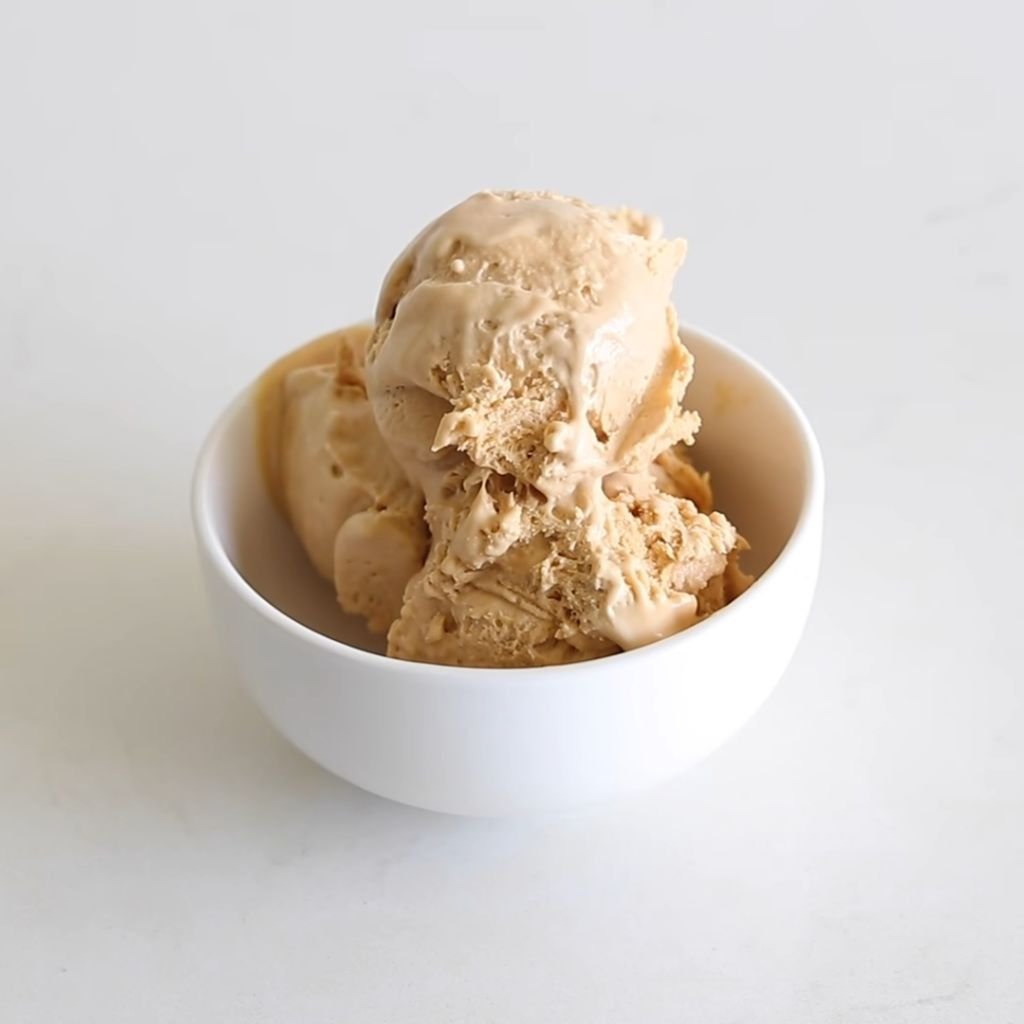
10. Salted Caramel Ice Cream
Prep Time: 10 minutes | Cook Time: 0 minutes | Serves: 4
Sweet, buttery caramel with a finishing hit of sea salt — this is one of those flavors that keeps you coming back for one more spoonful. Using store-bought caramel sauce makes this recipe quick and easy without sacrificing any flavor. The salt cuts through the richness and makes every bite perfectly balanced.
Ingredients
- 2 cups heavy whipping cream
- ¾ cup whole milk
- ½ cup store-bought caramel sauce (plus extra for drizzling)
- 3 tablespoons granulated sugar
- 1 teaspoon vanilla extract
- ¾ teaspoon fine sea salt
- 3 cups ice cubes
Instructions
Start by choosing a good quality caramel sauce. The flavor of the caramel sauce is the star of this recipe, so using one you enjoy eating on its own is important. A thick, rich caramel will give the best results. Thin, watery caramel sauces don’t provide enough flavor depth.
Pour the heavy whipping cream into the Vitamix container. Add the whole milk, caramel sauce, granulated sugar, vanilla extract, and sea salt. The sea salt goes in with the liquid — not added at the end — so it distributes evenly throughout the ice cream.
Place the lid on the container and run the machine on low speed for about 10 seconds to blend the caramel sauce into the cream mixture. Caramel sauce can sometimes sit in a thick layer at the bottom, so this short mix ensures it’s fully incorporated before adding ice.
Stop the machine and add the ice cubes. Lock the lid back in place and insert the tamper.
Start on the lowest speed and gradually increase to the highest speed. Use the tamper to press the ice cubes down and keep them moving toward the blades. Caramel ice cream benefits from thorough tamping because the sugar in the caramel can cause the mixture to be slightly stickier than a plain cream base — you want everything moving smoothly.
Blend on high for 45 to 60 seconds until completely smooth and thick. Watch the mixture transform from icy and chunky into a glossy, deep gold-colored cream. The caramel color will deepen slightly as everything blends together.
Once the texture is thick and uniform, stop the machine. Taste the ice cream and decide if you want more salt — salted caramel is very personal. Some people like a subtle hint, others like a pronounced salty contrast. Add a small extra pinch of sea salt and pulse 3 times if you want more.
Serve in bowls and drizzle with extra caramel sauce and a light sprinkle of flaky sea salt on top. Serve immediately for soft-serve, or freeze for 1 to 2 hours.
Variations
- Caramel Pretzel — Fold in crushed pretzels after blending for a salty crunch.
- Caramel Apple — Add ½ cup of unsweetened applesauce to the base for a fall-flavored twist.
- Dulce de Leche — Replace the caramel sauce with dulce de leche for a deeper, more intense caramel flavor.
11. Raspberry Chocolate Ice Cream
Prep Time: 10 minutes | Cook Time: 0 minutes | Serves: 4
The tartness of raspberries pairs naturally with rich chocolate in this gorgeous two-flavor frozen dessert. The raspberry gives the ice cream a bright, slightly fruity quality that keeps the chocolate from feeling too heavy. Every spoonful is a perfect balance of fruity and chocolatey.
Ingredients
- 2 cups frozen raspberries
- 1 cup heavy whipping cream
- ½ cup whole milk
- ½ cup granulated sugar
- 3 tablespoons unsweetened cocoa powder
- 1 teaspoon vanilla extract
- 1 pinch of salt
- 2 cups ice cubes
- ¼ cup mini chocolate chips (folded in after blending, optional)
Instructions
Before blending, take a moment to prepare the cocoa powder. Whisk it together with the sugar in a small bowl until fully combined. This helps prevent lumps of dry cocoa from getting trapped in the blended mixture, which can give you small bitter pockets if they don’t fully dissolve.
Pour the heavy whipping cream into the Vitamix container. Add the whole milk, then the cocoa-sugar mixture. Use a spoon to push the dry ingredients down into the liquid so they’re partially submerged. Add the vanilla extract and salt.
Place the lid on and pulse two to three times on low speed to start mixing the cocoa into the cream. Then remove the lid and add the frozen raspberries and ice cubes. Secure the lid again and insert the tamper.
Start the machine on low and increase to the highest speed over 5 to 6 seconds. Begin tamping immediately. Frozen raspberries are smaller and lighter than most frozen fruits, so they will float on top of the mixture without guidance — the tamper is especially important here. Push down with consistent pressure in a circular motion to keep the berries in contact with the blades.
Blend on high for 45 to 60 seconds. The raspberries release their bright red-pink color as they blend, and the cocoa adds deep brown undertones — together they produce a rich, dark rose-colored ice cream. Blend until everything is completely smooth with no raspberry seeds clumping together.
Stop the machine and taste. Raspberry and chocolate balance can be adjusted — if it’s too tart, add a teaspoon more of sugar and pulse four times. If it’s too sweet, add a small squeeze of lemon juice and blend for 5 seconds.
Fold in the mini chocolate chips with a spatula if using them, then serve immediately or freeze in a covered container for up to 2 hours.
Variations
- Dark Chocolate Raspberry — Use dark cocoa powder for a more intense chocolate base.
- Swirled — Make vanilla ice cream and raspberry ice cream separately, then swirl together in a container before freezing.
- Raspberry Sauce Drizzle — Blend a small amount of fresh raspberries with powdered sugar and drizzle over the finished ice cream.
12. Pineapple Dole Whip Style Ice Cream
Prep Time: 5 minutes | Cook Time: 0 minutes | Serves: 3
Light, fruity, and completely dairy-free, this pineapple soft-serve style recipe is inspired by the famous tropical theme park treat. It takes less than two minutes to make and uses just a few simple ingredients. Cold, smooth, and full of pineapple flavor — it’s the ultimate warm-weather dessert.
Ingredients
- 3 cups frozen pineapple chunks
- ½ cup coconut cream (or coconut milk)
- 2 tablespoons lime juice
- 1 tablespoon honey or agave
- ½ teaspoon vanilla extract
Instructions
The key to this recipe working correctly is that the pineapple must be solidly frozen — not partially thawed. Take it out of the freezer right before you’re ready to blend. Do not let it sit out.
Pour the coconut cream into the Vitamix container. Add the lime juice, honey or agave, and vanilla extract. The lime juice is what gives this recipe its brightness and keeps it from tasting one-dimensional. Don’t skip it.
Add the frozen pineapple chunks on top of the liquid base. Secure the lid tightly and insert the tamper.
Turn the machine to the lowest speed and increase to the highest setting within about 5 seconds. Start tamping right away with firm, circular strokes. Frozen pineapple is quite dense and fibrous, so it needs consistent pressure from the tamper to move through the blades properly.
Blend on high for about 30 to 45 seconds. Pineapple ice cream comes together faster than cream-based ice creams because there are no dairy ingredients to emulsify. Watch for the texture to shift from rough and chunky to a smooth, uniform, soft-serve consistency.
As soon as the mixture is fully smooth, stop blending. The pineapple will start to warm up quickly once blended, so speed is important. Taste it and adjust — more lime juice for tartness, more honey for sweetness.
Pipe or scoop into cups immediately for the full soft-serve experience. Serve right away — this one doesn’t freeze back as nicely as the cream-based recipes.
Variations
- Pineapple Coconut — Add ¼ cup of toasted coconut flakes on top for texture.
- Pineapple Orange — Replace half the lime juice with fresh orange juice.
- Pineapple Banana Whip — Add 1 frozen banana to the mix for a creamier texture.
13. Matcha Green Tea Ice Cream
Prep Time: 10 minutes | Cook Time: 0 minutes | Serves: 4
Earthy, slightly sweet, and beautifully green — matcha ice cream is a unique addition to any list of Vitamix ice cream recipes. The ceremonial-grade matcha powder gives it a clean, grassy flavor that pairs perfectly with the creamy base. It’s both elegant and simple to make.
Ingredients
- 2 cups heavy whipping cream
- 1 cup whole milk
- ¾ cup granulated sugar
- 2 tablespoons high-quality matcha powder
- 1 teaspoon vanilla extract
- 1 pinch of salt
- 3 cups ice cubes
Instructions
The quality of matcha powder matters significantly in this recipe. Culinary-grade matcha works, but ceremonial-grade gives a brighter green color and a smoother, less bitter flavor. Budget matcha powders often produce a dull, khaki-colored ice cream with a harsh aftertaste, so invest in a decent product.
Before blending, mix the matcha powder with 3 tablespoons of warm water in a small bowl. Whisk vigorously until no lumps remain and the mixture is a smooth, bright green paste. This step is critical — adding dry matcha powder directly to the cold cream can result in clumps that the blender won’t fully break up, leaving you with green streaks in the finished ice cream rather than a uniform color.
Pour the heavy whipping cream into the Vitamix container, followed by the whole milk. Add the dissolved matcha paste, granulated sugar, vanilla extract, and salt. The vanilla rounds out the matcha flavor and softens any bitterness.
Secure the lid and pulse the machine two to three times on low speed to start incorporating the matcha paste into the cream. Open the lid and add the ice cubes on top. Lock the lid in place and insert the tamper.
Start the machine on the lowest speed and increase to the highest over about 5 seconds. Begin tamping immediately to push the ice cubes into the cream mixture. Use a steady circular motion to keep everything moving toward the blades. The matcha-cream base is slightly denser than plain cream, so the tamper plays an especially important role here.
Blend on high for 45 to 60 seconds until the ice cream is completely smooth and a vibrant, uniform green. Stop the machine and check the texture — it should be thick and hold its shape when spooned. If any light green streaks are visible, blend for an additional 10 seconds.
Taste before serving. Matcha can vary in intensity by brand — if it tastes flat, add an extra ½ teaspoon of matcha paste and pulse five times. Serve immediately as soft-serve or freeze for a firmer texture.
Variations
- Matcha Honey — Replace the granulated sugar with 3 tablespoons of raw honey for a more complex sweetness.
- Matcha White Chocolate — Fold in white chocolate chips after blending for a complementary flavor pairing.
- Matcha Coconut — Swap the whole milk for coconut milk for a tropical, dairy-free version.
14. Oreo Ice Cream
Prep Time: 10 minutes | Cook Time: 0 minutes | Serves: 4
Loaded with chunks of real Oreo cookies and blended into a creamy vanilla base, this ice cream is everything an Oreo lover could want. The cookies soften slightly in the cream but still hold their shape enough to give you that familiar texture in every bite. Easy, quick, and always a hit.
Ingredients
- 2 cups heavy whipping cream
- 1 cup whole milk
- ¾ cup granulated sugar
- 2 teaspoons vanilla extract
- 1 pinch of salt
- 3 cups ice cubes
- 16–18 Oreo cookies, crushed into large pieces
Instructions
Separate about half of your Oreo cookies — 8 to 9 cookies — into a separate bowl. These will be blended into the base. The remaining cookies will be folded in by hand after blending. Crush the first batch into fine crumbs using a zip-lock bag and rolling pin. Crush the second batch into larger, uneven pieces to preserve texture.
Pour the heavy whipping cream into the Vitamix container. Add the whole milk, granulated sugar, vanilla extract, and salt. Add the finely crushed Oreo crumbs on top of the liquid. The crumbs will blend into the base and give the ice cream a slight gray-white color with a hint of cookies-and-cream flavor throughout.
Secure the lid and pulse two times on low speed to start mixing the crumbs into the cream. Open the lid and add the ice cubes. Secure the lid and insert the tamper.
Start the machine on the lowest speed and ramp up to the highest over 5 seconds. Begin tamping right away with circular, downward strokes. The Oreo crumbs will quickly absorb into the cream base as it blends. Keep the tamper moving to ensure the ice cubes are consistently pushed toward the blades.
Blend on high for 45 to 60 seconds until completely smooth and thick. The ice cream will have a very light gray-white color from the blended Oreo crumbs — this is exactly what you want. Stop the machine when the texture is uniformly creamy with no icy chunks.
Remove the lid and use a spatula to fold in the remaining large Oreo pieces. Stir from the bottom up with gentle strokes, distributing the cookie chunks evenly throughout. Do not blend them in — you want to keep the contrast between the smooth cream base and the chunky cookie pieces.
Serve immediately for a thick, cold soft-serve texture or transfer to a container and freeze for 1 to 2 hours. Press plastic wrap directly onto the surface before sealing the container to prevent ice crystals.
Variations
- Double Stuffed Oreo — Use double-stuffed Oreos for extra cream filling in every bite.
- Birthday Cake Oreo — Use birthday cake flavored Oreos and add 1 teaspoon of almond extract to the base.
- Oreo Cheesecake — Add 2 oz of softened cream cheese to the liquid base before blending for a cheesecake-flavored variation.
15. Cherry Vanilla Ice Cream
Prep Time: 10 minutes | Cook Time: 0 minutes | Serves: 4
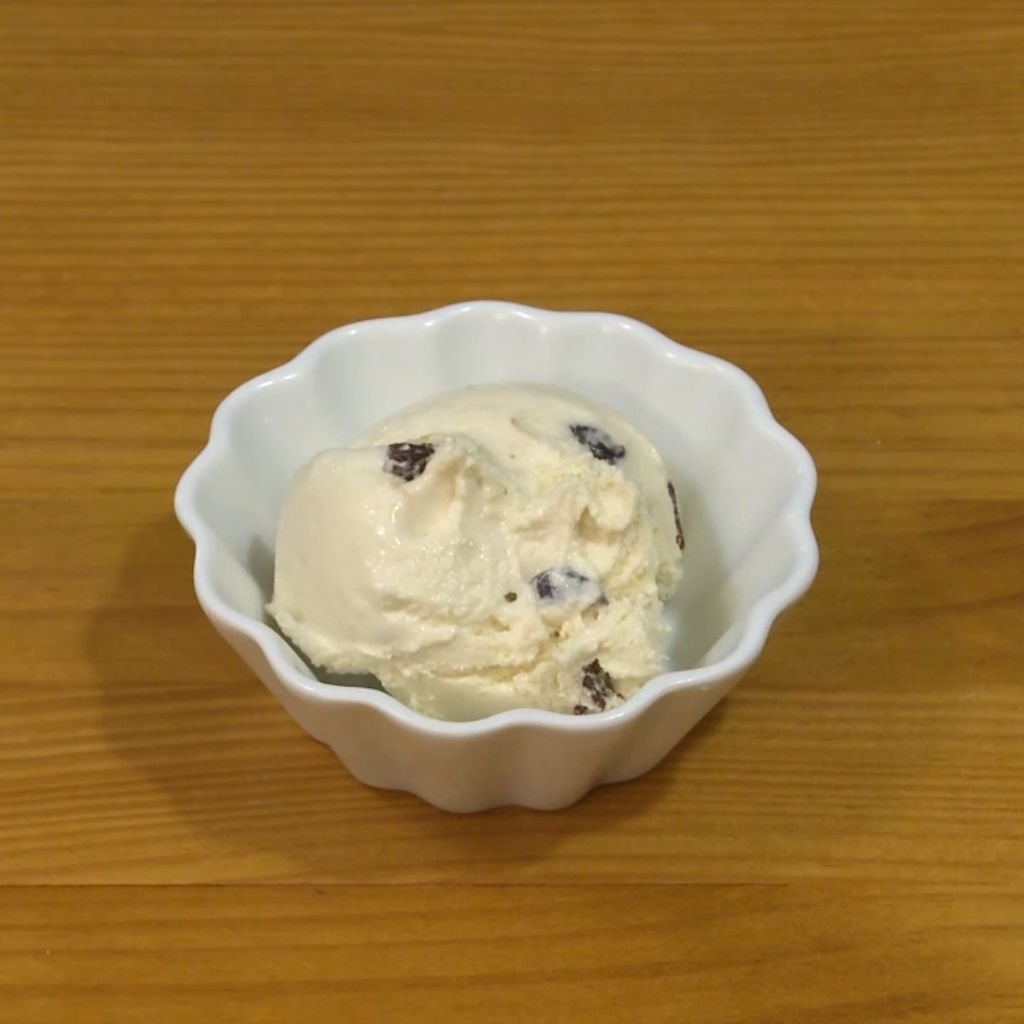
Sweet cherries and smooth vanilla come together in a classic combination that’s been beloved for generations. The frozen cherries give this ice cream a deep pink-red color and a natural fruit sweetness. It’s simple, pretty, and totally irresistible.
Ingredients
- 1½ cups frozen dark cherries (pitted)
- 1½ cups heavy whipping cream
- ½ cup whole milk
- ½ cup granulated sugar
- 2 teaspoons vanilla extract
- 1 tablespoon lemon juice
- 2 cups ice cubes
Instructions
Make sure your frozen cherries are fully pitted before blending. If using fresh cherries, pit them and freeze them in a single layer on a baking sheet for at least 4 hours before making this recipe. Frozen dark cherries from the grocery store work perfectly and save you the pitting step.
Let the frozen cherries sit out for 3 to 4 minutes before blending. Slightly softened cherries blend more evenly and reduce the risk of the blender struggling with very hard frozen fruit.
Pour the heavy whipping cream into the Vitamix container, followed by the whole milk. Add the granulated sugar, vanilla extract, and lemon juice. The lemon juice brightens the cherry flavor and keeps the color vivid.
Add the frozen cherries on top of the liquid base. Then add the ice cubes on top of the cherries. Secure the lid firmly and insert the tamper.
Start the Vitamix on the lowest speed and increase to the highest over about 6 seconds. Begin tamping immediately. Cherries can be slippery and dense when frozen, so they require consistent pressure from the tamper to move into the blades. Use a deep, downward circular motion to keep the cherries from riding up the sides of the container.
Blend on high for 45 to 60 seconds. The cherries will release their deep red color as they blend, turning the cream a stunning rose-red shade. Keep tamping throughout until you see a uniform, smooth texture with no chunks remaining.
Stop the machine and taste. Cherry flavor varies in intensity by brand — if you want more cherry flavor, add 2 tablespoons of cherry jam and blend for 10 more seconds. If you like it sweeter, add a tablespoon more of sugar and pulse four times.
Serve immediately for a vibrant, soft texture or freeze for a firmer result.
Variations
- Cherry Almond — Add ½ teaspoon of almond extract to the base for a cherry-almond flavor that tastes like marzipan.
- Black Forest — Fold in chocolate chips and a drizzle of chocolate sauce after blending.
- Cherry Limeade — Increase the lemon juice to 2 tablespoons and use lime instead for a fruit-punch-inspired flavor.
16. Healthy Banana Nice Cream
Prep Time: 5 minutes | Cook Time: 0 minutes | Serves: 2
Just frozen bananas, blended into something that looks and feels like real ice cream — banana nice cream is one of the most popular healthy frozen desserts for a reason. No dairy, no added sugar, no artificial anything. Just pure, ripe banana transformed into a creamy, soft frozen treat.
Ingredients
- 4 ripe bananas, sliced and frozen
- 2–3 tablespoons unsweetened almond milk (or water if preferred)
- ½ teaspoon vanilla extract
Instructions
Banana nice cream starts with the right banana. The riper the banana, the sweeter and creamier the nice cream will be. Bananas with brown spots or fully brown peels are perfect for this recipe — they’re sweeter, softer, and blend more easily than yellow bananas.
Peel the ripe bananas and slice them into 1-inch rounds. Lay them flat on a parchment-lined baking sheet in a single layer — don’t stack them or they’ll freeze together in a solid block. Freeze for a minimum of 4 hours. Overnight is ideal.
When you’re ready to make nice cream, remove the bananas from the freezer and let them sit at room temperature for exactly 5 minutes. This short rest period is important — completely rock-solid frozen bananas can be hard even for a Vitamix to blend without adding too much liquid. After 5 minutes, the outsides soften just slightly, making blending much easier.
Pour the almond milk into the Vitamix container first. Add the vanilla extract. Adding the liquid first protects the blades and gives the frozen banana somewhere to land when it starts blending.
Add the frozen banana slices on top of the liquid. Secure the lid and insert the tamper.
Start the machine on the lowest speed and increase gradually to the highest setting over about 5 seconds. Begin tamping right away. This recipe has very little liquid, so the tamper is absolutely essential. Without it, the banana will just sit on top of the blades without blending. Use firm, consistent downward pressure and work in wide circular strokes.
Blend on high for 30 to 45 seconds — this recipe comes together faster than cream-based recipes because bananas break down quickly once they start blending. Watch the texture change from rough, crumbled frozen chunks to a smooth, glossy cream. Stop blending the moment it looks like soft-serve ice cream.
Do not over-blend. If you blend too long, the warmth from the motor will melt the bananas and you’ll end up with a thick, warm banana drink instead of frozen nice cream. Serve immediately for the best texture.
Variations
- Chocolate Nice Cream — Add 2 tablespoons of cocoa powder to the almond milk before blending.
- Peanut Butter Nice Cream — Add 2 tablespoons of natural peanut butter for a protein-rich, nutty version.
- Mixed Berry Nice Cream — Add ½ cup of frozen mixed berries to the banana for a fruity twist.
17. Vegan Chocolate Ice Cream
Prep Time: 10 minutes | Cook Time: 0 minutes | Serves: 4
Rich, dark, and completely dairy-free, this vegan chocolate ice cream proves you don’t need cream or milk to make something truly indulgent. Full-fat coconut milk gives it a luxuriously creamy base, and good quality cocoa powder delivers deep chocolate flavor. Nobody will guess it’s vegan.
Ingredients
- 2 cups full-fat coconut milk (from a can, chilled overnight)
- ½ cup unsweetened cocoa powder
- ¾ cup coconut sugar or granulated sugar
- 1 teaspoon vanilla extract
- 1 pinch of salt
- 3 cups ice cubes
Instructions
Chill your cans of coconut milk in the refrigerator overnight before making this recipe. Cold full-fat coconut milk separates — the thick cream rises to the top and the watery liquid sinks to the bottom. You want to use the entire can, cream and all, but chilling it first means the fat is more evenly distributed when you open the can and pour it out, which gives you a richer, more consistent ice cream.
In a small bowl, whisk together the cocoa powder and sugar until fully combined. This pre-mixing step prevents the cocoa powder from clumping in the cold liquid when you add it to the blender. A few minutes of whisking now saves you from unpleasant dry pockets of bitter cocoa in the finished ice cream.
Open your chilled coconut milk and pour it into the Vitamix container. Add the cocoa-sugar mixture, vanilla extract, and salt. The salt enhances the chocolate flavor considerably — don’t skip it.
Secure the lid and run the machine on low speed for about 10 seconds to blend the cocoa mixture into the coconut milk. This short pre-blend ensures no dry cocoa remains at the bottom before you add the ice.
Open the lid and add the ice cubes on top. Secure the lid tightly and insert the tamper.
Start the machine on the lowest speed and ramp up to the highest setting within 5 to 6 seconds. Begin tamping right away with firm, downward circular strokes. The coconut milk base is slightly thinner than a heavy cream base, so the ice and cream will move more freely — you’ll still need the tamper, but the mixture will respond quickly.
Blend on high for 45 to 60 seconds until smooth and uniformly dark in color. The finished ice cream will have a deep, almost black-brown chocolate color and a thick, creamy texture despite being completely dairy-free. Stop blending as soon as it reaches a smooth soft-serve consistency.
Taste and adjust sweetness if needed. Serve immediately or freeze in a sealed container for up to 2 hours. Vegan ice cream can freeze harder than dairy-based versions, so allow 5 to 10 minutes at room temperature before scooping if it’s been frozen.
Variations
- Chocolate Avocado — Add ½ of a ripe avocado to the coconut milk for an extra creamy, healthy fat boost.
- Mexican Spiced Chocolate — Add ½ teaspoon of cinnamon and a tiny pinch of cayenne for a warming, spicy version.
- Vegan Chocolate Chip — Fold in dairy-free chocolate chips after blending.
18. Pumpkin Spice Ice Cream
Prep Time: 10 minutes | Cook Time: 0 minutes | Serves: 4
All the warm, cozy flavors of fall in a cold, creamy frozen dessert. Pumpkin puree adds a subtle earthiness and beautiful orange color, while the spice blend gives it that signature autumn warmth. It’s a seasonal treat that’s surprisingly simple to pull together.
Ingredients
- ½ cup pure pumpkin puree (not pie filling)
- 2 cups heavy whipping cream
- ¾ cup whole milk
- ½ cup granulated sugar
- 2 tablespoons brown sugar
- 1½ teaspoons pumpkin pie spice
- 1 teaspoon vanilla extract
- 1 pinch of salt
- 3 cups ice cubes
Instructions
Before you begin, make sure you’re using pure pumpkin puree and not canned pumpkin pie filling. Pumpkin pie filling already contains sugar and spices — using it in this recipe will throw off the flavor balance and make the ice cream too sweet and over-spiced. Pure pumpkin puree is just cooked, pureed pumpkin with nothing else added, and that’s what you need here.
Pour the heavy whipping cream into the Vitamix container, followed by the whole milk. Add the pumpkin puree directly on top of the cream. The pumpkin will sit in a thick mound on the liquid — this is normal and will blend in smoothly once the machine starts.
Add the granulated sugar and brown sugar. The brown sugar adds a slight molasses depth that pairs beautifully with pumpkin. Sprinkle in the pumpkin pie spice, vanilla extract, and salt.
Place the lid on the container and run the machine on low speed for about 15 seconds to start incorporating the pumpkin puree into the cream mixture. The pumpkin needs this brief pre-blend before adding ice — otherwise, it can stay in a thick clump that the ice cubes push around without breaking up.
Stop the machine and open the lid. Add the ice cubes on top. Secure the lid and insert the tamper.
Start the machine on the lowest speed and gradually increase to the highest over 5 to 6 seconds. Begin tamping immediately. The pumpkin adds density to the base, so the tamper is very important here — use consistent, circular downward pressure to keep everything moving toward the blades.
Blend on high for 45 to 60 seconds. The ice cream will turn a warm, creamy orange color as the pumpkin and spices blend throughout. When the mixture is uniformly smooth and thick with a soft-serve consistency, stop the machine.
Taste before serving. Pumpkin spice intensity is personal — if you want more spice, add an extra ¼ teaspoon of cinnamon and pulse 5 times. For more sweetness, add a tablespoon of maple syrup and blend for 5 seconds.
Serve immediately or freeze. Top with whipped cream and a sprinkle of cinnamon for presentation.
Variations
- Pumpkin Maple — Replace granulated sugar with pure maple syrup for a deeper sweetness.
- Pumpkin Gingersnap — Fold in crushed gingersnap cookies after blending for a spiced cookie crunch.
- Dairy-Free Pumpkin — Use full-fat coconut milk in place of the cream and whole milk.
19. Lemon Frozen Yogurt Ice Cream
Prep Time: 10 minutes | Cook Time: 0 minutes | Serves: 4
Bright, tangy, and refreshing — lemon frozen yogurt is the kind of dessert that makes your whole face light up on a hot day. The Greek yogurt gives it a thick, creamy body and a natural tang, while the lemon juice and zest give it that unmistakable citrus punch. Light but satisfying.
Ingredients
- 1½ cups plain Greek yogurt (full-fat)
- ½ cup heavy whipping cream
- ½ cup granulated sugar
- 3 tablespoons fresh lemon juice
- 1 tablespoon lemon zest
- 1 teaspoon vanilla extract
- 2½ cups ice cubes
Instructions
Use full-fat Greek yogurt for this recipe, not low-fat or non-fat. Full-fat yogurt has enough fat content to create a creamy, scoopable texture when frozen. Low-fat yogurt tends to become icy and hard rather than creamy, and doesn’t blend as smoothly in the Vitamix.
Zest the lemon before juicing it — it’s much easier to zest a whole lemon than a squeezed one. Use a fine grater and zest just the outer yellow layer of the lemon peel, avoiding the white pith underneath, which is bitter.
Spoon the Greek yogurt into the Vitamix container. Pour in the heavy whipping cream, then add the granulated sugar. Add the fresh lemon juice, lemon zest, and vanilla extract. The combination of lemon juice and lemon zest gives this recipe two layers of lemon flavor — the juice provides the bright, tart acidity and the zest adds a more aromatic, floral lemon quality.
Place the lid on the container and blend on low speed for about 10 seconds to mix everything together before adding ice. Greek yogurt is thick and needs a short pre-blend to combine fully with the cream and sugar.
Open the lid and add the ice cubes on top of the yogurt base. Secure the lid and insert the tamper.
Start the machine on the lowest speed and increase to the highest over about 5 seconds. Begin tamping immediately. Greek yogurt is quite dense, and combined with ice, the mixture will be thick from the start. Use firm, consistent pressure with the tamper and work in a thorough circular pattern.
Blend on high for 45 to 60 seconds. The finished frozen yogurt will be pale yellow with a creamy, thick texture. You may see small flecks of lemon zest throughout — this is a good sign and adds a beautiful visual detail.
Stop the machine and taste. Lemon flavor can vary depending on the size and ripeness of your lemons. Add more lemon juice for extra tartness or more sugar for sweetness. Blend for 5 seconds after any adjustments.
Serve right away for a refreshing, tangy soft-serve, or freeze for up to 1 hour. It firms up nicely and scoops beautifully after a short freeze.
Variations
- Lemon Blueberry — Fold in fresh blueberries after blending for a fruit-forward combination.
- Lime Frozen Yogurt — Swap the lemon juice and zest for lime for a slightly more tropical variation.
- Honey Lemon — Replace the granulated sugar with 3 tablespoons of honey for a more floral, natural sweetness.
20. Coconut Almond Ice Cream
Prep Time: 10 minutes | Cook Time: 0 minutes | Serves: 4
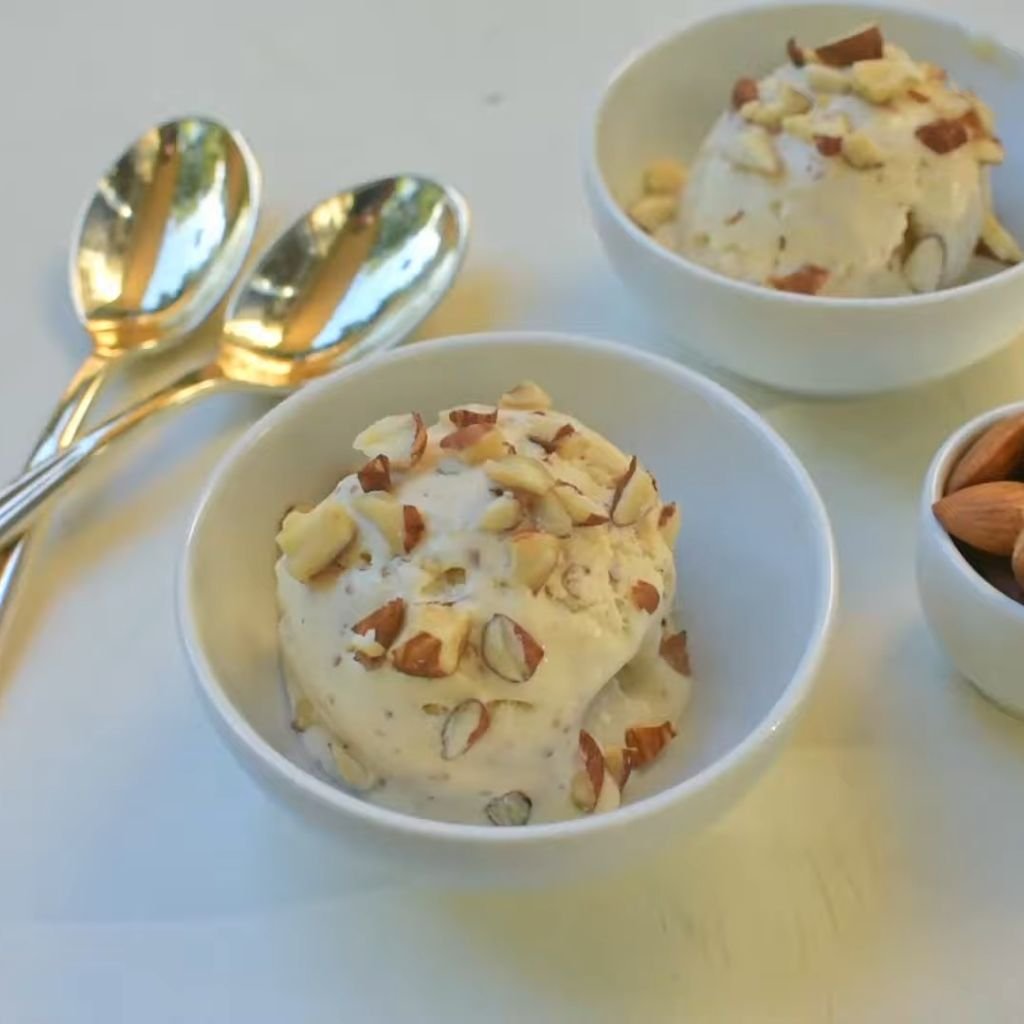
Creamy coconut and toasted almonds make this the most elegant ice cream on this entire list of Vitamix ice cream recipes. The coconut cream provides a rich, tropical base, and the almond extract adds a subtle, warm nuttiness that pairs with it perfectly. A toasted almond garnish on top makes it feel like a dessert from a nice restaurant.
Ingredients
- 1½ cups full-fat coconut cream (chilled overnight)
- ½ cup whole milk or almond milk
- ½ cup granulated sugar
- 1 teaspoon pure almond extract
- 1 teaspoon vanilla extract
- 1 pinch of salt
- 3 cups ice cubes
- ¼ cup toasted sliced almonds (folded in after blending)
Instructions
Chill your coconut cream in the refrigerator overnight before using it. Cold coconut cream is significantly thicker and more concentrated than room-temperature coconut cream, and this makes a meaningful difference in the final texture of the ice cream. When you open the chilled can, the thick cream will have risen to the top — scoop it out and use the full can for this recipe.
Spread your sliced almonds on a dry skillet over medium heat. Shake the pan gently every 30 seconds and watch the almonds closely — they go from white to golden to burned very quickly. When they’re golden and fragrant, remove them from the heat immediately and transfer to a plate. Let them cool completely before folding them into the ice cream. Warm almonds will melt into the cold ice cream rather than staying as distinct pieces.
Pour the chilled coconut cream into the Vitamix container. Add the whole milk or almond milk, granulated sugar, almond extract, vanilla extract, and salt. Almond extract is powerful — use exactly 1 teaspoon. Too much can make the ice cream taste medicinal.
Secure the lid and blend on low speed for 10 seconds to mix the coconut cream with the other liquid ingredients. Open the lid and add the ice cubes on top. Secure the lid again and insert the tamper.
Start the machine on the lowest speed and increase to the highest setting gradually over 5 to 6 seconds. Begin tamping right away. Coconut cream is dense and the mixture will be thick right from the start. Use the tamper firmly and continuously in a circular motion to keep the ice cubes moving toward the blades.
Blend on high for 45 to 60 seconds until the ice cream is completely smooth and uniformly white with a soft, thick consistency. The mixture will have a faint coconut fragrance as it blends — this is normal and a sign that everything is coming together well.
Stop the machine and taste. The almond extract should be noticeable but not overpowering. If it’s too subtle, add ¼ teaspoon more and pulse three times. Fold in the cooled toasted almonds with a spatula, using gentle upward strokes to distribute them throughout without crushing them.
Serve immediately for a soft, creamy texture with crunchy almond pieces throughout. Or freeze in a covered container for up to 2 hours. Top with extra toasted almonds and a light drizzle of honey before serving.
Variations
- Almond Joy Style — Fold in mini chocolate chips and shredded sweetened coconut along with the almonds.
- Dark Chocolate Drizzle — Melt dark chocolate and drizzle over the finished ice cream before serving.
- Vegan Version — This recipe is already dairy-free when made with almond milk — just confirm your sugar is vegan-certified.
How to Store Homemade Vitamix Ice Cream
1. Best freezer containers — Use airtight, shallow, freezer-safe containers made from glass or BPA-free plastic. Shallow containers allow the ice cream to freeze evenly and make scooping easier than deep containers. Avoid containers that let air in — oxygen causes freezer burn.
2. Recommended storage time — Most homemade ice cream stays best for 1 to 2 weeks in the freezer. After 2 weeks, the texture starts to degrade and ice crystals become more noticeable. Fruit-based ice creams and those made with coconut cream are best eaten within 7 days.
3. How to soften before serving — Move the container from the freezer to the refrigerator about 10 to 15 minutes before you plan to serve it. Alternatively, let it sit at room temperature for 5 to 8 minutes. Homemade ice cream is denser than commercial brands and needs a few minutes to soften enough for easy scooping.
4. Preventing ice crystals — Press a sheet of plastic wrap directly onto the surface of the ice cream before placing the lid on the container. This reduces air contact and prevents large ice crystals from forming on the top layer. Keeping the freezer temperature consistent (not opening the door repeatedly) also helps maintain the smooth texture.
Conclusion
Making homemade frozen desserts has never been easier, and these Vitamix ice cream recipes prove that you don’t need a fancy ice cream maker or hours of preparation to enjoy something truly delicious. The Vitamix handles the hard work — its powerful motor and high-speed blades do in 60 seconds what traditional machines take an hour or more to accomplish. The result is ice cream that’s smoother, fresher, and more flavorful than anything from a store.
The real beauty of blending your own ice cream is the freedom to make it exactly the way you like it. Go dairy-free with the Mango Coconut or Vegan Chocolate versions. Keep it simple with the Classic Vanilla or Banana Nice Cream. Or get creative with something bold like the Matcha Green Tea or Salted Caramel. There are 20 recipes here and they all start with the same basic technique — once you’ve made one, you’ve got the skill to make all of them.
Some personal favorites from this list are the Peanut Butter Banana for a quick, healthy everyday snack, the Cookies and Cream for when a crowd is involved, and the Lemon Frozen Yogurt when something bright and refreshing is needed.
Give one of these a try this week and see how it goes. Leave a comment below and share which recipe you made and what you thought — everyone loves hearing what variations people came up with. And if you share your creation on social media, tag the post so others can find it. The more people making homemade ice cream, the better.