
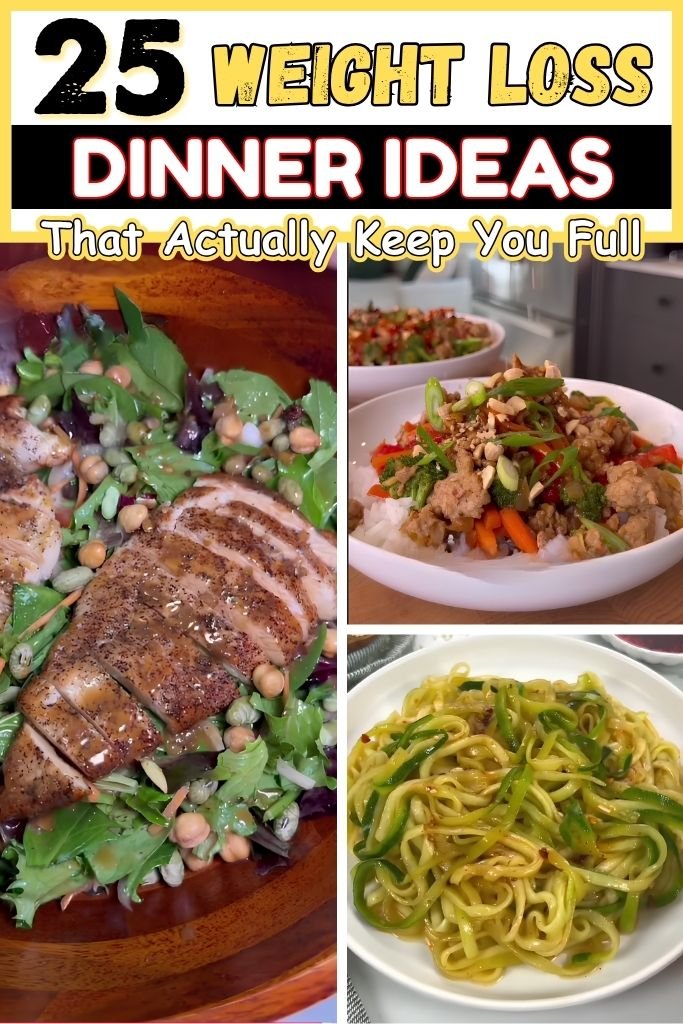
Eating a healthy dinner is one of the smartest things you can do when you want to lose weight. Weight loss dinner ideas do not have to be boring, tasteless, or hard to make. The right dinner helps your body burn fat, keeps you full through the night, and sets you up for a better day tomorrow.
Many people make dinner their biggest meal of the day. They come home tired, grab heavy foods, eat too much, and then sit on the couch.
This is one of the most common mistakes. Overeating at night, loading up on too many carbs, or eating very late can slow down your metabolism and make it harder to lose weight.
But here is the good news — choosing smarter weight loss dinner ideas can actually speed up fat burning. Foods high in protein and fiber keep you satisfied longer, support muscle, and help your body work more efficiently while you sleep.
With the right choices, dinner becomes one of your biggest tools in reaching your goals. These 25 recipes will show you exactly how to do that.
Why Dinner Is Crucial for Weight Loss
Dinner plays a big role in your overall health and weight. Here is why it matters so much:
1. How nighttime eating affects metabolism: Your body slows down at night. When you eat heavy or high-calorie foods late in the evening, your body has less time to process and burn those calories. Eating lighter, protein-rich dinners earlier in the evening gives your metabolism a better chance to do its job while you rest.
2. Calorie balance and portion control: Losing weight comes down to eating fewer calories than you burn. Dinner is often the meal where people overeat the most. Keeping portions in check and choosing low-calorie, filling foods like lean protein, vegetables, and legumes helps you stay within your daily calorie goal without feeling deprived.
3. Importance of protein and fiber at dinner: Protein helps your body repair muscle, keeps you full longer, and burns more calories during digestion than carbs or fat do. Fiber slows down digestion, keeping blood sugar steady and stopping late-night cravings. Together, these two nutrients make your weight loss dinner ideas actually work.
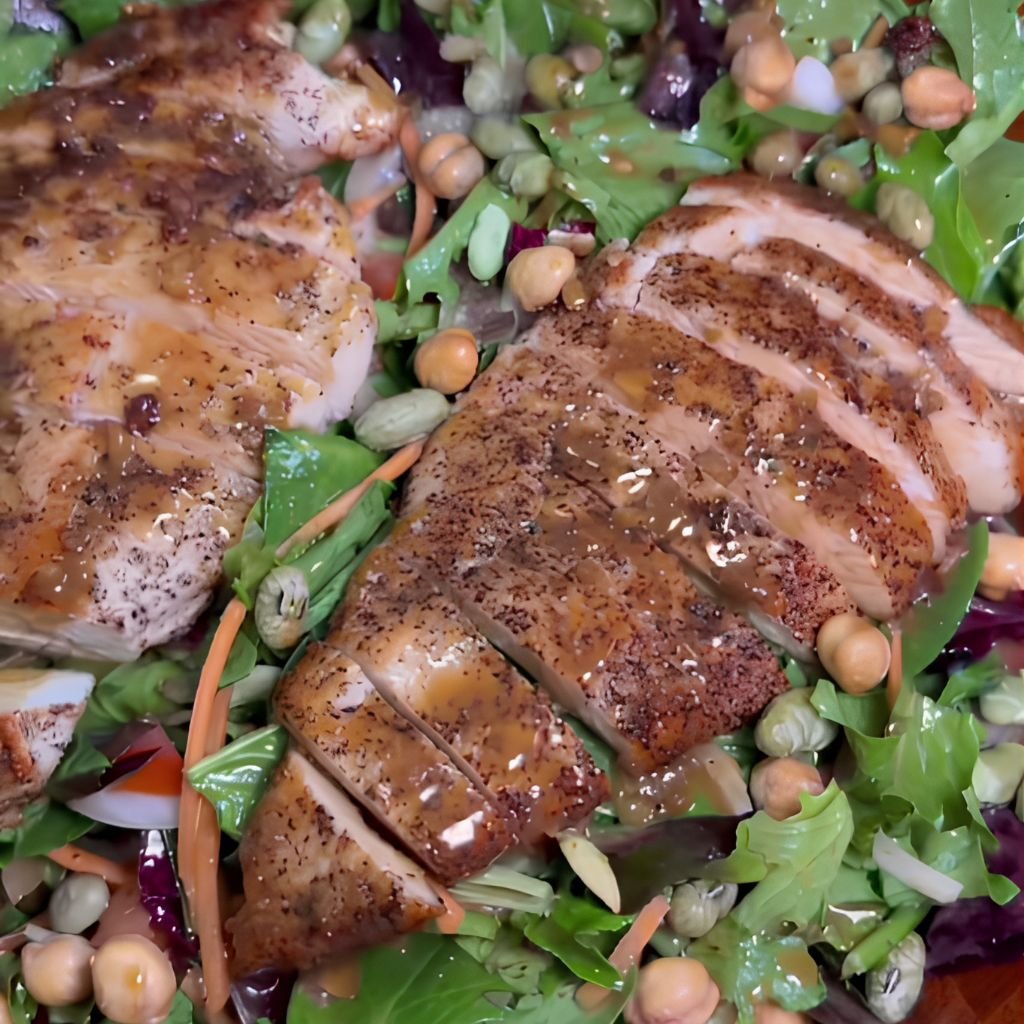
1. Grilled Chicken Salad
Prep Time: 15 minutes | Cook Time: 15 minutes | Serves: 2
A colorful bowl of crisp greens, juicy grilled chicken, and a light lemon dressing — this salad is fresh, filling, and ready in 30 minutes. Packed with lean protein and crunchy vegetables, it is one of the most popular weight loss dinner ideas that does not sacrifice flavor for nutrition.
Ingredients:
- 2 boneless, skinless chicken breasts (about 6 oz each)
- 4 cups romaine lettuce, chopped
- 1 cup cherry tomatoes, halved
- 1 cucumber, sliced
- 1/4 red onion, thinly sliced
- 1/2 avocado, sliced
- 2 tablespoons olive oil
- Juice of 1 lemon
- 1 teaspoon garlic powder
- 1 teaspoon paprika
- Salt and black pepper to taste
Instructions:
Start by preparing the chicken breasts. Place them on a clean cutting board and pat them dry with a paper towel. This step is important because drying the chicken helps the seasoning stick better and ensures a nice sear on the grill.
In a small bowl, mix together the garlic powder, paprika, a generous pinch of salt, and black pepper. Drizzle one tablespoon of olive oil over the chicken breasts, then rub the spice mixture all over both sides, making sure every surface is evenly coated.
Preheat your grill or grill pan over medium-high heat. Allow it to get fully hot before placing the chicken on it. A hot grill gives the chicken those beautiful grill marks and locks in the juices right away.
Place the seasoned chicken breasts on the hot grill. Cook for about 6 to 7 minutes on the first side without moving them. Resist the urge to press down on the chicken with a spatula, as this pushes out the natural juices and can make the meat dry.
Flip the chicken breasts carefully using tongs. Cook the other side for another 6 to 7 minutes. The internal temperature should reach 165 degrees Fahrenheit when checked with a meat thermometer. This ensures the chicken is fully cooked and safe to eat.
Once done, transfer the chicken to a clean plate and let it rest for 5 minutes before slicing. Resting is a key step that allows the juices to redistribute throughout the meat, keeping every bite moist and flavorful.
While the chicken rests, prepare your salad. In a large bowl, add the chopped romaine lettuce. Toss in the halved cherry tomatoes, sliced cucumber, and thinly sliced red onion. Gently lay the avocado slices on top.
In a small jar or bowl, whisk together the remaining one tablespoon of olive oil, fresh lemon juice, a pinch of salt, and black pepper. Taste the dressing and adjust the seasoning to your liking.
Slice the rested chicken into thin strips at a slight angle. Arrange the sliced chicken on top of the prepared salad base.
Drizzle the lemon dressing evenly over the entire salad. Toss gently to combine all the ingredients, or serve the dressing on the side so everyone can add their own. Serve immediately and enjoy this light, satisfying meal.
2. Baked Salmon with Vegetables
Prep Time: 10 minutes | Cook Time: 20 minutes | Serves: 2
Tender, flaky salmon paired with colorful roasted vegetables makes a dinner that is as nutritious as it is satisfying. Rich in omega-3 fatty acids and high in protein, baked salmon with vegetables is one of those weight loss dinner ideas that feels like a treat but works hard for your health goals.
Ingredients:
- 2 salmon fillets (about 5 oz each)
- 1 zucchini, sliced into rounds
- 1 bell pepper (any color), cut into strips
- 1 cup broccoli florets
- 1/2 red onion, cut into wedges
- 2 tablespoons olive oil
- 2 garlic cloves, minced
- 1 teaspoon dried oregano
- Juice of 1 lemon
- Salt and black pepper to taste
- Fresh parsley for garnish
Instructions:
Preheat your oven to 400 degrees Fahrenheit. Line a large baking sheet with parchment paper or lightly grease it with cooking spray. Using parchment makes cleanup much easier and prevents the salmon and vegetables from sticking.
Prepare all your vegetables first. Slice the zucchini into even rounds about half an inch thick. Cut the bell pepper into strips of similar size. Break the broccoli into small, even florets so everything cooks at the same rate. Cut the red onion into wedges.
In a large bowl, combine all the prepared vegetables. Drizzle one tablespoon of olive oil over them, add the minced garlic, dried oregano, salt, and black pepper. Toss everything together until all the vegetables are well coated with the oil and seasonings.
Spread the seasoned vegetables out in a single layer on one side of the prepared baking sheet. Make sure they are not piled on top of each other, as crowding causes steaming instead of roasting and the vegetables will not get that slightly caramelized texture.
Place the baking sheet in the preheated oven and roast the vegetables for about 10 minutes on their own first. This head start ensures they are fully tender by the time the salmon is done.
While the vegetables are roasting, prepare the salmon fillets. Pat them dry with a paper towel. Drizzle the remaining tablespoon of olive oil over each fillet, then squeeze fresh lemon juice on top. Season generously with salt and black pepper on both sides.
After the vegetables have roasted for 10 minutes, carefully remove the baking sheet from the oven. Nestle the salmon fillets on the other side of the baking sheet among the vegetables.
Return the sheet to the oven and continue baking for another 12 to 15 minutes. The salmon is done when it flakes easily with a fork and has turned from translucent to opaque throughout. Avoid overbaking, as salmon dries out quickly.
Remove from the oven and let rest for 2 minutes. Arrange the salmon and vegetables on plates, garnish with freshly chopped parsley, and serve right away with a wedge of lemon on the side.
3. Quinoa and Veggie Bowl
Prep Time: 10 minutes | Cook Time: 20 minutes | Serves: 2
A warm, hearty bowl built on fluffy quinoa and loaded with roasted vegetables. Quinoa brings complete protein and fiber to the table, making this one of those weight loss dinner ideas that keeps hunger away long after the meal is done. Colorful, nutritious, and easy to customize with whatever vegetables you have on hand.
Ingredients:
- 1 cup quinoa, rinsed well
- 2 cups low-sodium vegetable broth
- 1 cup cherry tomatoes, halved
- 1 zucchini, diced
- 1 cup spinach, fresh
- 1/2 red onion, diced
- 1 can (15 oz) chickpeas, drained and rinsed
- 2 tablespoons olive oil
- 1 teaspoon cumin
- 1 teaspoon smoked paprika
- Salt and black pepper to taste
- Fresh lemon juice for serving
Instructions:
Rinse the quinoa thoroughly under cold running water using a fine mesh strainer. This step removes the natural coating called saponin, which can make quinoa taste bitter. Shake off any excess water after rinsing.
Add the rinsed quinoa and vegetable broth to a medium saucepan. Using broth instead of plain water adds a deeper, richer flavor to the quinoa base. Place the saucepan over medium-high heat and bring it to a boil.
Once boiling, reduce the heat to low, place a lid on the saucepan, and let the quinoa simmer for 15 minutes. Do not lift the lid during cooking, as the steam inside is what perfectly cooks the quinoa. After 15 minutes, remove from heat and let it sit, lid on, for another 5 minutes.
While the quinoa cooks, preheat your oven to 425 degrees Fahrenheit. Line a baking sheet with parchment paper.
In a large bowl, combine the diced zucchini, halved cherry tomatoes, diced red onion, and drained chickpeas. Drizzle with olive oil, add cumin, smoked paprika, salt, and pepper. Toss well so everything is evenly coated.
Spread the vegetable and chickpea mixture onto the prepared baking sheet in a single layer. Roast in the oven for 18 to 20 minutes, stirring once halfway through, until the edges of the zucchini are golden and the chickpeas are slightly crispy.
Once the quinoa has rested, fluff it with a fork. It should look light and fluffy, with the small curly tails visible on each grain.
Divide the fluffed quinoa between two bowls. Add a handful of fresh spinach directly on top of the hot quinoa. The heat from the quinoa will gently wilt the spinach in just a minute or two.
Spoon the roasted vegetables and chickpeas over the spinach and quinoa. Squeeze fresh lemon juice over the top of each bowl. Serve immediately while warm and enjoy.
4. Stir-Fried Tofu with Broccoli
Prep Time: 15 minutes | Cook Time: 15 minutes | Serves: 2
Crispy golden tofu and bright green broccoli tossed in a savory, garlicky sauce — this stir-fry comes together quickly and makes a satisfying plant-based dinner. High in plant protein and low in calories, it is a wonderful addition to any list of weight loss dinner ideas, especially for those cutting back on meat.
Ingredients:
- 14 oz firm tofu, pressed and cubed
- 3 cups broccoli florets
- 3 garlic cloves, minced
- 1 teaspoon fresh ginger, grated
- 2 tablespoons low-sodium soy sauce
- 1 tablespoon sesame oil
- 1 tablespoon rice vinegar
- 1 teaspoon cornstarch
- 1/4 cup water
- 1 tablespoon vegetable oil for cooking
- Sesame seeds and green onions for garnish
Instructions:
Press the tofu first, as this is the most important step for achieving crispy results. Wrap the block of firm tofu in a clean kitchen towel or several layers of paper towels. Place a heavy cutting board or pan on top and let it press for at least 15 minutes. This removes excess moisture that would otherwise make the tofu steam instead of crisp up.
After pressing, cut the tofu into even cubes, about 3/4 inch in size. Cutting them uniformly helps them cook evenly and brown consistently.
In a small bowl, whisk together the soy sauce, sesame oil, rice vinegar, cornstarch, and water. Stir until the cornstarch is fully dissolved. Set this sauce aside for later.
Heat the vegetable oil in a large non-stick skillet or wok over medium-high heat. The pan must be very hot before you add the tofu. Test by dropping a tiny bit of water into the pan — it should sizzle and evaporate instantly.
Add the tofu cubes to the hot pan in a single layer. Do not stir them right away. Let them cook undisturbed for 3 to 4 minutes until a golden crust forms on the bottom. This patience is what gives you crispy tofu rather than mushy pieces.
Once the bottom is golden, flip each piece gently and cook the other sides for another 3 minutes, turning occasionally to brown all edges. Remove the crispy tofu from the pan and set it aside on a plate.
In the same pan, add a tiny drizzle more oil if needed. Add the broccoli florets and stir-fry over high heat for about 3 minutes. The broccoli should turn bright green and develop a few lightly charred edges while still staying crisp and tender.
Add the minced garlic and grated ginger to the broccoli. Stir constantly for about 30 seconds to 1 minute, until fragrant. Be careful not to burn the garlic — keep everything moving.
Return the crispy tofu to the pan with the broccoli. Pour the prepared sauce over everything. Toss and stir quickly over high heat for about 1 to 2 minutes until the sauce thickens slightly and coats all the tofu and broccoli evenly.
Remove from heat, garnish with a sprinkle of sesame seeds and sliced green onions, and serve immediately over a small portion of brown rice or on its own.
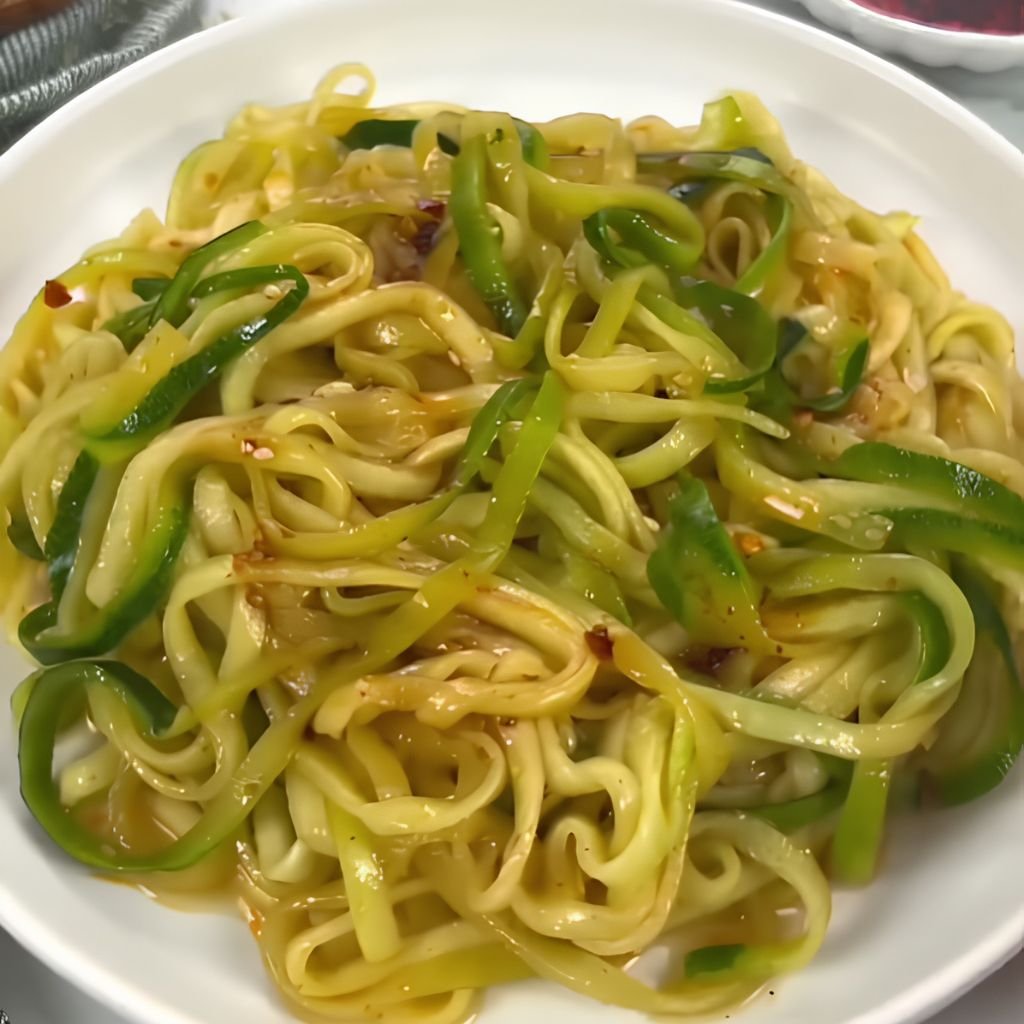
5. Zucchini Noodles with Tomato Sauce
Prep Time: 10 minutes | Cook Time: 15 minutes | Serves: 2
Zucchini noodles are a brilliant swap for traditional pasta — light, low-carb, and full of nutrients. Topped with a rich, homemade tomato sauce and fresh basil, this dish proves that weight loss dinner ideas can be just as comforting and delicious as the meals you grew up eating.
Ingredients:
- 3 medium zucchinis, spiralized
- 1 can (14 oz) crushed tomatoes
- 3 garlic cloves, minced
- 1/2 yellow onion, finely diced
- 1 teaspoon olive oil
- 1 teaspoon dried basil
- 1 teaspoon dried oregano
- 1/2 teaspoon red pepper flakes (optional)
- Salt and black pepper to taste
- Fresh basil leaves for serving
Instructions:
Use a spiralizer or a vegetable peeler to turn the zucchinis into long, noodle-like strands. If you do not have a spiralizer, you can use a julienne peeler or even a standard box grater to create thin strips. Set the zucchini noodles aside on a paper towel-lined plate.
Sprinkle a little salt over the zucchini noodles and let them rest for 10 minutes. Salt draws out excess water from the zucchini, which is important because watery noodles will thin out your sauce and make the dish soggy. After 10 minutes, gently squeeze the noodles with a clean towel to remove the released moisture.
Heat the olive oil in a medium saucepan over medium heat. Add the diced onion and cook, stirring occasionally, for about 4 to 5 minutes until it softens and becomes slightly translucent.
Add the minced garlic to the onion and stir for about 30 seconds. You will smell the garlic become fragrant right away. Add the dried basil, oregano, and red pepper flakes, stirring to bloom the spices in the oil for about 30 more seconds.
Pour in the crushed tomatoes and stir everything together. Season with salt and black pepper. Bring the sauce to a gentle simmer over medium heat.
Reduce the heat to low and let the sauce cook gently for 10 to 12 minutes, stirring occasionally. As it simmers, the sauce thickens and the flavors deepen. Taste and adjust the salt, pepper, or herbs as needed.
While the sauce finishes, lightly warm the zucchini noodles in a separate dry skillet over medium heat for just 1 to 2 minutes. You want them warmed through but still a little firm — overcooking zucchini noodles makes them completely limp.
Divide the warm zucchini noodles between two bowls or plates. Ladle the tomato sauce generously over the top.
Finish with a few fresh basil leaves torn by hand and placed on top. Serve right away and enjoy the fresh, light flavors of this low-carb dinner.
6. Lentil Soup
Prep Time: 10 minutes | Cook Time: 35 minutes | Serves: 4
A big pot of warm lentil soup is one of the most filling and budget-friendly weight loss dinner ideas you can make. Lentils are packed with plant-based protein, dietary fiber, and iron. Every bowl is thick, hearty, and deeply satisfying — the kind of dinner that keeps you full for hours without weighing you down.
Ingredients:
- 1 and 1/2 cups green or red lentils, rinsed
- 1 yellow onion, diced
- 3 garlic cloves, minced
- 2 medium carrots, peeled and diced
- 2 stalks celery, diced
- 1 can (14 oz) diced tomatoes
- 6 cups low-sodium vegetable broth
- 1 teaspoon cumin
- 1 teaspoon turmeric
- 1 teaspoon smoked paprika
- 1 tablespoon olive oil
- Salt and black pepper to taste
- Fresh lemon juice and parsley for serving
Instructions:
Rinse the lentils under cold water using a fine mesh strainer, picking out any debris. Unlike dried beans, lentils do not need soaking, which is what makes them so convenient for a weeknight dinner.
Heat olive oil in a large pot or Dutch oven over medium heat. Add the diced onion, carrots, and celery. Cook these together for about 7 to 8 minutes, stirring occasionally, until the onion is soft and the carrots start to soften.
Add the minced garlic and stir for 1 minute until fragrant. Then add the cumin, turmeric, and smoked paprika. Stir the spices into the vegetables for about 30 seconds, letting them toast lightly in the oil. This step brings out a much deeper, more complex flavor in the soup.
Pour in the can of diced tomatoes along with their liquid. Stir everything together and let it cook for 2 minutes, allowing the tomatoes to combine with the spiced vegetables.
Add the rinsed lentils and pour in the vegetable broth. Stir well and increase the heat to bring the soup to a full boil.
Once boiling, reduce the heat to medium-low and cover the pot with a lid. Let the soup simmer for 25 to 30 minutes. During this time, the lentils will absorb the broth and soften completely, naturally thickening the soup.
After 25 minutes, check the lentils by pressing one between your fingers — they should be very soft and easy to mash. If they are still a little firm, continue simmering for another 5 to 10 minutes.
At this point, you can leave the soup as is for a chunky texture, or use an immersion blender to partially blend it for a creamier consistency. Blend just a portion of the soup so some chunks of vegetable and lentil remain.
Season the soup generously with salt and black pepper. Taste and adjust the spices if needed. Ladle into bowls, squeeze fresh lemon juice over the top of each serving, and finish with chopped fresh parsley.
7. Grilled Shrimp with Avocado Salad
Prep Time: 15 minutes | Cook Time: 10 minutes | Serves: 2
Juicy, perfectly seasoned shrimp paired with a creamy avocado salad is the kind of dinner that feels special but takes almost no time at all. Shrimp is naturally low in calories and high in protein, making this one of the most effective weight loss dinner ideas for busy nights when you still want something that looks and tastes impressive.
Ingredients:
- 1 lb large shrimp, peeled and deveined
- 1 ripe avocado, diced
- 1 cup cherry tomatoes, halved
- 1/4 red onion, finely chopped
- 1/2 cucumber, diced
- Juice of 2 limes
- 2 tablespoons fresh cilantro, chopped
- 1 tablespoon olive oil
- 1 teaspoon garlic powder
- 1/2 teaspoon chili powder
- Salt and black pepper to taste
Instructions:
Begin by preparing the shrimp. Make sure they are fully peeled and deveined. Pat them completely dry with paper towels. Dry shrimp cook better — they get a lightly seared surface instead of steaming in their own moisture.
In a medium bowl, combine the dried shrimp with olive oil, garlic powder, chili powder, salt, and black pepper. Toss well until every shrimp is coated in the seasoning. Let the shrimp marinate for 5 to 10 minutes while you prepare the salad.
To make the avocado salad, combine the diced avocado, halved cherry tomatoes, diced cucumber, and finely chopped red onion in a mixing bowl. Add the chopped fresh cilantro.
Squeeze the lime juice over the salad mixture. Add a pinch of salt and gently toss everything together. Be gentle when mixing so the avocado pieces stay intact and do not turn to mush. Taste and adjust the salt or lime as needed. Set the salad aside.
Preheat your grill or a non-stick grill pan over high heat. The high heat is important for shrimp — they cook very quickly and need a hot surface to develop color.
Arrange the marinated shrimp on the hot grill in a single layer. Cook for 2 to 3 minutes on one side without moving them. You will see the shrimp start to turn pink and opaque from the bottom up.
Flip each shrimp using tongs and cook for another 1 to 2 minutes on the other side. Shrimp are done when they are pink and curled into a loose C shape. If they curl tightly into an O shape, they are slightly overcooked. Remove them promptly from the heat.
Plate the shrimp by arranging them on a plate or shallow bowl. Spoon the avocado salad generously alongside or underneath the shrimp. Garnish with extra cilantro and a lime wedge on the side.
Serve immediately while the shrimp are still warm and the salad is cool and fresh. The contrast of warm grilled shrimp with the creamy, cool avocado is what makes this dish so satisfying.
8. Egg White Omelette with Spinach
Prep Time: 5 minutes | Cook Time: 10 minutes | Serves: 1
Light, fluffy, and full of protein, an egg white omelette with spinach is a quick dinner for nights when you need something healthy on the table in under 15 minutes. Low in calories and rich in essential nutrients, this is one of those weight loss dinner ideas that works perfectly at any time of day.
Ingredients:
- 4 large egg whites
- 1 cup fresh baby spinach
- 1/4 cup cherry tomatoes, halved
- 2 tablespoons low-fat feta cheese or goat cheese (optional)
- 1 teaspoon olive oil or cooking spray
- Salt and black pepper to taste
- Fresh herbs like dill or chives for garnish (optional)
Instructions:
Crack the eggs and separate the whites from the yolks carefully. The easiest way to do this is to crack the egg over a bowl and pass the yolk back and forth between the two halves of the shell, letting the white drop into the bowl. Alternatively, use a clean egg separator tool. Collect all four egg whites in a medium mixing bowl.
Add a pinch of salt and black pepper to the egg whites. Using a fork or a small whisk, beat the egg whites vigorously for about 1 to 2 minutes. You want the mixture to be frothy and slightly airy with tiny bubbles visible throughout. This aeration is what makes the omelette light and fluffy.
Heat a small non-stick skillet (about 8 inches) over medium heat. Add the olive oil or spray the pan lightly with cooking spray. Allow the pan to heat up for about 1 minute so the egg whites do not stick.
Pour the beaten egg whites into the pan. They will begin to set around the edges almost immediately. Using a spatula, gently push the cooked edges toward the center of the pan while tilting the pan slightly so the liquid egg white runs to the edges and continues to cook.
Once the egg whites are mostly set but still slightly soft and glossy on top — about 2 to 3 minutes — it is time to add the fillings. Do not wait until the top is completely dry, or the omelette will be tough.
Spread the fresh baby spinach over one half of the omelette. Add the halved cherry tomatoes on top of the spinach. If using cheese, crumble it over the spinach and tomatoes now.
Carefully fold the empty half of the omelette over the filling using the spatula. Press down lightly to help the omelette hold its shape.
Let the folded omelette cook for another 30 to 60 seconds. The heat inside will gently wilt the spinach and melt the cheese slightly without overcooking the egg whites.
Slide the omelette gently onto a plate. Garnish with fresh herbs if using, and serve right away with a side of sliced cucumber or a small piece of whole grain toast if desired.
9. Chicken Lettuce Wraps
Prep Time: 10 minutes | Cook Time: 15 minutes | Serves: 2
Crispy lettuce leaves wrapped around savory, seasoned ground chicken with crunchy water chestnuts and fresh herbs — these wraps are light, low-carb, and completely addictive. Among weight loss dinner ideas, chicken lettuce wraps are a go-to because they feel like a restaurant meal but take only 25 minutes to make at home.
Ingredients:
- 1 lb lean ground chicken
- 8 large butter lettuce or iceberg lettuce leaves
- 1 can (8 oz) water chestnuts, drained and diced
- 3 garlic cloves, minced
- 1 teaspoon fresh ginger, grated
- 3 tablespoons low-sodium soy sauce
- 1 tablespoon hoisin sauce
- 1 tablespoon rice vinegar
- 1 teaspoon sesame oil
- 1/2 teaspoon red pepper flakes
- 3 green onions, thinly sliced
- 1 teaspoon vegetable oil for cooking
Instructions:
In a small bowl, combine the soy sauce, hoisin sauce, rice vinegar, sesame oil, and red pepper flakes. Stir well and set this sauce aside. Having the sauce ready before you start cooking makes the process much smoother since the chicken cooks quickly.
Prepare your lettuce leaves by carefully separating them from the head. Choose leaves that are large, cup-shaped, and intact so they can hold the filling without falling apart. Rinse them under cold water, pat dry with paper towels, and arrange on a serving plate.
Heat the vegetable oil in a large skillet over medium-high heat. Add the ground chicken, breaking it apart with a wooden spoon or spatula as soon as it hits the pan.
Cook the chicken, continuing to break it into small crumbles, for about 5 to 6 minutes until it is cooked through with no pink remaining. Stir frequently to make sure it cooks evenly.
Push the cooked chicken to one side of the pan. Add the minced garlic and grated ginger to the empty side of the pan. Let them cook for 30 seconds, stirring constantly, until fragrant, then mix everything together.
Add the diced water chestnuts to the pan and stir to combine with the chicken and aromatics. The water chestnuts add a satisfying crunch that contrasts beautifully with the tender chicken.
Pour the prepared sauce over the chicken mixture. Stir well to coat every piece evenly. Let the mixture cook for another 1 to 2 minutes over medium heat, allowing the sauce to thicken slightly and absorb into the chicken.
Remove from heat and stir in half of the sliced green onions. Taste the filling and adjust seasoning with a little more soy sauce or a dash of red pepper flakes if desired.
To serve, spoon about 2 to 3 tablespoons of the chicken filling into each lettuce cup. Top with the remaining green onions. Serve immediately while the filling is warm and the lettuce is cool and crisp.
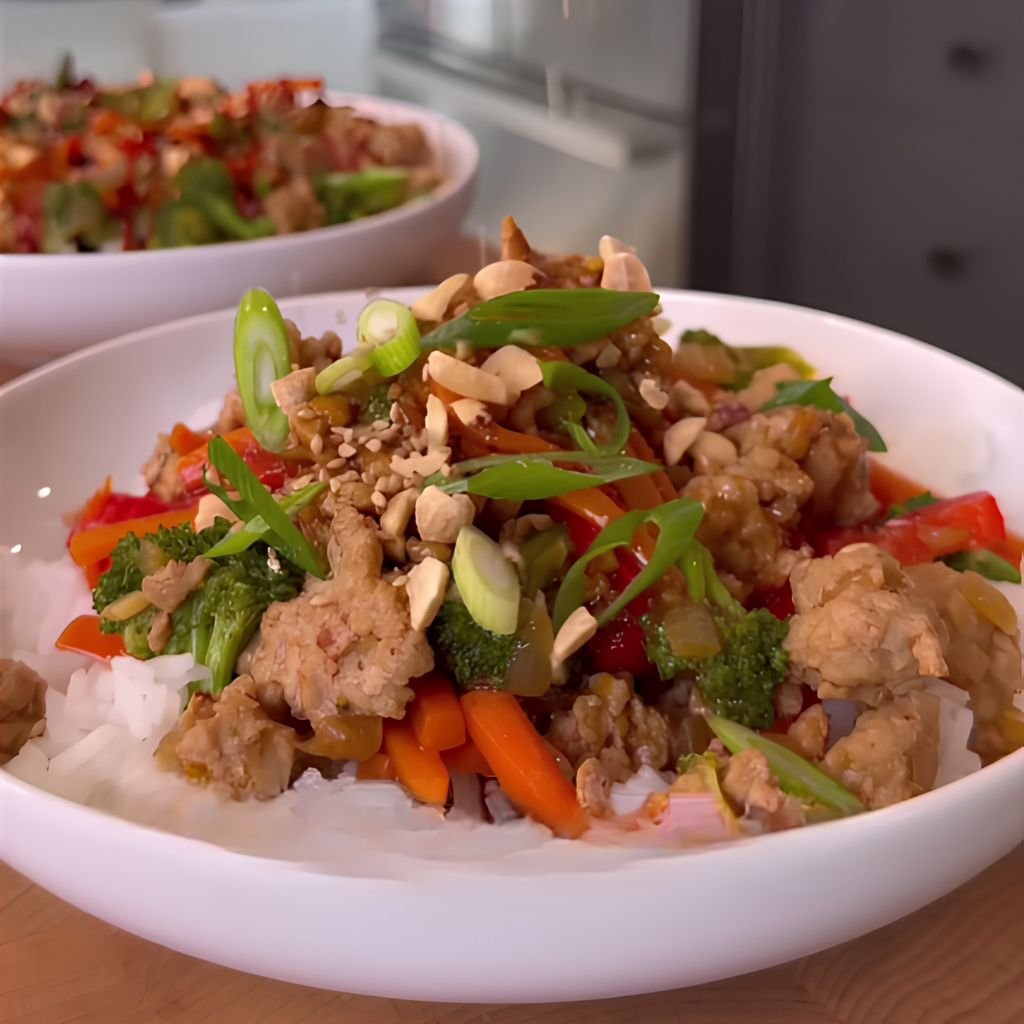
10. Turkey and Veggie Stir Fry
Prep Time: 10 minutes | Cook Time: 15 minutes | Serves: 2
Ground turkey tossed with colorful vegetables in a quick savory sauce makes a protein-packed dinner that comes together in under 30 minutes. Turkey is leaner than beef and keeps the calorie count low, making this stir fry one of the most practical weight loss dinner ideas for any night of the week.
Ingredients:
- 1 lb lean ground turkey
- 1 cup bell pepper (mixed colors), sliced
- 1 cup snap peas
- 1 cup mushrooms, sliced
- 1 medium carrot, julienned
- 3 garlic cloves, minced
- 1 teaspoon fresh ginger, grated
- 3 tablespoons low-sodium soy sauce
- 1 tablespoon oyster sauce (optional)
- 1 teaspoon sesame oil
- 1 tablespoon vegetable oil
- 1/2 teaspoon black pepper
Instructions:
Prepare all vegetables before you start cooking. Stir frying moves quickly, so having everything cut and ready prevents burning. Slice the bell peppers into thin strips, halve the snap peas if they are large, slice the mushrooms, and julienne the carrot into thin matchstick strips.
In a small bowl, stir together the soy sauce, oyster sauce (if using), sesame oil, and black pepper. Set this sauce aside so it is ready the moment you need it.
Heat vegetable oil in a large wok or wide skillet over high heat. The pan should be very hot — this high heat is the secret to a good stir fry.
Add the ground turkey and break it apart with a spatula. Cook over high heat for 4 to 5 minutes, stirring often, until the turkey is browned and fully cooked through with no pink left.
Move the cooked turkey to the edges of the pan. Add the garlic and ginger to the center. Stir them for about 30 seconds until fragrant, then mix together with the turkey.
Add the hardest vegetables first — the julienned carrot and bell pepper strips. Stir fry for 2 to 3 minutes over high heat, tossing constantly.
Add the snap peas and mushrooms. Continue stir frying for another 2 minutes. The mushrooms will release some liquid — keep the heat high so it evaporates quickly rather than making the dish watery.
Pour the sauce over the turkey and vegetables. Toss everything together quickly over high heat for 1 to 2 minutes until the sauce coats every piece and reduces slightly.
Remove from heat and serve immediately over a small portion of brown rice, cauliflower rice, or on its own. Garnish with sliced green onions or a drizzle of extra sesame oil for added flavor.
11. Cauliflower Rice Bowl
Prep Time: 10 minutes | Cook Time: 15 minutes | Serves: 2
Cauliflower rice is one of the best low-carb swaps you can make, and building a flavorful bowl around it transforms a simple vegetable into a full, satisfying dinner. Loaded with vegetables and seasoned beautifully, this is a standout among weight loss dinner ideas for people watching their carbohydrate intake.
Ingredients:
- 1 large head of cauliflower, grated (or 3 cups pre-riced cauliflower)
- 1 cup edamame, shelled
- 1 cup shredded red cabbage
- 1 medium carrot, shredded
- 2 tablespoons low-sodium soy sauce
- 1 tablespoon sesame oil
- 1 teaspoon rice vinegar
- 2 garlic cloves, minced
- 1 teaspoon grated ginger
- 1 tablespoon olive oil for cooking
- Sesame seeds and lime wedges for serving
Instructions:
If using a whole cauliflower, break it into large chunks and place them in a food processor. Pulse several times until the cauliflower reaches a rice-like consistency. Do not over-process or it will become too mushy. Alternatively, grate the cauliflower on the large holes of a box grater.
Spread the cauliflower rice onto a clean kitchen towel and squeeze out as much moisture as possible. This step prevents the cauliflower rice from steaming itself in the pan, which would make it soft and wet rather than light and fluffy.
Heat the olive oil in a large skillet over medium-high heat. Add the minced garlic and grated ginger. Stir for about 30 seconds until aromatic.
Add the dried cauliflower rice to the pan. Spread it out in an even layer and let it cook without stirring for 2 minutes. This allows the bottom to lightly toast, creating a better texture and more depth of flavor.
Stir the cauliflower rice and cook for another 3 to 4 minutes, stirring occasionally, until it is heated through and slightly golden in spots. Season lightly with salt and a tablespoon of soy sauce.
While the cauliflower rice cooks, prepare the toppings. Cook the edamame according to package directions if frozen. Shred the carrot and cabbage if not already done.
In a small bowl, whisk together the remaining soy sauce, sesame oil, and rice vinegar to create a dressing for the bowl toppings.
Divide the cauliflower rice between two bowls. Arrange the edamame, shredded red cabbage, and shredded carrot on top in separate sections.
Drizzle the sesame dressing over the entire bowl. Sprinkle with sesame seeds and serve with lime wedges on the side for a bright finishing squeeze.
12. Baked Sweet Potato with Cottage Cheese
Prep Time: 5 minutes | Cook Time: 45 minutes | Serves: 2
A fluffy baked sweet potato topped with creamy cottage cheese and fresh herbs is a simple, nourishing dinner that feels surprisingly indulgent. Sweet potatoes are rich in fiber and vitamins, while cottage cheese adds a big hit of protein — together they make one of the most balanced weight loss dinner ideas on this list.
Ingredients:
- 2 medium sweet potatoes
- 1 cup low-fat cottage cheese
- 2 tablespoons fresh chives, chopped
- 1/4 teaspoon garlic powder
- Salt and black pepper to taste
- 1 teaspoon olive oil
- Paprika for garnish
Instructions:
Preheat your oven to 400 degrees Fahrenheit. While it heats up, scrub the sweet potatoes well under running water to remove any dirt from the skin. Pat them completely dry.
Rub each sweet potato with a small amount of olive oil, coating the entire skin. Place them directly on the oven rack or on a foil-lined baking sheet. Using the oven rack allows hot air to circulate fully around the potatoes and gives you the crispiest skin.
Bake the sweet potatoes for 40 to 50 minutes depending on their size. A medium-sized sweet potato usually takes about 45 minutes. You can test doneness by inserting a fork or thin knife into the thickest part — it should slide in easily with no resistance.
While the potatoes bake, prepare the cottage cheese topping. In a small bowl, mix together the cottage cheese, garlic powder, half of the chopped chives, salt, and black pepper. Stir well to combine. Taste and adjust the seasoning as needed.
Once the sweet potatoes are done, remove them from the oven and let them cool for 3 to 4 minutes so they are safe to handle. Then, using a knife, slice each potato open lengthwise down the center.
Use a fork to gently fluff the inside of each potato, pushing the flesh up from the edges toward the center to create a soft, open pocket ready to hold the topping.
Spoon the seasoned cottage cheese generously into the open sweet potatoes. Do not be shy — the cottage cheese is a key part of the nutrition and the flavor of this dish.
Sprinkle the remaining fresh chives over the top, followed by a light dusting of paprika for color. Serve immediately while the potato is still hot and the cottage cheese is cool and creamy.
13. Greek Yogurt Chicken Salad
Prep Time: 15 minutes | Cook Time: 0 minutes (use pre-cooked chicken) | Serves: 2
Creamy, tangy, and packed with protein, this chicken salad swaps heavy mayonnaise for thick Greek yogurt — cutting calories without sacrificing any of the richness. Served in lettuce cups, on cucumber slices, or with whole grain crackers, this is one of those weight loss dinner ideas that works equally well as a quick lunch or a no-cook evening meal.
Ingredients:
- 2 cups cooked chicken breast, shredded or diced
- 1/2 cup plain non-fat Greek yogurt
- 2 stalks celery, finely chopped
- 1/4 red onion, finely diced
- 1/4 cup seedless grapes, halved (optional)
- 1 tablespoon Dijon mustard
- 1 tablespoon fresh dill or parsley, chopped
- Juice of half a lemon
- Salt and black pepper to taste
- Lettuce leaves or cucumber slices for serving
Instructions:
Begin with the chicken. Use pre-cooked rotisserie chicken for the easiest option, or cook and cool chicken breasts ahead of time. Shred the chicken by pulling it apart with two forks, or dice it into small bite-sized pieces — about half an inch in size. Using small pieces means the dressing coats everything evenly.
In a large mixing bowl, combine the Greek yogurt, Dijon mustard, and lemon juice. Whisk or stir these together until smooth and well blended. Taste the base and adjust — add a little more mustard for a sharper flavor or more lemon juice for brightness.
Add the finely chopped celery and diced red onion to the yogurt dressing. Stir to distribute evenly throughout the mixture. The celery adds crunch and the onion adds a mild bite.
Add the shredded or diced chicken to the bowl. Fold everything together gently, making sure the chicken is fully coated in the yogurt dressing. Do not overmix, as this can break down the chicken into too-small pieces.
If using grapes, add them now and fold them in gently. Grapes add a subtle sweetness that balances the tanginess of the yogurt and mustard very nicely.
Season the salad with salt and black pepper. Add the fresh dill or parsley and fold it in gently.
For the best flavor, cover the bowl and refrigerate for at least 15 to 20 minutes before serving. This resting time allows all the flavors to come together beautifully.
Serve the chicken salad in crisp lettuce cups, on top of cucumber rounds, or with a side of whole grain crackers. It stays fresh in the refrigerator for up to 2 days.
14. Vegetable Soup
Prep Time: 15 minutes | Cook Time: 30 minutes | Serves: 4
A pot of homemade vegetable soup is one of the most generous weight loss dinner ideas you can make. Low in calories, high in fiber, and full of vitamins from a rainbow of vegetables, this soup keeps you warm, full, and well-nourished. Make a big batch and enjoy it for multiple meals throughout the week.
Ingredients:
- 2 medium carrots, diced
- 2 stalks celery, diced
- 1 yellow onion, diced
- 2 garlic cloves, minced
- 1 zucchini, diced
- 1 cup green beans, trimmed and chopped
- 1 can (14 oz) diced tomatoes
- 1 can (15 oz) kidney beans, drained and rinsed
- 6 cups low-sodium vegetable broth
- 1 teaspoon dried thyme
- 1 teaspoon dried rosemary
- 1 tablespoon olive oil
- Salt and black pepper to taste
Instructions:
Heat the olive oil in a large, heavy-bottomed pot over medium heat. Add the diced onion, carrots, and celery. Cook these base vegetables for about 6 to 8 minutes, stirring occasionally, until they soften and the onion becomes translucent.
Add the minced garlic, dried thyme, and dried rosemary. Stir for about 1 minute to let the aromatics become fragrant in the hot oil.
Pour in the canned diced tomatoes along with all their liquid. Stir and scrape any bits from the bottom of the pot. Allow this to simmer for 2 minutes.
Add the low-sodium vegetable broth and stir everything together. Increase the heat to bring the soup to a full boil.
Once boiling, add the diced zucchini, chopped green beans, and drained kidney beans. Stir to distribute all the vegetables evenly.
Reduce the heat to medium-low and let the soup simmer uncovered for 20 minutes. The vegetables will soften, the flavors will blend together, and the broth will deepen in color.
After 20 minutes, taste the soup and season with salt and black pepper as needed. Different broths have varying salt levels, so always season at the end after tasting.
Ladle the soup into bowls and serve hot. Top with a sprinkle of fresh parsley or a drizzle of extra virgin olive oil if desired. Store any leftovers in an airtight container in the refrigerator for up to 4 days.
15. Chickpea Salad
Prep Time: 10 minutes | Cook Time: 0 minutes | Serves: 2
No cooking required and ready in 10 minutes — this chickpea salad is a protein-rich, fiber-packed dinner you can throw together on the busiest of nights. With crisp vegetables, fresh herbs, and a zesty lemon dressing, it is one of those weight loss dinner ideas that is as quick as it is nutritious.
Ingredients:
- 2 cans (15 oz each) chickpeas, drained and rinsed
- 1 cucumber, diced
- 1 cup cherry tomatoes, halved
- 1/4 red onion, finely diced
- 1/4 cup fresh parsley, chopped
- Juice of 1 large lemon
- 2 tablespoons olive oil
- 1 teaspoon cumin
- Salt and black pepper to taste
- Optional: 2 oz feta cheese, crumbled
Instructions:
Drain the chickpeas from their cans and rinse them very well under cold running water. Rinse until the water runs clear and no foam remains. Pat or shake off excess water. Well-rinsed chickpeas absorb the dressing much better.
Spread the rinsed chickpeas on a clean kitchen towel and roll them around gently to dry the outer surface. If you have a few extra minutes, this step makes a notable difference in the final texture of the salad.
In a large bowl, add the dried chickpeas, diced cucumber, halved cherry tomatoes, and finely diced red onion.
In a separate small bowl, whisk together the lemon juice, olive oil, cumin, salt, and black pepper. Whisk until the oil and lemon juice are well combined and the cumin is evenly distributed.
Pour the dressing over the chickpea and vegetable mixture. Toss everything together until all the ingredients are coated in the dressing.
Add the chopped fresh parsley and toss again gently. If using feta cheese, crumble it over the top and fold it in lightly so the pieces stay visible and do not break down completely.
Taste the salad and adjust with more lemon juice for brightness, more salt for flavor, or a drizzle of extra olive oil for richness.
Let the salad rest for 5 to 10 minutes before serving. This short resting time allows the chickpeas to absorb the lemon dressing and the flavors to come together fully. Serve at room temperature or slightly chilled.
16. Grilled Paneer with Veggies
Prep Time: 15 minutes | Cook Time: 15 minutes | Serves: 2
Golden, lightly charred cubes of paneer paired with colorful grilled vegetables make a vibrant, protein-rich dinner. Paneer is a fresh Indian cheese that holds its shape beautifully when grilled. For those exploring vegetarian weight loss dinner ideas, this dish delivers both satisfaction and great nutrition in every bite.
Ingredients:
- 8 oz paneer, cut into 1-inch cubes
- 1 bell pepper, cut into chunks
- 1 zucchini, cut into rounds
- 1 red onion, cut into wedges
- 1 cup mushrooms, whole or halved
- 2 tablespoons plain low-fat yogurt
- 1 tablespoon olive oil
- 1 teaspoon cumin
- 1 teaspoon coriander
- 1/2 teaspoon turmeric
- 1/2 teaspoon chili powder
- Salt to taste
- Fresh mint or cilantro for garnish
Instructions:
In a large mixing bowl, combine the plain yogurt, olive oil, cumin, coriander, turmeric, chili powder, and salt. Stir together until the marinade is smooth and uniform.
Add the paneer cubes to the marinade and toss gently to coat all sides. The yogurt base helps the spices stick to the paneer and promotes a beautiful, slightly charred crust when grilled.
Add all the prepared vegetables — the bell pepper chunks, zucchini rounds, red onion wedges, and mushrooms — to the same bowl. Toss everything together so the vegetables are coated in the remaining marinade.
Cover the bowl and let everything marinate for at least 10 to 15 minutes at room temperature, or up to 30 minutes in the refrigerator. The longer marinating time gives you a deeper, more complex flavor.
If using skewers, thread the marinated paneer and vegetables alternately onto the skewers. If using a grill pan or baking sheet, simply arrange them in a single layer.
Preheat your grill, grill pan, or broiler to high heat. For a grill pan, lightly oil the surface to prevent sticking.
Cook the paneer and vegetables over high heat for about 3 to 4 minutes per side. You are looking for golden-brown grill marks on the paneer and lightly charred edges on the vegetables. Turn carefully using tongs.
Once everything is nicely grilled on all sides, remove from heat and arrange on a serving plate. The paneer should be golden and firm on the outside with a soft center.
Garnish generously with fresh mint or cilantro. Serve immediately with a side of cucumber raita, a small salad, or wrapped in a lettuce leaf for a low-carb option.
17. Brown Rice and Chicken Bowl
Prep Time: 10 minutes | Cook Time: 30 minutes | Serves: 2
A nourishing, well-balanced bowl of fluffy brown rice, tender grilled chicken, and fresh vegetables is a meal prep dream. Simple to make in large batches and endlessly customizable, this bowl is one of the most reliable weight loss dinner ideas for people who want to eat clean throughout the week without spending hours in the kitchen.
Ingredients:
- 1 cup brown rice
- 2 cups low-sodium chicken broth (for cooking rice)
- 2 boneless, skinless chicken breasts
- 1 cup broccoli florets, steamed
- 1 cup shredded purple cabbage
- 1 medium carrot, julienned
- 2 tablespoons low-sodium soy sauce
- 1 tablespoon olive oil
- 1 teaspoon garlic powder
- 1 teaspoon onion powder
- Salt and black pepper to taste
- Sesame seeds and sliced green onion for garnish
Instructions:
Rinse the brown rice under cold water until the water runs clear. Place the rinsed rice in a medium saucepan with the chicken broth. Bring to a boil over medium-high heat, then reduce the heat to low, cover tightly, and cook for 25 to 30 minutes until all the liquid is absorbed and the rice is tender.
While the rice cooks, prepare the chicken. Pat the chicken breasts dry and season both sides with garlic powder, onion powder, salt, and black pepper.
Heat olive oil in a skillet over medium-high heat. Add the chicken and cook for 6 to 7 minutes on the first side without disturbing it. Let the bottom develop a golden crust.
Flip the chicken and cook for another 6 to 7 minutes on the other side until the internal temperature reads 165 degrees Fahrenheit. Remove from the pan and let the chicken rest on a cutting board for 5 minutes.
While the chicken rests, drizzle the soy sauce into the same hot skillet. Swirl it around and cook for 30 seconds. This creates a quick, flavorful glaze you can drizzle over the bowls.
Steam the broccoli florets in a small pot with a steamer basket, or microwave them in a covered dish with a splash of water for 2 to 3 minutes until bright green and just tender.
Once the rice is done, remove from heat and let it rest with the lid on for 5 minutes. Then fluff it with a fork.
Slice the rested chicken into thin strips. Divide the fluffy brown rice between two bowls. Arrange the sliced chicken, steamed broccoli, shredded cabbage, and julienned carrot over the rice.
Drizzle the soy glaze over the assembled bowls. Sprinkle with sesame seeds and sliced green onions. Serve immediately.
18. Tuna Salad
Prep Time: 10 minutes | Cook Time: 0 minutes | Serves: 2
Classic tuna salad gets a healthy upgrade with Greek yogurt, crisp celery, and a bright lemon dressing. High in protein and omega-3 fatty acids, canned tuna is one of the most affordable and convenient building blocks for weight loss dinner ideas. Ready in 10 minutes with no cooking required.
Ingredients:
- 2 cans (5 oz each) tuna in water, well drained
- 3 tablespoons plain non-fat Greek yogurt
- 1 tablespoon Dijon mustard
- 2 stalks celery, finely chopped
- 2 tablespoons red onion, finely chopped
- 1 tablespoon capers, roughly chopped (optional)
- Juice of half a lemon
- Salt and black pepper to taste
- Fresh dill or parsley, chopped
- Cucumber slices, lettuce leaves, or whole grain crackers for serving
Instructions:
Open the tuna cans and drain them very well. Press down on the tuna with the can lid while tilting it over the sink to remove as much liquid as possible. Excess liquid in the tuna will make the salad watery and thin. Transfer the drained tuna to a mixing bowl and flake it apart with a fork.
Break up any large chunks of tuna so the texture is relatively even throughout — small to medium flakes blend better with the dressing and vegetables.
Add the Greek yogurt and Dijon mustard to the bowl with the tuna. Stir together until the tuna is evenly coated. The yogurt adds creaminess while the mustard brings a sharp, tangy edge that makes this much more interesting than plain tuna.
Add the finely chopped celery and red onion. The celery provides a satisfying crunch and fresh flavor, while the red onion adds a mild sharpness. Stir to distribute them evenly.
If using capers, add them now. Capers bring a briny, savory note that pairs exceptionally well with tuna. Roughly chop them first so the flavor is more evenly distributed throughout the salad.
Squeeze the lemon juice over the entire mixture. Season with salt and black pepper. Stir everything together thoroughly.
Taste the salad and adjust the seasoning. Add more lemon for brightness, more yogurt for creaminess, or a pinch of extra salt for depth.
Add the fresh dill or parsley and fold it in gently. Fresh herbs brighten the entire salad significantly and should not be skipped.
Serve the tuna salad immediately on a bed of crisp lettuce leaves, on cucumber rounds, or alongside whole grain crackers. Store any leftover salad in an airtight container in the refrigerator for up to 2 days.
19. Stuffed Bell Peppers
Prep Time: 15 minutes | Cook Time: 35 minutes | Serves: 4
Vibrant bell peppers stuffed with a hearty filling of lean ground turkey, black beans, and vegetables make a complete, colorful dinner that the whole table will enjoy. Naturally portioned and packed with nutrients, stuffed bell peppers are among the most satisfying weight loss dinner ideas that truly feel like a full and special meal.
Ingredients:
- 4 large bell peppers (any color), tops cut off and seeded
- 1 lb lean ground turkey
- 1 can (15 oz) black beans, drained and rinsed
- 1 cup low-sodium tomato sauce
- 1/2 cup frozen corn, thawed
- 1/2 yellow onion, diced
- 2 garlic cloves, minced
- 1 teaspoon cumin
- 1 teaspoon chili powder
- Salt and black pepper to taste
- 1/4 cup shredded low-fat mozzarella cheese (optional)
- Fresh cilantro for garnish
Instructions:
Preheat your oven to 375 degrees Fahrenheit. Prepare the bell peppers by cutting off the tops and removing all the seeds and white membranes from the inside. Stand them upright in a baking dish. If they do not stand straight, trim a thin slice from the bottom to level them out without cutting through.
Place the empty peppers in the baking dish and add about half an inch of water to the bottom of the dish. This water creates steam in the oven that helps soften the peppers while they bake.
Heat a large skillet over medium-high heat. Add the ground turkey and break it up with a wooden spoon. Cook for about 5 minutes until browned and cooked through with no pink remaining.
Add the diced onion to the cooked turkey and stir for 3 to 4 minutes until softened. Add the minced garlic, cumin, and chili powder, stirring for 1 minute until fragrant.
Pour in the tomato sauce and stir to combine with the meat and vegetables. Add the drained black beans and thawed corn. Stir everything together and season with salt and black pepper. Let this filling simmer on low heat for about 5 minutes so the flavors develop.
Taste the filling and adjust the spices if needed. The filling should be flavorful on its own since it is the main component of the dish.
Spoon the filling generously into each prepared bell pepper, pressing down gently to pack it in and filling each one right to the top.
If using cheese, sprinkle a tablespoon of shredded low-fat mozzarella on top of each filled pepper.
Cover the baking dish tightly with aluminum foil and bake for 25 minutes. Then remove the foil and bake for another 10 minutes until the peppers are tender and any cheese on top is melted and lightly golden.
Remove from the oven and let the peppers cool for 5 minutes before serving. Garnish each pepper with a sprinkle of fresh cilantro and serve.
20. Mushroom and Spinach Stir Fry
Prep Time: 10 minutes | Cook Time: 15 minutes | Serves: 2
Earthy mushrooms and tender baby spinach come together in a quick, savory stir fry that is light yet deeply satisfying. Mushrooms are naturally low in calories but have a meaty, umami-rich quality that makes every bite feel substantial. Rounding out the list of weight loss dinner ideas, this one is proof that plant-based eating can be genuinely delicious.
Ingredients:
- 3 cups mixed mushrooms (cremini, shiitake, or button), sliced
- 3 cups fresh baby spinach
- 3 garlic cloves, minced
- 1 teaspoon fresh ginger, grated
- 2 tablespoons low-sodium soy sauce
- 1 teaspoon sesame oil
- 1 tablespoon rice vinegar
- 1 tablespoon vegetable oil for cooking
- 1/2 teaspoon red pepper flakes (optional)
- Sesame seeds and green onions for garnish
Instructions:
Prepare the mushrooms by wiping them clean with a damp paper towel rather than rinsing them under water. Mushrooms absorb water quickly and wet mushrooms will steam rather than brown in the pan. Slice them into even pieces about a quarter inch thick.
In a small bowl, combine the soy sauce, sesame oil, and rice vinegar. Stir together and set this sauce aside for the end of cooking.
Heat the vegetable oil in a large wok or skillet over high heat. The pan must be very hot before adding the mushrooms. High heat is essential for browning mushrooms properly.
Add the sliced mushrooms to the hot pan in a single layer if possible. Do not stir immediately — let them cook undisturbed for 2 to 3 minutes. This allows a golden, caramelized crust to form on the mushrooms, which is where much of the rich, savory flavor comes from.
Once the bottoms are nicely browned, stir the mushrooms and cook for another 2 to 3 minutes, continuing to cook them over high heat until they are golden on multiple sides and their moisture has evaporated.
Add the minced garlic, grated ginger, and red pepper flakes to the pan. Stir constantly for about 30 to 45 seconds until fragrant. Do not let the garlic sit still — it can burn very quickly over high heat.
Add the fresh baby spinach to the pan. It will look like a large amount at first but will reduce dramatically. Toss the spinach quickly with the mushrooms using tongs or a spatula.
Pour the prepared sauce over the mushrooms and spinach. Toss everything together quickly over the high heat for about 1 minute. The spinach will wilt completely, the sauce will reduce slightly, and everything will be coated in the savory glaze.
Remove from heat immediately to prevent the spinach from becoming overcooked and too soft. Transfer to plates, sprinkle with sesame seeds and sliced green onions, and serve right away over cauliflower rice or a small portion of brown rice.
Tips to Make Your Dinner More Weight Loss Friendly
Small changes at dinner time add up to big results over weeks and months. Here are four simple strategies to make every meal work harder for your goals:
1. Control portion sizes. Use a smaller plate and fill at least half of it with vegetables or salad. Measure out proteins and grains when you first start so you build a sense of what the right amount looks like. Eating the right amount — even of healthy food — matters just as much as choosing the right food in the first place.
2. Avoid late-night heavy meals. Try to eat your last meal at least 2 to 3 hours before you go to bed. Eating a large, heavy dinner right before sleep means your body has very little time to process those calories. Light, protein-rich dinners earlier in the evening support better sleep and more efficient fat burning overnight.
3. Stay hydrated. Drink a full glass of water about 20 to 30 minutes before dinner. Water helps your stomach feel fuller before you start eating, which naturally reduces how much you consume. Sip water throughout your meal as well. Staying well-hydrated throughout the day also helps your body distinguish between thirst and hunger, which are often confused.
4. Eat slowly and mindfully. Put your fork down between bites and chew each mouthful well. Your brain takes about 20 minutes to register that your stomach is full, so eating quickly leads to overeating almost every time. Turn off the television, step away from your phone, and truly pay attention to the meal in front of you. Mindful eating is one of the most powerful habits you can build for long-term weight management.
Conclusion
A healthy dinner is not a punishment — it is one of the kindest things you can do for your body every single day. These 20 weight loss dinner ideas prove that nutritious cooking does not have to mean flavorless or complicated. From a simple grilled chicken salad to a comforting bowl of lentil soup, every recipe here is built to help you feel full, energized, and good about what you are eating.
The most important thing to remember is that consistency matters far more than perfection. You do not need to eat perfectly every single day. Missing one healthy dinner or indulging occasionally will not derail your progress. What counts is coming back to these habits most of the time — choosing vegetables over heavy sauces, picking protein over empty carbs, and making dinner a moment you actually look forward to.
Start with one or two recipes from this list this week. Cook them, enjoy them, and notice how much better you feel. Then try a few more the following week. Before long, making smart weight loss dinner choices will feel completely natural — not like a diet, but like a lifestyle you are genuinely happy to live. You have got everything you need right here. Get cooking.