
Homemade ice cream has turned into one of the most loved kitchen projects in American homes, and there’s a simple reason for that.
Nothing beats a bowl of creamy, cold dessert made from scratch, with fresh flavors and no strange additives hiding in the mix.
A Cuisinart ice cream maker turns this once-complicated process into something quick, mess-free, and downright enjoyable for anyone, from total beginners to seasoned home cooks.
The machine churns, chills, and thickens the mixture on its own, so there’s no need for rock salt, ice buckets, or constant hand-stirring.
This collection of Cuisinart Ice Cream Maker Recipes covers a little bit of everything: classic flavors that never go out of style, fruity treats bursting with natural sweetness, tangy frozen yogurt, silky gelato, dairy-free options for those avoiding milk products, and a few unique seasonal picks perfect for holidays and special occasions.
Grab the machine, pick a flavor, and get ready to build a dessert lineup that beats anything sold in a store.
Why You’ll Love These Cuisinart Ice Cream Maker Recipes
1. Easy for beginners – Every recipe here uses plain steps and common kitchen tools, so even someone who has never made frozen dessert before can follow along without trouble. It might seem a little intimidating at first glance, but it’s actually much simpler than expected!
2. Fresh ingredients – Each recipe relies on real cream, real fruit, and real flavorings, not artificial shortcuts.
3. Endless flavor combinations – Mix and match add-ins like nuts, cookies, caramel, or fruit chunks to build a custom dessert every time.
4. Better than store-bought – Homemade batches taste richer and creamier, since the mixture never sits on a shelf for weeks.
5. Great for family gatherings and parties – A big batch of fresh ice cream is an instant crowd-pleaser at birthdays, cookouts, or holiday dinners.
1. Classic Vanilla Ice Cream
Prep Time: 15 minutes | Churn Time: 25 minutes | Serve: 8
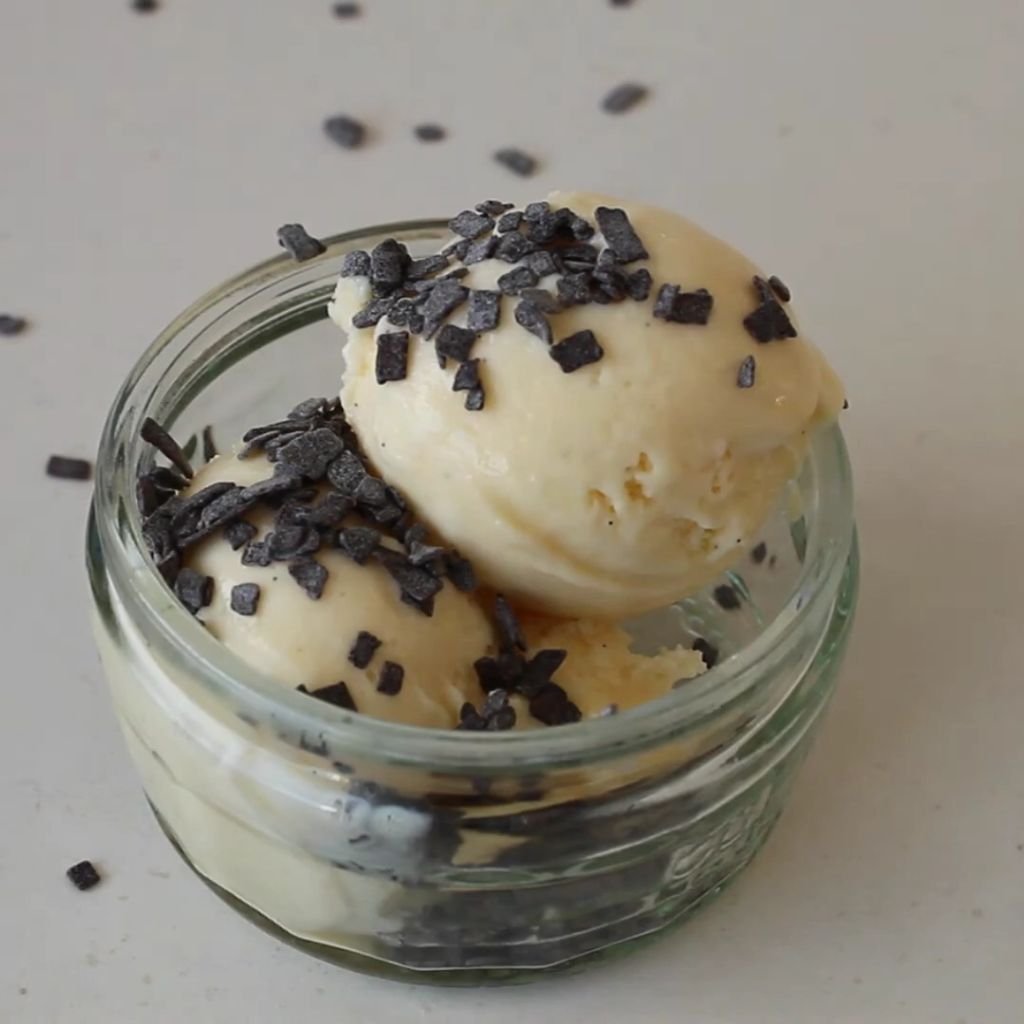
Sweet cream and real vanilla bean come together in this timeless recipe that never loses its charm. Smooth, rich, and lightly sweet, it works alone in a bowl or as the base for sundaes, pies, and milkshakes. A small batch of pantry staples turns into a dessert everyone asks for again.
Ingredients
- 2 cups heavy cream
- 1 cup whole milk
- 3/4 cup granulated sugar
- 1 tablespoon pure vanilla extract
- 1 vanilla bean, split and scraped (optional)
- Pinch of salt
Instructions
Start by grabbing a medium mixing bowl and pouring in the heavy cream and whole milk together. Add the granulated sugar right away, since sugar dissolves faster into cold liquid when whisked early rather than left to sit. Use a whisk, not a spoon, to combine the mixture for about two full minutes, until the sugar granules disappear completely and the liquid turns slightly thicker and pale. Sugar that isn’t fully dissolved will leave a gritty texture once frozen, so patience during this step matters more than it seems.
Next, split the vanilla bean lengthwise with a paring knife and scrape out the tiny black seeds using the dull edge of the blade. Add both the seeds and the empty pod into the cream mixture for extra flavor, or skip the pod and rely only on the seeds along with the vanilla extract. Stir in the pure vanilla extract and a small pinch of salt, which helps balance the sweetness and brings out the vanilla flavor more clearly. Cover the bowl with plastic wrap and refrigerate the mixture for at least two hours, though overnight chilling produces the smoothest texture, since a cold base churns faster and traps less air.
Once chilled, remove the vanilla pod from the mixture and give everything one more quick whisk. Turn on the Cuisinart ice cream maker and pour the cold mixture directly into the frozen bowl attachment while the paddle is already spinning. Let the machine churn for 20 to 25 minutes, checking around the twenty-minute mark for a soft-serve consistency. The mixture is ready to stop churning once it thickens enough to hold its shape on a spoon but still looks glossy and soft.
Transfer the finished ice cream into an airtight, freezer-safe container. Press a piece of parchment paper directly against the surface before sealing the lid, since this small step blocks air pockets that cause ice crystals. Freeze for a minimum of four hours for a firmer, scoopable texture, or serve immediately for a soft-serve style treat straight from the machine.
Tips
- Chill the mixing bowl and whisk beforehand for faster, smoother results.
- Avoid over-churning past the soft-serve stage, since the mixture will harden properly in the freezer anyway.
- Real vanilla bean produces tiny black flecks and a deeper flavor compared to extract alone.
Flavor Variations
- Stir in mini chocolate chips during the last five minutes of churning for vanilla chip.
- Swirl in caramel sauce right after churning for a caramel ribbon effect.
- Add crushed shortbread cookies for a buttery, crunchy twist.
2. Rich Chocolate Ice Cream
Prep Time: 15 minutes | Churn Time: 25 minutes | Serve: 8
Deep, dark cocoa meets melted chocolate in a dessert built for serious chocolate lovers. Every spoonful carries a dense, fudgy flavor that tastes closer to a chocolate bar than a light dessert. Simple pantry cocoa powder combined with real chocolate creates layers of flavor most store shelves can’t match.
Ingredients
- 1 3/4 cups heavy cream
- 1 cup whole milk
- 2/3 cup granulated sugar
- 1/2 cup unsweetened cocoa powder
- 4 ounces semisweet chocolate, chopped
- 1 teaspoon vanilla extract
- Pinch of salt
Instructions
Combine the whole milk, sugar, and cocoa powder together in a medium saucepan over medium-low heat. Whisk constantly during this stage, since cocoa powder clumps easily and needs steady stirring to blend smoothly into the warm milk. Continue heating the mixture until small bubbles form around the edges of the pan, which usually takes around four to five minutes, but never let the mixture reach a full rolling boil.
Remove the saucepan from heat immediately and add the chopped semisweet chocolate straight into the warm mixture. Let the chocolate sit undisturbed for one full minute to soften from the residual heat, then whisk everything together until every piece melts completely and the mixture turns glossy and dark. Small unmelted chocolate specks mean more whisking is needed, so keep going until the surface looks completely smooth with no visible lumps.
Pour in the heavy cream, vanilla extract, and a pinch of salt, then whisk one more time to combine everything into a single silky mixture. Transfer the chocolate base into a bowl and cover with plastic wrap, pressing the wrap directly against the surface to prevent a skin from forming as it cools. Refrigerate the mixture for a minimum of three hours, since chocolate bases benefit from longer chilling time compared to lighter flavors, allowing the cocoa flavor to deepen and the mixture to thicken slightly on its own.
When fully chilled, whisk the base one final time to loosen any thickened spots, then pour it into the running Cuisinart ice cream maker. Churn for 20 to 25 minutes, watching closely near the twenty-minute point, since chocolate mixtures tend to thicken faster than plain cream bases because of the added cocoa solids. Stop churning once the texture resembles soft, thick pudding and holds its shape when lifted with a spatula.
Scoop the finished chocolate ice cream into a freezer-safe container, smoothing the top with the back of a spoon. Seal tightly and freeze for at least four hours for a firm, scoopable texture that holds its shape well in a bowl or cone.
Tips
- Use high-quality cocoa powder for a richer, less bitter flavor.
- Chop chocolate into small, even pieces so it melts quickly and evenly.
- Store away from strong-smelling freezer items, since chocolate easily absorbs odors.
Variations
- Fold in toasted chopped walnuts for added crunch and texture.
- Swirl in peanut butter after churning for a rich flavor combination.
- Add chunks of brownie for an extra decadent, bakery-style dessert.
3. Fresh Strawberry Ice Cream
Prep Time: 20 minutes | Churn Time: 25 minutes | Serve: 8
Ripe strawberries bring natural sweetness and a soft pink color to this bright, fruity dessert. Real fruit chunks stay scattered throughout every scoop instead of disappearing into the base. A short mash-and-macerate step pulls out deep berry flavor before the mixture ever touches the machine.
Ingredients
- 2 cups fresh strawberries, hulled and chopped
- 3/4 cup granulated sugar, divided
- 1 1/2 cups heavy cream
- 3/4 cup whole milk
- 1 tablespoon lemon juice
- 1 teaspoon vanilla extract
Instructions
Place the chopped strawberries into a medium bowl and sprinkle 1/4 cup of the granulated sugar over the top, along with the lemon juice. Stir gently with a spoon to coat every piece, then let the bowl sit at room temperature for about thirty minutes. During this resting period, the sugar draws natural juice out of the berries, creating a sweet, syrupy liquid packed with concentrated strawberry flavor that flavors the entire base later.
Once the berries have released plenty of juice, transfer roughly half of the strawberry mixture into a blender or food processor and pulse until mostly smooth, leaving a few small chunks for texture. Leave the remaining half of the berries chopped and whole, since these pieces add pleasant bursts of fruit throughout the finished dessert rather than blending everything into a uniform puree.
In a separate bowl, whisk together the heavy cream, whole milk, remaining 1/2 cup of sugar, and vanilla extract until the sugar dissolves completely, which takes about two minutes of steady whisking. Fold the pureed strawberry mixture into the cream base first, stirring gently until the color turns a soft, even pink throughout. Add the reserved chunky strawberry pieces next, folding carefully to distribute them evenly without breaking them apart too much.
Cover the bowl and refrigerate the entire mixture for at least two hours, though longer chilling produces better flavor and texture since the fruit continues to release small amounts of juice into the cream. Stir the mixture once more before churning to redistribute any settled fruit pieces at the bottom of the bowl.
Pour the chilled strawberry base into the running Cuisinart ice cream maker and churn for 20 to 25 minutes. Because of the added fruit and natural sugars, this mixture may take slightly longer to thicken compared to plain cream bases, so check consistency starting around the twenty-minute mark rather than stopping early. The finished texture should look thick, creamy, and lightly streaked with pink fruit throughout.
Transfer into a freezer-safe container, pressing parchment paper against the surface before sealing. Freeze for four hours or longer for the firmest scoopable texture, though a soft-serve bowl straight from the machine works wonderfully too.
Tips
- Choose deep red, fully ripe strawberries for the sweetest, most flavorful results.
- Macerating the berries beforehand prevents a watery, icy final texture.
- Frozen strawberries work in a pinch; thaw and drain excess liquid first.
Variations
- Add crushed graham crackers for a strawberry cheesecake-style flavor.
- Swirl in white chocolate chips for extra sweetness and texture.
- Mix in chopped fresh basil for a surprising, refreshing twist.
4. Mint Chocolate Chip Ice Cream
Prep Time: 15 minutes | Churn Time: 25 minutes | Serve: 8
Cool mint flavor pairs with tiny chocolate flecks scattered through every bite of this refreshing dessert. A soft green tint comes from natural coloring rather than anything artificial-tasting. Crisp chocolate pieces stay firm and crunchy even after freezing, giving the whole batch pleasant texture.
Ingredients
- 2 cups heavy cream
- 1 cup whole milk
- 3/4 cup granulated sugar
- 1 1/2 teaspoons pure peppermint extract
- Few drops green food coloring (optional)
- 4 ounces dark chocolate, finely chopped
- Pinch of salt
Instructions
Pour the heavy cream and whole milk into a medium mixing bowl, then add the granulated sugar directly into the liquid. Whisk steadily for about two minutes until the sugar fully dissolves and the mixture feels smooth between the fingers when a small drop is tested between thumb and finger. A grainy texture at this stage means more whisking time is needed before moving forward with the recipe.
Add the peppermint extract slowly, starting with one teaspoon and tasting the mixture before adding more. Peppermint extract carries a strong, concentrated flavor, so a small amount goes a long way, and too much can quickly overpower the dessert with a medicinal taste instead of a pleasant coolness. Once the flavor feels balanced, add a few drops of green food coloring if a classic mint-green shade is wanted, stirring gently until the color spreads evenly throughout the base without streaks.
Add a small pinch of salt to round out the sweetness, then cover the bowl tightly with plastic wrap. Refrigerate the mixture for a minimum of two hours, though overnight chilling gives the peppermint flavor more time to settle and mellow into the cream rather than tasting sharp and separate.
While the base chills, chop the dark chocolate into small, uneven pieces roughly the size of a pea. Uneven sizes create better texture than perfectly uniform chips, since smaller shards mix into every spoonful while larger pieces provide occasional crunchy bites. Store the chopped chocolate in the refrigerator until ready to use, since cold chocolate holds its shape better once folded into the churning mixture.
Once fully chilled, whisk the peppermint base one more time and pour it into the running Cuisinart ice cream maker. Churn for 20 to 25 minutes, watching the texture closely as it thickens toward a soft-serve consistency. During the final three to five minutes of churning, slowly add the chopped dark chocolate through the top opening while the paddle continues turning, allowing the pieces to distribute evenly without clumping together in one spot.
Once the chocolate pieces are fully incorporated and the texture looks thick and creamy, transfer everything into a freezer-safe container. Smooth the top and seal tightly, then freeze for at least four hours for a firm, scoopable finish.
Tips
- Add chocolate chips gradually rather than all at once to prevent clumping.
- Use pure peppermint extract instead of mint extract for a cleaner, less herbal flavor.
- Chill the chocolate pieces beforehand so they don’t melt too quickly during churning.
Variations
- Swap dark chocolate for white chocolate chips for a sweeter contrast.
- Add crushed chocolate sandwich cookies alongside the chocolate pieces.
- Fold in chopped fresh mint leaves for a brighter, more natural mint flavor.
5. Cookies and Cream Ice Cream
Prep Time: 15 minutes | Churn Time: 25 minutes | Serve: 8
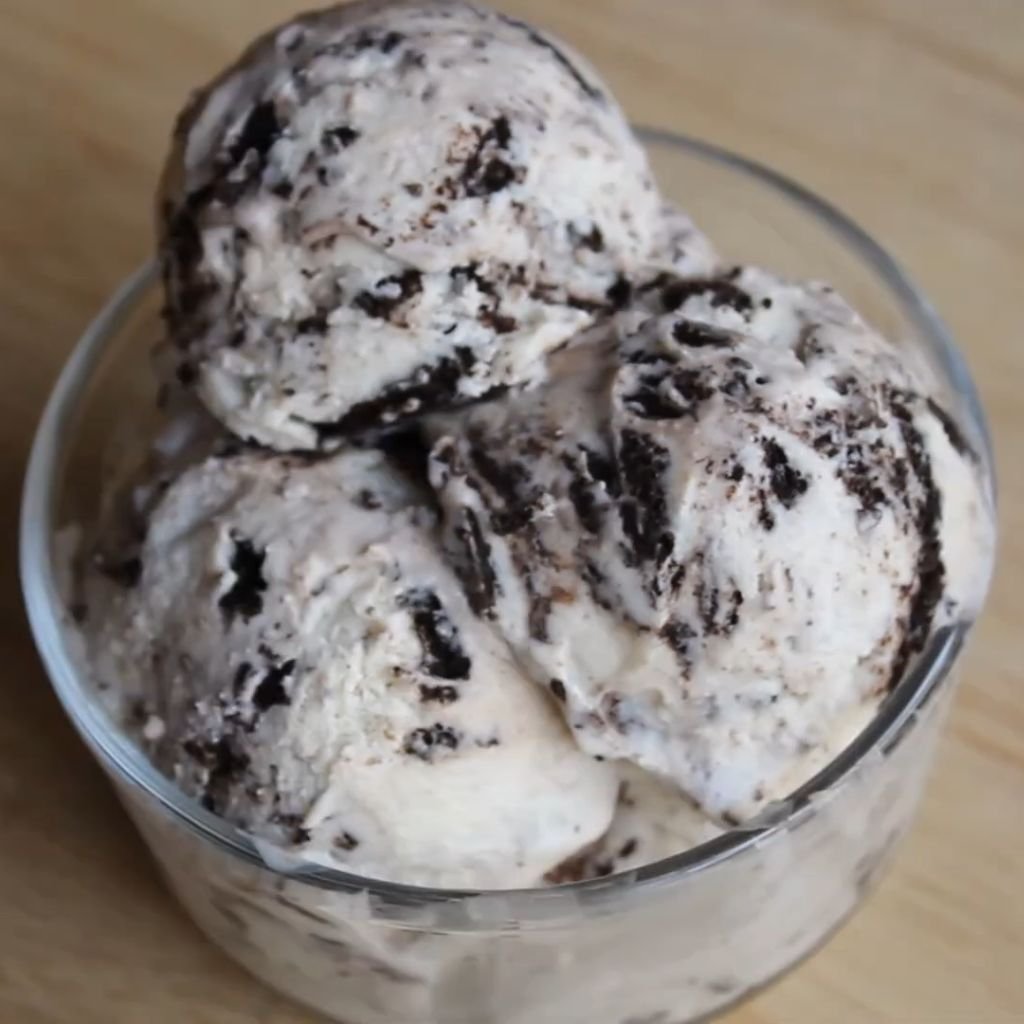
Crushed chocolate sandwich cookies turn a plain vanilla base into a chunky, crowd-favorite dessert. Soft cream carries just enough sweetness to let the cookie flavor shine through clearly. Every scoop holds a good mix of small crumbs and larger cookie chunks for satisfying texture.
Ingredients
- 2 cups heavy cream
- 1 cup whole milk
- 2/3 cup granulated sugar
- 1 teaspoon vanilla extract
- Pinch of salt
- 15 chocolate sandwich cookies, roughly chopped
Instructions
Combine the heavy cream, whole milk, and granulated sugar together in a medium bowl, whisking steadily until the sugar dissolves completely into the liquid. This process typically takes around two minutes of continuous whisking, and the mixture should feel silky smooth with no gritty texture remaining when tested between two fingers.
Stir in the vanilla extract and a small pinch of salt, mixing just enough to combine everything evenly without over-whisking the base. Cover the bowl with plastic wrap, pressing it gently against the surface of the mixture to prevent a skin from forming during chilling. Refrigerate for a minimum of two hours, though longer chilling produces a smoother, creamier final texture once churned.
While the base chills, prepare the chopped cookies by breaking them into a mix of small crumbs and slightly larger chunks using hands or a rolling pin over a sealed bag. A mixture of sizes works far better than uniform crumbs alone, since small pieces flavor the cream evenly while larger chunks provide pleasant bites of crunch throughout the finished dessert. Set the chopped cookies aside in the refrigerator to keep them cold and firm until needed.
Once the base finishes chilling, give it one final whisk to loosen any settled sugar, then pour the mixture into the running Cuisinart ice cream maker. Churn for 20 to 25 minutes, checking the texture starting around the eighteen-minute mark. As the mixture begins thickening toward a soft-serve consistency, slowly add the chopped cookies through the top opening in small handfuls, allowing the paddle to fold them evenly through the base rather than dumping everything in at once.
Continue churning for another two to three minutes after adding the cookies, just long enough to distribute the pieces evenly without breaking them down into fine dust. The finished mixture should look speckled with dark cookie pieces throughout a pale, creamy base.
Scoop the finished ice cream into a freezer-safe container, pressing gently to remove any air pockets between layers. Seal tightly and freeze for at least four hours before serving for the best scoopable texture.
Tips
- Add cookies near the end of churning to keep pieces from turning to mush.
- Chill the cookie pieces beforehand so they hold their shape better in the machine.
- Use a mix of cookie crumb sizes for the best texture in every bite.
Variations
- Swap chocolate sandwich cookies for chocolate chip cookie dough chunks.
- Add a swirl of chocolate fudge sauce for extra richness.
- Mix in crushed pretzels alongside the cookies for a salty contrast.
6. Salted Caramel Ice Cream
Prep Time: 25 minutes | Churn Time: 25 minutes | Serve: 8
Golden caramel sauce swirls through a lightly salted cream base for a dessert that balances sweet and salty flavors perfectly. Homemade caramel gives a deeper, richer taste compared to anything from a jar. A gentle sprinkle of sea salt lifts the sweetness without overpowering the flavor.
Ingredients
- 1 cup granulated sugar
- 6 tablespoons unsalted butter, cubed
- 1/2 cup heavy cream, plus 1 1/2 cups more, divided
- 1 teaspoon sea salt, plus more for topping
- 1 cup whole milk
- 1/3 cup brown sugar
- 1 teaspoon vanilla extract
Instructions
Add the granulated sugar to a medium saucepan set over medium heat, spreading it evenly across the bottom of the pan. Let the sugar melt slowly without stirring at first, swirling the pan occasionally once the edges begin turning golden brown. Melting sugar can burn quickly, so close attention during this step matters more than almost any other part of the recipe.
Once the sugar turns a deep amber color, remove the pan from heat and add the cubed butter all at once, whisking quickly as it melts and bubbles into the hot sugar. The mixture will bubble vigorously, so standing back slightly during this step prevents any splattering onto hands or arms. Continue whisking until the butter fully melts and combines smoothly with the caramelized sugar.
Slowly pour in 1/2 cup of heavy cream while whisking constantly, since the cold cream will cause the hot caramel to bubble up rapidly for a moment. Keep whisking until the mixture turns smooth and glossy, then stir in the sea salt. Set this caramel sauce aside to cool to room temperature, which takes about twenty minutes, then transfer half of it into a separate small container to use later as a swirl.
In a separate bowl, whisk together the remaining 1 1/2 cups of heavy cream, whole milk, and brown sugar until the sugar dissolves completely into the liquid. Stir in the vanilla extract along with the remaining half of the cooled caramel sauce, whisking until the mixture turns a light golden color throughout. Cover and refrigerate for at least two hours, allowing the caramel flavor to fully blend into the cream base.
Once chilled, pour the caramel cream base into the running Cuisinart ice cream maker and churn for 20 to 25 minutes until thick and soft. During the final few minutes, drizzle in the reserved caramel sauce in a thin stream, allowing the paddle to create ribbons throughout the mixture rather than blending it in completely.
Transfer the finished ice cream into a freezer-safe container, adding an extra small drizzle of caramel between layers for a stronger ribbon effect. Sprinkle a small pinch of sea salt across the top before sealing the lid. Freeze for four hours or longer before serving.
Tips
- Watch the sugar closely while melting, since it can burn within seconds once it starts browning.
- Add cold cream slowly to avoid excessive bubbling and overflow.
- Keep the reserved caramel slightly warm before swirling so it flows easily into the mixture.
Variations
- Add chopped pecans or toasted almonds for extra crunch.
- Swirl in chocolate sauce alongside the caramel for a turtle-inspired flavor.
- Mix in small pieces of soft caramel candy for extra chewy bites.
7. Butter Pecan Ice Cream
Prep Time: 20 minutes | Churn Time: 25 minutes | Serve: 8
Toasted pecans coated in browned butter bring a warm, nutty flavor to this classic Southern-style dessert. A light caramel note comes from browning the butter before it ever meets the cream. Crunchy pecan pieces stay firm throughout the mixture for satisfying texture in every scoop.
Ingredients
- 1 cup pecan halves, roughly chopped
- 4 tablespoons unsalted butter
- 2 cups heavy cream
- 1 cup whole milk
- 3/4 cup light brown sugar
- 1 teaspoon vanilla extract
- Pinch of salt
Instructions
Melt the butter in a small skillet over medium heat, swirling the pan occasionally as it begins to foam and bubble. Continue heating for about four to five minutes, watching closely as the butter transitions from yellow to a golden brown color with a nutty aroma filling the kitchen. Small brown flecks will appear at the bottom of the pan once the butter has properly browned, which signals the milk solids have caramelized correctly.
Add the chopped pecans directly into the browned butter, stirring frequently to coat every piece evenly. Toast the pecans for two to three minutes, just long enough to deepen their flavor without burning them, since nuts can turn bitter quickly once they pass the golden stage. Remove the skillet from heat and transfer the buttery pecans onto a plate lined with paper towel to cool completely, spreading them out so they don’t clump together while cooling.
In a medium bowl, whisk together the heavy cream, whole milk, and brown sugar until the sugar dissolves fully into the liquid, which takes roughly two minutes of steady whisking. Brown sugar tends to clump more than white sugar, so breaking apart any lumps with the back of a spoon before whisking helps the process move faster. Stir in the vanilla extract and a pinch of salt, mixing until fully combined and smooth.
Cover the bowl and refrigerate the cream base for a minimum of two hours, giving the brown sugar time to fully dissolve and the flavors time to meld together. Meanwhile, keep the toasted pecans stored at room temperature in a sealed container, since refrigerating them beforehand can cause them to lose some of their pleasant crunch.
Once the base finishes chilling, whisk it once more and pour it into the running Cuisinart ice cream maker. Churn for 20 to 25 minutes, checking the texture around the eighteen-minute mark for early signs of thickening. During the final three to four minutes of churning, add the cooled, toasted pecans through the top opening in small batches, letting the paddle fold them evenly throughout the mixture.
Once the pecans are fully distributed and the texture looks thick and creamy, transfer everything into a freezer-safe container. Seal tightly and freeze for at least four hours before serving for the best firm, scoopable texture.
Tips
- Watch the butter closely while browning, since it can burn within moments once it turns golden.
- Toast pecans lightly instead of deeply, since they continue cooking slightly from residual heat.
- Store toasted pecans separately if making the base ahead of time, adding them fresh during churning.
Variations
- Swap pecans for toasted walnuts or almonds for a different nutty flavor.
- Add a caramel swirl alongside the pecans for extra sweetness.
- Mix in a small amount of maple syrup in place of some brown sugar for a deeper flavor.
8. Coffee Ice Cream
Prep Time: 15 minutes | Churn Time: 25 minutes | Serve: 8
Bold, roasted coffee flavor turns simple cream into a dessert that feels like a treat and a pick-me-up combined. Strong brewed coffee and instant espresso powder work together for deep, layered flavor. Smooth and rich, this dessert pairs wonderfully with a small dusting of cocoa on top.
Ingredients
- 2 cups heavy cream
- 1 cup whole milk
- 3/4 cup granulated sugar
- 3 tablespoons instant espresso powder
- 1/4 cup strong brewed coffee, cooled
- 1 teaspoon vanilla extract
- Pinch of salt
Instructions
Pour the heavy cream and whole milk into a medium saucepan set over medium-low heat, stirring occasionally as the mixture begins to warm. Heat gently for about three to four minutes, just until small bubbles start forming around the edges of the pan, but never let the mixture reach a full boil, since scorched cream can ruin the flavor of the entire batch.
Remove the saucepan from heat and whisk in the granulated sugar until it dissolves completely into the warm liquid. Add the instant espresso powder next, whisking steadily to break up any small clumps that form when the powder first hits the liquid. Espresso powder dissolves more easily in warm liquid compared to cold, which is why this step happens before the mixture cools rather than after.
Stir in the cooled brewed coffee, vanilla extract, and a small pinch of salt, mixing everything together until the color turns a deep, even brown throughout. Taste the mixture at this point, since coffee strength can vary between brands, and a touch more espresso powder can be added now if a bolder flavor is wanted.
Transfer the coffee mixture into a bowl and cover with plastic wrap, pressing the wrap gently against the surface to prevent a skin from forming as it cools. Refrigerate the mixture for a minimum of three hours, since coffee-based bases benefit from extra chilling time to let the flavor mellow and fully blend with the cream rather than tasting sharp or bitter.
Once fully chilled, whisk the base one final time to redistribute any settled espresso powder at the bottom of the bowl. Pour the mixture into the running Cuisinart ice cream maker and churn for 20 to 25 minutes, checking the texture starting around the eighteen-minute mark. The coffee flavor tends to intensify slightly as air gets incorporated during churning, so the finished product will taste bolder than the raw base did.
Once the mixture thickens to a soft, creamy consistency, transfer it into a freezer-safe container, smoothing the top with a spatula. Seal tightly and freeze for at least four hours for a firm, scoopable texture that holds its shape well when served.
Tips
- Use good quality espresso powder for the boldest, most balanced coffee flavor.
- Taste the base before churning, since coffee strength can be adjusted easily at that stage.
- Let brewed coffee cool completely before adding, since warm coffee can affect the churning process.
Variations
- Add chocolate-covered espresso beans for extra crunch and caffeine punch.
- Swirl in caramel sauce for a coffee caramel flavor combination.
- Mix in chopped toffee bits for added texture and sweetness.
9. Chocolate Peanut Butter Ice Cream
Prep Time: 20 minutes | Churn Time: 25 minutes | Serve: 8
Creamy peanut butter swirls through a rich chocolate base for a dessert that tastes like a favorite candy bar in frozen form. Salty and sweet flavors balance each other perfectly in every bite. Chunks of peanut butter cup candy add extra texture throughout the mixture.
Ingredients
- 1 3/4 cups heavy cream
- 1 cup whole milk
- 2/3 cup granulated sugar
- 1/3 cup unsweetened cocoa powder
- 1/2 cup creamy peanut butter
- 1 teaspoon vanilla extract
- Pinch of salt
- 1/2 cup chopped peanut butter cups
Instructions
Combine the whole milk, sugar, and cocoa powder in a medium saucepan set over medium-low heat, whisking constantly to break apart any cocoa clumps as the mixture warms. Continue heating for about four minutes, until small bubbles form around the edges of the pan and the cocoa fully dissolves into a smooth, dark liquid. Avoid letting the mixture reach a full boil, since overheating can cause the texture to turn grainy later.
Remove the pan from heat and whisk in the heavy cream, vanilla extract, and a pinch of salt until fully combined and glossy. Transfer about half of this chocolate mixture into a separate bowl and whisk the creamy peanut butter directly into it, stirring until completely smooth with no visible streaks remaining. This creates two separate bases, one plain chocolate and one peanut butter chocolate, which will later combine for a marbled effect.
Pour both bases back together into one bowl, stirring only two or three times just to loosely combine them without fully blending the flavors into one uniform color. A few visible streaks of lighter peanut butter mixture running through the darker chocolate base creates the marbled look this dessert is known for. Cover the bowl and refrigerate for a minimum of three hours, allowing both flavors to chill fully while keeping their separate identities intact.
While the base chills, chop the peanut butter cups into small, uneven chunks, keeping them refrigerated until ready for use so they hold their shape better during churning. Once the base finishes chilling, give it one gentle stir, being careful not to fully blend the marbled streaks together.
Pour the chilled mixture into the running Cuisinart ice cream maker and churn for 20 to 25 minutes, checking the texture starting around the eighteen-minute mark. During the final three minutes, add the chopped peanut butter cups through the top opening, letting the paddle fold them evenly throughout the mixture without breaking them down too much.
Transfer the finished ice cream into a freezer-safe container, smoothing the top gently to preserve some of the marbled streaks visible on the surface. Seal tightly and freeze for at least four hours before serving.
Tips
- Avoid over-mixing the two bases together to preserve the marbled effect.
- Use natural peanut butter sparingly, since it can separate more than processed varieties.
- Keep peanut butter cups cold before chopping so they don’t turn sticky and messy.
Variations
- Swap peanut butter cups for chopped peanut butter cookies.
- Add a swirl of extra peanut butter on top before freezing for a stronger flavor.
- Mix in roasted, salted peanuts for additional crunch.
10. Rocky Road Ice Cream
Prep Time: 20 minutes | Churn Time: 25 minutes | Serve: 8
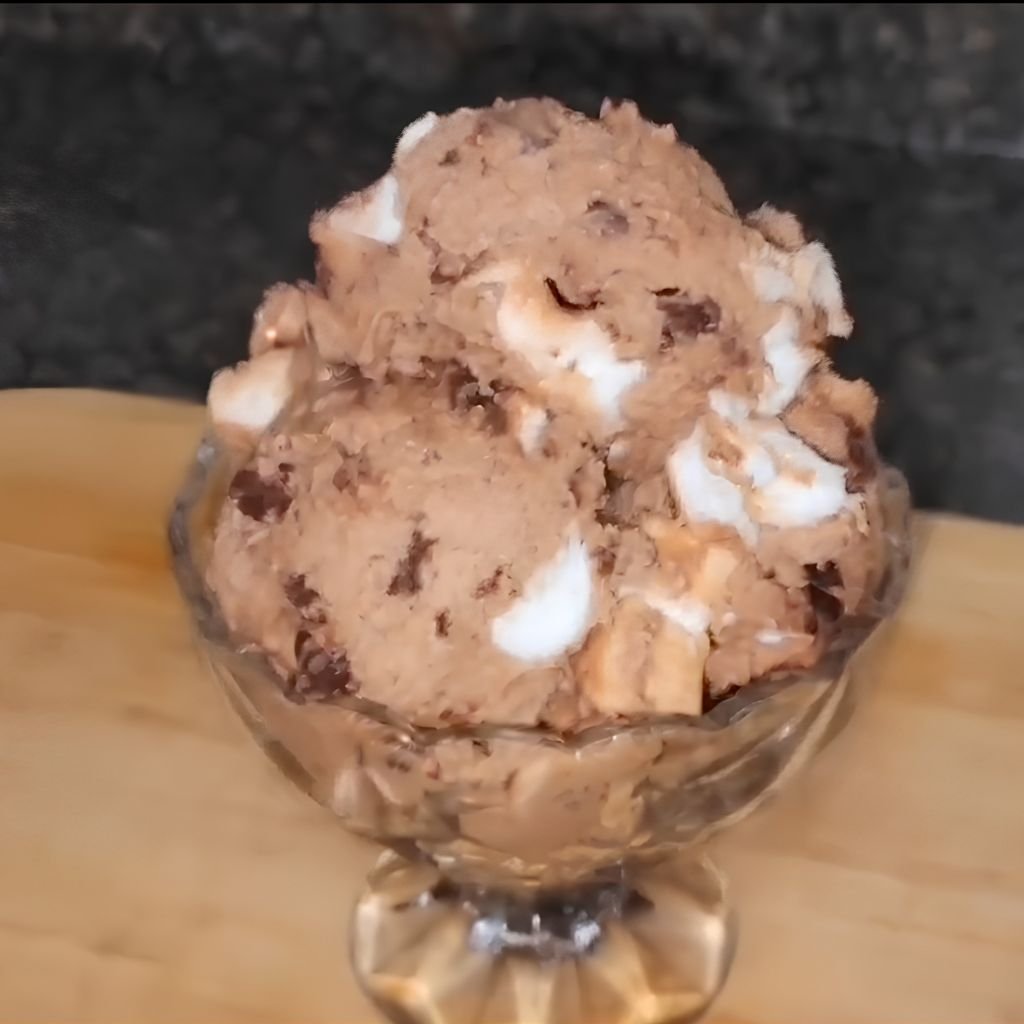
Fluffy marshmallows, crunchy almonds, and rich chocolate chunks combine inside a deep chocolate base for a dessert loaded with texture. Every scoop delivers a different combination of soft, chewy, and crunchy bites. A classic combination that has stayed popular for good reason.
Ingredients
- 1 3/4 cups heavy cream
- 1 cup whole milk
- 2/3 cup granulated sugar
- 1/2 cup unsweetened cocoa powder
- 4 ounces semisweet chocolate, chopped
- 1 teaspoon vanilla extract
- Pinch of salt
- 3/4 cup mini marshmallows
- 1/2 cup roasted almonds, roughly chopped
- 1/2 cup chopped chocolate chunks
Instructions
Whisk together the whole milk, sugar, and cocoa powder in a medium saucepan set over medium-low heat, stirring constantly to prevent clumping as the cocoa powder blends into the warm liquid. Heat the mixture for about four minutes, until small bubbles begin forming around the edges, then remove the pan from heat immediately before it reaches a full boil.
Add the chopped semisweet chocolate directly into the warm mixture, letting it sit undisturbed for about one minute before whisking everything together until fully melted and smooth. Pour in the heavy cream, vanilla extract, and a pinch of salt, whisking until the entire mixture turns glossy and evenly combined with no visible lumps remaining anywhere in the base.
Transfer the chocolate mixture into a bowl and cover with plastic wrap, pressing it directly against the surface to prevent a skin from forming. Refrigerate for a minimum of three hours, allowing the chocolate flavor to deepen and the mixture to thicken slightly on its own before churning begins.
While the base chills, roughly chop the roasted almonds and chocolate chunks into small, bite-sized pieces, keeping them stored separately at room temperature. Measure out the mini marshmallows as well, keeping everything ready to add once churning begins, since these mix-ins work best when folded in during the final stretch rather than added too early.
Once fully chilled, whisk the chocolate base one more time and pour it into the running Cuisinart ice cream maker. Churn for 20 to 25 minutes, checking texture around the eighteen-minute mark for early thickening signs. During the final three to four minutes, add the marshmallows, chopped almonds, and chocolate chunks together through the top opening in small handfuls, allowing the paddle to fold everything evenly throughout the mixture without breaking the marshmallows apart too much.
Once all the mix-ins are evenly distributed and the base looks thick and well combined, transfer everything into a freezer-safe container. Press down gently to remove any large air pockets, then seal tightly and freeze for at least four hours before serving.
Tips
- Add marshmallows only during the final minutes of churning to keep them soft and intact.
- Toast the almonds lightly beforehand for a deeper, richer nutty flavor.
- Chop chocolate chunks unevenly for a mix of small and large bites throughout.
Variations
- Swap almonds for chopped walnuts or pecans for a different nutty crunch.
- Add a swirl of marshmallow fluff after churning for extra sweetness.
- Mix in chunks of chocolate brownie for an even more indulgent version.
11. Banana Ice Cream
Prep Time: 20 minutes | Churn Time: 25 minutes | Serve: 8
Sweet, ripe bananas bring natural creaminess and gentle sweetness to this comforting, old-fashioned dessert. A quick roast on the bananas beforehand deepens their flavor far past what raw fruit alone can offer. Soft and smooth, this dessert works wonderfully alone or with a few warm toppings.
Ingredients
- 3 large ripe bananas, peeled and sliced
- 1 tablespoon brown sugar
- 1 1/2 cups heavy cream
- 3/4 cup whole milk
- 1/2 cup granulated sugar
- 1 tablespoon lemon juice
- 1 teaspoon vanilla extract
Instructions
Preheat the oven to 400 degrees Fahrenheit and line a baking sheet with parchment paper. Arrange the sliced bananas in a single layer across the sheet, then sprinkle the brown sugar evenly over the top. Roast the bananas for twelve to fifteen minutes, until they turn soft, golden, and slightly caramelized around the edges, watching closely near the end since sugar can burn quickly once it starts browning.
Remove the roasted bananas from the oven and let them cool for about ten minutes before transferring them into a blender or food processor. Add the lemon juice at this stage, which helps prevent the bananas from turning brown while also brightening the overall flavor of the finished dessert. Blend the mixture until completely smooth, scraping down the sides of the blender as needed to catch any larger pieces.
In a separate bowl, whisk together the heavy cream, whole milk, and granulated sugar until the sugar dissolves fully into the liquid, which takes about two minutes of steady whisking. Add the vanilla extract, mixing until fully combined and smooth throughout the base.
Pour the pureed roasted banana mixture into the cream base, whisking gently until the color turns an even, pale yellow with no streaks remaining. Taste the mixture at this point, adding a touch more sugar if the bananas were less ripe and need extra sweetness to balance the flavor properly.
Cover the bowl and refrigerate the mixture for a minimum of two hours, though longer chilling helps the banana flavor fully settle into the cream base. Stir once more before churning to redistribute any settled banana puree sitting at the bottom of the bowl.
Pour the chilled banana base into the running Cuisinart ice cream maker and churn for 20 to 25 minutes, checking the texture starting around the eighteen-minute mark. Banana bases can sometimes take slightly longer to thicken due to natural fruit sugars, so patience during the final few minutes helps achieve the best texture.
Once thickened to a soft, creamy consistency, transfer the finished ice cream into a freezer-safe container. Seal tightly and freeze for at least four hours before serving for the firmest, most scoopable texture.
Tips
- Use very ripe bananas with plenty of brown spots for the sweetest, most flavorful results.
- Roasting the bananas beforehand adds a deeper, caramelized flavor compared to using them raw.
- Add lemon juice early to prevent the banana puree from turning brown or dull.
Variations
- Add chopped walnuts or pecans for extra crunch and texture.
- Swirl in caramel sauce for a banana caramel flavor combination.
- Mix in small chocolate chips for a banana chocolate chip variation.
12. Mango Ice Cream
Prep Time: 20 minutes | Churn Time: 25 minutes | Serve: 8
Tropical mango puree brings bright color and juicy sweetness to this refreshing summer dessert. Ripe fruit does most of the work here, needing only a few simple ingredients to shine. Smooth and fruity, this treat feels like a mini vacation in a bowl.
Ingredients
- 3 cups ripe mango, peeled and chopped
- 1/2 cup granulated sugar
- 1 tablespoon lime juice
- 1 1/2 cups heavy cream
- 1/2 cup whole milk
- Pinch of salt
Instructions
Place the chopped mango into a blender or food processor along with the granulated sugar and lime juice. Blend the mixture until completely smooth, scraping down the sides occasionally to catch any larger fibrous pieces that mangoes sometimes contain near the pit. Taste the puree at this stage, adding a touch more sugar if the mango was slightly underripe and tart rather than fully sweet.
Pour the mango puree through a fine mesh strainer into a large bowl, pressing gently with the back of a spoon to remove any remaining fibrous strands or pulp. This straining step matters more with mango than most other fruits, since mango fibers can create an unpleasant stringy texture once frozen if left in the mixture.
Add the heavy cream, whole milk, and a small pinch of salt into the strained mango puree, whisking everything together until fully combined and evenly colored throughout. The mixture should turn a smooth, bright orange color with no streaks of cream remaining visible on the surface.
Cover the bowl with plastic wrap and refrigerate the mixture for a minimum of two hours, allowing the flavors to meld together and the mixture to chill fully before churning begins. Stir once more before pouring into the machine to redistribute any settled puree sitting near the bottom of the bowl.
Pour the chilled mango base into the running Cuisinart ice cream maker and churn for 20 to 25 minutes, checking the texture starting around the eighteen-minute mark. Fruit-based mixtures like this one sometimes take slightly longer to fully thicken compared to plain cream bases, so continue checking every couple of minutes rather than stopping too early.
Once the mixture thickens to a soft, creamy consistency with a bright orange color throughout, transfer it into a freezer-safe container. Smooth the top with a spatula, seal tightly, and freeze for at least four hours before serving for the best scoopable texture.
Tips
- Choose mangoes that give slightly when pressed for the ripest, sweetest flavor.
- Straining the puree removes stringy fibers that can affect the final texture.
- Add lime juice gradually, tasting as it’s added, since mango sweetness varies by fruit.
Variations
- Add shredded coconut for a tropical mango coconut flavor combination.
- Swirl in raspberry puree for a bright, colorful contrast.
- Mix in small chunks of fresh mango for extra fruit texture throughout.
13. Blueberry Cheesecake Ice Cream
Prep Time: 25 minutes | Churn Time: 25 minutes | Serve: 8
Tangy cream cheese base pairs with a sweet blueberry swirl and crunchy graham cracker bits for a dessert that mimics a favorite slice of cheesecake. Juicy blueberry sauce ribbons through every scoop for color and flavor. Crushed graham crackers add a pleasant crumbly texture throughout.
Ingredients
- 8 ounces cream cheese, softened
- 1 1/2 cups heavy cream
- 3/4 cup whole milk
- 3/4 cup granulated sugar
- 1 teaspoon vanilla extract
- 1 cup fresh blueberries
- 2 tablespoons water
- 2 tablespoons sugar (for blueberry sauce)
- 1/2 cup crushed graham crackers
Instructions
Begin by making the blueberry sauce, since it needs time to cool before use. Combine the fresh blueberries, water, and two tablespoons of sugar in a small saucepan over medium heat. Cook for about eight to ten minutes, stirring occasionally and gently mashing some of the berries with a spoon as they soften, until the mixture turns thick and syrupy. Remove from heat and let the sauce cool completely to room temperature, then refrigerate until fully cold.
While the sauce cools, place the softened cream cheese into a large mixing bowl and beat it smooth using a hand mixer or sturdy whisk, working out any lumps until the texture turns completely creamy. Cream cheese that isn’t fully softened beforehand will leave small chunks in the final base, so make sure it sits at room temperature for at least thirty minutes before starting this step.
Slowly add the granulated sugar into the cream cheese, beating continuously until fully combined and smooth. Pour in the heavy cream gradually, mixing well after each addition to prevent lumps from forming. Add the whole milk and vanilla extract last, whisking everything together until the mixture turns silky and pourable with no visible cream cheese chunks remaining anywhere in the bowl.
Cover the bowl and refrigerate the cream cheese base for a minimum of two hours, giving the mixture time to chill fully and the flavors time to blend together. Keep the cooled blueberry sauce refrigerated separately during this time, along with the crushed graham crackers stored at room temperature in a sealed container.
Once fully chilled, whisk the cream cheese base once more and pour it into the running Cuisinart ice cream maker. Churn for 20 to 25 minutes, checking texture starting around the eighteen-minute mark. During the final three minutes, add the crushed graham crackers through the top opening, letting the paddle fold them evenly throughout the mixture.
Transfer half of the churned ice cream into a freezer-safe container, then drizzle a generous layer of the cold blueberry sauce over the top. Add the remaining ice cream, then top with another layer of blueberry sauce, using a butter knife to gently swirl the sauce through the mixture without fully blending it in. Seal tightly and freeze for at least four hours before serving.
Tips
- Make sure cream cheese is fully softened to avoid lumps in the finished base.
- Cool the blueberry sauce completely before swirling to keep distinct ribbons.
- Add graham crackers during the last few minutes of churning to keep them slightly crunchy.
Variations
- Swap blueberries for raspberries or blackberries for a different berry cheesecake flavor.
- Add a swirl of cream cheese frosting for an extra cheesecake-like taste.
- Mix in small chunks of graham cracker crust pieces for added texture.
14. Lemon Ice Cream
Prep Time: 15 minutes | Churn Time: 25 minutes | Serve: 8
Bright, tangy lemon flavor cuts through rich cream for a dessert that feels light and refreshing. Fresh lemon zest and juice work together to create bold citrus flavor without any artificial aftertaste. A pale yellow color makes this dessert as pretty as it is tasty.
Ingredients
- 2 cups heavy cream
- 1 cup whole milk
- 3/4 cup granulated sugar
- Zest of 3 lemons
- 1/2 cup fresh lemon juice
- Pinch of salt
Instructions
Combine the granulated sugar and lemon zest together in a medium mixing bowl, rubbing the zest into the sugar with clean fingertips for about one full minute. This step releases fragrant lemon oils from the zest directly into the sugar, creating a much more intense citrus flavor throughout the finished dessert compared to simply adding zest on its own later.
Pour the heavy cream and whole milk into the bowl with the lemon sugar, whisking steadily for about two minutes until the sugar fully dissolves and the mixture feels smooth between two fingers. Add a small pinch of salt at this stage, which helps balance the tartness of the lemon while making the sweetness taste more rounded overall.
Slowly whisk in the fresh lemon juice, adding it a little at a time rather than all at once. Heavy cream can sometimes thicken slightly when acidic lemon juice hits it too quickly, so gradual mixing while whisking constantly helps keep the texture smooth and prevents any separation from happening in the bowl.
Taste the mixture once fully combined, adjusting with a touch more sugar if the lemon flavor tastes too sharp, or a small splash more juice if a bolder citrus taste is wanted. Cover the bowl with plastic wrap and refrigerate for a minimum of two hours, allowing the lemon flavor to mellow slightly and blend fully into the cream base.
Once chilled, give the mixture one final whisk to redistribute the zest evenly throughout, then pour it into the running Cuisinart ice cream maker. Churn for 20 to 25 minutes, checking the texture starting around the eighteen-minute mark. Citrus-based mixtures like this one can sometimes churn slightly faster than plain cream bases, so check consistency a little earlier than usual to avoid over-churning.
Once the mixture thickens into a soft, pale yellow, creamy texture, transfer it into a freezer-safe container. Smooth the top and seal tightly, then freeze for at least four hours before serving for the firmest texture.
Tips
- Zest lemons before juicing them, since it becomes much harder afterward.
- Rub zest into sugar first for a more intense, well-rounded lemon flavor.
- Add lemon juice gradually while whisking to prevent any curdling in the cream.
Variations
- Add crushed shortbread cookies for a lemon shortbread flavor combination.
- Swirl in raspberry sauce for a bright, colorful lemon raspberry twist.
- Mix in poppy seeds for a lemon poppy seed variation.
15. Raspberry Sorbet
Prep Time: 15 minutes | Churn Time: 25 minutes | Serve: 6
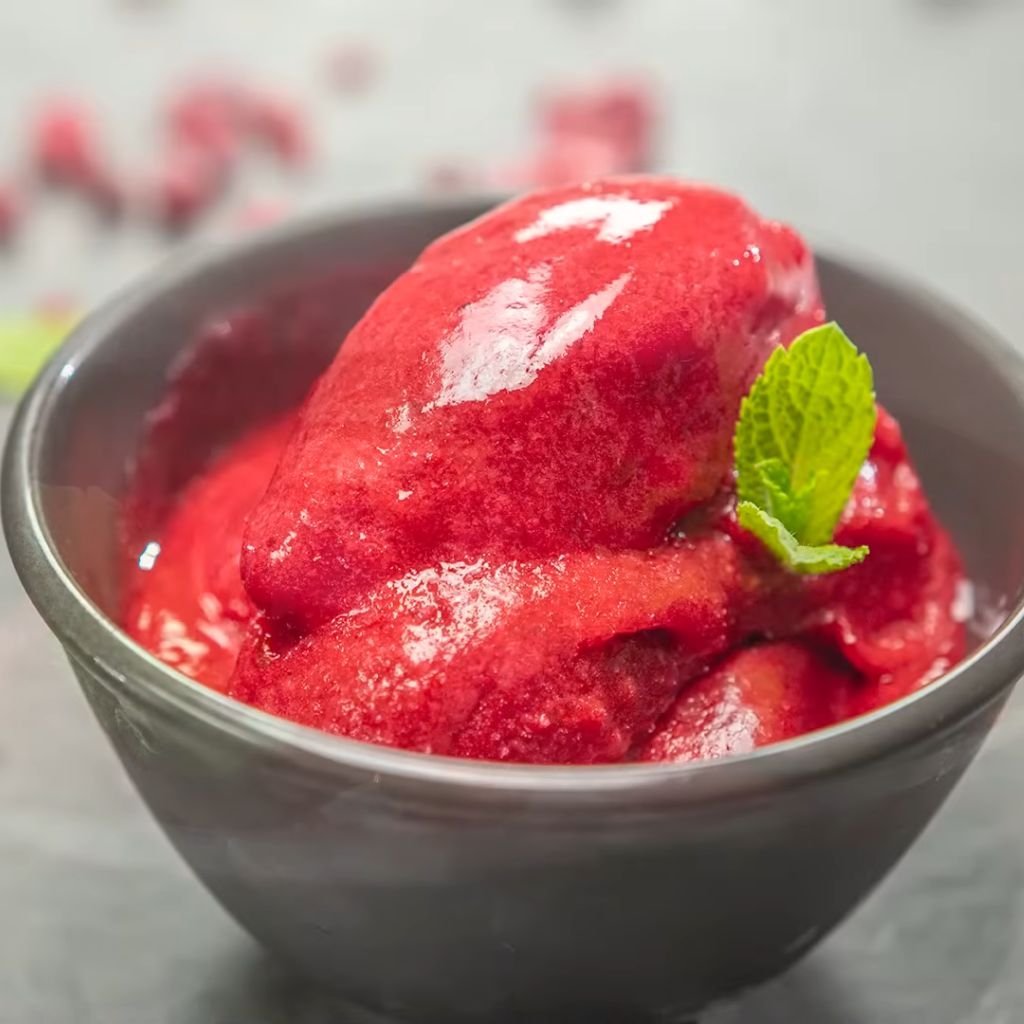
Bright, tart raspberries create a bold, dairy-free frozen treat bursting with natural fruit flavor. No cream or milk needed here, just ripe fruit, sugar, and a touch of lemon. Deep pink color and smooth texture make this sorbet a refreshing way to end any meal.
Ingredients
- 4 cups fresh or frozen raspberries
- 3/4 cup granulated sugar
- 1/2 cup water
- 1 tablespoon lemon juice
- Pinch of salt
Instructions
Combine the water and granulated sugar together in a small saucepan set over medium heat, stirring occasionally as the mixture warms. Continue heating for about three to four minutes, just until the sugar fully dissolves into the water and the mixture turns clear rather than cloudy. Remove the pan from heat once dissolved and let the simple syrup cool for about ten minutes before moving forward with the recipe.
While the syrup cools, place the raspberries into a blender or food processor and pulse until completely smooth. Raspberries contain a good number of small seeds, so pouring the puree through a fine mesh strainer set over a bowl helps remove seeds and creates a much smoother final texture. Press firmly on the solids with the back of a spoon or spatula to extract as much juice and puree as possible, discarding the leftover seeds and pulp once finished.
Pour the cooled simple syrup into the strained raspberry puree, along with the lemon juice and a small pinch of salt. Whisk everything together until fully combined and evenly colored throughout, creating a smooth, deep pink mixture with no streaks remaining.
Taste the mixture at this stage, adding a touch more sugar if the raspberries were tart, since sweetness levels can vary quite a bit depending on ripeness and season. Cover the bowl with plastic wrap and refrigerate for a minimum of two hours, allowing the mixture to chill completely before churning, since a cold sorbet base freezes faster and smoother inside the machine.
Once fully chilled, pour the raspberry mixture into the running Cuisinart ice cream maker and churn for 20 to 25 minutes. Sorbet bases often thicken a bit faster than cream-based mixtures due to the lack of fat, so begin checking texture around the sixteen-minute mark rather than waiting the full time. The finished sorbet should look thick, glossy, and hold its shape softly on a spoon.
Transfer the finished sorbet into a freezer-safe container, smoothing the top with a spatula. Seal tightly and freeze for at least three hours before serving, since sorbet typically firms up a bit faster than dairy-based ice cream.
Tips
- Strain the puree thoroughly to remove seeds for the smoothest texture.
- Taste and adjust sweetness before churning, since fruit ripeness affects overall flavor.
- Serve slightly softened for the brightest, most vibrant raspberry flavor.
Variations
- Add a splash of orange liqueur for a slightly grown-up flavor twist.
- Mix in fresh mint leaves for a refreshing herbal note.
- Combine with a few blackberries for a mixed berry sorbet variation.
16. Watermelon Sorbet
Prep Time: 15 minutes | Churn Time: 25 minutes | Serve: 6
Juicy watermelon turns into a light, refreshing sorbet perfect for hot summer afternoons. Naturally sweet fruit needs only a small amount of added sugar to shine. A pale pink color and clean, fruity flavor make this treat feel effortless and cooling.
Ingredients
- 5 cups seedless watermelon, cubed
- 1/2 cup granulated sugar
- 2 tablespoons lime juice
- Pinch of salt
Instructions
Place the cubed watermelon into a blender or food processor and pulse until completely smooth, working in batches if the blender feels too full to blend evenly. Watermelon releases a large amount of juice once blended, so a fairly full blender pitcher will still produce a thin, pourable puree without needing any added liquid.
Pour the blended watermelon through a fine mesh strainer set over a large bowl, using a spatula to press down and push as much liquid through as possible. Straining removes small bits of pulp and any remaining seeds, creating a smoother final texture once the mixture freezes. Discard the leftover pulp once finished straining.
Add the granulated sugar directly into the strained watermelon juice, whisking for about two minutes until the sugar fully dissolves into the liquid. Since watermelon juice is naturally thin, dissolving sugar might take a bit longer than in thicker fruit purees, so continue whisking patiently until no grainy texture remains when tested.
Stir in the lime juice and a small pinch of salt, mixing until fully combined. Taste the mixture at this point, since watermelon sweetness can vary noticeably depending on ripeness, adjusting with a touch more sugar if a sweeter result is wanted.
Cover the bowl with plastic wrap and refrigerate for a minimum of two hours, allowing the mixture to chill completely before churning. Because this mixture is thinner and lighter than dairy-based bases, thorough chilling helps it churn properly and reach the right texture inside the machine.
Once fully chilled, pour the watermelon mixture into the running Cuisinart ice cream maker and churn for 20 to 25 minutes. Check the texture starting around the sixteen-minute mark, since thin fruit sorbets sometimes take a little longer to firm up compared to thicker purees, due to their higher water content.
Once the sorbet reaches a soft, slushy consistency that holds lightly on a spoon, transfer it into a freezer-safe container. Seal tightly and freeze for at least three hours before serving, since watermelon sorbet tends to freeze quite firm and benefits from a few minutes of softening before scooping.
Tips
- Choose a fully ripe, deep red watermelon for the sweetest, most flavorful sorbet.
- Strain thoroughly to remove pulp for the smoothest possible texture.
- Let the sorbet soften for a few minutes at room temperature before scooping.
Variations
- Add fresh mint leaves for a cooling, herbal twist.
- Mix in a small amount of chopped fresh strawberries for a mixed melon berry flavor.
- Add a splash of coconut water for a lighter, tropical variation.
17. Peach Ice Cream
Prep Time: 20 minutes | Churn Time: 25 minutes | Serve: 8
Ripe, juicy peaches bring a soft, natural sweetness to this warm-weather favorite dessert. A quick cook on the stovetop deepens the peach flavor before it ever meets the cream base. Small peach chunks stay scattered throughout for a pleasant, fruity bite in every spoonful.
Ingredients
- 3 cups fresh peaches, peeled and chopped
- 3/4 cup granulated sugar, divided
- 1 tablespoon lemon juice
- 1 1/2 cups heavy cream
- 3/4 cup whole milk
- 1 teaspoon vanilla extract
Instructions
Combine the chopped peaches with 1/4 cup of the granulated sugar and the lemon juice in a medium saucepan set over medium heat. Cook for about eight to ten minutes, stirring occasionally, until the peaches soften considerably and release their natural juices into the pan, creating a light, syrupy liquid around the fruit pieces.
Remove the pan from heat and let the cooked peaches cool for about fifteen minutes. Once cooled, transfer roughly half of the mixture into a blender or food processor and pulse until smooth, leaving the remaining half chopped and chunky. This combination of smooth puree and chunky pieces creates better texture than blending everything into one uniform consistency.
In a separate bowl, whisk together the heavy cream, whole milk, remaining 1/2 cup of sugar, and vanilla extract until the sugar dissolves completely, which takes about two minutes of steady whisking. Fold the pureed peach mixture into the cream base first, stirring until the color turns a soft, even golden hue throughout the entire mixture.
Add the reserved chunky peach pieces next, folding gently to distribute them evenly without breaking them down too much. Taste the mixture at this stage, adjusting sweetness with a touch more sugar if the peaches were less ripe and needed extra help to reach a balanced flavor.
Cover the bowl and refrigerate the mixture for a minimum of two hours, though longer chilling allows the peach flavor to blend more fully into the cream base. Stir once more before churning to redistribute any settled fruit pieces sitting at the bottom of the bowl.
Pour the chilled peach base into the running Cuisinart ice cream maker and churn for 20 to 25 minutes, checking the texture starting around the eighteen-minute mark. Because of the added fruit, this mixture may thicken slightly slower than plain cream bases, so patience during the final few minutes helps achieve the ideal texture.
Once thickened to a soft, creamy consistency with visible peach pieces throughout, transfer the mixture into a freezer-safe container. Seal tightly and freeze for at least four hours before serving for the firmest, most scoopable texture.
Tips
- Choose fully ripe, fragrant peaches for the best natural sweetness and flavor.
- Cooking the peaches beforehand deepens their flavor compared to using them raw.
- Peel peaches easily by briefly dipping them in boiling water before cooling and peeling.
Variations
- Add a swirl of caramel sauce for a peach caramel flavor combination.
- Mix in crushed graham crackers for a peach cobbler-style texture.
- Swap peaches for nectarines for a slightly different, equally sweet flavor.
18. Coconut Ice Cream
Prep Time: 15 minutes | Churn Time: 25 minutes | Serve: 8
Rich coconut milk and shredded coconut flakes combine for a tropical, dairy-forward dessert with deep flavor. Toasted coconut adds a warm, nutty note that plain coconut alone can’t quite reach. Smooth and creamy, this dessert works beautifully on its own or alongside other tropical fruit flavors.
Ingredients
- 2 cups full-fat coconut milk
- 1 cup heavy cream
- 3/4 cup granulated sugar
- 1 cup shredded coconut, divided
- 1 teaspoon vanilla extract
- Pinch of salt
Instructions
Preheat the oven to 325 degrees Fahrenheit and spread 1/2 cup of the shredded coconut evenly across a baking sheet. Toast the coconut for five to seven minutes, stirring every two minutes to prevent burning, until the pieces turn a light golden brown color and smell fragrant and nutty. Remove from the oven and let the toasted coconut cool completely on the baking sheet before using.
While the coconut cools, whisk together the coconut milk, heavy cream, and granulated sugar in a medium bowl until the sugar fully dissolves into the liquid, which takes about two minutes of steady whisking. Coconut milk sometimes separates in the can, so whisking thoroughly helps recombine the thicker cream portion with the thinner liquid for an even, consistent texture.
Stir in the vanilla extract and a small pinch of salt, mixing until fully combined. Add the remaining untoasted 1/2 cup of shredded coconut directly into the mixture at this stage, stirring gently to distribute the flakes evenly throughout the base.
Cover the bowl with plastic wrap and refrigerate the mixture for a minimum of two hours, allowing the coconut flavor to fully infuse into the cream base while chilling completely. Keep the toasted coconut stored separately at room temperature in a sealed container until ready to use during churning.
Once fully chilled, whisk the mixture once more to redistribute any settled coconut flakes, then pour it into the running Cuisinart ice cream maker. Churn for 20 to 25 minutes, checking the texture starting around the eighteen-minute mark. During the final two to three minutes, add the toasted coconut through the top opening, letting the paddle fold it evenly throughout the mixture.
Once the toasted coconut is fully incorporated and the base looks thick and creamy, transfer everything into a freezer-safe container. Seal tightly and freeze for at least four hours before serving for the firmest, most scoopable texture.
Tips
- Watch toasted coconut closely in the oven, since it can burn quickly once it starts browning.
- Whisk canned coconut milk thoroughly before use, since it often separates during storage.
- Add toasted coconut near the end of churning to preserve its light, crispy texture.
Variations
- Add chopped macadamia nuts for a tropical macadamia coconut flavor.
- Swirl in pineapple puree for a piña colada-inspired variation.
- Mix in dark chocolate chips for a coconut chocolate combination.
19. Dairy-Free Chocolate Ice Cream
Prep Time: 15 minutes | Churn Time: 25 minutes | Serve: 8
Rich coconut milk replaces dairy cream in this deep, fudgy chocolate dessert perfect for those avoiding milk products. Cocoa powder and melted dark chocolate build layers of bold flavor without needing a drop of cream. Smooth and satisfying, nobody will guess this treat skips dairy entirely.
Ingredients
- 2 cans full-fat coconut milk
- 2/3 cup granulated sugar
- 1/2 cup unsweetened cocoa powder
- 4 ounces dairy-free dark chocolate, chopped
- 1 teaspoon vanilla extract
- Pinch of salt
Instructions
Pour the coconut milk into a medium saucepan set over medium-low heat, whisking well as it warms to recombine the thicker cream portion with any separated liquid. Add the granulated sugar and cocoa powder directly into the pan, whisking constantly to break apart cocoa clumps as the mixture heats through. Continue heating for about four to five minutes, until small bubbles form around the edges, but avoid letting the mixture reach a full boil.
Remove the saucepan from heat and add the chopped dairy-free dark chocolate directly into the warm mixture. Let it sit undisturbed for about one minute, allowing the residual heat to soften the chocolate before whisking everything together until fully melted and smooth. Small unmelted specks mean a bit more whisking is needed until the surface turns glossy with no visible lumps remaining.
Stir in the vanilla extract and a small pinch of salt, mixing until fully combined throughout the mixture. Transfer the chocolate base into a bowl and cover with plastic wrap, pressing the wrap gently against the surface to prevent a skin from forming as it cools.
Refrigerate the mixture for a minimum of three hours, since coconut milk-based chocolate bases benefit from extra chilling time to thicken slightly and let the cocoa flavor deepen fully. Coconut milk can sometimes solidify a bit more than dairy cream when cold, so give the mixture a good whisk once chilled to loosen it back into a smooth, pourable consistency.
Once fully chilled and whisked smooth, pour the mixture into the running Cuisinart ice cream maker and churn for 20 to 25 minutes. Check the texture starting around the eighteen-minute mark, since coconut milk bases can sometimes thicken a bit faster than dairy cream due to the natural fat content found in full-fat coconut milk.
Once the mixture thickens into a rich, glossy, chocolate texture, transfer it into a freezer-safe container. Smooth the top with a spatula, seal tightly, and freeze for at least four hours before serving for the firmest, most scoopable texture.
Tips
- Use full-fat coconut milk rather than light, since it produces a much creamier texture.
- Check chocolate labels carefully to confirm they contain no dairy or milk fat.
- Whisk the chilled base well before churning, since coconut milk firms up more than dairy cream.
Variations
- Add chopped toasted almonds for a dairy-free rocky road-style variation.
- Swirl in dairy-free caramel sauce for extra sweetness.
- Mix in shredded coconut for a chocolate coconut flavor combination.
20. Vanilla Frozen Yogurt
Prep Time: 10 minutes | Churn Time: 25 minutes | Serve: 8
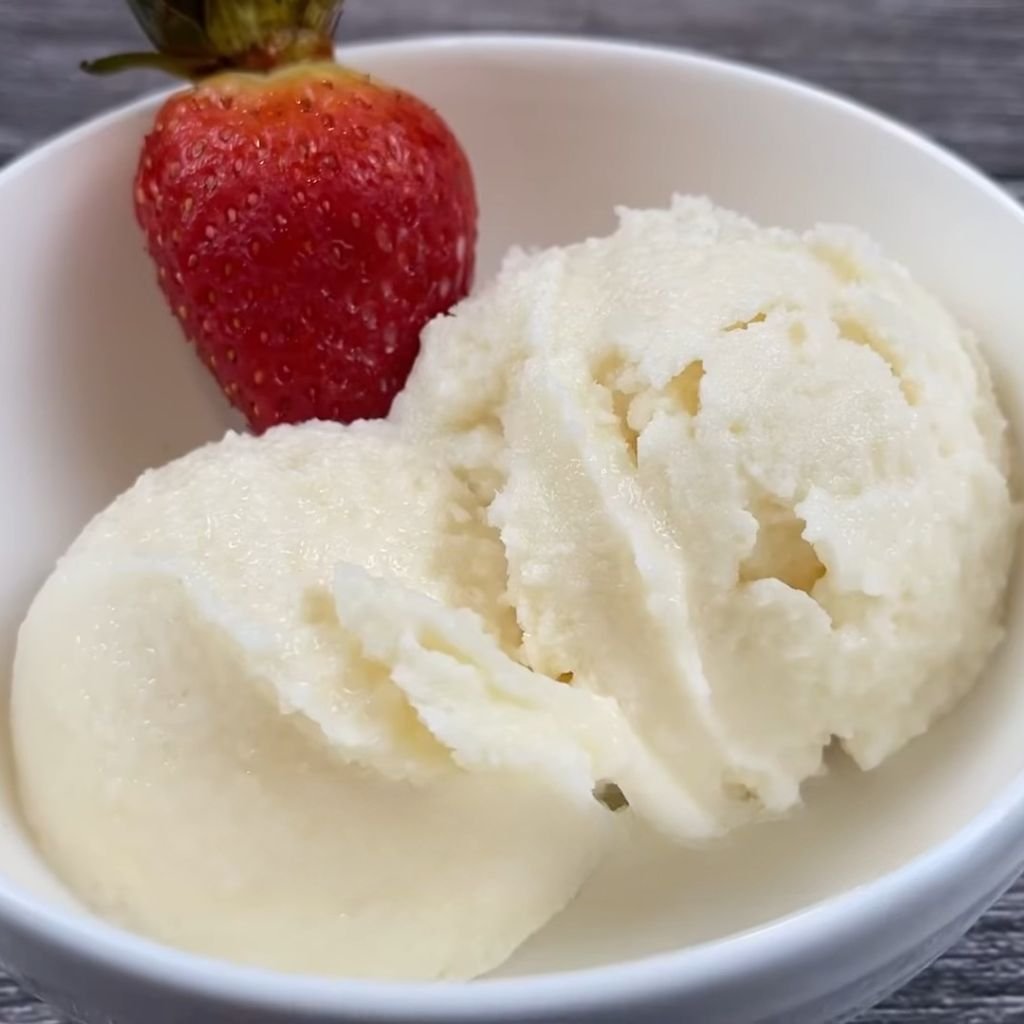
Tangy Greek yogurt combines with a touch of cream for a lighter, tangier take on classic vanilla dessert. Less rich than traditional ice cream but every bit as satisfying, with a pleasant tartness balancing the sweetness. A quick, simple recipe perfect for anyone wanting a lighter frozen treat.
Ingredients
- 3 cups plain Greek yogurt, full-fat
- 1/2 cup heavy cream
- 2/3 cup granulated sugar
- 1 tablespoon vanilla extract
- Pinch of salt
Instructions
Place the Greek yogurt into a large mixing bowl and whisk it briefly to loosen its texture, since yogurt straight from the refrigerator can sometimes feel quite thick and dense. A smooth, loosened starting point makes it much easier to fully combine the remaining ingredients without lumps forming later in the process.
Add the granulated sugar directly into the yogurt, whisking steadily for about two minutes until the sugar fully dissolves. Greek yogurt has a thicker consistency than milk or cream, so dissolving sugar into it takes a bit more patience and whisking effort compared to thinner dairy bases used in traditional ice cream recipes.
Pour in the heavy cream gradually, whisking continuously to keep the mixture smooth and evenly combined throughout. The cream lightens the tangy intensity of the yogurt slightly while still keeping the overall dessert lighter than a fully cream-based recipe. Stir in the vanilla extract and a small pinch of salt, mixing until the base turns pale and completely smooth.
Taste the mixture at this stage, adjusting sweetness with a touch more sugar if a milder tang is preferred, since yogurt brands can vary noticeably in tartness depending on the specific type used. Cover the bowl with plastic wrap and refrigerate for a minimum of one hour, since yogurt-based mixtures generally need less chilling time compared to cooked custard bases.
Once chilled, whisk the mixture one final time to ensure everything stays fully combined, then pour it into the running Cuisinart ice cream maker. Churn for 20 to 25 minutes, checking the texture starting around the sixteen-minute mark, since yogurt bases often thicken a bit faster than heavier cream bases due to their naturally denser starting consistency.
Once the mixture reaches a soft, thick, and creamy texture, transfer it into a freezer-safe container. Smooth the top and seal tightly, then freeze for at least three hours before serving, since frozen yogurt tends to soften more quickly than traditional ice cream once removed from the freezer.
Tips
- Use full-fat Greek yogurt for the creamiest, richest final texture.
- Whisk yogurt smooth before adding other ingredients to prevent lumps.
- Serve slightly softened, since frozen yogurt firms up more than dairy ice cream.
Variations
- Add a swirl of honey for a natural, floral sweetness.
- Mix in fresh berries for a fruity frozen yogurt variation.
- Swap vanilla extract for almond extract for a subtly different flavor.
21. Strawberry Frozen Yogurt
Prep Time: 15 minutes | Churn Time: 25 minutes | Serve: 8
Sweet strawberries and tangy Greek yogurt combine for a bright, fruity dessert lighter than traditional ice cream. Real fruit puree gives this treat a natural pink color and genuine berry flavor throughout. A refreshing option for anyone wanting fruit flavor with a lighter, tangier finish.
Ingredients
- 2 cups fresh strawberries, hulled
- 1/2 cup granulated sugar, divided
- 1 tablespoon lemon juice
- 2 1/2 cups plain Greek yogurt, full-fat
- 1/4 cup heavy cream
Instructions
Place the strawberries into a blender or food processor along with 1/4 cup of the granulated sugar and the lemon juice. Blend until completely smooth, then pour the puree into a small saucepan set over medium heat. Cook the puree for about five to six minutes, stirring occasionally, until it thickens slightly and reduces down a bit, concentrating the strawberry flavor before it ever meets the yogurt base.
Remove the saucepan from heat and let the cooked strawberry puree cool completely, which takes about twenty minutes at room temperature, followed by a short stint in the refrigerator if time allows. A warm puree added directly into cold yogurt can cause an uneven texture, so patience during this cooling step pays off in the final product.
While the puree cools, whisk the Greek yogurt in a large bowl to loosen its thick texture, then add the remaining 1/4 cup of sugar, whisking until fully dissolved. Pour in the heavy cream, mixing until the base turns smooth and well combined throughout.
Once the strawberry puree has cooled fully, fold it into the yogurt base, stirring gently until the color turns an even, soft pink with no streaks of plain yogurt remaining visible. Taste the mixture at this point, adjusting sweetness with a touch more sugar if the strawberries were on the tart side.
Cover the bowl and refrigerate the mixture for a minimum of one hour, allowing the flavors to settle and the base to chill fully before churning begins. Stir once more before pouring into the machine to redistribute any settled puree sitting at the bottom of the bowl.
Pour the chilled strawberry yogurt base into the running Cuisinart ice cream maker and churn for 20 to 25 minutes, checking the texture starting around the sixteen-minute mark. Once the mixture thickens into a soft, creamy, pink-hued texture, transfer it into a freezer-safe container, smoothing the top before sealing tightly.
Freeze for at least three hours before serving, since frozen yogurt softens faster than dairy ice cream once out of the freezer, making it best served just slightly firm rather than fully hard.
Tips
- Cook the strawberry puree first to concentrate flavor and remove excess liquid.
- Let the cooked puree cool fully before combining with yogurt to prevent texture issues.
- Serve slightly softened for the brightest, most vibrant strawberry flavor.
Variations
- Add a swirl of honey or agave for natural additional sweetness.
- Mix in fresh strawberry chunks for extra fruit texture throughout.
- Swap strawberries for raspberries for a tangier, seedier berry version.
22. Pistachio Ice Cream
Prep Time: 15 minutes | Churn Time: 25 minutes | Serves: 8
Pistachio ice cream has a nutty, slightly sweet taste that pairs nicely with a smooth, creamy base. Real pistachios ground into a fine paste give this frozen treat its natural green color and rich, toasted flavor. A small splash of almond extract rounds out the taste, making every scoop feel like it came straight from a real ice cream shop counter.
Ingredients
- 1 cup shelled pistachios, unsalted
- 2 cups heavy cream
- 1 cup whole milk
- ¾ cup granulated sugar
- 4 large egg yolks
- 1 teaspoon vanilla extract
- ¼ teaspoon almond extract
- Pinch of salt
- ¼ cup chopped pistachios, for mixing in
Instructions
Start by toasting the pistachios in a dry skillet over medium heat for about 4 minutes, stirring often so they warm evenly without burning. Once they smell fragrant and turn slightly darker, remove them from the heat and let them cool completely on a plate. Cooling matters here because warm nuts can turn grainy and change the texture of the final base.
Add the cooled pistachios to a food processor and pulse them into a fine, slightly oily paste. This may take a few minutes of scraping down the sides and pulsing again, but a smooth paste gives the ice cream its signature flavor and color, so take the extra time.
In a medium saucepan, combine the milk, half of the sugar, and the pistachio paste. Warm this mixture over medium heat, stirring often, until small bubbles form around the edges. Do not let it boil, since high heat can cause the milk to scorch and ruin the flavor.
While the milk warms, whisk the egg yolks with the remaining sugar in a separate bowl until the mixture turns pale yellow and slightly thick. Slowly pour a small amount of the warm milk mixture into the yolks while whisking quickly. This step, called tempering, keeps the eggs from cooking too fast and turning into scrambled bits.
Once tempered, pour the egg mixture back into the saucepan with the rest of the milk. Cook over low heat, stirring constantly with a wooden spoon, until the mixture thickens enough to coat the back of the spoon. This usually takes 5 to 8 minutes.
Strain the mixture through a fine mesh sieve into a clean bowl to remove any bits of cooked egg or coarse nut pieces. Stir in the heavy cream, vanilla extract, almond extract, and salt. Cover the bowl and refrigerate for at least 4 hours, or overnight for the best texture.
Once chilled, pour the base into your Cuisinart ice cream maker and churn according to the manufacturer’s instructions, usually around 20 to 25 minutes. During the last few minutes of churning, add the chopped pistachios so they spread evenly through the mixture. Transfer to a container and freeze for 2 more hours before serving for a firmer scoop.
Tips
- Use raw, unsalted pistachios for better control over the flavor.
- Strain the base twice for an extra smooth texture.
- Chill your ice cream maker bowl overnight for faster churning.
Variations
- Add white chocolate chips for a sweeter twist.
- Swap almond extract with rose water for a floral note.
- Mix in dried cranberries for color and tartness.
23. Matcha Green Tea Ice Cream
Prep Time: 15 minutes | Churn Time: 25 minutes | Serves: 8
Matcha green tea ice cream brings a smooth, earthy flavor with a light bitterness that balances out the sweetness of the cream base. The bright green color comes from high-quality matcha powder, which also gives the dessert a slightly grassy, toasted taste. This frozen treat pairs well with red bean paste or a plain sugar cookie on the side.
Ingredients
- 2 cups heavy cream
- 1 cup whole milk
- ¾ cup granulated sugar
- 4 large egg yolks
- 2 tablespoons matcha powder
- 1 teaspoon vanilla extract
- Pinch of salt
Instructions
Begin by sifting the matcha powder into a small bowl. Sifting is an important step because matcha tends to clump together, and any lumps left behind will show up as bitter specks in the finished ice cream. Set the sifted powder aside while you prepare the base.
In a medium saucepan, warm the milk and half of the sugar over medium heat, stirring often. Once small bubbles start forming around the edges of the pan, remove it from the heat. Avoid letting the milk boil, since overheating can cause a skin to form on top and affect the smoothness of the base.
While the milk warms, whisk together the egg yolks and remaining sugar in a separate bowl until the mixture turns pale and slightly thick. Slowly add a small amount of the warm milk into the yolks while whisking constantly. This gradual step keeps the eggs from clumping or cooking too quickly.
Pour the tempered egg mixture back into the saucepan with the remaining milk. Cook over low heat, stirring constantly with a wooden spoon, until the base thickens enough to coat the back of the spoon, about 5 to 8 minutes. Keep the heat low throughout this process, since eggs can scramble quickly if the pan gets too hot.
Remove the pan from the heat and whisk in the sifted matcha powder until fully dissolved. Strain the mixture through a fine mesh sieve into a clean bowl to catch any remaining lumps or bits of cooked egg. Stir in the heavy cream, vanilla extract, and salt until well combined.
Cover the bowl with plastic wrap, pressing it directly onto the surface of the mixture to prevent a skin from forming. Refrigerate for at least 4 hours, though overnight chilling gives the best flavor and texture.
Once fully chilled, pour the base into your Cuisinart ice cream maker and churn according to the manufacturer’s directions, typically 20 to 25 minutes, until it reaches a soft-serve consistency. Transfer the finished ice cream into a container and freeze for an additional 2 hours for a firmer texture before scooping and serving.
Tips
- Choose culinary-grade matcha for the best balance of flavor and cost.
- Sift the matcha at least twice to avoid clumps.
- Store in an airtight container to protect the color and flavor.
Variations
- Swirl in sweetened red bean paste before freezing.
- Add white chocolate chunks for extra sweetness.
- Top with toasted coconut flakes for added texture.
24. Pumpkin Spice Ice Cream
Prep Time: 15 minutes | Churn Time: 25 minutes | Serves: 8
Pumpkin spice ice cream captures the cozy flavors of cinnamon, nutmeg, and clove mixed into a creamy pumpkin base. Real pumpkin puree gives the ice cream a naturally smooth texture and a warm orange color that looks great in a bowl. Serve it alongside gingerbread cookies or a slice of pie for a comforting seasonal dessert.
Ingredients
- 1 cup pumpkin puree (not pumpkin pie filling)
- 2 cups heavy cream
- 1 cup whole milk
- ¾ cup brown sugar
- 4 large egg yolks
- 1 ½ teaspoons pumpkin pie spice
- 1 teaspoon vanilla extract
- Pinch of salt
Instructions
Start by warming the milk, brown sugar, and pumpkin pie spice together in a medium saucepan over medium heat. Stir the mixture often so the sugar dissolves evenly and the spices release their aroma into the milk. Heat until small bubbles form around the edges, then remove the pan from the heat before it reaches a full boil.
While the milk mixture warms, whisk the egg yolks in a separate bowl until they turn slightly pale and thick. Slowly pour a small amount of the warm milk into the yolks while whisking quickly and steadily. This tempering step raises the temperature of the eggs gradually, which keeps them from curdling once combined with the rest of the hot liquid.
Pour the tempered egg mixture back into the saucepan with the remaining milk mixture. Place the pan over low heat and stir constantly with a wooden spoon until the custard thickens enough to coat the back of the spoon, which usually takes about 6 to 8 minutes. Keep stirring the entire time to prevent the eggs from sticking or scrambling at the bottom of the pan.
Remove the custard from the heat and strain it through a fine mesh sieve into a clean bowl to remove any small lumps. Whisk in the pumpkin puree until the mixture turns a smooth, even orange color. Add the heavy cream, vanilla extract, and salt, stirring until fully combined.
Cover the bowl and refrigerate the base for at least 4 hours, though chilling overnight allows the spices to blend more deeply into the cream. A fully chilled base also churns faster and produces a smoother final texture.
Once chilled, pour the mixture into your Cuisinart ice cream maker and churn according to the manufacturer’s instructions, typically 20 to 25 minutes, until it thickens into a soft-serve consistency. Transfer to a storage container and freeze for at least 2 more hours before scooping for a firmer bite.
Tips
- Use canned pure pumpkin, not pie filling, for the right texture.
- Toast your own spice blend for a stronger, fresher aroma.
- Let the base rest overnight for deeper flavor.
Variations
- Swirl in caramel sauce before freezing.
- Add crushed graham crackers for a pie-like crunch.
- Mix in chopped pecans for extra texture.
25. Cinnamon Roll Ice Cream
Prep Time: 15 minutes | Churn Time: 25 minutes | Serves: 8
Cinnamon roll ice cream turns a favorite breakfast treat into a cool, creamy dessert. Swirls of cinnamon sugar and bits of soft pastry blend into a rich vanilla base, creating little pockets of spice in every bite. A light drizzle of cream cheese glaze on top makes this frozen dessert taste just like the real thing.
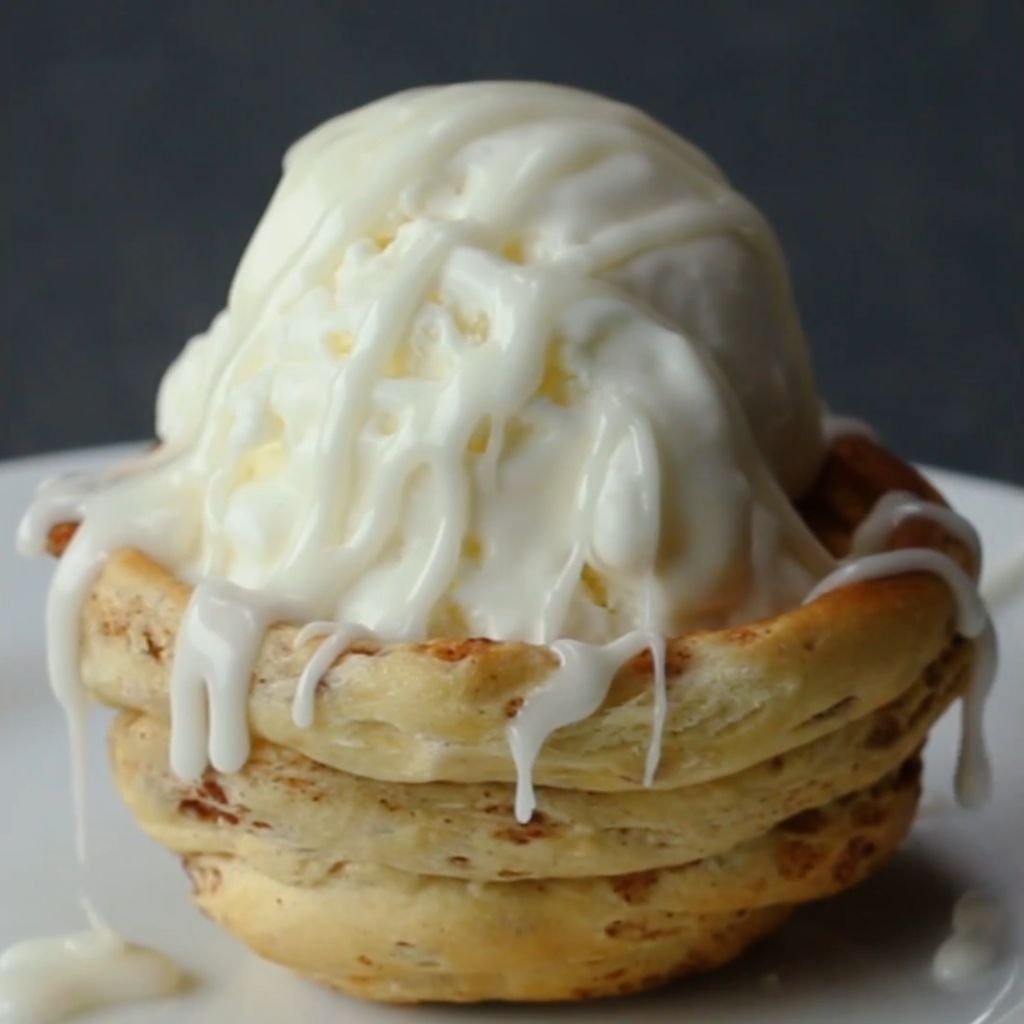
Ingredients
- 2 cups heavy cream
- 1 cup whole milk
- ¾ cup granulated sugar
- 4 large egg yolks
- 1 tablespoon vanilla extract
- Pinch of salt
- ⅓ cup brown sugar
- 1 tablespoon ground cinnamon
- 2 tablespoons melted butter
- ½ cup chopped cinnamon rolls or pastry pieces
- ¼ cup cream cheese glaze, for swirling
Instructions
Begin by making the cinnamon swirl. In a small bowl, mix the brown sugar, ground cinnamon, and melted butter until it forms a thick paste. Set this mixture aside at room temperature so it stays soft enough to swirl later without clumping.
In a medium saucepan, warm the milk and granulated sugar over medium heat, stirring often until small bubbles appear around the edges. Remove from the heat right before it reaches a boil, since overheating can affect the smoothness of the base.
While the milk warms, whisk the egg yolks in a separate bowl until pale and slightly thickened. Slowly add a small amount of the warm milk into the yolks while whisking constantly to bring up their temperature gradually. This prevents the eggs from cooking too fast when added back to the pan.
Pour the tempered egg mixture into the saucepan with the rest of the milk. Cook over low heat, stirring constantly, until the custard thickens enough to coat the back of a spoon, about 6 to 8 minutes. Keep the heat low and stir without stopping to avoid scrambling the eggs.
Strain the custard through a fine mesh sieve into a clean bowl to remove any lumps. Stir in the heavy cream, vanilla extract, and salt. Cover and refrigerate for at least 4 hours, or overnight for a fuller flavor.
Once chilled, pour the base into your Cuisinart ice cream maker and churn according to the manufacturer’s directions, about 20 to 25 minutes. During the last few minutes of churning, add the chopped pastry pieces so they distribute evenly.
Transfer half of the churned ice cream into a storage container, then drizzle some cinnamon swirl and cream cheese glaze on top. Add the remaining ice cream, followed by more swirl and glaze, gently folding with a knife to create a marbled pattern. Freeze for at least 2 hours before serving.
Tips
- Use day-old cinnamon rolls for the best texture, since they hold their shape better in the ice cream.
- Warm the cinnamon swirl slightly before adding it for easier mixing.
- Store leftover glaze in the fridge and drizzle fresh on each scoop.
Variations
- Add chopped pecans for a nutty crunch.
- Swap cream cheese glaze with maple glaze for extra warmth.
- Mix in raisins for a classic cinnamon bun taste.
26. Birthday Cake Ice Cream
Prep Time: 15 minutes | Churn Time: 25 minutes | Serves: 8
Birthday cake ice cream brings the fun of a celebration into a creamy, colorful scoop. Bits of soft cake and sprinkles mix into a sweet vanilla base, giving every spoonful a festive touch. This frozen treat works well for parties, family gatherings, or any day that calls for a little extra sweetness.
Ingredients
- 2 cups heavy cream
- 1 cup whole milk
- ¾ cup granulated sugar
- 4 large egg yolks
- 1 tablespoon vanilla extract
- ½ teaspoon almond extract
- Pinch of salt
- ½ cup crumbled yellow cake
- ⅓ cup rainbow sprinkles
Instructions
Start by warming the milk and half of the sugar in a medium saucepan over medium heat. Stir often so the sugar dissolves fully and the mixture heats evenly. Once small bubbles start to form around the edges of the pan, remove it from the heat right away to avoid scorching the milk.
While the milk warms, whisk the egg yolks with the remaining sugar in a separate bowl until the mixture turns pale and slightly thick. Slowly pour a small amount of the warm milk into the yolks while whisking constantly. This gradual step raises the temperature of the eggs without cooking them too quickly.
Pour the tempered egg mixture back into the saucepan along with the rest of the milk. Cook over low heat, stirring constantly with a wooden spoon, until the custard thickens enough to coat the back of the spoon, usually around 6 to 8 minutes. Stir the entire time to keep the eggs smooth and prevent them from sticking to the bottom of the pan.
Remove the custard from the heat and strain it through a fine mesh sieve into a clean bowl to catch any small lumps. Stir in the heavy cream, vanilla extract, almond extract, and salt until fully combined. The almond extract adds a subtle bakery-style flavor that pairs nicely with the cake pieces.
Cover the bowl and refrigerate for at least 4 hours, though chilling overnight gives a smoother, richer texture. A cold base churns better and freezes into a creamier final product.
Once chilled, pour the mixture into your Cuisinart ice cream maker and churn according to the manufacturer’s instructions, about 20 to 25 minutes. During the last two minutes of churning, add the crumbled cake and sprinkles so they spread evenly without breaking down too much. Transfer to a container and freeze for at least 2 more hours before scooping.
Tips
- Use slightly stale cake so it holds its shape better in the ice cream.
- Add sprinkles at the very end to keep their color from bleeding.
- Store in an airtight container to keep the cake pieces from getting soggy.
Variations
- Swap yellow cake for chocolate cake for a richer flavor.
- Add white chocolate chips for extra sweetness.
- Mix in a swirl of frosting for a more indulgent treat.
27. S’mores Ice Cream
Prep Time: 15 minutes | Churn Time: 25 minutes | Serves: 8
S’mores ice cream combines toasted marshmallow, chocolate, and graham cracker into one creamy dessert. Each bite delivers a mix of textures, from soft marshmallow swirls to crunchy graham pieces, all wrapped in a smooth chocolate base. This frozen treat brings the flavor of a campfire favorite straight to your freezer.
Ingredients
- 2 cups heavy cream
- 1 cup whole milk
- ¾ cup granulated sugar
- 4 large egg yolks
- ¼ cup cocoa powder
- 1 teaspoon vanilla extract
- Pinch of salt
- ½ cup mini marshmallows
- ½ cup crushed graham crackers
- ¼ cup chocolate chunks
- ¼ cup marshmallow fluff, for swirling
Instructions
Begin by whisking the cocoa powder into the milk in a medium saucepan until fully dissolved, with no dry lumps remaining. Add half of the sugar and warm the mixture over medium heat, stirring often. Heat until small bubbles form around the edges, then remove from the heat before it reaches a full boil.
While the milk warms, whisk the egg yolks with the remaining sugar in a separate bowl until pale and slightly thickened. Slowly pour a small amount of the warm chocolate milk into the yolks while whisking quickly and steadily. This tempering step keeps the eggs from cooking too fast once combined with the hot liquid.
Pour the tempered egg mixture back into the saucepan with the remaining chocolate milk. Cook over low heat, stirring constantly with a wooden spoon, until the custard thickens enough to coat the back of the spoon, about 6 to 8 minutes. Keep stirring throughout to avoid any scrambling near the bottom of the pan.
Strain the custard through a fine mesh sieve into a clean bowl to remove lumps. Stir in the heavy cream, vanilla extract, and salt until smooth and fully combined. Cover the bowl and refrigerate for at least 4 hours, or overnight for a deeper chocolate flavor.
Once chilled, pour the base into your Cuisinart ice cream maker and churn according to the manufacturer’s directions, typically 20 to 25 minutes. During the last few minutes, add the mini marshmallows, crushed graham crackers, and chocolate chunks so they mix in evenly without breaking apart too much.
Transfer half of the churned ice cream into a storage container and drizzle marshmallow fluff on top. Add the rest of the ice cream, followed by more fluff, and gently swirl with a knife for a marbled effect. Freeze for at least 2 hours before serving for the best texture.
Tips
- Toast a few extra marshmallows on top for a smoky campfire touch.
- Warm the marshmallow fluff slightly before swirling for easier mixing.
- Store with extra graham crackers on the side for added crunch when serving.
Variations
- Add caramel sauce for a deeper, richer flavor.
- Swap milk chocolate chunks with dark chocolate for a bolder taste.
- Mix in crushed pretzels for a salty contrast.
How to Store Homemade Ice Cream
1. Best storage containers – Shallow, airtight containers work better than deep tubs since they freeze faster and keep texture smooth. Glass or BPA-free plastic containers with tight lids work well for daily use.
2. Prevent freezer burn – Press a piece of parchment or wax paper directly onto the surface of the ice cream before sealing the lid. This blocks air from reaching the surface and forming ice crystals.
3. Ideal freezing temperature – Keep your freezer at 0°F (-18°C) or lower for the firmest texture and longest-lasting freshness.
4. Shelf life – Homemade ice cream tastes best within 2 to 3 weeks, though it stays safe to eat for up to 2 months if stored properly.
5. How to soften before serving – Let the container sit at room temperature for 5 to 10 minutes before scooping, or place it in the fridge for 15 minutes for a gentler softening process.
Conclusion
Making frozen desserts at home with a Cuisinart ice cream maker turns simple ingredients into rich, creamy treats without much effort.
From classic vanilla to bold flavors like matcha and s’mores, this collection covers something for every taste and occasion. Homemade batches also let you control sugar levels, pick fresh ingredients, and skip the preservatives found in store-bought pints.
Try mixing different add-ins like cookie pieces, fruit swirls, or crushed candy to build your own signature flavor. Keep this collection bookmarked, since it makes a handy guide throughout the year, whether you’re craving something fruity in summer or a spiced treat during the colder months. With a bit of practice, homemade ice cream can become a regular treat in your kitchen rotation.